

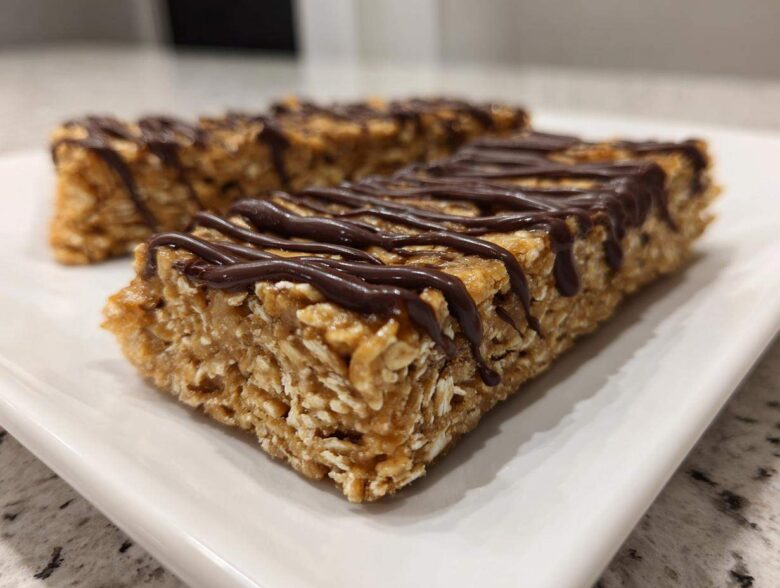
Oh my gosh, are you tired of those weirdly textured, chalky store-bought protein bars that cost a fortune? Me too! I felt like I was constantly searching for a healthy snack that actually tasted like a treat, not cardboard masquerading as nutrition. That’s why I finally perfected my absolute favorite batch of homemade protein bars. Seriously, these peanut butter protein bars are a game-changer.
What makes them the ultimate go-to? They require zero oven time—that’s right, they are completely no-bake—and use only five main ingredients! I developed this recipe out of pure necessity on a busy Tuesday when I needed a high-protein snack ready before my afternoon errands, and I didn’t have time for complicated steps. Trust me, these chewy little squares will replace every packaged bar in your pantry. You won’t believe how good they are!
Why These Are the Best Homemade Protein Bars You Will Ever Make
Listen, I’ve tried hundreds of so-called healthy bars, and usually, they are either too dry or taste suspiciously like nothing. These peanut butter protein bars are different. They nail that craving satisfaction every single time. When I say these are the best tasting protein bars, I mean it! They are dense, wonderfully chewy, and have just the right amount of sticky sweetness from the maple syrup.
The magic here is the texture. We skip the oven entirely, which means we lock in that moisture and prevent any drying out. They are truly glorious chewy protein bars that hold together perfectly, which is exactly what you are after in a homemade snack.
Quick Protein Treats Ready in Minutes
If you’re in a rush, these are your new best friends. The active prep time clocks in under 10 minutes. Mix everything, press it down, and done! Because they are no-bake, you don’t have to wait around monitoring an oven timer. The longest part is waiting for the fridge to do its job, and honestly, that’s time I use to clean up the one bowl I dirtied!
Perfect for Meal Prep Bars
These are absolutely the workhorses of my weekly snack rotation. Once they are chilled, they slice up beautifully into ten solid portions. I stack them in an airtight container, and boom—I have ready-to-go meal prep bars ready for the entire week. They are so much cheaper than buying pre-packaged protein bars, which is a huge win in my book!
Gathering Ingredients for Your Easy Protein Bar Recipe
Okay, let’s talk ingredients! This is where the magic of keeping things simple really shines through. We’re only rocking five core components to make these amazing homemade protein bars. Forget complicated grocery runs; you probably have most of this stuff already!
The absolute key here is the peanut butter. You must use natural peanut butter—the kind where the oil separates on top if it sits too long. That means no added sugars or hydrogenated oils are messing with the binding process. We want pure, sticky peanut goodness to hold our oats together. If you use conventional creamy stuff, the recipe might end up way too soft, so stick to natural, please!
Ingredient Spotlight: Protein Powder Choice
The protein powder is arguably the most influential ingredient in these protein bars because it’s drying. You can use whey, casein, or a plant-based blend, but you have to pay attention to how much liquid you add later. Whey tends to soak up moisture faster than pea protein, for instance.
I usually stick to a tried-and-true vanilla whey because it blends so seamlessly with the peanut butter flavor. If you are using a really thick plant-based powder, you might need an extra splash of milk to get that perfect dough consistency we talked about. Don’t just dump it all in; watch the bowl as you mix!
Substitutions for Peanut Butter Protein Bars
If you have a nut allergy—and I know lots of people who do—don’t worry! These easy protein bar recipe variations are super flexible. Swap the peanut butter out for sunflower seed butter or almond butter if that works better for you. Same consistency rules apply: go for the natural variety if you can!
When it comes to the sweetener, maple syrup works beautifully, especially if you are going for that full vegan route (just ensure your protein powder is also vegan). If you’re trying to keep the sugar lower, honey or maple syrup can sometimes be swapped for a zero-calorie liquid sweetener, but be warned—it may change the way the bars firm up in the fridge, as sugar plays a role in binding! These simple swaps let you tailor these protein bars perfectly for whatever you need that day.
Step-by-Step: How to Prepare No Bake Protein Bars
Alright, getting these protein bars assembled is incredibly straightforward, which is why I love them for a quick afternoon cooking session. We are moving fast today because there’s no actual baking involved! Just follow these five easy steps, and you’ll be ready for the chilling phase.
First thing’s first—prep your station! Grab your 8×8 pan and line it with parchment paper. I mean it, leave a good overhang on the sides. This parchment is your best friend when it’s time to lift these babies out later without them crumbling everywhere. It’s the secret to keeping them looking nice, especially for giving them away! If you’re feeling extra fancy, remember that homemade pan release mixture I use in my fudge recipe works here too, but parchment is easiest!
Next, get cozy with your mixing bowl. We’re tossing in the oats, the protein powder, the peanut butter, your sweetener (maple syrup or honey), and that splash of milk right in there. It all goes in together because we’re skipping oven nonsense today! Now, it’s time to mix until your arms feel it a little bit.
Mixing the Dough for Perfect Chewy Protein Bars
When you first start mixing, it’s going to look like a chaotic mess. Don’t panic! Keep stirring and working it with your spoon or a sturdy spatula. You are aiming for a thick, uniform dough. It should look stiff, almost like cookie dough that you can actually scoop and roll between your palms.
Here’s where you need to pay attention, because every protein powder absorbs differently. If you stir it all together and you still have dry clumps of oat or powder floating around, your bar is going to be crumbly later. If that happens, add milk! A teaspoon at a time, mix it in, and see if it comes together. If your mix looks too wet and sloppy, add a tablespoon of extra protein powder or oats until it firms up just enough to hold its shape. That perfect consistency is the key for these homemade protein bars!
Pressing and Chilling Your Homemade Protein Bars
Once your dough has achieved that perfect thick dough status, scoop everything into that parchment-lined pan. Now, this next part is crucial for structure: you have to press it down firmly! Use the back of your spoon, or if you’re feeling bold, just use clean hands and press them right into the corners and edges. You want that mixture compacted! If you leave it loose, you’ll end up with soft, floppy squares instead of structured bars.
If you want that look that rivals the store-bought stuff, melt up some chocolate chips—I use a quick 30-second zap in the microwave—and drizzle it all over the top. That just makes them feel fancy!
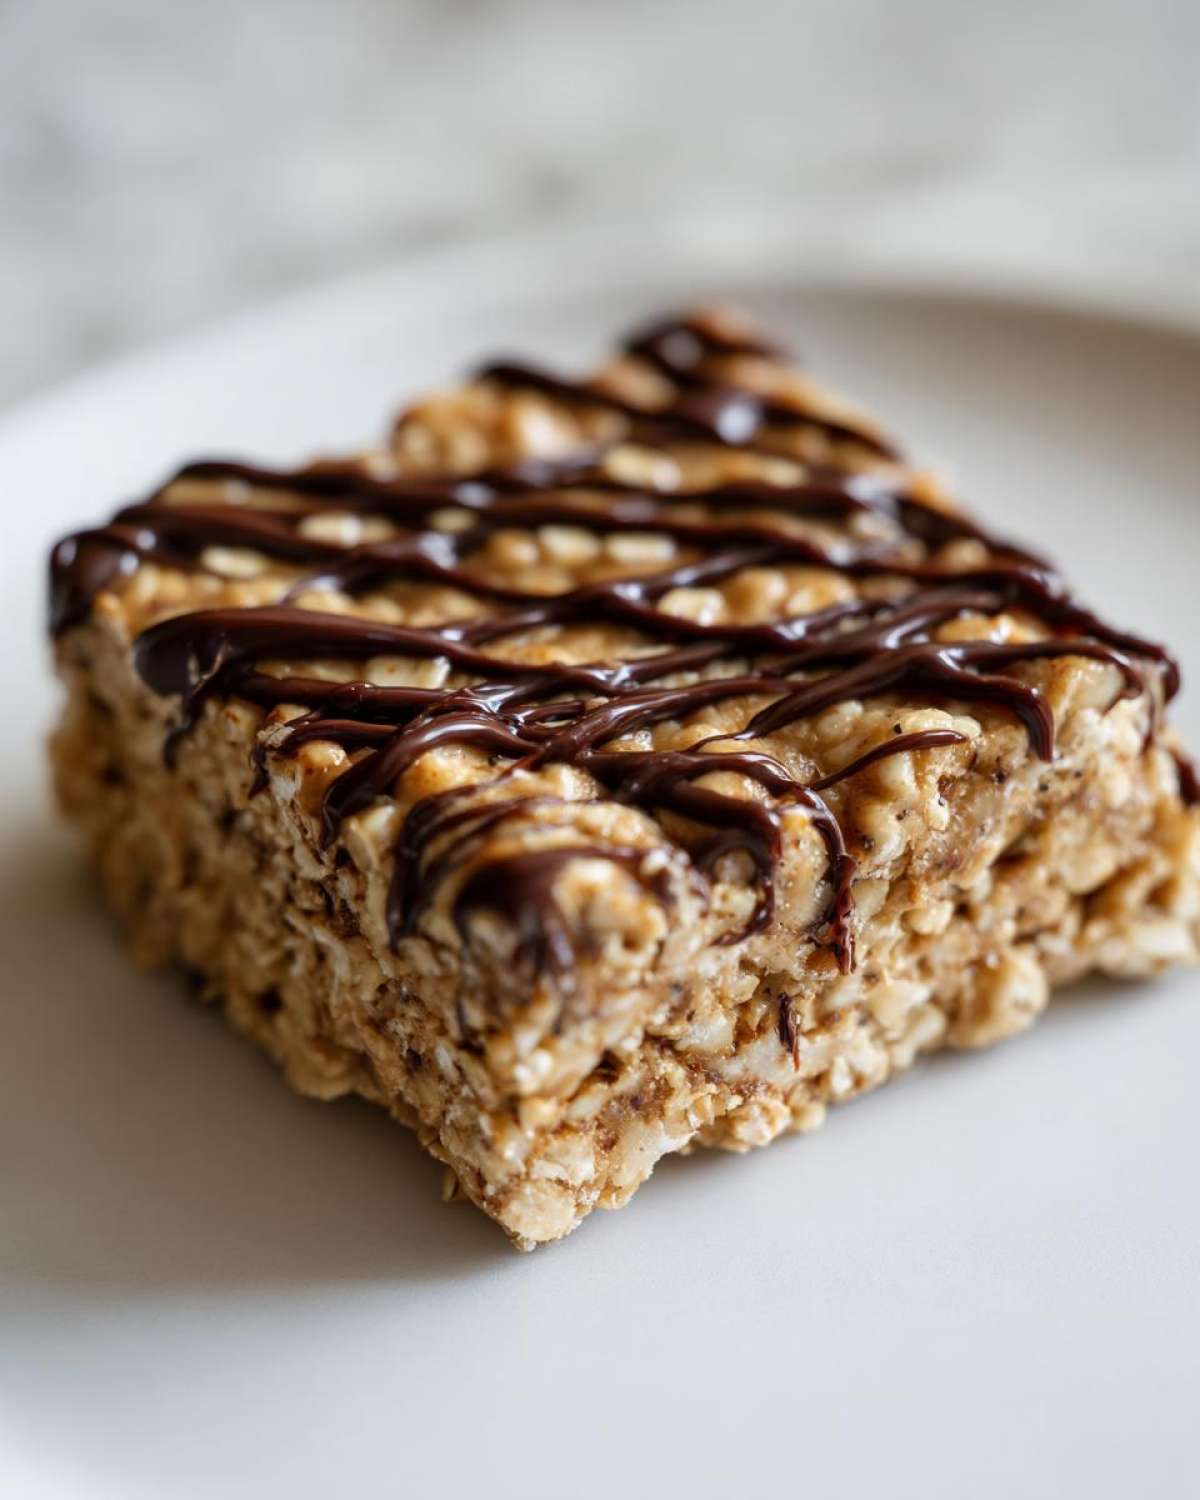
Finally, they head into the fridge! You need a minimum of one hour chilling time. I usually leave mine closer to two hours just to make sure they are rock solid. This chilling period allows everything to set up perfectly, ensuring you get 10 clean, beautiful squares when you cut them later. Patience pays off here, trust me!
Tips for Success When Making Protein Bars for Beginners
If this is your first venture into making these kinds of protein bars at home, please don’t stress if things look a little off at first. I made plenty of crumbly messes before I perfected this formula! I want to save you the headache, so here are the absolute best pointers for protein bars for beginners.
The biggest reason homemade bars fall apart is either not enough sticky binder—that’s the peanut butter and maple syrup doing the heavy lifting—or not pressing hard enough in the pan. When you press the dough into the pan, really put your weight into it! Imagine you are sealing a tire; that firmness is non-negotiable if you want those clean cuts later.
If you are worried about the chocolate drizzle seizing up (it gets that grainy texture), make sure your bowl is bone dry when you melt the chips. Water is the enemy of smooth melted chocolate! Another note on texture: if you happen to over-mix the dough after everything is combined, you can accidentally develop the oats, which sometimes leads to a slightly tougher bar. So, mix until *just* combined, and then stop!
Also, don’t trust the recipe time on chilling if your kitchen is hot. Sometimes summer heat means the bars need an extra 30 minutes in the fridge to fully set up. If you cut them too early, they will smoosh. If you want to try adding things like flaxseed or chia seeds—which I talk about in my muffin recipe post, by the way—remember that seeds are super absorbent. Add them slowly, or you’ll end up needing extra milk, which throws off the ratio again!
Variations on These Simple Homemade Snacks
Now that you’ve mastered the basic five-ingredient beauty, it’s time to start throwing in some extras! Even though these peanut butter protein bars are perfect as-is, sometimes you just need to shake things up so your snacks don’t get boring. Keeping things minimal is great, but adding one or two more ingredients is super easy and can dramatically change the flavor profile.
My favorite trick when I’m craving something chocolatey is to whisk in a tablespoon of unsweetened cocoa powder right along with the protein powder. It turns them into a beautiful, rich chocolate peanut butter bar—it’s decadent! You might notice the mix gets a little bit stiffer because cocoa is drying, but just add that extra teaspoon of milk until it comes back to that perfect dough texture we talked about.
If you want more crunch, toasted chopped walnuts or almonds work wonderfully. Or, for a little brightness, try stirring in half a teaspoon of pure almond extract instead of vanilla if you used vanilla powder. These little tweaks make the difference between a standard snack and a custom creation you can brag about! You can find tons of inspiration for flavor additions over on my protein cookie recipe post, too!
Making Vegan Protein Bars Recipe Variations
We already talked about making these bars vegan by using maple syrup instead of honey, which is step one. But when you’re using plant-based protein powder, you have to be extra careful about the final texture!
Sometimes vegan protein powders, especially brown rice or mixed blends, don’t bind quite as smoothly as whey. If you find your mixture is crumbling even after mixing it thoroughly, that means you need a little extra glue. You can try adding a teaspoon of chia seeds or ground flaxseed. These little superheroes will soak up any excess moisture but also create tiny gelatinous binders that keep those vegan protein bars recipe variations from falling apart when you bite into them.
I usually add these seeds right when I add the dry ingredients. Give it a good 5 minutes after mixing before you press it into the pan, too. This gives the seeds a moment to start absorbing liquid and fully hydrate before you chill them. They’ll still set up perfectly firm without needing any baking time, I promise!
Storage and Make Ahead Protein Snacks
This is where the “meal prep” magic really happens! Because these are no-bake, they need a little quality time in the cold to firm up properly. You cannot skip that chilling step, seriously. If you try to cut them warm, you’re just going to end up with a sticky mess that looks awful, even if it tastes fine. Remember, we want nice squares!
Once your bars are cut, you need to store them correctly to keep that perfect, chewy texture. Luckily, storing these make ahead protein snacks is a breeze. You’ll want an airtight container—a nice glass container with a good snapping lid works best for me!
Since they rely on peanut butter and chilling to hold their shape, these bars MUST live in the refrigerator. That cold temperature keeps that peanut butter firm, which keeps the oats and powder tightly bound together. In the fridge, I find they stay absolutely perfect for a full week. I sometimes stretch it to ten days, but truthfully, they are best within the first seven for that fresh, chewy bite.
I always separate the layers with a small piece of wax paper or parchment paper if I’m stacking more than three high. This stops them from sticking together in one big beautiful, but impossible-to-separate, block of peanut butter goodness. If you use the chocolate drizzle, chilling also keeps that drizzle nice and snappy rather than melted and messy. Making a huge batch on Sunday means I always have easy high protein recipes ready to grab when I’m running out the door!
Understanding the Nutrition in Homemade Protein Bars
I know that when we make our own snacks, we aren’t just doing it for the taste—we want to control what exactly goes into our bodies! That’s why I pulled the initial nutritional estimates straight from the core ingredients list. Remember, these are just guideposts, not gospel, because every protein powder and every brand of peanut butter is a little different. I always say that transparency builds trust, and I want you to know exactly what you’re fueling up with!
If you use an unsweetened protein powder or swap maple syrup for a liquid zero-calorie alternative, your sugar count will drop significantly. But based on the core five ingredients, here is what an average serving looks like for one of these protein bars:
- Serving Size: 1 bar
- Calories: Around 200
- Protein: A fantastic 15 grams!
- Sugar: Pretty low at about 8 grams
- Fat: About 10 grams (mostly the healthy fats from peanut butter!)
- Carbohydrates: Roughly 20 grams
See that protein count? That’s why we make these! Getting 15 grams of protein in a simple, chewy snack without any weird fillers or gums that the store-bought stuff uses is a huge win. It keeps you full way longer than a standard granola bar.
A quick disclaimer though, because I like being upfront: since everyone’s protein powder brands have wildly different levels of fillers, added sweeteners, or even thickness, your exact numbers will shift slightly. If you use a chocolate powder instead of vanilla, or if you skip the chocolate drizzle, your macros adjust! But even with minor variations, you are still getting a fantastic, high-protein, low-fuss snack that blows those expensive processed bars out of the water. This is about eating well without breaking the bank or spending hours in the kitchen!
Frequently Asked Questions About Homemade Protein Bars
I get so many questions about these homemade protein bars after people try them, and I love hearing from you all! Since they are so straightforward, the questions usually revolve around substitutions or preventing the one or two things that can go wrong in a no-bake recipe. Here are the things I hear most often:
Can I bake these peanut butter protein bars?
That’s a great question! Since these are designed as no bake protein bars, baking changes the chemistry entirely. If you put them in the oven, the protein powder will dry out super fast, and the peanut butter will turn oily instead of binding the ingredients. You’ll end up with something hard and crumbly, which is the opposite of the wonderful chewy protein bars we want! Stick to the fridge method for the best, chewiest result.
Why are my protein bars crumbly even after chilling?
This is usually one of two issues. The first is not enough binder—either you didn’t use enough peanut butter or your sweetener wasn’t sticky enough. The second, and most common, issue is that your protein powder was too dry and absorbed all the moisture. If you find they are crumbly, it means you need more liquid—go ahead and mix in another teaspoon of milk or a tiny dab more peanut butter to the batch, press it back down hard, and chill it again. This usually fixes it right up!
How do I make them low sugar protein bars?
That’s a common request for those watching their sugar intake! If you need low sugar protein bars, you need to address the sweetener, which is usually 1/4 cup of maple syrup or honey for this recipe. You can look into experimenting with liquid Monk Fruit sweetener or liquid stevia. Just remember that sugar is a binder here. If you swap it out, you *must* increase the dry ingredients slightly (maybe a tablespoon more protein powder or oats) to maintain that thick consistency we worked so hard to achieve!
Are they safe to leave out on the counter?
Nope, I wouldn’t recommend it, especially if you want them to keep their structure! Because we don’t bake them, the binding agents (like peanut butter) are susceptible to room temperature changes. If you leave them out, especially on a warm day, they will get soft and possibly start to slightly ooze. For the best flavor and firm texture to support your simple homemade snacks, definitely keep these sealed up tight in the refrigerator!
Share Your Experience Making These Protein Bars
Alright, now it’s your turn! I’ve poured all my secrets for making the absolute best homemade protein bars—the ones that are chewy, satisfying, and don’t require turning on the oven. I really hope you give this simple five-ingredient recipe a shot!
When you do make them, I want to hear absolutely everything! Did you stick to the classic peanut butter setup, or did you try one of the fun variations we talked about? Did you add cocoa powder and turn them into chocolate bombs? Or maybe you’re a strict low-sugar devotee? Don’t keep it a secret!
Please, please leave a star rating right here on the page. That helps other busy folks know these quick protein treats are truly worth the three minutes of mixing time. And if you snap a picture of those perfectly cut squares, tag me on social media! I love seeing these high protein recipes show up in real kitchens.
If you found a substitution that worked brilliantly—maybe you used a different type of protein powder that you think everyone else needs to know about—drop a comment below! We’re all learning together here in the kitchen. If you have any trouble at all, or if you want to send me a note directly, you can always hop over to my contact page. Happy snacking!
PrintEasy No-Bake 5-Ingredient Peanut Butter Protein Bars
Make simple, chewy peanut butter protein bars at home with only five ingredients. These no-bake bars are perfect for quick meal prep and satisfy cravings.
- Prep Time: 10 min
- Cook Time: 0 min
- Total Time: 70 min
- Yield: 10 servings
- Category: Snack
- Method: No-Bake
- Cuisine: American
- Diet: Vegetarian
Ingredients
- 1 cup rolled oats
- 1/2 cup natural peanut butter
- 1/2 cup vanilla or unflavored protein powder
- 1/4 cup maple syrup or honey
- 2 tablespoons milk (dairy or non-dairy)
- 1/4 cup dark chocolate chips (for drizzle, optional)
Instructions
- Line an 8×8 inch baking pan with parchment paper, leaving an overhang on the sides for easy removal.
- In a medium bowl, combine the rolled oats, protein powder, peanut butter, maple syrup, and milk.
- Mix all ingredients thoroughly until a thick, uniform dough forms. If the mixture is too dry, add milk one teaspoon at a time until it comes together.
- Press the dough evenly into the prepared pan, using the back of a spoon or your fingers to compact it firmly.
- If using chocolate, melt the chocolate chips in a microwave-safe bowl in 30-second intervals, stirring until smooth. Drizzle the melted chocolate over the top of the bars.
- Place the pan in the refrigerator and chill for at least 1 hour, or until firm.
- Lift the bars out using the parchment paper overhang and cut into 10 even squares. Store in an airtight container in the refrigerator.
Notes
- For a vegan option, use maple syrup instead of honey and use non-dairy milk.
- If you prefer a firmer bar, reduce the liquid slightly.
- These bars store well in the refrigerator for up to one week.
Nutrition
- Serving Size: 1 bar
- Calories: 200
- Sugar: 8
- Sodium: 90
- Fat: 10
- Saturated Fat: 2
- Unsaturated Fat: 8
- Trans Fat: 0
- Carbohydrates: 20
- Fiber: 2
- Protein: 15
- Cholesterol: 0