

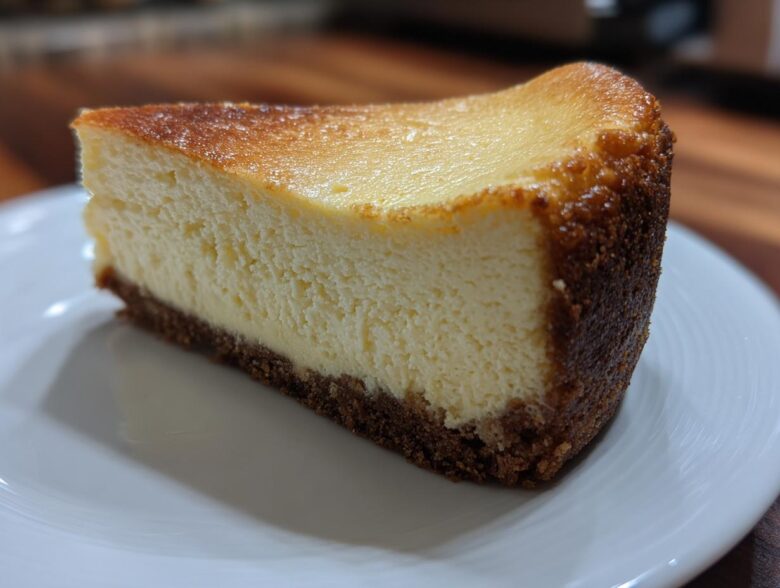
Oh, honey, let me tell you—I used to be absolutely terrified of cheesecake. I mean, the idea of baking something so dense and rich and then having it crack the second it hits room temperature? Terrifying! But after years of experimenting—and yes, wasting a few expensive blocks of cream cheese—I finally cracked the code. This isn’t just any dessert; this is the real deal. We are talking about creating the definitive Classic New York Cheesecake with a Graham Cracker Crust. It comes out perfectly smooth, incredibly dense, and always, always crack-free, thanks to a few small secrets I’ll share. Trust me, once you master this texture, you’ll feel like a baking wizard. And if you ever need another perfectly creamy side to go with that rich dessert, you should check out my guide for the best creamy mashed potatoes. Get your springform pan ready; we’re making magic!
Why This Is the Best New York Cheesecake Recipe
I’ve tried so many approaches, but this iteration really nails that iconic, decadent style. If you want a slice that feels heavy on the fork and melts slowly in your mouth, this is your go-to. Forget those puffy, light imitations; we aim for pure, rich indulgence here.
What makes this truly the Best Cheesecake Recipe? It all comes down to technique and ingredients:
- That Signature Density: We rely on full-fat cream cheese and the right amount of eggs to deliver the classic, almost silky, **Dense Cheesecake Recipe** texture.
- Zero Cracks, Guaranteed: Between the careful mixing and the essential water bath, I promise you’ll end up with a pristine, smooth top—perfect for showing off!
- Authentic Flavor Profile: The marriage of just the right amount of sugar, a hint of flour for stability, and high-quality vanilla gives you that unmistakable, slightly tangy New York flavor people crave.
If you love chasing that perfect texture, you might also want to look at my recipe for best creamy homemade chocolate pudding; it’s another dessert where texture reigns supreme!
Gathering Ingredients for Classic New York Cheesecake with a Graham Cracker Crust
Listen, you can’t fake New York cheesecake. It needs the right cast of characters, and that means saying absolutely no to low-fat substitutes! For that dense, rich mouthfeel that defines this dessert, you must use full-fat cream cheese. I use four whole 8-ounce bricks, and they need to be beautifully softened—pull them out at least two hours early. Seriously, room temperature is non-negotiable for a smooth batter!
We need to keep our ingredients grouped for the two main acts: the crust and the filling.
For the base—our perfect Graham Cracker Crust—you’ll need:
- 1 1/2 cups graham cracker crumbs (I crush mine fresh!)
- 1/4 cup granulated sugar
- 6 tablespoons unsalted butter, melted
Now for the luscious body of the cake. Remember, the eggs and sour cream must be at room temperature, too. It seems fussy, but it truly prevents streaks and lumps. Here’s what goes into the filling:
- 4 (8 ounce) packages full-fat cream cheese, softened
- 1 1/2 cups granulated sugar
- 1/4 cup all-purpose flour (a secret stabilizer!)
- 1 teaspoon vanilla extract
- 1/4 teaspoon salt
- 4 large eggs, room temperature
- 1 cup sour cream, room temperature
If you’re planning on decorating afterwards, make sure you find a good cookie icing recipe, but honestly, this cheesecake is perfect all by itself!
Step-by-Step Instructions for the Graham Cracker Crust Baking
Alright, let’s start building this masterpiece from the foundation up! Before anything else, crank that oven up to 350 degrees F. You need to prepare your 9-inch springform pan now, and this is super important: wrap the bottom and sides tightly in heavy-duty aluminum foil. We’re sealing it up like a vault to protect it from the water bath we’ll use later for the Graham Cracker Crust Baking.
Mix up your crumbs, the quarter cup of sugar, and that six tablespoons of melted butter until it looks like wet sand. Press this mixture down into your prepared pan. Make sure you get it firmly and evenly distributed across the bottom and about an inch up the sides. Here’s my little trick: once the sides are packed, I grab the bottom of a flat measuring cup and press the base down as firmly as I can. That makes the absolute most solid bottom!
Pop that crust into the oven for just 10 minutes. Once it’s done, pull it out, let it cool down while you whip up the creamy filling, and then—this is key—drop your oven temperature down to 325 degrees F. If you’re looking for another easy base recipe, you might enjoy my quick treat for saltine cracker toffee!
Preparing the Filling for a Rich Cream Cheese Dessert: Creamy Cheesecake Tutorial
Now for the main event—the filling that turns this into a true Rich Cream Cheese Dessert! Remember we have all those lovely room-temperature ingredients waiting? Good. Grab your biggest bowl and that electric mixer, but please, please, use the paddle attachment if you have one. We are aiming for smooth, not fluffy, aeration here. Start by whipping that softened cream cheese all by itself until it looks like perfect, buttery spackle. Scrape down the sides constantly; we don’t want hidden pockets of unmixed cheese!
Next, gradually beat in that 1 1/2 cups of sugar, followed by the flour, vanilla, and salt. Keep mixing just until you see everything integrate. That flour is one of the keys to a successful texture—it helps firm up the structure just enough for that classic Creamy Cheesecake Tutorial result. Don’t feel like you need to beat this part for ages; we just want it smooth.
Here is the make-or-break moment for avoiding cracks, folks. Add your four room-temperature eggs one at a time. When I say “add,” I mean beat *just* until you see the yellow disappear. As soon as it’s incorporated, stop! Overbeating once the eggs are in incorporates too much air, and when that air tries to escape later, it pulls the cake apart. Finally, gently mix in the sour cream until the entire batter is homogenous and velvety smooth. That’s it! Pour this beautiful, thick batter right over your pre-baked crust.
If you thought that was smooth, you have to try my recipe for best creamy easy homemade chocolate pudding; the blending technique is similar and yields incredible results!
Baking the Classic New York Cheesecake with a Water Bath Cheesecake Instructions
Okay, here comes the part that sends most people running away screaming: the water bath. But trust me, this is the secret weapon for achieving those gorgeous, crack-free sides on your Classic New York Cheesecake. Remember how we wrapped that springform pan tightly in foil? Now, we need a roasting pan that’s larger than the springform pan itself. Carefully place your foil-wrapped cheesecake into the center of that roasting pan.
Set your oven to 325 degrees F—we’re going low and slow for even cooking. Now, very gently, pour *hot* water into the roasting pan until it comes about halfway up the sides of the springform. This water bath (**Water Bath Cheesecake Instructions**) creates a humid environment in the oven. That moisture keeps the surface of the cheesecake from setting too fast and drying out, which avoids those dreaded cracks. It’s pure insurance!
Bake for about 60 to 75 minutes. You want to look for the edges to be set, but if you gently nudge the whole roasting pan, the very center (about two inches wide) should still have a little shimmy, like Jell-O. If it’s completely firm, you’ve baked it too long! Once done, turn the oven off completely. Here’s the second crucial cooling step: prop the oven door open about two inches using a wooden spoon. Leave the cheesecake inside this warm, slowly cooling environment for a full hour. This gradual transition prevents temperature shock, which is the *other* main reason cheesecakes crack. After that hour, pull it out, unwrap the foil away from the sides, and let it finish cooling on a wire rack before chilling.
If you’re looking for a simple appetizer to serve before this incredible dessert, you have to try my recipe for the easy baked popper dip!
Chilling and Serving Your Classic New York Cheesecake with a Graham Cracker Crust
Oh my goodness, we are so close! The hard part—the water bath and the slow cool-down—is over, but here’s where most people panic and try to rush things. **Don’t you dare try to eat this yet!** The final transformation from baked custard to that solid, dense, perfect slice happens entirely in the fridge. You have to cover the cheesecake loosely with plastic wrap—make sure the wrap isn’t touching the surface, or it’ll stick if any condensation forms—and get it into the refrigerator.
I know waiting is killer, but you need a minimum of six hours. Honestly, if you can resist until the next day, you’ll get the absolute best texture for your Classic New York Cheesecake with a Graham Cracker Crust. Overnight is my sweet spot; that’s when it firms up exactly right.
When it’s time to serve, take it out about 20 minutes before you plan to slice it. This lets it warm up ever so slightly, making it easier to cut cleanly. I usually just leave it plain because that rich cream cheese flavor is honestly the star of the show. But if you feel fancy, a very light topping of fresh, bright raspberries or a simple drizzle of melted chocolate is fantastic. If you need another make-ahead dessert that tastes amazing chilled, you have to try my homemade chocolate pudding recipe!
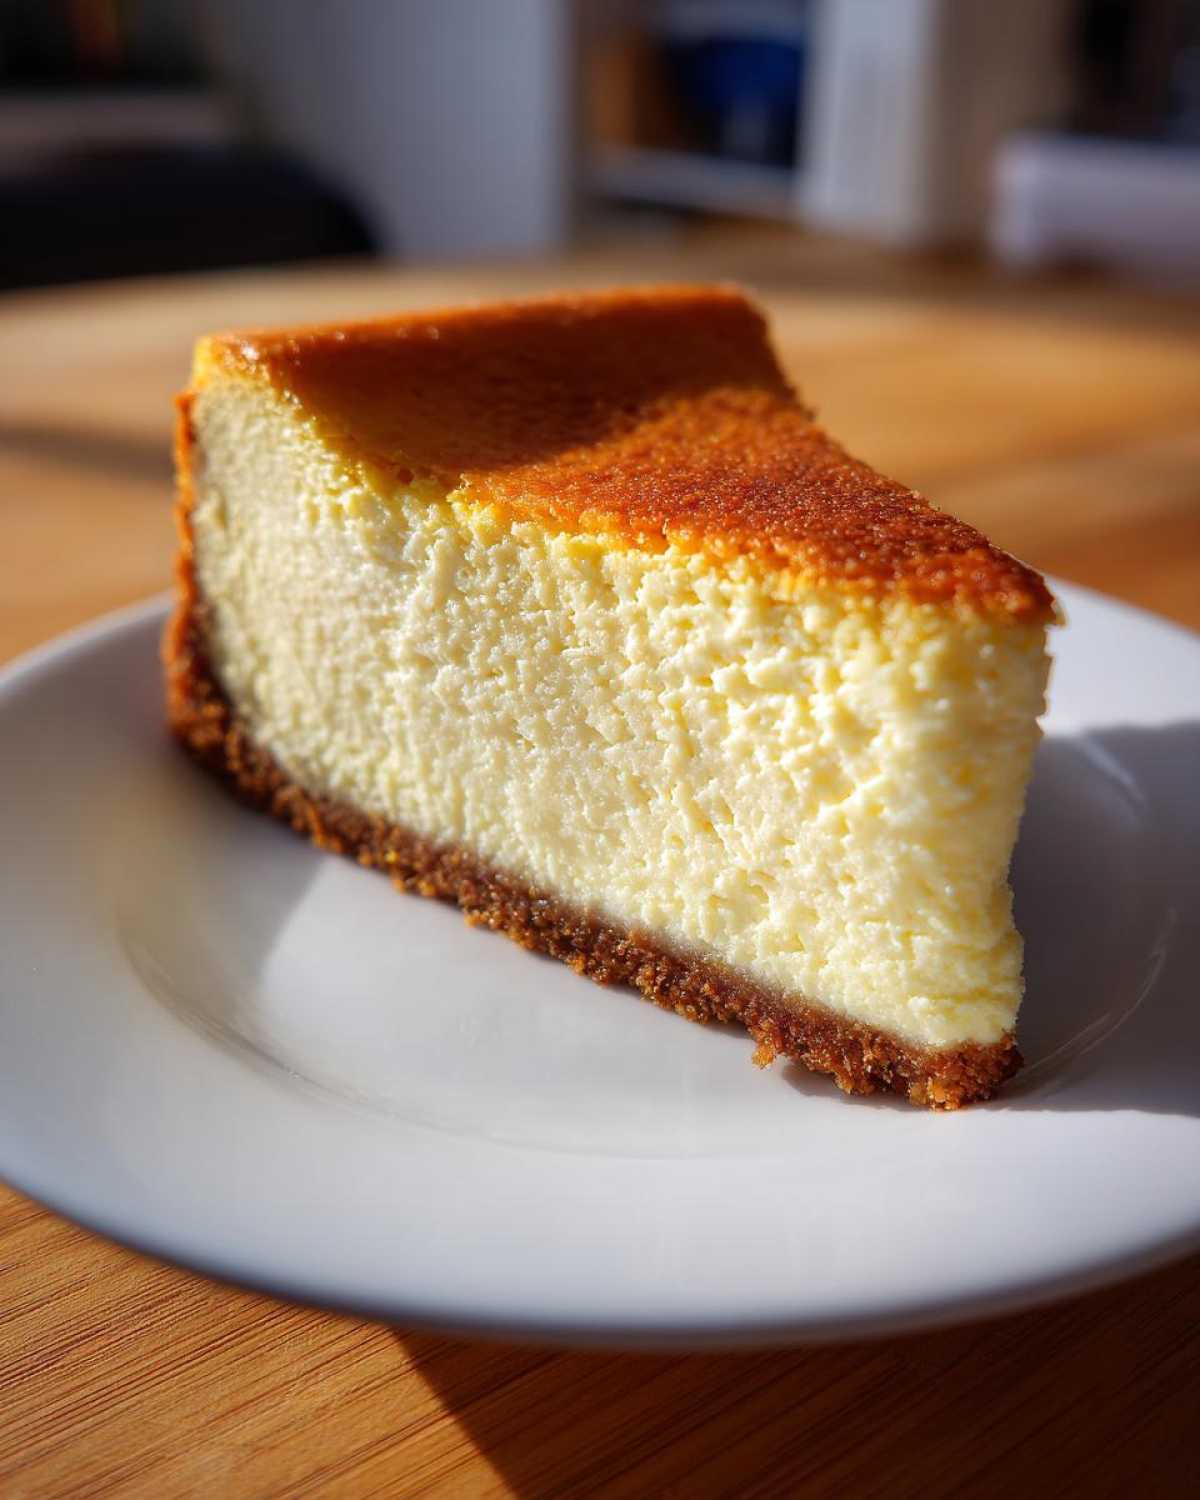
When you slice it, don’t saw at it! Use a long, thin, sharp knife dipped in hot water and wiped dry between every single cut. That’s how you get those gorgeous, museum-worthy slices without dragging any crumbs or crust with you. Enjoy every single, rich bite!
Troubleshooting Common Issues When Making a Traditional Baked Cheesecake
Even with the best plan, sometimes baking throws you a curveball! Don’t panic if your cheesecake doesn’t look magazine-perfect right away. Many of the huge problems people have with a Traditional Baked Cheesecake are actually surprisingly easy to fix once you know the cause. I’ve wrestled with every potential disaster, so let’s talk about the big three culprits: cracks, lumps, and dryness.
Why is my cheesecake top cracked?
This is the age-old complaint, and 99% of the time, it boils down to temperature shock. You did the water bath and you did the slow cool-down in the oven, right? If it still cracked, it usually means the change from the oven to the counter was too fast, or perhaps you baked it just a little too long. Remember that tiny wobble in the center we talked about? If the center isn’t wobbling, it’s overbaked, and that extra heat has solidified the custard too much, making it brittle.
If you notice a thin crack the second you take it out, don’t stress! That small crack is fine, but to stop it from widening while it cools, take a little piece of plastic wrap—dampened with cool water—and gently lay it over the crack to create a tiny bit of steam/humidity right on that spot as it cools on the counter. It won’t fix a disaster, but it keeps small issues from becoming big ones!
My filling is lumpy, what did I do wrong?
Lumps are the enemy of a smooth New York style cake, and it almost always points back to cold ingredients. If your cream cheese, eggs, or sour cream were chilly, they fight each other in the mixer. That’s why I stress pulling them out early. Cold cream cheese can’t blend smoothly into sugar; it clumps up before it softens, and you’ll end up beating for ages trying to smooth it out.
If you are mid-mix and realize you have lumps: stop the mixer! Take the bowl off the stand and put it in a warm spot—maybe near a preheating oven or just on the stove top—for five or ten minutes. Then, beat it again on low speed. Do not be tempted to turn the mixer up to high power to fix it, because that just introduces the crack-causing air we are trying to avoid. Sometimes a quick pulse with an immersion blender (holding it *very* low to avoid bubbles) can save a lumpy batter, but room temperature ingredients prevent this mess entirely!
How can I tell if the cheesecake is over-baked?
Dryness and toughness come from over-baking, plain and simple. Even with the water bath, dry heat will win eventually if you leave it in too long. We are going for a texture that is totally set around the edges, but the center needs to look like soft pudding when you get it out. If you see any part of the edges starting to brown or look tight and cakey, you’ve gone too far.
The best way to stop the clock is by immediately pulling it out of the oven and starting that one-hour slow cool in the turned-off oven. That residual heat is enough to finish the cooking process gently. If you accidentally overbake it slightly, don’t worry; just make sure you serve it with something slightly acidic or creamy, like a tart berry topping, to cut through any dryness. A few extra minutes cooling time in the initial stage with the door cracked can really save a **Traditional Baked Cheesecake** that’s flirting with being overdone. If you ever decide to tackle a different savory bake, check out my recipe for chicken Marsala; it’s elegant but shockingly easy!
Frequently Asked Questions About This New York Cheesecake Recipe
Can I skip the water bath when making this Classic New York Cheesecake?
Oh gosh, I really, really advise against it, especially if you’re new to baking cheesecakes! The water bath is probably the single most important step to getting that perfectly smooth, crack-free top that defines a true New York style dessert. Without it, the direct, dry heat of the oven causes the outer edges to bake much faster than the center. As the center tries to catch up, the edges get tight, and *snap*—you get a crack. If you absolutely cannot do a water bath, you must bake it at a much lower temperature (like 300 degrees F) for way longer, and you need to add extra liquid—maybe a little extra sour cream—to the filling to boost the humidity internally. But honestly, just wrap that pan well and go for the water bath; it’s your best bet for the Best Cheesecake Recipe!
What is the best way to soften cream cheese quickly?
I know sometimes you plan to bake, but life happens, and you realize your cream cheese is still rock solid! Don’t be tempted to microwave a block of cream cheese—that creates hot spots that will absolutely ruin your smooth batter and lead to lumps. If you’re in a huge hurry, cut the room-temperature-prioritized blocks into about one-inch cubes.
Place those cubes on a microwave-safe plate and zap them for just 10 to 15 seconds on LOW power. Check them frequently. You want them soft and pliable around the edges, but still slightly cool in the center. That way, when you put them in the stand mixer bowl, they’ll blend easily without being greasy. This slight cheat helps tremendously with making a Dense Cheesecake Recipe without lumps!
Can this cheesecake be made ahead of time? In fact, how far ahead?
Yes, and this is another great thing about making this Classic New York Cheesecake: it *needs* to be made ahead! Cheesecakes seriously taste better the next day after the flavors have really melted together overnight in the cold. Since chilling for at least 6 hours is required—preferably overnight, remember?—you can easily bake it on a Saturday, let it chill all night, and serve it perfectly on Sunday afternoon.
You can actually keep it, tightly wrapped and refrigerated, for up to four or five days. If you want something quick and easy to pair with it, check out my recipe for easy tortilla soup recipe one pot—perfect for a make-ahead meal!
Do I have to use sour cream if I want that slight tang?
If you are aiming for that true, authentic New York style tang, yes, the sour cream is vital! It’s not just for texture, although it certainly contributes to the overall creamy richness. The slight acidity balances the sheer volume of sweet cream cheese and sugar. If, for some reason, you absolutely can’t use sour cream, you could substitute it with an equal amount of plain Greek yogurt that has been strained overnight to remove excess liquid, or sometimes even crème fraîche will work in a pinch. But if you want the best result for this Cream Cheese Dessert, stick to the sour cream!
Estimated Nutritional Data for Classic Cheesecake
I always tell people not to look too closely at the numbers when you’re dealing with something this gloriously rich, but for those who are curious about what goes into each satisfying slice of our Classic Cheesecake, here’s a general breakdown. Please remember that these figures are just estimates based on standard ingredient calculations. The actual values can shift slightly depending on the brands of butter, sugar, and cream cheese you use.
This information is based on yielding 12 generous servings:
- Serving Size: 1 slice
- Calories: Approximately 450
- Fat: Around 30g (with about 18g of that being saturated fat)
- Carbohydrates: Nearly 38g
- Sugar: About 35g
- Protein: Roughly 8g
It’s definitely a treat, but every single calorie is worth it for that perfect texture! Planning a full meal around this dessert? You might enjoy making my excellent keto pumpkin cheesecake recipe for another time, or perhaps checking out the sides for my main dish recipe for chicken Marsala!
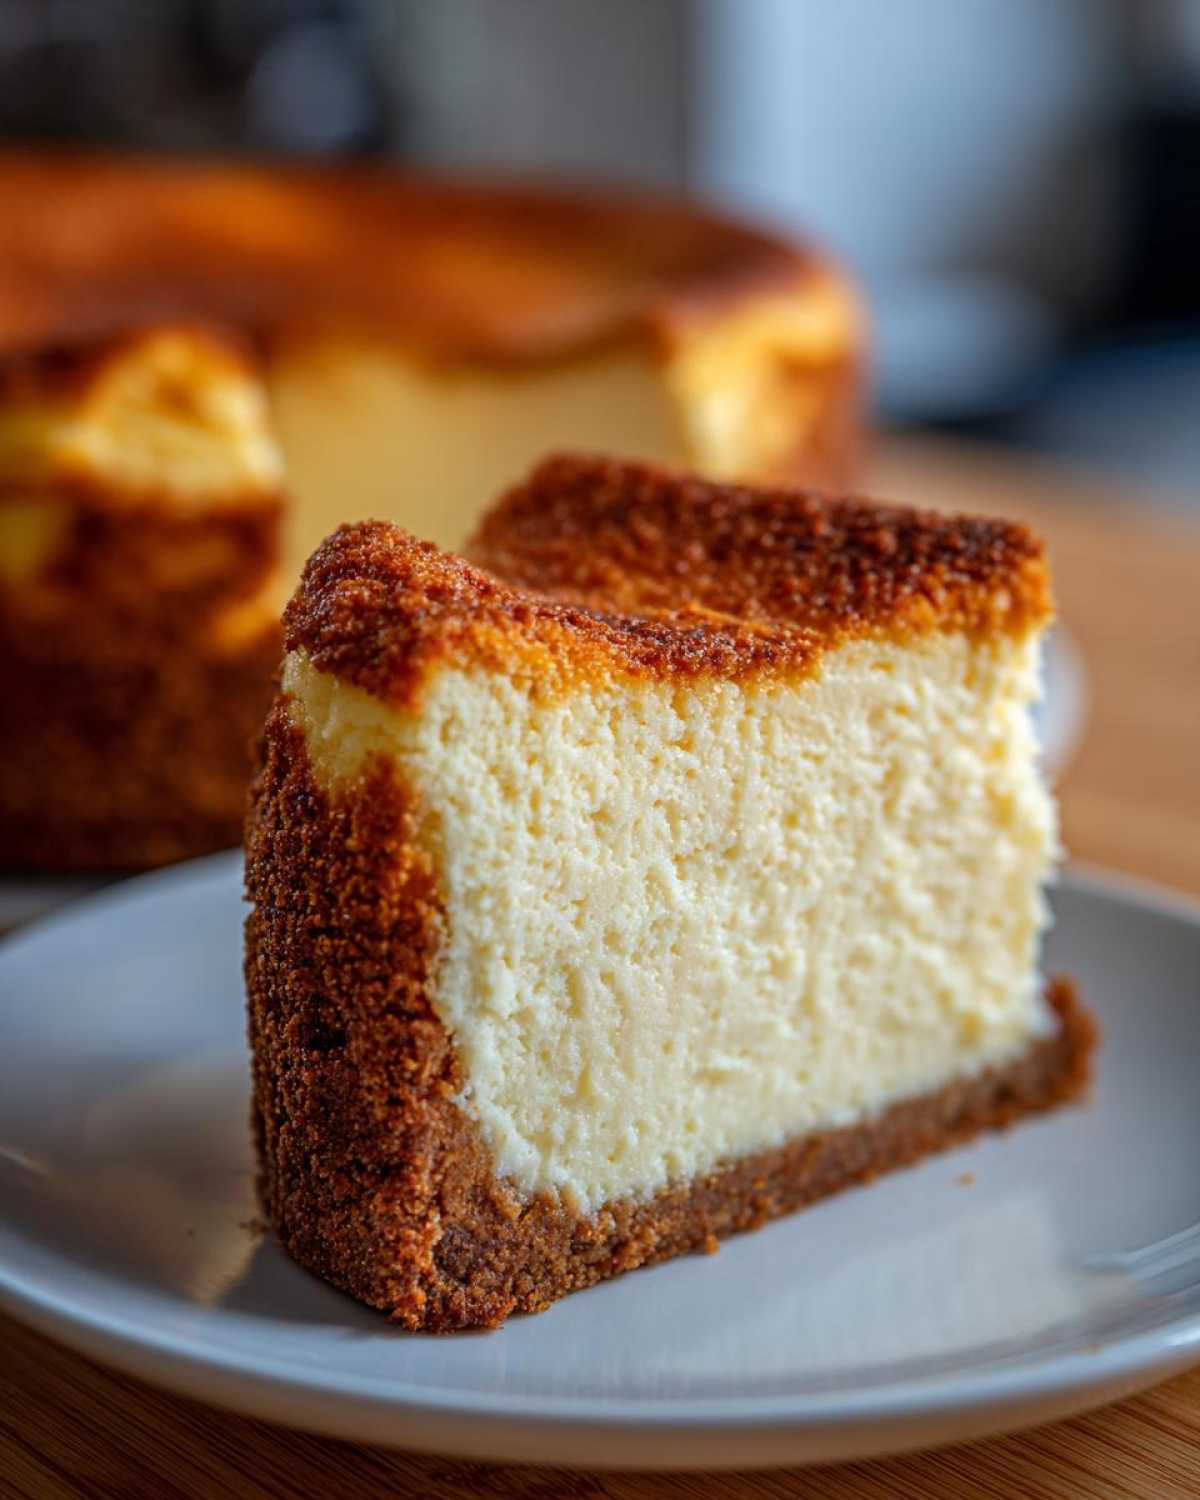
Estimated Nutritional Data for Classic Cheesecake
I always tell people not to look too closely at the numbers when you’re dealing with something this gloriously rich, but for those who are curious about what goes into each satisfying slice of our Classic Cheesecake, here’s a general breakdown. Please remember that these figures are just estimates based on standard ingredient calculations. The actual values can shift slightly depending on the brands of butter, sugar, and cream cheese you use.
This information is based on yielding 12 generous servings:
- Serving Size: 1 slice
- Calories: Approximately 450
- Fat: Around 30g (with about 18g of that being saturated fat)
- Carbohydrates: Nearly 38g
- Sugar: About 35g
- Protein: Roughly 8g
It’s definitely a treat, but every single calorie is worth it for that perfect texture! Planning a full meal around this dessert? You might enjoy making my excellent keto pumpkin cheesecake recipe for another time, or perhaps checking out the sides for my main dish recipe for chicken Marsala!
PrintClassic New York Cheesecake with Graham Cracker Crust
Follow this recipe to make a dense, rich, and smooth New York style cheesecake using a traditional graham cracker crust. Includes instructions for a water bath to prevent cracking.
- Prep Time: 30 min
- Cook Time: 75 min
- Total Time: 8 hours 45 min
- Yield: 12 servings
- Category: Dessert
- Method: Baking
- Cuisine: American
- Diet: Vegetarian
Ingredients
- 1 1/2 cups graham cracker crumbs
- 1/4 cup granulated sugar (for crust)
- 6 tablespoons unsalted butter, melted (for crust)
- 4 (8 ounce) packages full-fat cream cheese, softened
- 1 1/2 cups granulated sugar (for filling)
- 1/4 cup all-purpose flour
- 1 teaspoon vanilla extract
- 1/4 teaspoon salt
- 4 large eggs, room temperature
- 1 cup sour cream, room temperature
Instructions
- Preheat your oven to 350 degrees F. Wrap the outside bottom of a 9-inch springform pan tightly with heavy-duty aluminum foil, covering the bottom and sides completely to prepare for the water bath.
- Make the crust: Combine graham cracker crumbs, 1/4 cup sugar, and melted butter. Press the mixture firmly and evenly into the bottom and about 1 inch up the sides of the prepared springform pan.
- Bake the crust for 10 minutes. Remove from the oven and let it cool while you prepare the filling. Reduce the oven temperature to 325 degrees F.
- Make the filling: In a large bowl, beat the softened cream cheese with an electric mixer until completely smooth. Scrape down the sides of the bowl.
- Gradually beat in the 1 1/2 cups sugar, flour, vanilla extract, and salt until just combined. Do not overmix.
- Add the eggs one at a time, mixing only until each egg is incorporated. Mix in the sour cream until the batter is smooth.
- Pour the filling over the cooled crust. Tap the pan gently on the counter a few times to release any large air bubbles.
- Place the foil-wrapped springform pan into a larger roasting pan. Carefully pour hot water into the roasting pan until the water reaches about halfway up the sides of the springform pan. This is the water bath.
- Bake at 325 degrees F for 60 to 75 minutes. The edges should look set, but the center (about 2 inches wide) should still wobble slightly when gently nudged.
- Turn off the oven. Prop the oven door open slightly (about 2 inches) using a wooden spoon. Let the cheesecake cool inside the oven for 1 hour.
- Remove the cheesecake from the water bath and remove the foil. Let it cool completely on a wire rack at room temperature for another hour.
- Cover the cheesecake loosely with plastic wrap and refrigerate for at least 6 hours, or preferably overnight, before serving.
Notes
- Use room temperature ingredients for the filling to prevent lumps and ensure a smooth texture.
- Do not overbeat the batter once the eggs are added; too much air causes cracking during cooling.
- For the smoothest texture, use a paddle attachment on your mixer, not a whisk attachment.
Nutrition
- Serving Size: 1 slice
- Calories: 450
- Sugar: 35g
- Sodium: 300mg
- Fat: 30g
- Saturated Fat: 18g
- Unsaturated Fat: 12g
- Trans Fat: 0.5g
- Carbohydrates: 38g
- Fiber: 1g
- Protein: 8g
- Cholesterol: 120mg