


I have to tell you, achieving that picture-perfect Lemon Meringue pie used to be my Everest. I mean, who hasn’t had that heartbreaking moment where the beautiful fluffy clouds collapse or weep all over the bright filling? Jacob and I spent ages testing ratios until we cracked the code. This isn’t just any dessert; this is our absolute masterpiece. We call it The Ultimate Homemade Lemon Meringue Pie, and I promise you, it’s totally from scratch. Forget the boxes—we’re aiming for a mile-high, stable meringue and a zesty, smooth custard that will make your taste buds sing. Get ready for your new family favorite!
Why This Classic Lemon Meringue Pie Recipe Works (The Taste Portfolio Promise)
When Amelia organizes the project, it means spreadsheets, and when Jacob executes, it means delicious outcomes! We know you’ve searched for the very Best Lemon Meringue Pie recipe out there, and we stand by this one because we’ve solved the common kitchen nightmares. If you’re tired of runny lemon filling or meringue that sinks faster than a leaky boat, you’re in the right place. This recipe is designed to deliver a truly showstopping dessert every single time.
Achieving the Perfect Balance: Tart Custard Meets Fluffy Meringue Topping
The magic here is the contrast. We’re not making a sweet, dull filling; we want that bright, zesty lemon custard that makes your eyes pop open a little wider! That sharp, wonderful tartness cuts through the richness of our buttery crust beautifully. Then, you get that cloud-like, fluffy meringue topping. It’s high, it’s golden, and it gently kisses the slightly warm filling—it’s texture heaven, honestly.
Jacob’s Expert Tips for a Homemade Lemon Meringue Pie
Jacob refuses to use anything other than fresh-squeezed lemon juice. Seriously, bottled juice just doesn’t carry that sharp, clean flavor we need for our Homemade Lemon Meringue Pie. He’s also meticulous about tempering those egg yolks. It sounds fancy, but it’s just slowly introducing the hot liquid to them so they don’t scramble! Also, the goal for the meringue is stiff, glossy peaks that stand straight up. If they droop when you hold the bowl upside down? Keep whipping!
Gathering Your Ingredients for the Ultimate Lemon Meringue
Okay, this part is where Amelia gets very happy because planning means lists! Getting your components ready before you start cooking is half the battle for a perfect Lemon Meringue. We are doing this totally from scratch, so make sure you have the freshest things you can get your hands on. Don’t worry, once these ingredients are measured out, the actual cook time flies by. We need items for the crust, the filling, and, of course, that glorious cloud on top.
- 1 (9-inch) unbaked Buttery Pie Crust (use your favorite recipe or store-bought)
- 1 1/2 cups granulated sugar
- 1/3 cup cornstarch
- 1/4 teaspoon salt
- 1 1/2 cups cold water
- 3 large egg yolks, lightly beaten
- 2 tablespoons unsalted butter
- 1/2 cup fresh lemon juice
- 1 tablespoon lemon zest
- 3 large egg whites, at room temperature
- 1/4 teaspoon cream of tartar
- 6 tablespoons granulated sugar (for meringue)
Ingredient Notes and Substitutions for Your Lemon Meringue
A few quick notes so you don’t run into trouble! You absolutely must have that 9-inch unbaked pie crust ready to go—and make sure it’s completely cooled before the hot filling goes in. For the yolks, make sure they are just lightly beaten; we don’t want extra air incorporated yet. And listen, for the best flavor in your Zesty Lemon Pie, please use fresh lemons for the juice and zest. That bottled stuff just has a flat flavor that doesn’t do this pie justice. Trust me on this one!
If you want to see the full setup for the next part of the adventure, check out my organizational notes here: Easy Homemade Lemon Meringue Pie Recipe Prep.
How to Prepare the Perfect Lemon Meringue Pie From Scratch
This is it, the main event! Learning How to Make Lemon Meringue Pie perfectly from scratch feels like unlocking a big secret. The key here is moving quickly once the custard is done, especially when dealing with those delicate egg components. Don’t rush, but don’t dawdle either. We’re breaking this down into four major phases so you can follow along like a true baking project manager.
Step 1: Preparing the Crust and Cooking the Lemon Custard Filling
First things first: your crust has to be totally cool. A warm crust equals a soupy bottom layer, and we don’t want that soggy mess! Bake that 9-inch shell until it’s just lightly golden, then let it chill out on a rack. Now, grab a medium saucepan. We’re whisking the main sugar, cornstarch, and salt together—make sure there are zero lumps there. Slowly whisk in the cold water until it looks smooth. Pop it over medium heat and stir constantly, like you mean it! Keep stirring until it gets super thick and starts bubbling. Let it bubble hard for a full minute while you stir. Then, and this is important, pull it right off the heat.
Step 2: Tempering Yolks and Finishing the From Scratch Lemon Custard
This next bit is critical for that unbelievably smooth From Scratch Lemon Custard. Take about one cup of that hot sugar goo you just made and pour it *slowly*, in a thin stream, into your lightly beaten egg yolks while whisking like crazy. This is called tempering, and it stops you from ending up with sweet lemon scrambled eggs! Once tempered, just dump that yolk mixture straight back into the saucepan with the rest of the hot filling. Put it back on medium heat and stir until it comes back up to a boil and boils for one more minute. Take it off the heat for good, then whisk in the butter, fresh lemon juice, and zest until everything melts and smooths out. Pour that bright, gorgeous filling right into your cooled crust!

Step 3: Creating the Fluffy Meringue Topping
While the filling is still warm, get your meringue going. Remember, those egg whites *must* be at room temperature; that’s how you get that amazing volume! In a completely clean, grease-free bowl, beat the whites with the cream of tartar until they form soft peaks—they should look billowy but still curl over. Now, add that remaining 6 tablespoons of sugar, just a spoonful at a time, beating high speed between additions. You’re done when the peaks are stiff, they hold their shape perfectly when you lift the whisk, and they look glossy. Spread that fluffy meringue right over the hot filling. Make absolutely certain that meringue touches the crust edge all the way around. That seals in the heat and flavor!
Step 4: Baking and Cooling the Final Lemon Meringue
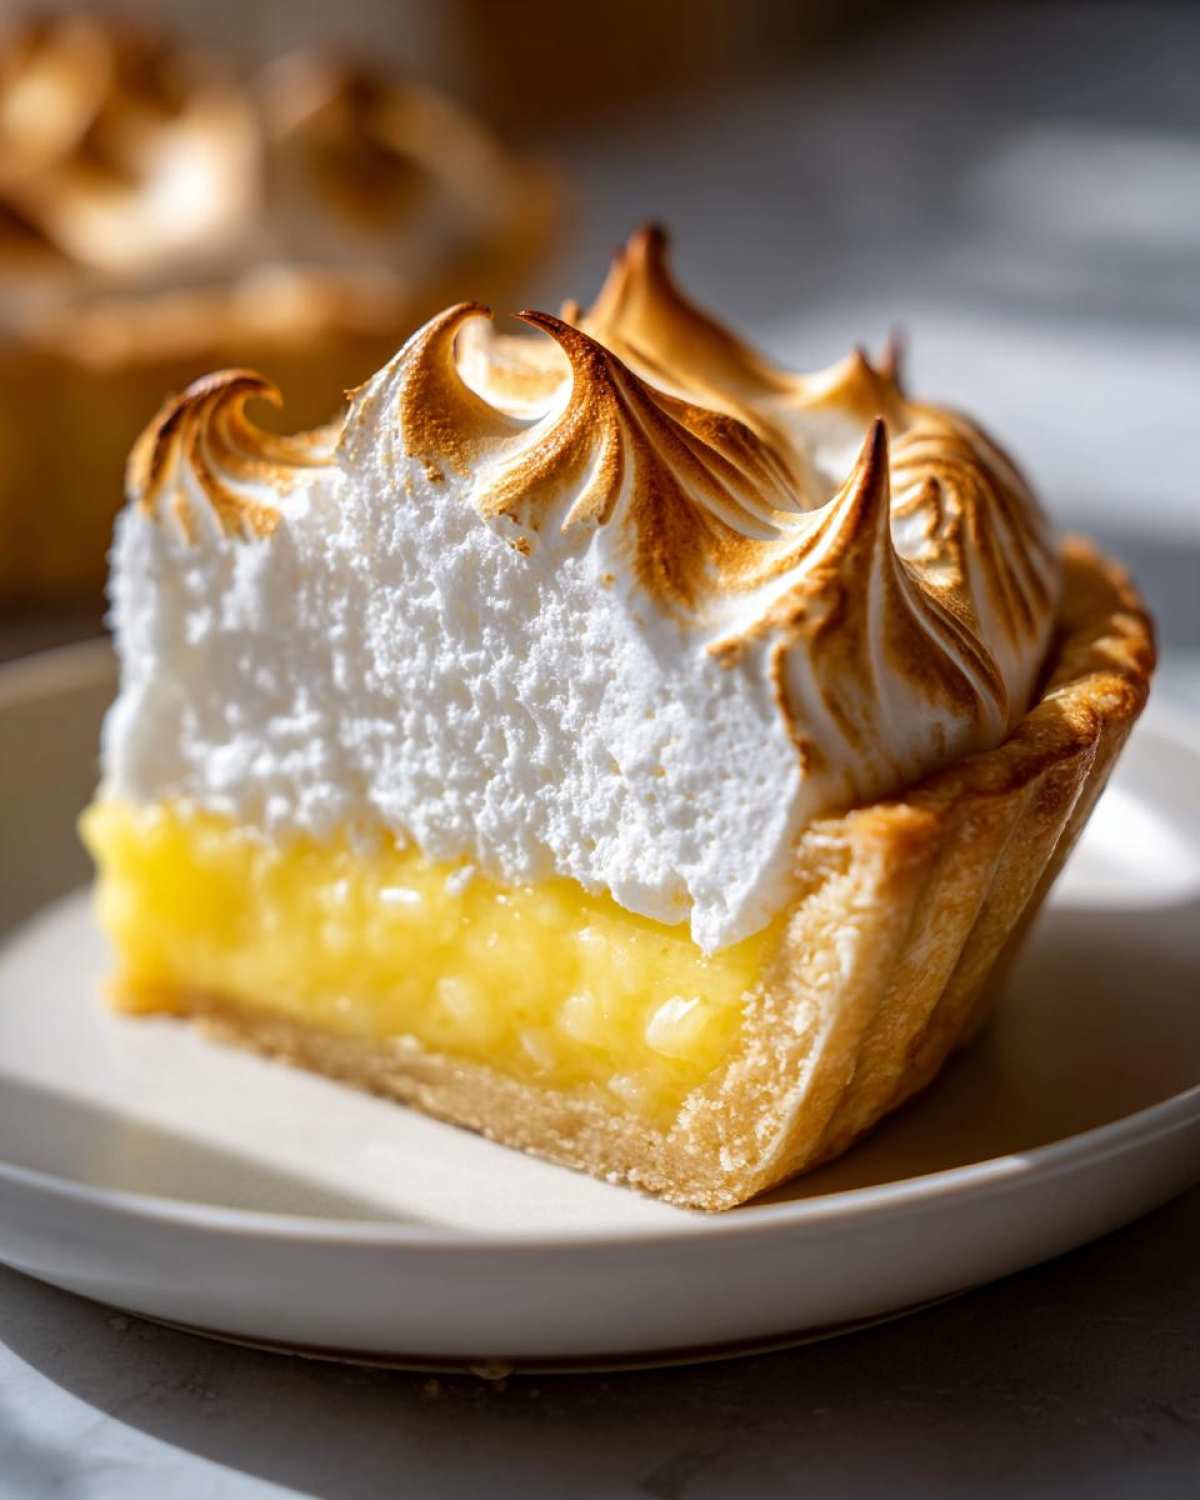
You’re so close! Pop your pie into a 350°F oven for just 12 to 15 minutes. We’re just browning the peaks to a perfect golden color. When they look beautiful, take it out. Now, this next part is tough, but necessary for a perfect Lemon Meringue: Do NOT refrigerate it immediately. You have to let it cool completely on the counter for at least four hours. Sudden temperature changes are what cause the meringue to weep. Good things come to those who wait, my friend!
Tips for a No Weeping Meringue and Showstopping Lemon Meringue
Okay, let’s talk about the single scariest thing in pie baking: meringue weep. It’s that unpleasant sugary syrup that leaks out from under the meringue, and trust me, it ruins the beauty of a perfectly Zesty Lemon Pie. We have a couple of major No Weeping Meringue Tips that work every single time for us.
First, remember what I stressed in Step 4: the cooling process is mandatory. Never put a hot pie directly in the fridge! The filling needs to set slowly at room temperature for at least four hours. That steady cooling ensures the humidity stays locked in the filling where it belongs.
Second, when you spread that meringue onto the hot custard, make sure you are completely sealing the edges against the crust all the way around. Think of it like patching a roof; no gaps allowed! This traps steam inside the meringue, preventing it from collapsing on itself.
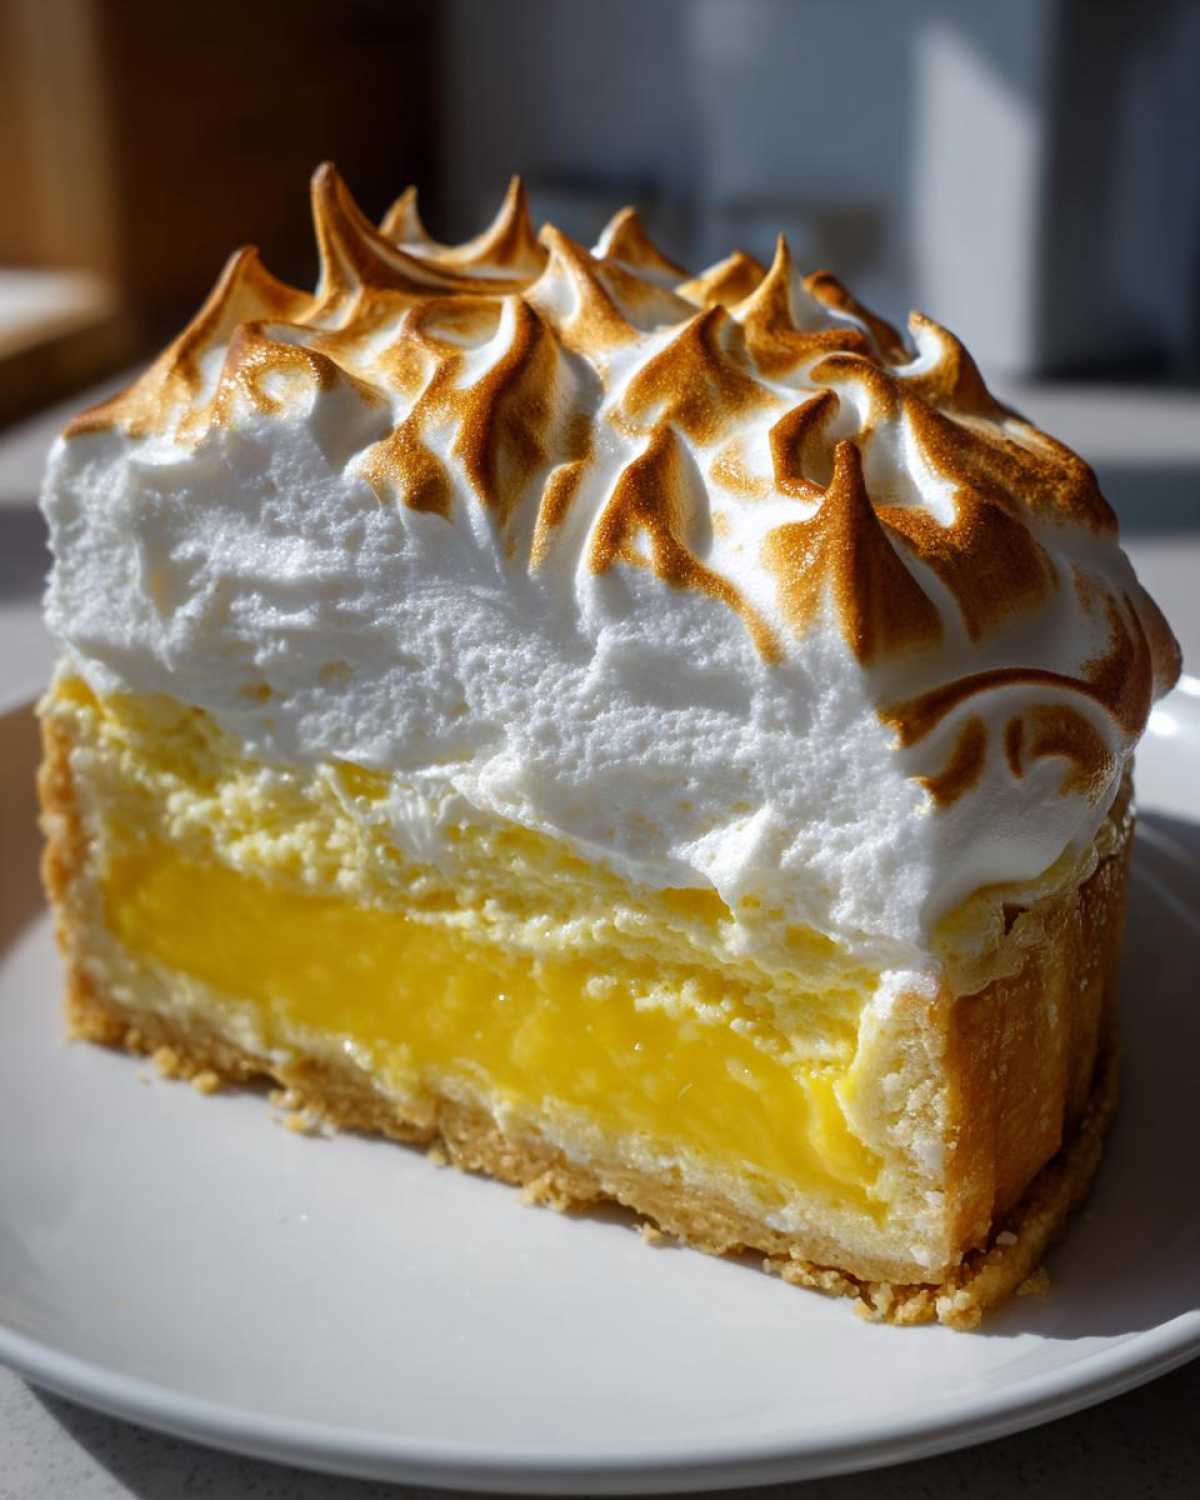
For a real showstopper moment, Jacob often skips the oven browning entirely. If you own one, using a good quality kitchen torch to char the peaks is amazing. It gives you perfectly crisp, toasted edges without subjecting the whole pie to more heat. You get that golden color faster, and it’s super dramatic!
If you want more behind-the-scenes kitchen experiments that led to this perfect texture, you can browse all our successes (and failures!) over on the main Taste Portfolio blog.
Serving Suggestions for Your Classic Lemon Meringue Pie
Phew! You’ve made it through the baking and the agonizing cooling period. Now comes the best part: serving this beautiful, tangy sweet dessert! This pie is so bright and flavorful, it honestly doesn’t need much else to stand up on the dessert table. It’s perfect for a warm day, making it a fantastic Summer Dessert Recipe.
Because the lemon curd is so intensely flavored, we usually keep the garnish really simple. A light dusting of confectioners’ sugar right before serving is often all we do. It just settles nicely on all those high meringue peaks, giving it that professional final touch without obscuring Jacob’s gorgeous swirls.
However, if you want to add a little something extra, especially when serving as a grand finale for a holiday like Easter, fresh fruit is your friend. The tartness of the pie pairs amazingly well with slightly sweeter berries. Think about arranging a fan of fresh, ripe raspberries or sliced strawberries around the base of the serving plate. The red color against the yellow custard and white meringue is just stunning.
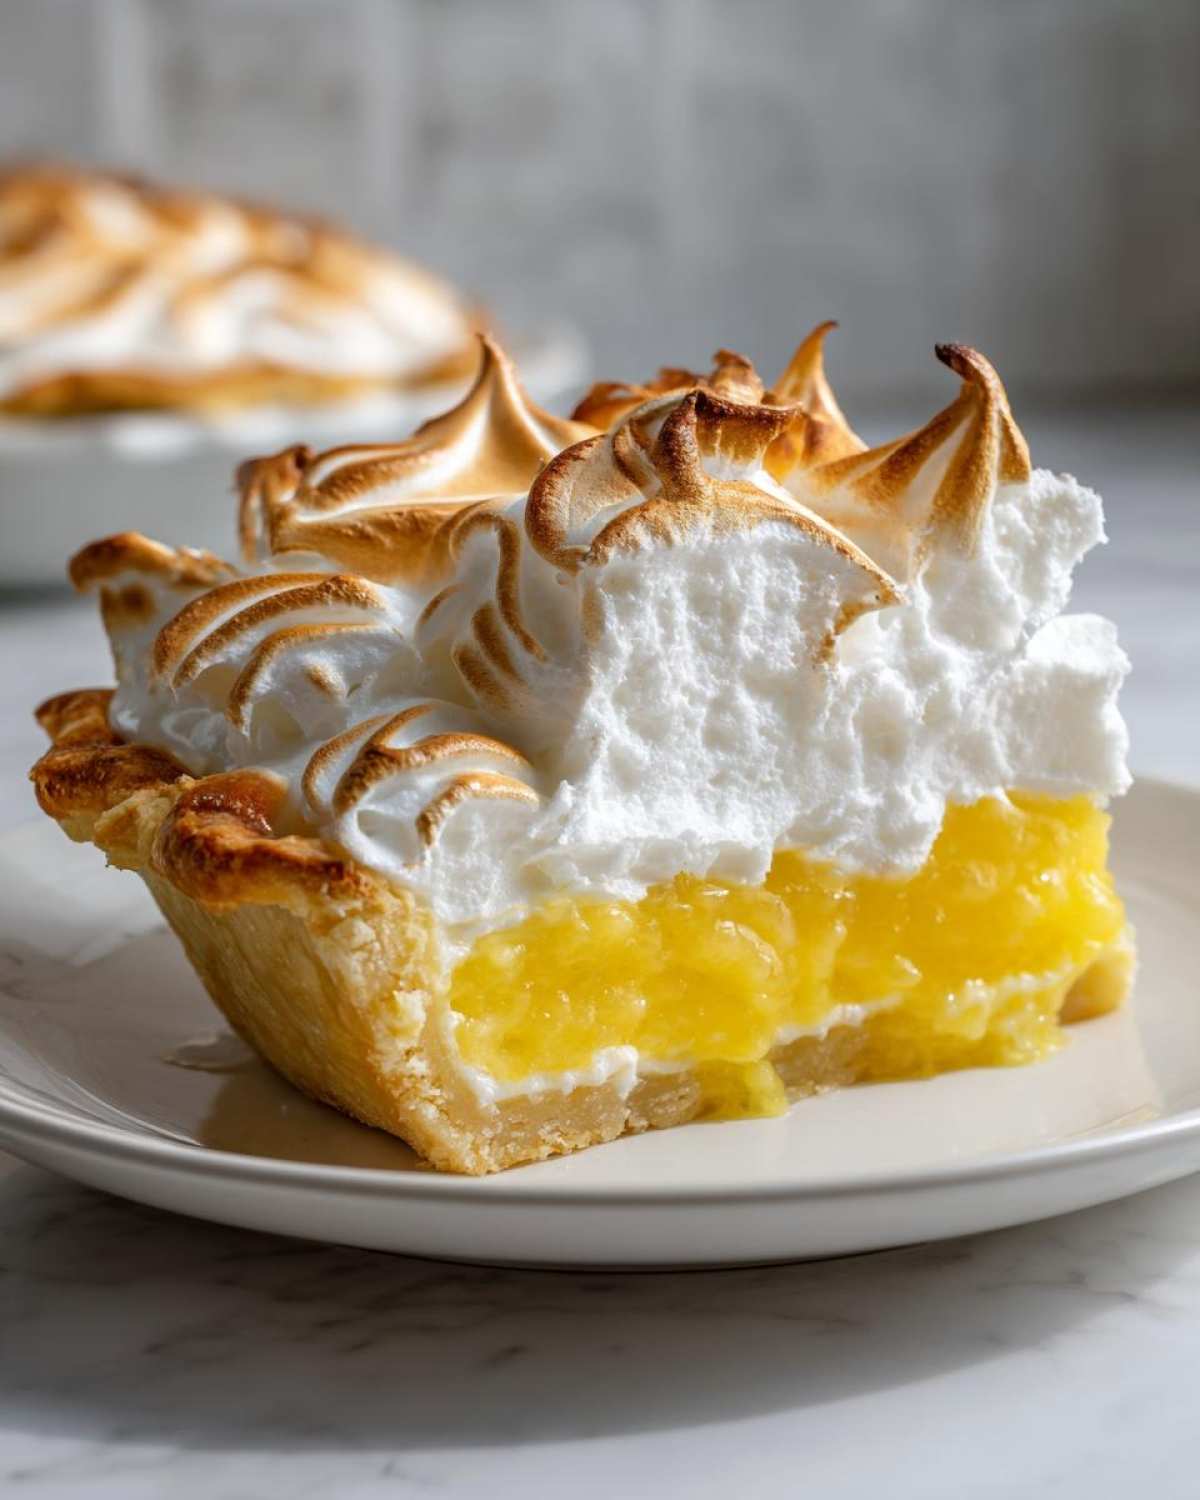
For a holiday table, sometimes we even swap out the usual crust for a gingersnap crust—it adds a nice spicy warmth that plays well with the citrus! If you’re interested in other great recipes that bring seasonal flair to the table, you have to check out our Cranberry Orange Cake recipe for later this year!
Storage and Reheating Instructions for Lemon Meringue
Oh, the dreaded leftovers dilemma! You’ve made this amazing Lemon Meringue wonder, and now you have pieces left over, or maybe you want to make it a day ahead. Here’s the deal: meringue pies are fussy, and we need to treat them gently after all that hard work.
The number one rule, and I cannot stress this enough, is that this pie must cool completely—and I mean completely—at room temperature *first*. That usually means about four hours sitting on the counter, away from drafts. If you rush it to the fridge while it’s still warm, that temperature shock will make the sugar in the meringue weep right before your eyes. It’s inevitable, like taxes!
Once cooled, you can absolutely move it into the refrigerator. I just loosely tent it with plastic wrap. Don’t press the wrap down onto the meringue, though, or you risk sticking and tearing off those beautiful golden peaks! Keep it covered loosely, and it should be fantastic for about three days max. The longer it sits, the more likely the crust will soften up, but the filling will hold.
Now, let’s talk about reheating, because this is a simple “no.” You absolutely cannot reheat a finished Classic Lemon Meringue Pie. The custard will turn liquid again, and the meringue will just disintegrate into sweet foam. If you have leftovers, enjoy them cold straight from the fridge. That chilled custard with the cooled meringue provides an entirely different, but still totally delicious, experience!
Frequently Asked Questions About Lemon Meringue
I always get the same questions when folks try this recipe for the first time, which is totally normal because a perfect Lemon Meringue Pie takes a little practice! I’ve compiled the most common ones we hear to help you bypass those rookie mistakes and jump straight to the delicious results. Don’t worry if something seems tricky; we figured it out, and so will you!
Can I make the Lemon Meringue Pie filling ahead of time?
Yes, this is one of the great secrets to less stress! You can absolutely make the From Scratch Lemon Custard filling a day ahead of time. Once it’s cooked, stir in the butter, juice, and zest, pour it into your pre-baked (and cooled!) crust, and cover it tightly with plastic wrap—make sure that wrap isn’t touching the surface. Now, here’s the crucial “ahead of time” rule: Do *not* add the meringue until you are ready to bake that day. The meringue has to go on right before baking, and ideally, you want to bake and cool that final pie on the same day for the best texture stability.
What is the secret to a truly ‘Tangy Sweet Dessert’ flavor?
It all comes down to the balance in the filling, which is where the magic ratio lives. If your pie tastes flat or too sweet, it’s usually because there isn’t enough acid! We use 1/2 cup of fresh lemon juice and 1 tablespoon of zest for this recipe to achieve that perfect punch. If you try to substitute some of that juice with bottled stuff, you lose the brightness. We aim for that Tangy Sweet Dessert experience, meaning the sweetness from the 1 1/2 cups of sugar is absolutely necessary to balance the intense tartness of that fresh zest and juice. Taste your filling before you temper the eggs—it should make you pucker just a little bit! If you’re looking for more ways to connect with us, I’m always here to chat recipes over at our Contact Page.
Can I use a graham cracker crust instead of a regular pie crust?
It’s tempting, I know! Graham cracker crusts are so easy, but they don’t hold up as well against that heavy, hot lemon custard. The heat from the filling can make a graham crust turn soggy really fast. For this recipe, which uses a very hot cooked custard, I strongly urge you to stick with a sturdy, fully pre-baked Buttery Pie Crust Recipe. If you absolutely must use graham, you’ll need to bake it until it’s super dark and crisp, maybe even cool it completely, and put a thin layer of melted chocolate in the bottom first. The chocolate acts like a moisture barrier, but honestly, the flavor pairing isn’t quite as lovely as that classic buttery crunch!
Why did my meringue develop beads of sugar syrup (weeping)?
Ah, weeping—the bane of every baker’s existence! Almost always, weeping happens for one of two reasons we’ve already talked about, but it deserves repeating. The main culprit is temperature shock; you baked the pie, and then you immediately put it in a super cold fridge. That rapid cooling causes the sugar/water mixture in the meringue to separate. The second reason is that the meringue didn’t fully seal to the hot custard underneath. Always make sure your meringue covers the filling completely, right to the very edge of the crust, to create that seal. Cold egg whites are also grumpy, so remember to use room temperature whites for that Fluffy Meringue Topping!
Variations on the Classic Lemon Meringue
While this Classic Lemon Meringue Pie is pure perfection and our main collection piece, I know sometimes you just can’t make a whole pie, or maybe you need something portable! Amelia is already working on my next big organizational project, which involves tackling some of those fun sister recipes.
If you love this flavor combination but need something lighter or easier to serve at a picnic, keep an eye out for when we publish our recipe for Lemon Meringue Bars Recipe. Bars are great because you skip the whole sealing-the-meringue-to-the-crust headache, and they travel so much better!
We’ve also been experimenting with shrinking things down. Who doesn’t love a single-serving dessert? Preparing Mini Lemon Meringue Tarts is basically the same process, but you use small tart shells. The biggest difference, and this is important, is bake time. Since the custard is shallower, it cooks much faster, so you definitely need to watch that custard like a hawk! We’re planning on making those a feature sooner rather than later.
And I can’t forget about the most adorable variation: Lemon Meringue Cookies Recipe. Those are lighter, almost like a meringue kiss with a bright lemon flavor baked right in. They are a perfect, light option if you’re looking for a less intense dessert experience. It’s all about adapting that fantastic zest and fluffiness to whatever cookie sheet project you’re tackling next. If you are looking for another fun baking project while you wait for those recipes to drop, you might enjoy our tips for Easy Fluffy Oatmeal Pancakes!
Nutritional Estimate for Your Homemade Lemon Meringue Pie Slice
Since Jacob and I like to approach everything like a proper project, we always try to nail down the numbers after we figure out the flavor! If you’re counting things out, here is a general guide for one slice of this incredible Homemade Lemon Meringue Pie. Keep in mind these figures are based on the recipe above, using a standard, unbaked refrigerated pie crust, and splitting the pie into eight generous servings. Your numbers might shift slightly based on the butter brands or specific sugar amounts you use.
We know none of us are baking this for the fiber content, but it’s good to have the data handy! You can review our full disclosure policy right here: Our Official Nutrition Disclaimer.
- Serving Size: 1 slice
- Calories: 380
- Sugar: 45g
- Sodium: 180mg
- Fat: 18g
- Saturated Fat: 8g
- Unsaturated Fat: 10g
- Trans Fat: 0g
- Carbohydrates: 52g
- Fiber: 1g
- Protein: 5g
- Cholesterol: 95mg
Doesn’t that look surprisingly reasonable for something so decadent? The good news is that the cholesterol is mostly thanks to those three beautiful egg yolks we use in the filling. Enjoy every tangy, sweet bite—you’ve earned it!
PrintThe Ultimate Homemade Lemon Meringue Pie (From Scratch with Tall, Stable Meringue)

This recipe delivers the classic Lemon Meringue Pie you want: a buttery crust, a bright, zesty lemon custard filling, and a high, fluffy, golden-brown meringue topping. We focus on making this from scratch for the best flavor.
- Prep Time: 30 min
- Cook Time: 30 min
- Total Time: 4 hours 0 min
- Yield: 8 servings
- Category: Dessert
- Method: Baking
- Cuisine: American
- Diet: Vegetarian
Ingredients
- 1 (9-inch) unbaked Buttery Pie Crust (use your favorite recipe or store-bought)
- 1 1/2 cups granulated sugar
- 1/3 cup cornstarch
- 1/4 teaspoon salt
- 1 1/2 cups cold water
- 3 large egg yolks, lightly beaten
- 2 tablespoons unsalted butter
- 1/2 cup fresh lemon juice
- 1 tablespoon lemon zest
- 3 large egg whites, at room temperature
- 1/4 teaspoon cream of tartar
- 6 tablespoons granulated sugar (for meringue)
Instructions
- Prepare the pie crust: Bake the 9-inch pie crust according to your recipe instructions until lightly golden. Let it cool completely on a wire rack.
- Make the lemon custard filling: In a medium saucepan, whisk together the 1 1/2 cups sugar, cornstarch, and salt. Gradually whisk in the cold water until smooth.
- Cook the mixture over medium heat, stirring constantly, until it thickens significantly and begins to bubble. Cook for one minute more, stirring constantly. Remove from heat.
- In a separate small bowl, whisk the 3 egg yolks lightly. Slowly temper the yolks by whisking about 1 cup of the hot sugar mixture into the yolks.
- Pour the tempered yolk mixture back into the saucepan with the remaining hot mixture. Return the pan to medium heat. Cook, stirring constantly, until the filling comes to a boil. Boil for one minute, stirring. Remove from heat immediately.
- Stir in the butter, lemon juice, and lemon zest until the butter is melted and the filling is smooth.
- Pour the hot lemon custard immediately into the cooled, pre-baked pie shell.
- Prepare the meringue: In a clean, grease-free bowl of a stand mixer fitted with the whisk attachment (or using a hand mixer), beat the 3 room-temperature egg whites and cream of tartar on medium speed until soft peaks form.
- Gradually add the 6 tablespoons of sugar, one tablespoon at a time, while beating continuously. Increase the speed to high and beat until stiff, glossy peaks form. The meringue should hold its shape firmly.
- Spread the meringue over the hot lemon filling, making sure the meringue touches the inside edge of the crust all the way around. This seals the filling and helps prevent weeping. Create decorative swirls with the back of a spoon.
- Bake the pie in a preheated 350°F (175°C) oven for 12 to 15 minutes, or until the meringue peaks are golden brown.
- Cool the pie completely on a wire rack at room temperature for at least 4 hours before slicing. Do not refrigerate immediately, as rapid cooling can cause the meringue to weep.
Notes
- To prevent weeping, make sure the meringue completely seals the hot filling to the crust edge.
- Use room temperature egg whites for the fluffiest, most stable meringue structure.
- For a truly showstopping dessert, use a kitchen torch to brown the meringue peaks instead of baking.
Nutrition
- Serving Size: 1 slice
- Calories: 380
- Sugar: 45g
- Sodium: 180mg
- Fat: 18g
- Saturated Fat: 8g
- Unsaturated Fat: 10g
- Trans Fat: 0g
- Carbohydrates: 52g
- Fiber: 1g
- Protein: 5g
- Cholesterol: 95mg