

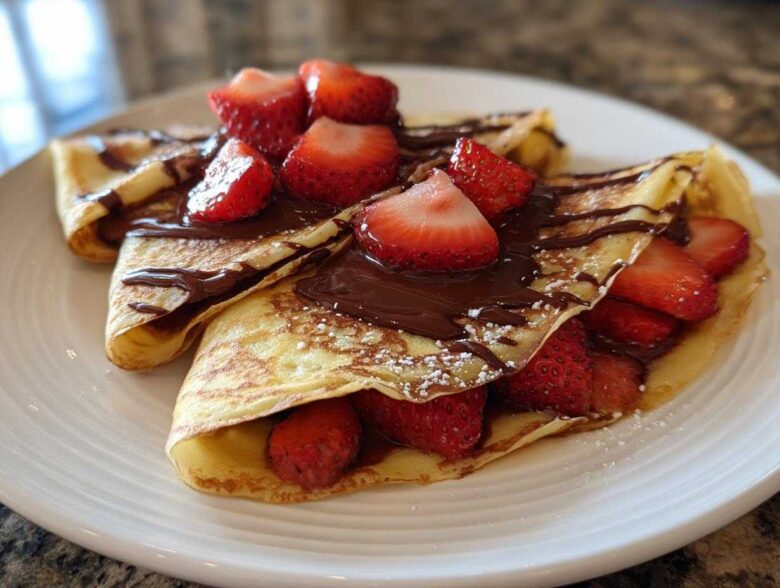
Oh, let’s be honest. Making a truly great crepe is already an act of mild kitchen sorcery, right? You need that delicate, lacy edge and a texture that melts the second it hits your tongue. When you throw gluten out the window, everyone assumes you’re stuck with thick, gummy pancakes instead of those dreamy, thin French classics. Well, trust me when I say that assumption is just plain wrong!
After about three disastrously rubbery attempts, I finally cracked the code for my perfect Gluten-Free Chocolate Strawberry Crepes. The secret is all in the liquid balance and making sure that GF flour mix has enough binding power to get that paper-thin structure without falling apart when you flip it. We’re aiming for delicate, chocolatey perfection here, and I can’t wait to show you how easy it is!
Why You Will Love These Gluten-Free Chocolate Strawberry Crepes
I know you’re probably skeptical, but I promise this recipe delivers! Making **Gluten-Free Chocolate Strawberry Crepes** shouldn’t feel like a chore. Here’s why I know you’ll be making this all the time, whether it’s for a special weekend or just a Tuesday morning craving:
- They are unbelievably thin! I swear, you won’t believe there’s no wheat flour in these. We’ve cracked the code for pliability.
- The ganache is rich, decadent, and so simple to whip up—way better than just sprinkling chips inside, trust me.
- Macerated strawberries give you that perfect burst of fresh, slightly tart fruit flavor to cut through the chocolate. It’s the best **Chocolate Strawberry Dessert** combo!
- We keep the cleanup simple; since the batter comes together perfectly in the blender, you’re not messing with a million bowls.
- This is one of the very few recipes I trust to keep its texture, making it a fantastic option for your next big gathering. It’s one of my favorite **Easy Gluten Free Brunch Recipes**.
- You even get built-in substitutions! It’s naturally easy to make this a **Dairy Free Crepes Option** just by swapping a couple of ingredients.
If you’re looking for more ideas along these lines, you should definitely check out my guide on Easy Gluten Free Brunch Recipes for weekend inspiration!
Essential Ingredients for Perfect Gluten-Free Chocolate Strawberry Crepes
Okay, this is where we put the foundation down! You need the right players for this team, especially when foregoing gluten. Don’t just grab any old bag of flour, either; the blend matters big time if you want thin, pliable **Gluten-Free Crepes Recipe**!
You’ll notice I’ve broken the ingredients down into three jobs: the crepe batter itself, the strawberries that need a little time to get juicy, and the dreamy chocolate part. Please make sure your GF flour blend already has xanthan gum in it, or we’ll add it later—it’s non-negotiable for structure!
Here is what you need for about 8 perfect crepes:
- 1 cup gluten-free all-purpose flour blend (and this MUST have xanthan gum, seriously!)
- 2 large eggs
- 1 cup milk (feel free to use almond or oat milk if you need a **Dairy Free Crepes Option**!)
- 1/4 cup water (This little bit of water keeps things super light!)
- 2 tablespoons melted butter or oil, plus extra for greasing that pan
- 1 tablespoon sugar
- 1/4 teaspoon salt
These components are what we’re mixing for our delicate shells. But the real stars of the show are these next components:
For the Macerated Strawberries
This step is the easiest, but don’t skip it! You need the strawberries to release their own sweet syrup, which is way better than any bottled syrup you can buy. Trust me, this step is key for a truly vibrant **Crepes with Fresh Fruit Filling**.
- 2 cups fresh strawberries, sliced nicely.
- 1 tablespoon granulated sugar (just enough to help the magic happen).
Just toss these two together in a bowl and let them hang out for at least 15 minutes while you start the batter. They’ll be perfectly juicy by the time you’re ready to fold!
For the Rich Chocolate Ganache
This is how we get that luxurious, thick texture that spreads without tearing our delicate gluten-free shell. We aren’t making a thin drizzle here; we want something you can truly stuff inside. You can find more tips on making silky sauces like this one in my guide to Chocolate Sauce for Crepes.
- 1/2 cup heavy cream (This is the fat that makes it rich!)
- 4 ounces bittersweet chocolate, chopped up small.
Chopping the chocolate small helps it melt faster and smoother into that luscious ganache consistency we are after!
Mastering the Batter: Tips for Thin Gluten-Free Crepes Recipe
Alright, this is the big moment. The batter is where most gluten-free baking goes sideways, right? People try to make a standard recipe dairy-free or skip the resting step, and suddenly they have something closer to edible wallpaper paste than a delicate crepe. We want the thinnest possible shell so that the **Chocolate Strawberry Dessert** filling shines through!
The absolute best tool for this job is a blender. Forget hand whisking—for wafer-thin **Gluten-Free Crepes Recipe**, you need zero lumps. Throw everything in—the GF flour, the eggs, the milk, the water, the melted butter, the sugar, and salt—and blend it until it’s impossibly smooth. This is what gives us that beautiful, flowing liquid consistency.
But here’s the absolute, number one, non-negotiable tip for success if you want true **Gluten-Free Chocolate Strawberry Crepes**: You must let it rest! The gluten-free flour blend needs time to fully hydrate. Seriously, walk away. Set a timer for 15 minutes. If you skip this, the batter will be gritty or sticky, and you won’t get that lovely thinness you’re dreaming of. It’s a total game-changer.
During that rest, the starches swell up, making the batter tougher and less likely to tear when you flip it. It transforms from a runny mess into something that has just enough body. If you’re feeling adventurous and want to see another great use of alternative flours, check out my (Almond Flour Pancakes Recipe) for a different kind of breakfast treat!
Step-by-Step Instructions for Gluten-Free Chocolate Strawberry Crepes
Now that our batter has rested and the strawberries are getting juicy, we can move on to the actual cooking! This is where we put all that preparation work to the test. Remember, we are making **Gluten-Free Chocolate Strawberry Crepes**, so we have to be gentle, but the rested batter should be cooperative!
We need a good non-stick skillet for this. If your pan sticks, you’ll never get that thin, delicate structure we’re aiming for. I use mine over medium heat—not too high, or the thin batter will burn before it sets!
Preparing the Fruit and Chocolate Components
We handle the fillings first so that by the time the crepes are cooked, everything is ready to assemble immediately. You want those strawberries dripping syrup and the ganache perfectly spreadable!
- First off, check those strawberries! If you tossed them with sugar 15 minutes ago, they should look beautifully wet now. Give them a gentle stir and set the bowl right next to your stove—you’ll want them handy.
- Next, let’s check the ganache. Remember, we heated the cream and poured it over the chocolate? Let it sit undisturbed for a full five minutes. Then, whisk it slowly in the center until it melts into a completely smooth, shiny sauce.
- The ganache needs to cool just a tiny bit so it thickens up enough to stay put when you spread it, rather than just running off the edge. If it’s too hot, it will break the crepe! Set it aside to reach a thickness you can easily spread, kind of like peanut butter.
Cooking and Stacking the Delicate Gluten-Free Crepes
This part goes fast, so make sure you have a plate ready to stack your finished crepes. You’ll get about 8 of these beauties from this recipe.
- Lightly grease your skillet with butter or oil and let it get nice and hot over medium heat. You want sizzling, but not smoking!
- Pour about 1/4 cup of that rested batter into the very center of the hot pan. This is the trickiest part, so do it in one swift motion: immediately tilt and rotate the pan so the batter swirls around and coats the bottom in a paper-thin, even layer. If you see any thick spots, carefully use a silicone spatula to push the excess back toward the center to thin it out.
- Cook for about 1 to 2 minutes. You’ll see the edges start to dry out and lift slightly. Once the bottom is lightly golden, slide your spatula carefully underneath and give it a gentle flip—don’t worry too much about the second side; it only needs about 30 seconds. Overcooking makes them brittle!
- Slide the cooked crepe onto a plate. I just stack them up as they come out; they don’t stick much because they are so thin, but you can slip a piece of parchment paper between them if you want extra insurance.
Once you’ve finished all your **Gluten-Free Chocolate Strawberry Crepes**, you’re ready for the best part! If you want to see my technique for getting the absolute fluffiest results in general, check out How to Make Thin Gluten-Free Pancakes; some of those general tips really help with crepe structure, too!
Assembling Your Decadent Gluten-Free Breakfast Treats
Okay, put down the spatula—it’s time for the fun part! We have our delicate, thin shells, our plump strawberries, and our spreadable, glossy chocolate ganache. It’s time to turn this pile of ingredients into a true masterpiece. This is what separates a good **Gluten Free Crepes Recipe** from a showstopper, folks!
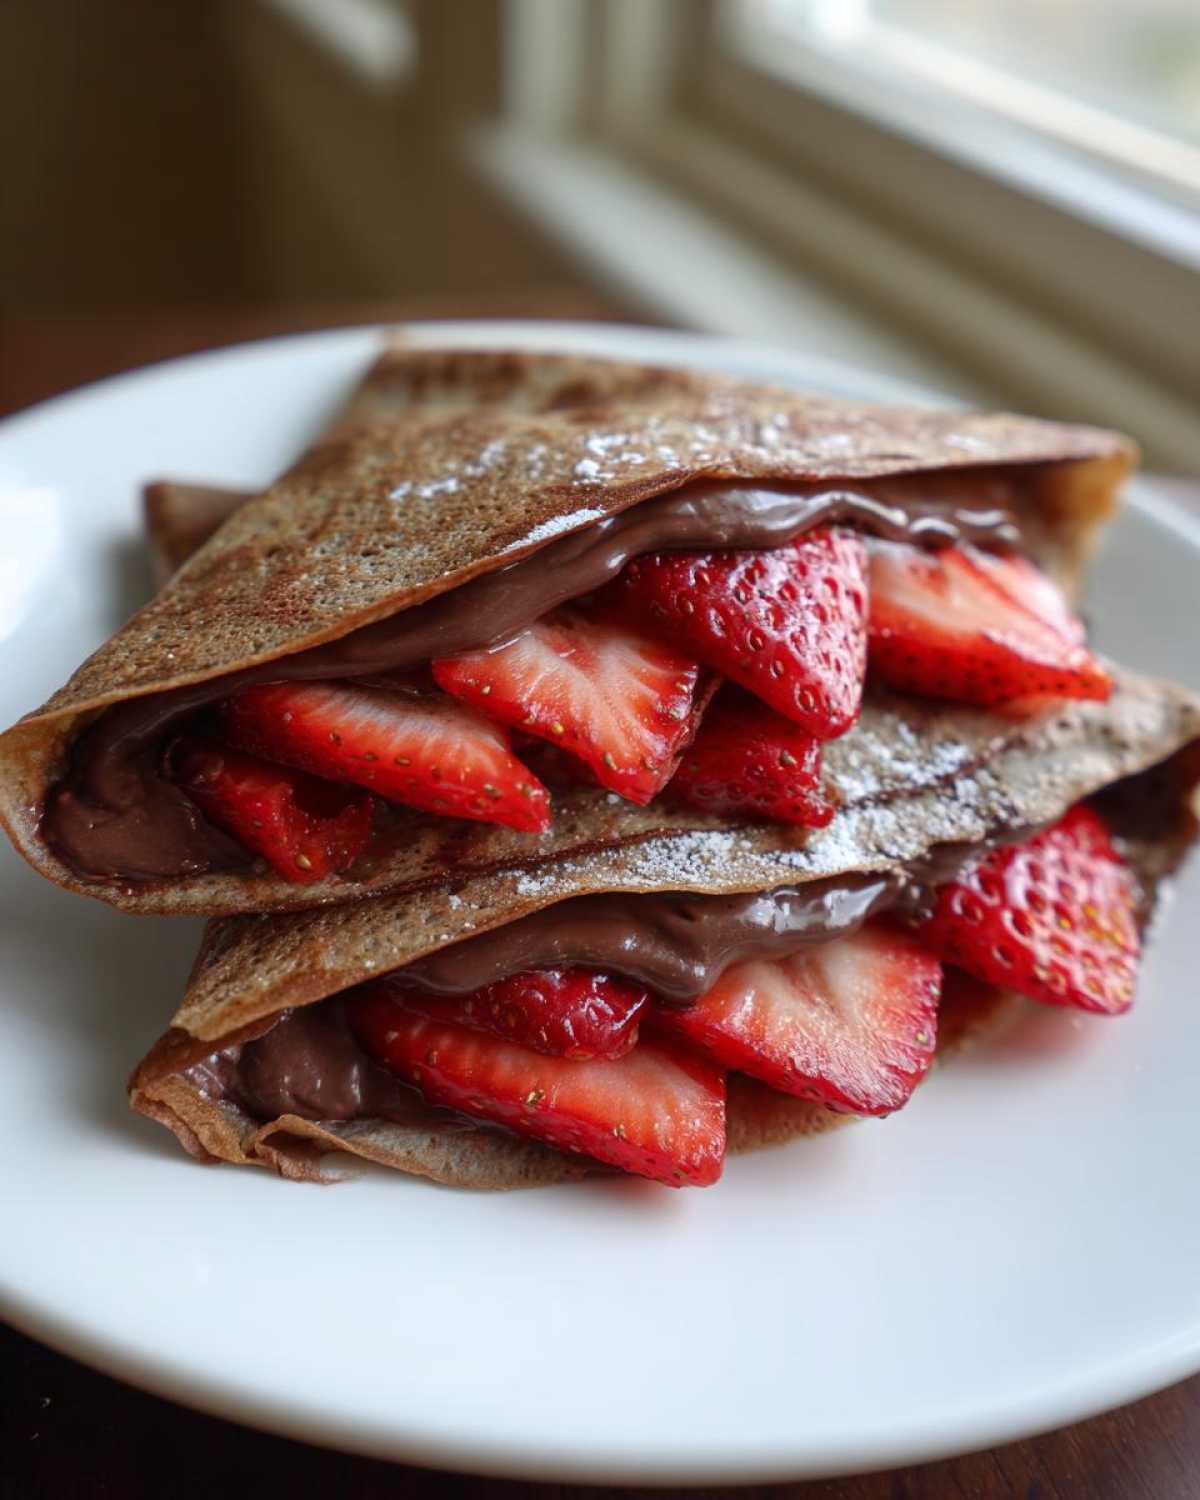
I love how easily these fold up. They are so tender and flexible thanks to that rested, hydrated gluten-free batter. This is the peak experience for anyone looking for a **Decadent Gluten Free Breakfast** that doesn’t require hours of fuss.
Here’s how I put my **Gluten-Free Chocolate Strawberry Crepes** together so they look just as good as they taste:
- Lay one warm crepe flat on a plate. You want it slightly warm so the ganache melts just a tiny bit when you spread it!
- Take a spoonful of that wonderful chocolate ganache—maybe two spoonfuls, I’m not judging!—and spread it evenly over about two-thirds of the crepe surface. Leave a nice border around the edge so you don’t have an uncontrolled ooze later.
- Next, layer on those syrupy, macerated strawberries right over the chocolate. Don’t be shy, but don’t overload it either—remember, we have to fold this treat!
- Folding time! You have two great options here. I usually go for the classic triangle: Fold the crepe in half over the filling, and then fold that half over one more time to create a neat, sturdy triangle. Alternatively, you can just roll it up tightly like a burrito, which is perfect if you are taking them to go!
Seriously, eat these immediately if you can! The combination of the slightly warm crepe, the melting chocolate, and the cool, fresh strawberries is just unbeatable. If you’re looking for another amazing fruit pairing for pastries, you have to check out my recipe for (Strawberry Freezer Jam Recipe). It works beautifully as an alternative filling!
Ingredient Notes and Substitutions for Gluten-Free Crepes
When you’re baking without wheat, the reader questions always tend to pile up, and that’s totally fair! It’s not like swapping out sugar for honey; gluten-free baking requires a little more precision regarding the structure. I want you to feel totally confident making these **Gluten-Free Chocolate Strawberry Crepes**, so let’s talk about those ingredients that cause the most confusion.
My biggest piece of advice, which I mentioned earlier but I just can’t stress enough, is the xanthan gum. If the 1-to-1 gluten-free flour blend you bought doesn’t explicitly say it includes xanthan gum, you absolutely must add about half a teaspoon to the batter. That gummy substance is what replaces the elasticity gluten usually provides; without it, your crepes will just tear the second you try to flip them. No gum, no thin **Gluten Free Crepes Recipe**!
Also, don’t forget that if you are serving someone who can’t have dairy, this recipe is incredibly simple to adapt. I’ve made this batch dozens of times completely dairy-free, and honestly, you can barely tell the difference, especially once they are stuffed with chocolate and berries!
Making This a Dairy Free Crepes Option
This is perfect for a simple swap! The texture stays nearly identical, which is why I love being able to offer this for friends who have sensitivities. If you wanted to make a fully dairy-free version of these **Stuffed Crepes Recipes GF**, here’s what you change:
- Swap the regular milk for a creamy, unsweetened non-dairy alternative. Soy milk or oat milk work wonderfully because they have a slightly higher fat/protein content than almond milk, helping with texture.
- When melting your fat for the batter, just use a neutral oil (like avocado or light olive oil) instead of butter.
- For the ganache, this is the most crucial swap: Replace the heavy cream with a high-quality full-fat coconut cream (the thick part from the top of a chilled can), and use coconut-based or soy-based dairy-free dark chocolate chunks. It melts beautifully!
If you want more dedicated tips just on making these dairy-free for your next brunch, you absolutely have to read my deep dive on my Dairy Free Crepes Option guide. It walks through all the best products to use!
Ultimately, the goal is a tender, thin shell for your **Chocolate Strawberry Dessert**, and whether you use dairy or a substitute, the technique for the batter hydration is what gets you there!
Tips for Success When Making Gluten-Free Chocolate Strawberry Crepes
Even with the perfect batter resting time, cooking ultra-thin **Gluten-Free Chocolate Strawberry Crepes** can sometimes feel like walking a tightrope. We want them golden and pliable, not stiff or stuck to the pan! I’ve learned a few tricks over the years for when things *aren’t* going perfectly, and these tips are what elevate this dish from ‘pretty good’ to ‘I can’t believe that’s gluten-free!’
Here are my absolute must-know tips for managing texture and cleanup:
- The Pan Temperature is Everything: Never try to cook gluten-free crepes in a cold pan. Also, never crank the heat too high! If the pan is too hot, the batter solidifies instantly before you can swirl it thin, leaving you with thick little hockey pucks. Medium heat, let the pan get warm, lightly grease it, and then start swirling. If the next crepe seems to be cooking too slowly, nudge the heat up just a hair, but medium is your sweet spot.
- The Grease Test: You need very little fat, but you absolutely need *some* fat between each crepe. If your crepe sticks, don’t wait for it to burn! Wipe out the pan instantly with a paper towel, add another tiny swipe of butter or oil, and let it heat back up briefly before pouring the next scoop of batter. Those residual bits from the previous crepe gum up the process.
- Don’t Overfill! This applies especially when you’re making **Stuffed Crepes Recipes GF**. Because the batter is delicate, too much heavy filling (like heaps of ganache and berries) can cause the crepe to tear instantly when you attempt to fold it. I usually stick to about one tablespoon of ganache and just enough strawberries to cover half of the surface area. It’s all about balance!
- Cooling Stack Trick: If you are making a huge batch and need to stack them before serving, they can get steamy and stick together while they cool down. To prevent this, always place a small square of parchment paper between each finished crepe when you stack them on the plate. This acts as a tiny barrier and ensures they peel apart cleanly when you’re ready to assemble the final stack.
If you are worried about overdoing the chocolate richness, you might want to check out my guide on making a Flourless Chocolate Torte Recipe—it uses only high-quality dark ingredients and relies on pure cocoa power!
Storage and Reheating Instructions for Leftover Gluten-Free Chocolate Strawberry Crepes
The best part about these **Gluten-Free Chocolate Strawberry Crepes** is that they are marvelous leftovers! Honestly, I often make a double batch just so I have an easy grab-and-go breakfast for the next couple of days. However, once you add the messy fillings—the ganache and the juicy strawberries—they become much trickier to store because the moisture starts to break down that delicate crepe structure.
So, here’s my golden rule: Store the components separately! Don’t assemble them until you are ready to eat. This is how you keep these **Easy Gluten Free Brunch Recipes** tasting fresh for days.
For the leftover cooked crepes before filling, that’s easy peasy. I stack them up, just like when I’m cooking, but I make sure I put a small square of parchment paper or wax paper between every single crepe. Plastic wrap touching the crepe is your enemy here, as it traps too much steam and makes them gummy. Seal the stack tightly in an airtight container or zip-top bag and pop them in the fridge. They stay perfect for three to four days this way!
Reheating Your Gluten-Free Crepes
When you’re ready to eat them later, you want to bring back that lovely, supple texture. You want them warm, not crispy, because they are meant to be soft for folding.
- Microwave Method (Quickest): Place one or two crepes on a plate. Cover them loosely with a slightly damp paper towel. Microwave on low power for about 15 seconds. Check, flip, and microwave for another 10 seconds if needed. The damp towel creates steam to reintroduce moisture.
- Skillet Method (Best Texture): This is my favorite way to reheat them. Heat your non-stick skillet over low heat, add just a tiny whisper of butter or oil, and lay the crepe flat. Heat for about 20 seconds per side until thoroughly warm. They feel almost freshly made this way!
If you’re looking for inspiration on how to store and reheat savory items in a hurry, you can check out my tips for prepping things like Easy Chicken Enchiladas Recipe—the principles of sealing and gentle reheating are similar!
Handling Leftover Filling
The fillings are much easier to manage!
- Ganache: If you have leftover ganache, store it in a small, sealed container in your fridge. It will harden up like fudge. When you want to use it again, just scoop out what you need and let it sit on the counter for about 30 minutes to come back to that soft, spreadable consistency.
- Macerated Strawberries: Keep these in the liquid they created in a sealed container in the fridge. They honestly taste even better the next day once all those sugars and juices have fully mingled.
Once the crepes are warm, simply spread the ganache, top with the leftover strawberries, and fold them up. Enjoy that fresh **Chocolate Strawberry Dessert** flavor without any of the morning rush!
Frequently Asked Questions About Gluten-Free Chocolate Strawberry Crepes
I always get a flood of questions when I post this recipe because people are so nervous about messing up the delicate texture of gluten-free crepes! Here are the things I hear most often. Don’t worry, we’ll address them all and make sure your next batch is perfect!
Can I make these crepes ahead of time?
Yes, absolutely! This is perfect for turning this from a long **Weekend Brunch Recipes Gluten Free** project into something super fast. You can cook all your **Gluten-Free Chocolate Strawberry Crepes** and then stack them with parchment separated between them, storing them in the fridge for up to four days. Remember my rule: don’t add the filling until you plan to eat them! If you try to store them already stuffed, they get soggy super fast.
What is the best GF flour blend for thin Gluten Free Crepes Recipe?
Listen, I struggle with **Flourless Crepes Ideas** that use specialty single flours—they tend to be too heavy or too crumbly. For this recipe, you really need a high-quality, 1-to-1 gluten-free all-purpose flour blend. The absolute key is that it must contain xanthan gum, or you need to add about 1/2 teaspoon yourself. That gum acts like the glue, giving the batter the elasticity it needs to stretch thin without tearing when you flip it. It makes the difference between a success and a sad, broken mess on the pan!
Can I use a different fruit instead of strawberries for this Chocolate Strawberry Dessert?
Oh, that’s a fun question! Yes, you totally can switch up the fruit based on what looks best at the market or what you have in the pantry. Raspberries are divine with dark chocolate, but you must macerate them just like the strawberries so they release some juice. If you use bananas, skip the macerating step—just slice them thin and layer them with the ganache. They turn any **Gluten Free Crepes Recipe** into a fantastic, **Decadent Gluten Free Breakfast**!
If you’re looking for more simple meal prep ideas inspired by these flavors, maybe check out some quick recipes like my (Quick Italian Pastina Soup Recipe); sometimes you just need something fast and comforting!

Gluten-Free Chocolate Strawberry Crepes

A recipe for thin, delicate gluten-free crepes filled with rich chocolate ganache and fresh strawberries.
- Prep Time: 20 min
- Cook Time: 25 min
- Total Time: 45 min
- Yield: 8 crepes
- Category: Dessert
- Method: Pan Frying
- Cuisine: French
- Diet: Gluten Free
Ingredients
- 1 cup gluten-free all-purpose flour blend (with xanthan gum)
- 2 large eggs
- 1 cup milk (dairy or non-dairy for dairy-free option)
- 1/4 cup water
- 2 tablespoons melted butter or oil, plus more for the pan
- 1 tablespoon sugar
- 1/4 teaspoon salt
- 1/2 cup heavy cream (for ganache)
- 4 ounces bittersweet chocolate, chopped (for ganache)
- 2 cups fresh strawberries, sliced
- 1 tablespoon granulated sugar (for macerating strawberries)
Instructions
- Prepare the strawberry maceration: In a small bowl, toss the sliced strawberries with 1 tablespoon of sugar. Set aside for at least 15 minutes.
- Make the crepe batter: In a blender, combine the gluten-free flour, eggs, milk, water, 2 tablespoons of melted butter or oil, 1 tablespoon of sugar, and salt. Blend until completely smooth, about 30 seconds. Let the batter rest for 15 minutes.
- Prepare the chocolate ganache: Heat the heavy cream in a small saucepan until it just begins to simmer. Remove from heat and pour it over the chopped chocolate in a heatproof bowl. Let it sit for 5 minutes, then whisk until smooth. Let the ganache cool slightly until it thickens to a spreadable consistency.
- Cook the crepes: Lightly grease an 8-inch non-stick skillet with butter or oil and heat over medium heat. Pour about 1/4 cup of batter into the center of the hot pan, immediately tilting and rotating the pan so the batter coats the bottom in a thin, even layer.
- Cook for 1 to 2 minutes until the edges look dry and the bottom is lightly golden. Flip the crepe and cook the other side for about 30 seconds. Slide the finished crepe onto a plate. Repeat with the remaining batter, stacking the crepes as you go.
- Assemble the crepes: Lay a crepe flat. Spread a spoonful of chocolate ganache over half of the crepe surface. Top the ganache with a layer of macerated strawberries.
- Fold the crepe in half, then in half again to form a triangle, or roll it up. Serve immediately with extra strawberries and any remaining ganache.
Notes
- If your gluten-free flour blend does not contain xanthan gum, add 1/2 teaspoon to the batter for structure.
- For a dairy-free option, use non-dairy milk and oil instead of butter, and use a dairy-free dark chocolate alternative for the ganache.
- If you prefer a thinner ganache for drizzling, use less chocolate or add a teaspoon of warm milk after whisking.
Nutrition
- Serving Size: 2 crepes
- Calories: 350
- Sugar: 22
- Sodium: 150
- Fat: 22
- Saturated Fat: 13
- Unsaturated Fat: 9
- Trans Fat: 0
- Carbohydrates: 30
- Fiber: 3
- Protein: 9
- Cholesterol: 85