

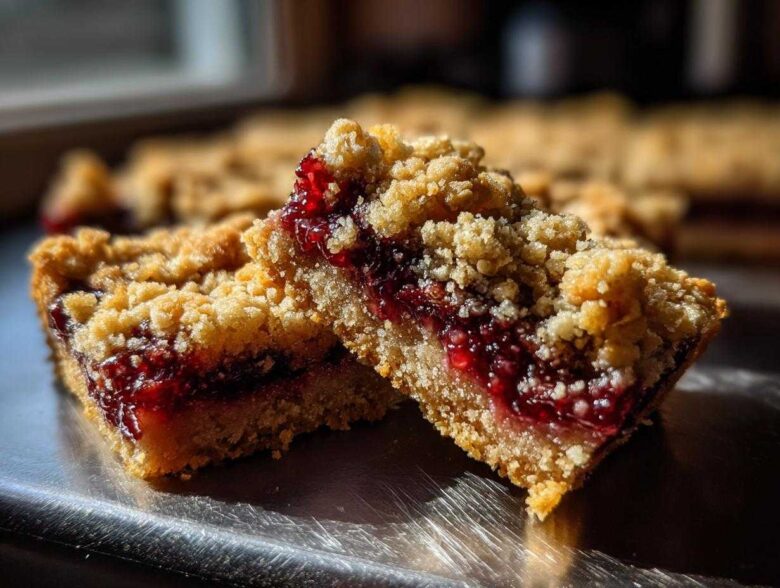
Oh my gosh, I know that feeling! You want something bright, sunny, and totally satisfying after a long week, but you also need it to be completely safe for everyone at the table enjoying your baking. For years, getting that perfect blend of crispy shortbread and gooey fruit without using a drop of regular wheat flour was my ultimate quest. Seriously, I had a graveyard full of sad, crumbly messes! But folks, I cracked the code. After testing every gluten-free flour combination under the sun, I finally nailed it, and I am so excited to share the ultimate recipe with you: these beautiful **Gluten-Free Lemon Berry Crumble Bars**. They have the tartness you crave, the sweetness of summer berries, and that melt-in-your-mouth shortbread base. Trust me, these aren’t just good “for gluten-free”; they are just plain delicious!
Why You Will Love These Gluten-Free Lemon Berry Crumble Bars
I know, I know, ordering is easy to do on paper, but making the perfect texture in a gluten-free bake takes a little magic. Don’t worry, these bars deliver the dream every single time. I never share a recipe unless it’s something I make over and over! You’re going to adore these because they check every single box!
- They absolutely nail the texture! We get a buttery, crisp base that stays firm—no soggy bottoms here. It’s the best gluten free shortbread bars experience, I promise.
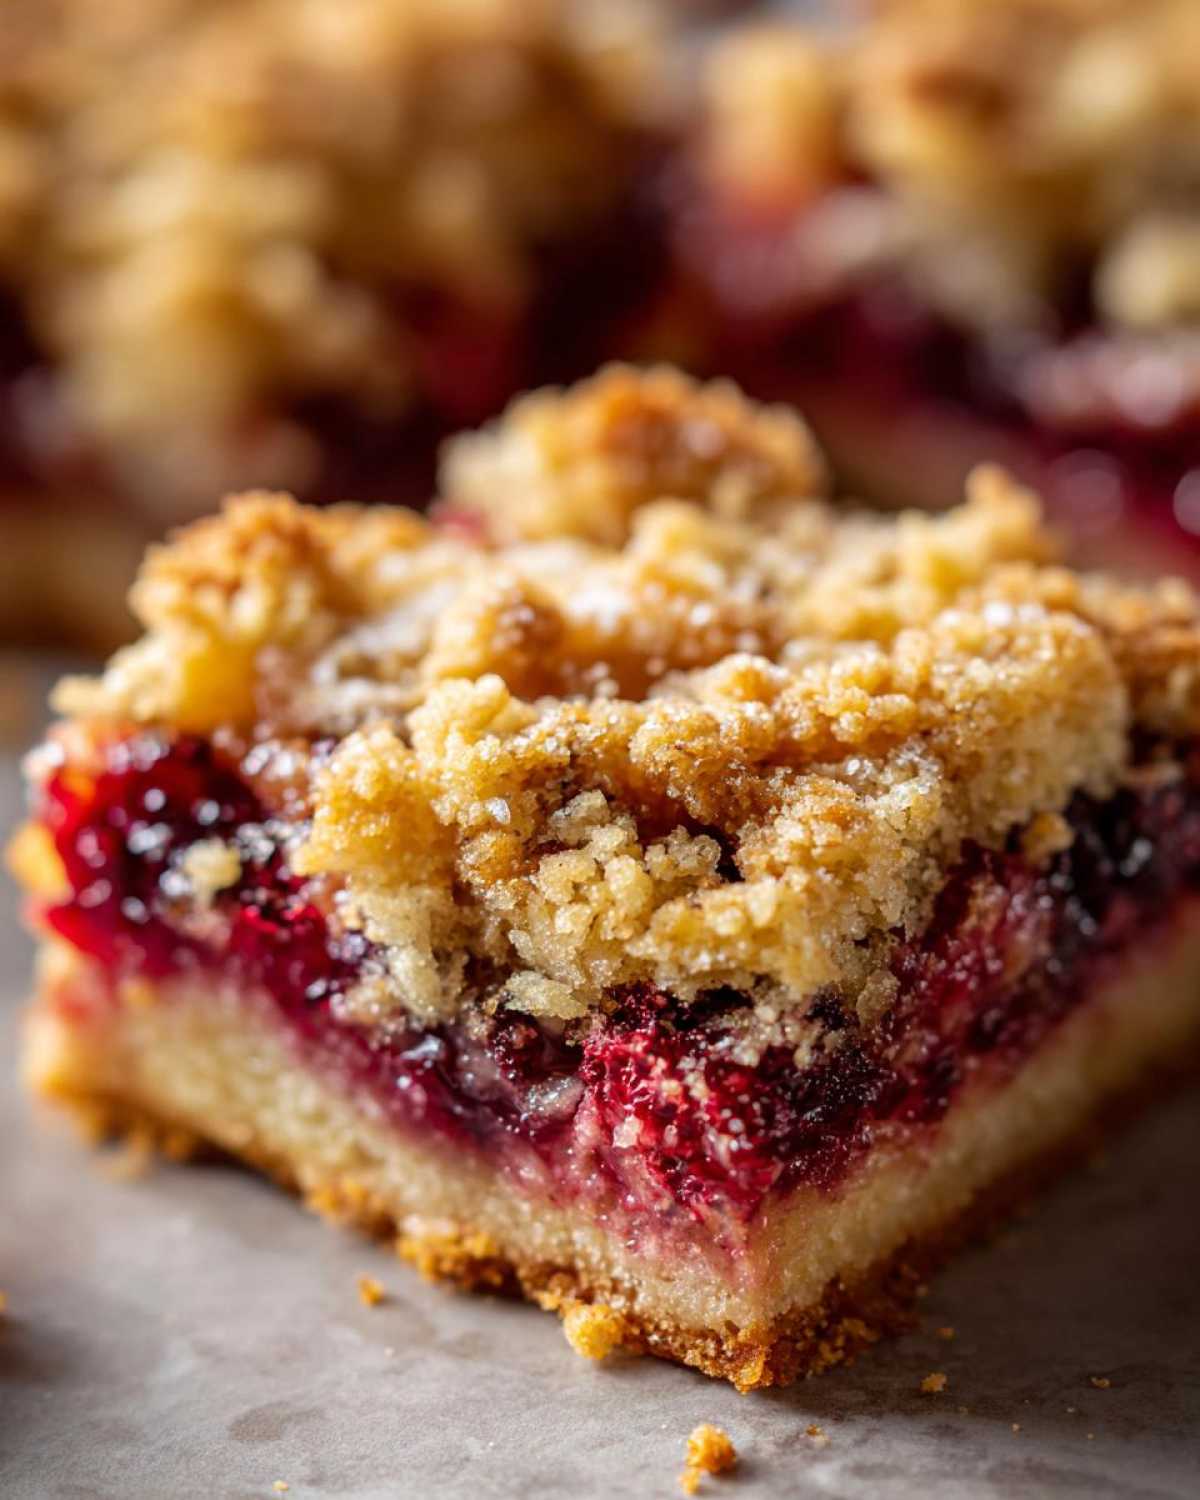
- That filling pops! The combination of bright lemon zest and that sweet-tart flavor from the mixed berries is just pure sunshine in bar form.
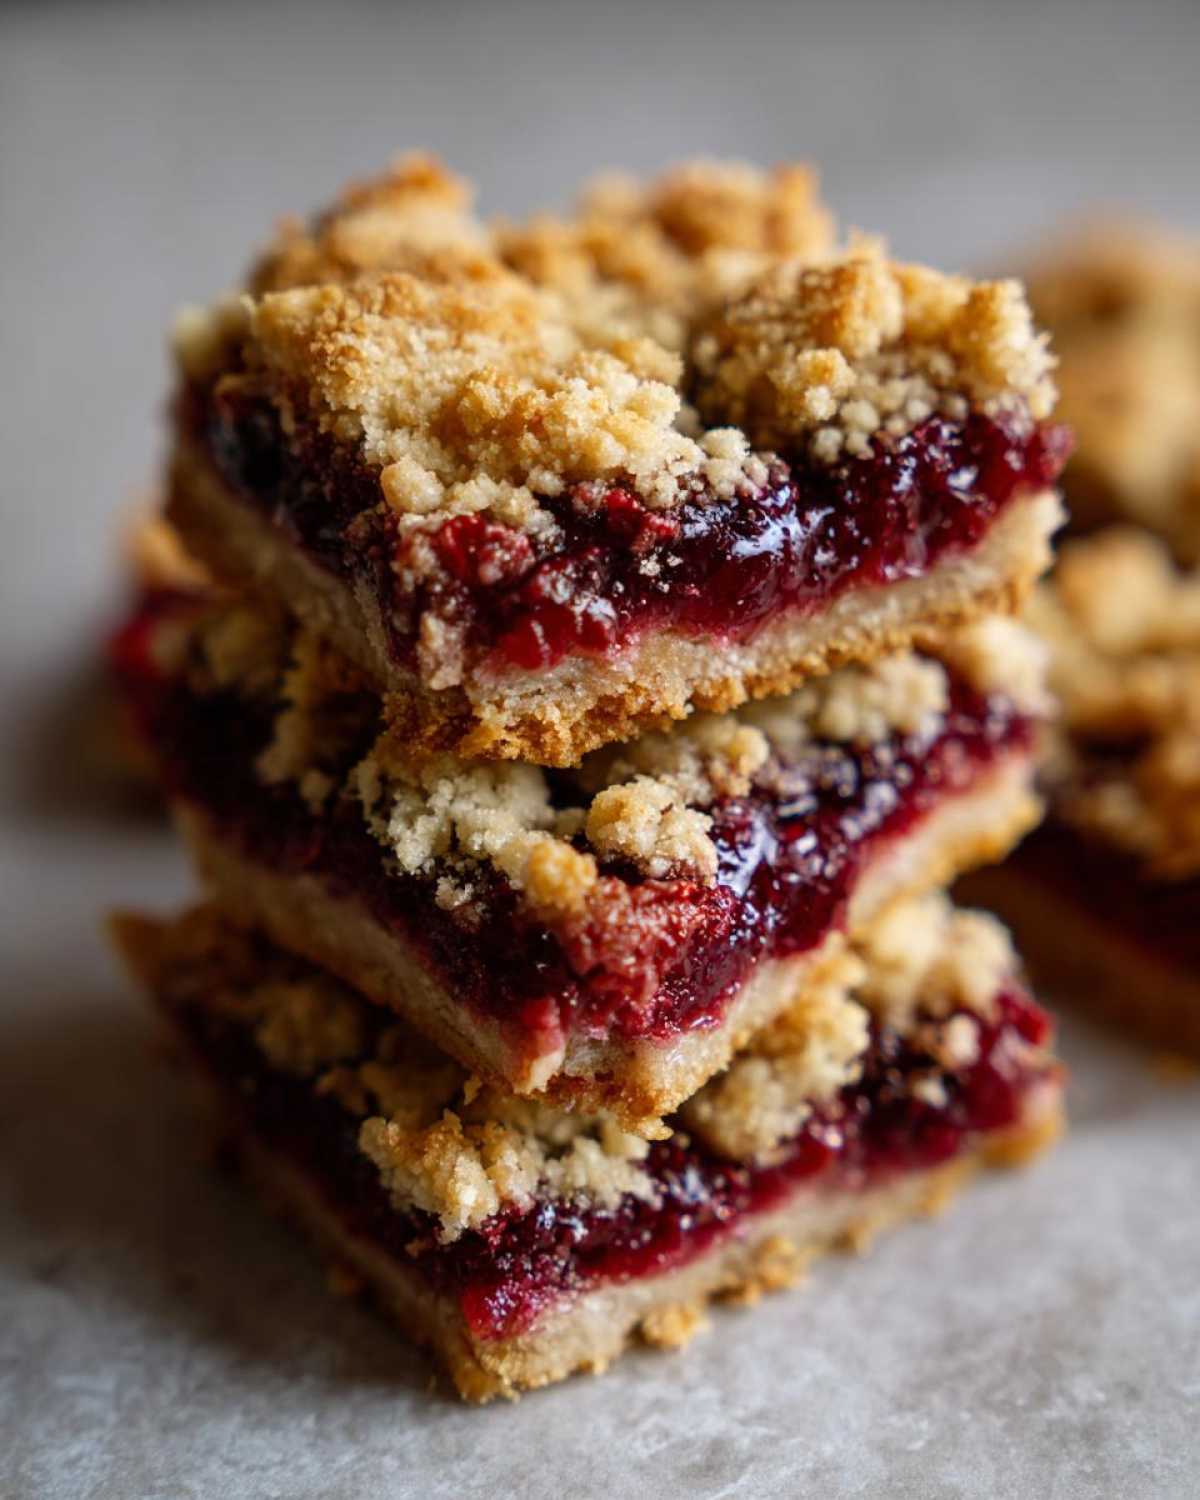
- They look gorgeous on a serving plate, making them perfect for spring gatherings or any time you need easy baked berry desserts that impress.
- We use a blend of almond and oat flours which keeps them wonderfully tender inside while still being completely gluten free.
- These are fantastic make ahead gluten free treats—you can bake them Friday and they taste even better Saturday!
See? They are built for success! Now let’s get right into the ingredients so we can start mixing.
Essential Ingredients for Perfect Gluten-Free Lemon Berry Crumble Bars
Okay, this is where we lay the groundwork for success! It’s critical, especially when we’re ditching the gluten, to measure exactly. Gluten does a lot of heavy lifting in standard baking, so we need the right combination of our specialty flours to mimic that structure. I stick to a mix of almond flour and almond flour, which gives that wonderful nutty flavor and keeps the base tender, combined with oat flour for just a touch more body in the crust and a crisp finish on the topping. Don’t skip the ‘cold’ description for the butter—that’s key for a crumbly texture!
For the Gluten-Free Shortbread Base and Crumble Topping
You’ll notice the base and the topping share most of their dry ingredients! We just separate them mentally for the steps, but here’s what you need for both:
- 1 1/2 cups almond flour (for the base)
- 1/2 cup gluten-free oat flour (for the base)
- 1/4 cup granulated sugar
- 1/2 teaspoon salt
- 1/2 cup cold unsalted butter, cubed (for the base)
- 1 large egg yolk
- 1 teaspoon vanilla extract
- 1/2 cup gluten-free oat flour (for the topping)
- 1/4 cup almond flour (for the topping)
- 1/4 cup packed light brown sugar
- 1/4 teaspoon salt
- 1/4 cup cold unsalted butter, cubed (for the topping)
For the Bright Lemon Berry Filling
This part needs to sing! The lemon is what lifts these bars from being just another plain berry square to something truly memorable. Make sure you zest that lemon right before you mix everything up; the fresh lemon zest is non-negotiable for true citrus punch!
- 1 1/2 cups mixed berries (fresh or frozen—I prefer frozen since they don’t bleed as much!)
- 1/4 cup granulated sugar
- 2 tablespoons cornstarch (this is our magic thickener!)
- 1 tablespoon fresh lemon juice
- 1 teaspoon lemon zest
Step-by-Step Instructions for Gluten-Free Lemon Berry Crumble Bars
This is where the magic happens! Baking these bars is broken down into four super straightforward stages. Since we’re working with gluten free ingredients, technique is everything! We want crispness on the bottom and a sturdy structure before we bake. Keep your oven set at 350°F (175°C) and have that 8×8 inch pan ready to go—lining it with parchment paper with a good overhang on two sides will save your sanity later, trust me!
Preparing the Pan and Crust Layer
First things first, we build that essential base. In a bowl, whisk together the almond flour, oat flour, the first portion of sugar, and salt. Now, grab that cold, cubed butter! You need to cut it into those dry ingredients. Don’t use your warm hands too much here; use a pastry blender or even just your fingertips to work the butter in until it looks like coarse, sandy crumbs. Once you hit that texture, stir in the egg yolk and vanilla extract until the dough just barely holds together when you squeeze it. Then, press about two-thirds of this dough firmly and evenly into the bottom of that prepared pan. This is my expert tip: press it down really well, like you mean it! A solid crust layer prevents that dreaded soggy bottom we talked about.
Assembling the Lemon Berry Filling
While the base is chilling for a second (totally optional but recommended!), let’s whip up the bright center. In a different bowl, gently toss your mixed berries—remember, frozen is fine, just toss them in right from the freezer! Mix them with the rest of the sugar, the cornstarch, lemon juice, and that fragrant zest. We use cornstarch because it gelatinizes during baking, stopping all that lovely berry liquid from seeping into our perfect crust. Once everything is lightly coated, carefully spread this gorgeous filling over your pressed crust layer. These help make it one of the best easy baked berry desserts you’ll ever make!
Creating and Baking the Crumble Topping
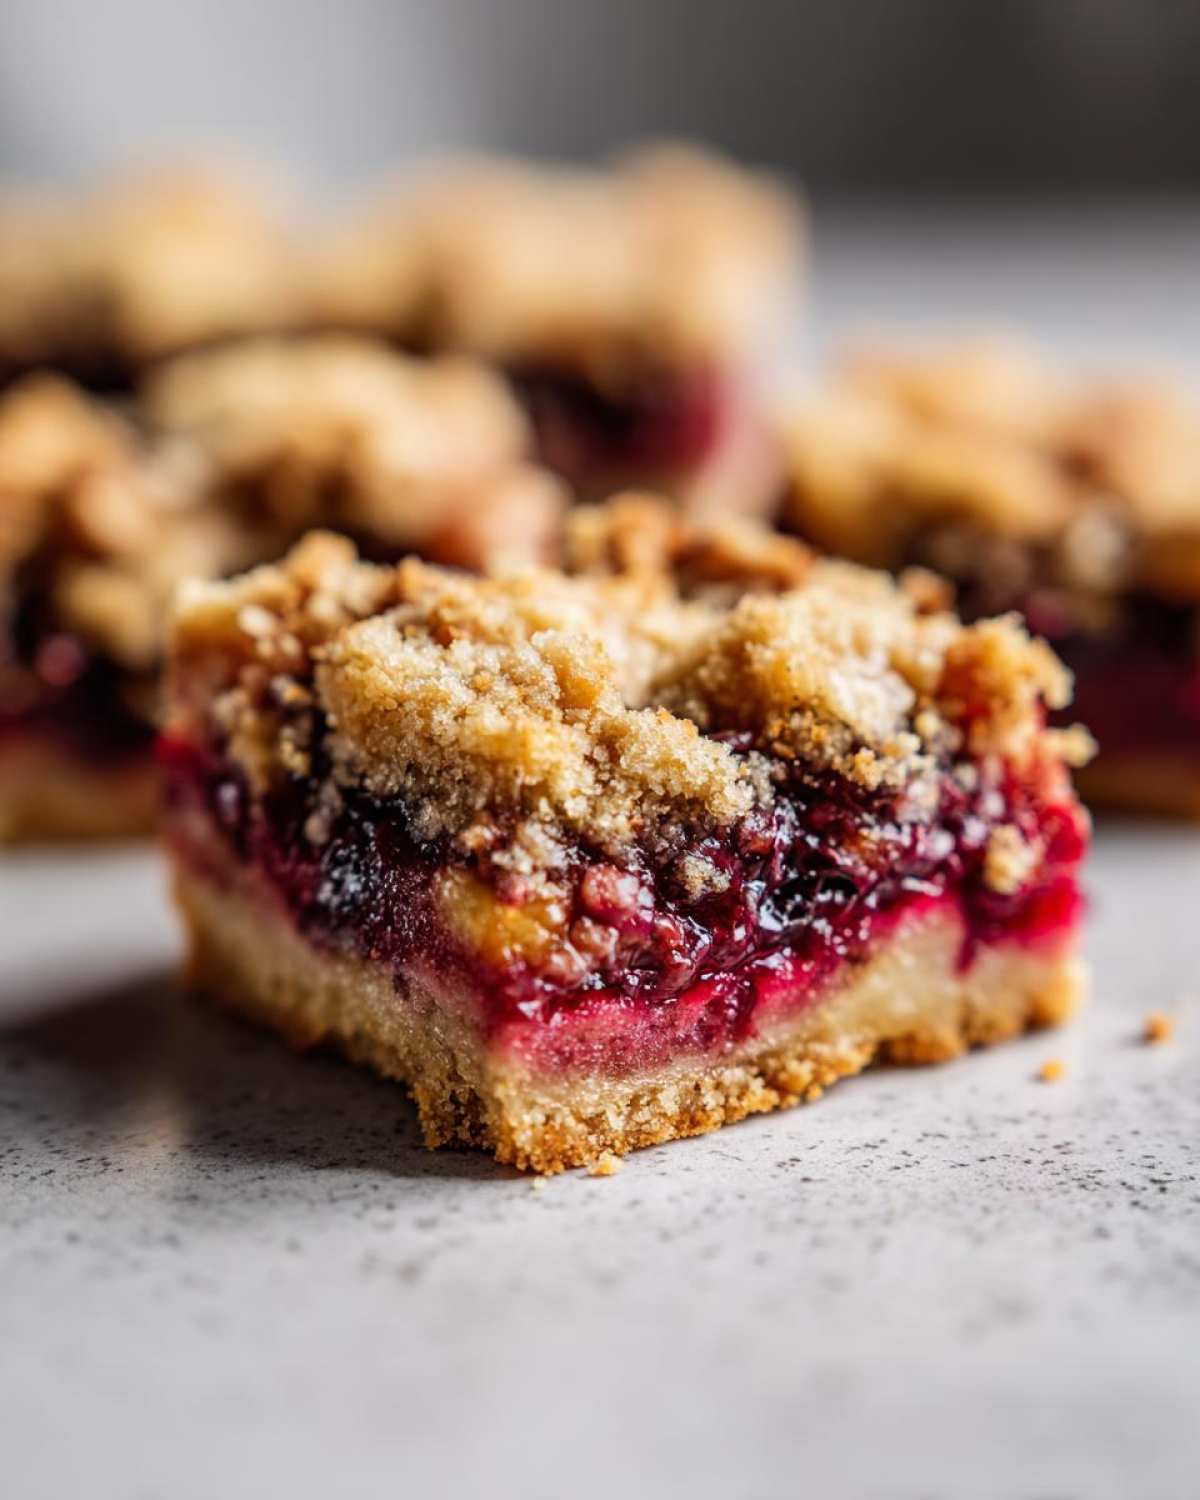
Now for the crown jewel! For the topping, mix the remaining oat flour, almond flour, brown sugar, and salt. Cut in the last bit of cold butter. You are looking for small, pea-sized crumbles here—again, keep that butter cold! Once you have lovely crumbles, sprinkle this topping evenly over the berry layer, making sure you get coverage right up to the edges. Pop the pan into your 350°F oven. You’re looking for about 35 to 40 minutes. We know it’s done when the topping is nicely golden brown and you can see that berry filling bubbling joyfully underneath.
Cooling and Cutting Your Gluten Free Lemon Berry Crumble Bars
This is the hardest part, but you absolutely cannot rush it! Resist the urge to cut into these warm babies! If you try to lift them out now, you’ll have a beautiful, messy puddle of cooked fruit on your counter. You need to let these bars cool completely in the pan on a wire rack—and I mean *completely* cooled, which usually takes about two full hours. Once they are totally chilled, use those parchment paper overhangs to gently lift the whole slab out of the pan. Then, grab a sharp knife and slice them into perfect squares. Patience yields these beautiful **Gluten Free Lemon Berry Crumble Bars**!
Tips for Perfect Gluten Free Dessert Bars Texture
I swear, dealing with texture is 90% of gluten-free baking success! You can have the best flavor, but if the crust collapses or the top turns to dust when you pick it up, it’s heartbreaking. My goal with these bars was to create something that rivals the absolute best gluten free shortbread bars out there, and that means focusing intensely on eliminating sogginess and crumbling!
First, let’s talk about the crust sticking or getting soggy. Remember how I told you to press the base down firmly? Do that, but also, listen to this: chilling that pressed crust for 10 or 15 minutes before you even think about adding the berry filling makes a world of difference. It’s like a little vacation for the butter to firm up before it hits the liquid from the berries.
If your topping seems too sandy when you’re done mixing, it means your final quarter cup of butter wasn’t cut in quite enough. You want those pea-sized chunks! If you end up with a topping that is too melted or oily before it goes into the oven, your bars will bake flat instead of having that lovely, textured crumble. Remember that the chilling of the butter is crucial for both the base and the top, making sure we get that separation needed for a crisp bite!
And finally, the cooling advice! I know I mentioned it before, but I can’t stress enough how important it is for these **Gluten-Free Lemon Berry Crumble Bars**. If you try to cut them hot, the starches and the cornstarch in the filling haven’t fully set up yet. They’ll seem gooey, but what’s actually happening is that the internal structure hasn’t locked into place. Give them the full two hours to go from warm to room temperature. That waiting game is what results in clean, perfect squares you can actually handle!
Ingredient Notes and Substitutions for Your Lemon Crumble Bar Recipe
Okay, you’ve got the instructions down, but what happens when you’re missing a specific ingredient or just itching to tweak things a little? I get it! Customizing is part of the fun, especially with baking. Since these are my signature **Gluten-Free Lemon Berry Crumble Bars**, I usually stick close to the recipe, but I know every pantry looks different. Let’s talk about customizing the flavor and swapping out some parts without messing up that beautiful structure we worked so hard for!
The biggest question I always get is about the berries. Whether you use fresh or frozen makes a difference, but honestly, both work beautifully! If you use fresh, just give them a gentle pat dry with a paper towel before tossing them with the sugar and cornstarch. If you’re using frozen berries, like I often do because they are cheaper, don’t bother thawing them! Toss them straight into the mixture—the cornstarch will handle the extra chilling power they bring.
Now, let’s talk flour. I chose that specific almond flour and oat flour combination because it gives the best structural integrity; the almond flour keeps everything rich, and the oat flour lends that classic, slightly rustic crumble feel. Remember to use *certified* gluten-free oat flour if you have Celiac disease! If you’re out of oat flour, you can generally substitute it with more almond flour, cup-for-cup, but you might want to chill that crust mix for an extra 15 minutes, as almond flour tends to be a little oilier and softer when warm. You can check out how I use almond flour in other desserts on my lemon crumble bar recipe page too!
And for that dazzling flavor? It all comes down to the citrus! To really amp up the brightness for the ultimate lemon zest dessert baking experience, try adding an extra half teaspoon of zest to the filling mixture. You could even swap out half the lemon juice for lime juice if you are feeling adventurous—it adds a really lovely, surprising zing to the berry mixture!
Make Ahead Gluten Free Treats: Storing Your Gluten-Free Lemon Berry Crumble Bars
One of my absolute favorite things about these **Gluten-Free Lemon Berry Crumble Bars** is that they are perfect for preparing in advance, making them top-tier make ahead gluten free treats! Since the base is shortbread-style, they hold up incredibly well. Once they are totally cooled, you can store them right on the counter in an airtight container. Room temperature is best for texture stability, and they’ll stay nice for about three to four days. No refrigeration needed unless your kitchen is super humid!
If you want to get ahead of the game, you can actually bake them completely, cool them, and then wrap the whole 8×8 slab tightly in plastic wrap before freezing it for up to a month. When you pull them out to serve, just let them thaw on the counter for an hour. If you want that warming, ‘just-baked’ scent back, you can reheat individual bars lightly in a toaster oven for just a few minutes. Honestly, though, chilling them fully before cutting is the most important prep step, but storing them baked is wonderfully easy!
Serving Suggestions for These Gluten Free Fruit Squares
We’ve made these beautiful **Gluten Free Fruit Squares**, and now it’s time to serve them up! While I honestly think they are magnificent all on their own—especially grabbing one for a midday snack while enjoying the bright citrus notes—sometimes you just want to dress them up a tiny bit for company or dessert time. Because the lemon flavor is so assertive and the texture is dense and buttery, you don’t need much.
My absolute favorite way to serve them when they’re slightly warm—but only slightly, remember to wait that hour!—is with a simple, beautiful scoop of vanilla bean ice cream. The cold creaminess melts right into that warm, tart berry layer, creating this amazing contrast. It’s heaven! If you’re serving them slightly chilled, a dollop of freshly whipped cream is perfect. I just whip heavy cream with a tiny splash of vanilla and maybe one teaspoon of powdered sugar—nothing complicated, just enough to give it a little lift.
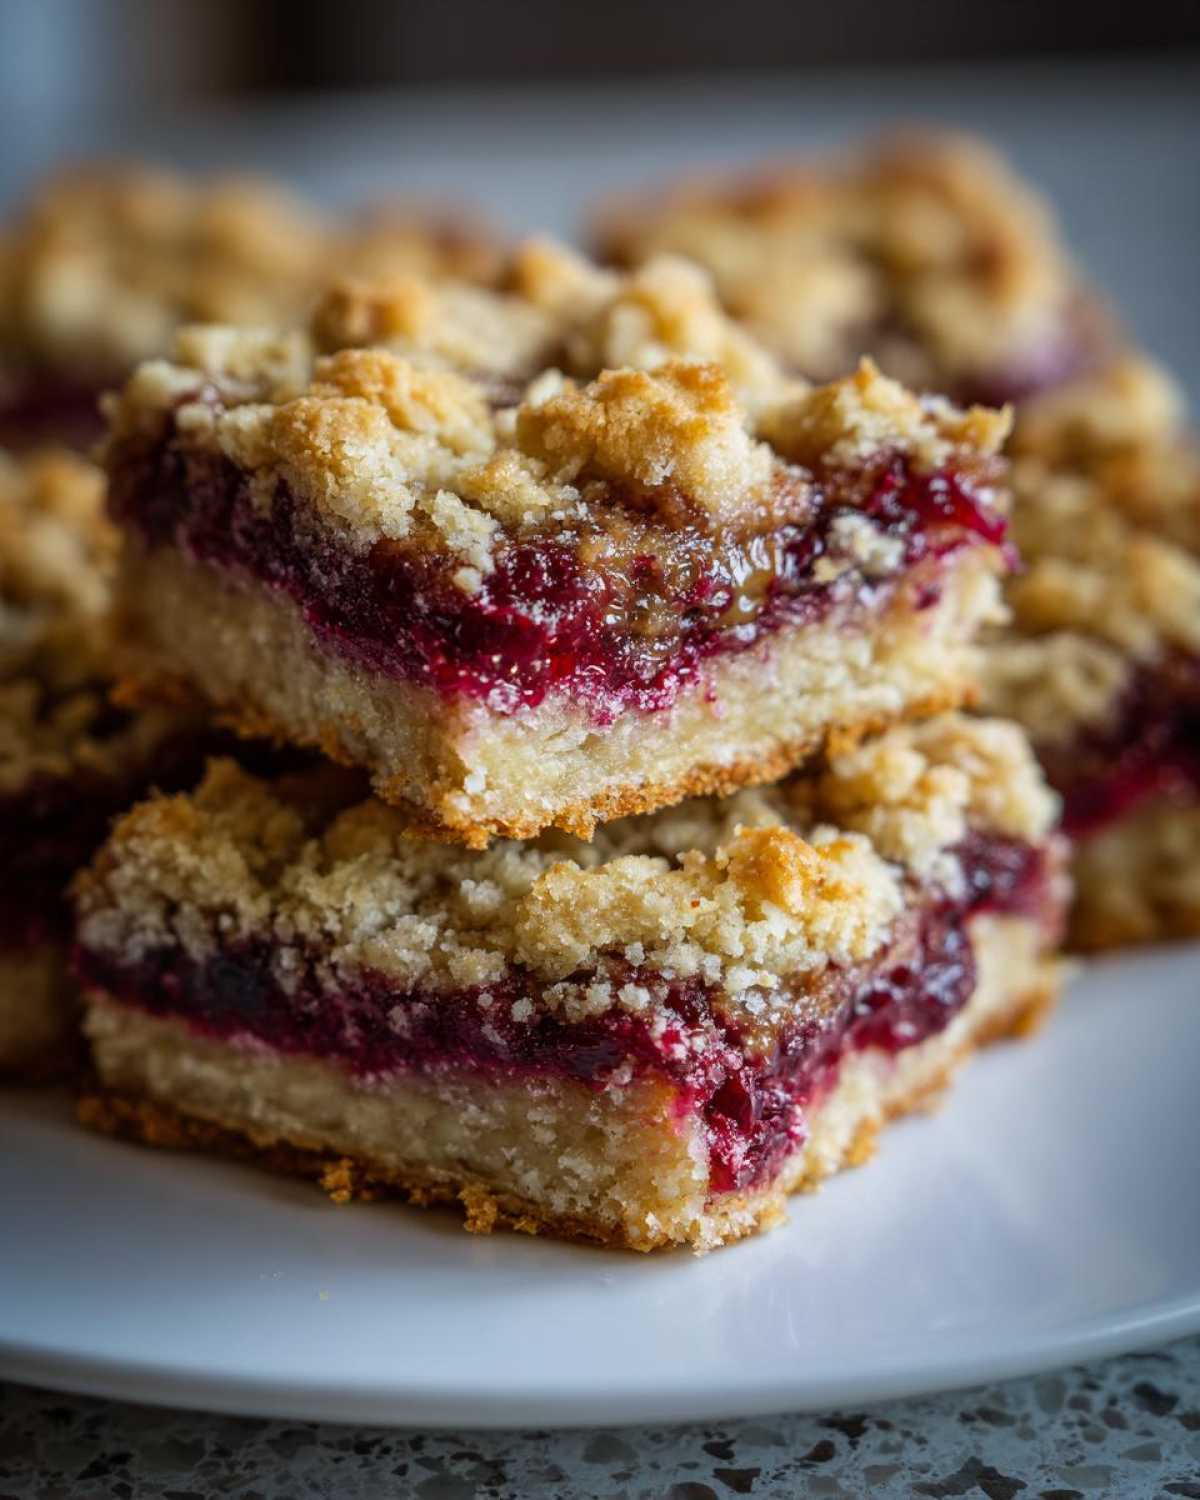
For a picnic or something truly casual, these **Gluten Free Fruit Squares** are actually best served completely plain at room temperature. They hold together perfectly, they aren’t overly messy, and everyone can just grab one and go. They are such a reliable and tasty gluten-free option for any gathering!
Frequently Asked Questions About Citrus Dessert Bars
It’s only natural that when you’re trying something new—especially when it involves gluten-free baking—you’ll have questions! I’ve been baking these types of **Gluten Free Dessert Bars** for years, and I’ve had just about every issue pop up at least once, so maybe I can save you a headache or two. Here are some of the questions I get most often about these bright, tangy bakes!
Can I use only one type of berry instead of mixed berries?
Absolutely, yes! You totally can. Sometimes all you have in the freezer is a giant bag of blueberries, and that’s okay. The mixed berries offer a lovely visual pattern and a complexity of flavor, but if you use just one—say, raspberries or blueberries—the flavor will just be concentrated in that one direction. If you use a substitute berry, just make sure you still use the exact same amount of sugar and cornstarch listed for the filling. That makes sure the texture stays perfect and the flavor profile is balanced!
What is the best gluten free flour blend for this recipe?
This is such a great question because the flour mix is really the backbone of these **Gluten Free Lemon Berry Crumble Bars**! I chose the almond and oat flour combo because almond gives us that rich, moist, shortbread crumb, and the oat flour gives it just the right substance for holding up under the heavy filling. If you don’t have oat flour, you can generally swap it out for more almond flour, but the texture in the topping might feel a little looser. Keep the butter really cold if you increase the almond flour! If you want to try a pre-made blend, look for one that isn’t too heavy on rice flours, as that can sometimes make the crust gritty instead of crisp. For more inspiration using this kind of base, check out some of my other citrus dessert bars!
Can I make these bars dairy-free or vegan?
Oh, you totally can adapt these! We use a lot of butter, which is the main hurdle. For the dairy-free version, you can substitute the cold butter with a high-quality, cold dairy-free baking stick alternative. Some work better than others, so make sure yours is solid when you start! For the vegan swap, you’d replace the butter with the same dairy-free stick, and then for the egg yolk in the base, you can use about one tablespoon of applesauce or a flax egg (one tablespoon ground flaxseed mixed with three tablespoons of water, let it sit for five minutes). These small changes make them vegan and still delicious, though the crust might be slightly less ‘shortbread-y’ since the egg yolk really helps bind that base!
Share Your Gluten-Free Lemon Berry Crumble Bars Experience
Now that you’ve whipped up a batch of these sunny, tart, and totally amazing **Gluten-Free Lemon Berry Crumble Bars**, I really, really want to hear about it! Honestly, sharing these recipes isn’t just about posting measurements; it’s about building this wonderful community where we can all swap tips and celebrate our baking wins. Did the crust come out perfectly crisp? Did you overload it with extra lemon zest like I secretly hope you did?
Please, don’t be shy! Scroll down right now and leave me a rating and a comment below. Tell me how they turned out, what berries you used, or if you tried any fun substitutions in your kitchen for these gluten free dessert bars. I read every single comment, and your feedback truly helps me keep making sure my favorite recipes are working perfectly for all of you!
And if you took a gorgeous picture of your finished squares cooling on the rack or stacked up on a platter—please share it! Tag me on social media so I can see your handiwork. Seeing friendly faces enjoying treats that are safe, homemade, and delicious makes all the testing in the world worth it. Happy baking, friends!
PrintGluten-Free Lemon Berry Crumble Bars
Bake these easy gluten-free bars featuring a crisp shortbread base, a bright lemon berry filling, and a buttery crumble topping.
- Prep Time: 20 min
- Cook Time: 40 min
- Total Time: 160 min
- Yield: 16 bars
- Category: Dessert
- Method: Baking
- Cuisine: American
- Diet: Gluten Free
Ingredients
- 1 1/2 cups almond flour
- 1/2 cup gluten-free oat flour
- 1/4 cup granulated sugar
- 1/2 teaspoon salt
- 1/2 cup cold unsalted butter, cubed
- 1 large egg yolk
- 1 teaspoon vanilla extract
- 1 1/2 cups mixed berries (fresh or frozen)
- 1/4 cup granulated sugar
- 2 tablespoons cornstarch
- 1 tablespoon fresh lemon juice
- 1 teaspoon lemon zest
- 1/2 cup gluten-free oat flour
- 1/4 cup almond flour
- 1/4 cup packed light brown sugar
- 1/4 teaspoon salt
- 1/4 cup cold unsalted butter, cubed
Instructions
- Preheat your oven to 350°F (175°C). Line an 8×8 inch baking pan with parchment paper, leaving an overhang on two sides for easy removal.
- Prepare the crust: In a medium bowl, whisk together the almond flour, gluten-free oat flour, 1/4 cup granulated sugar, and 1/2 teaspoon salt.
- Cut in the cold butter using a pastry blender or your fingers until the mixture resembles coarse crumbs.
- Mix in the egg yolk and vanilla extract until the dough just comes together.
- Press two-thirds of the dough evenly into the bottom of the prepared pan to form the crust.
- Prepare the filling: In a separate bowl, gently toss the mixed berries with 1/4 cup sugar, cornstarch, lemon juice, and lemon zest until the berries are coated.
- Spread the berry mixture evenly over the crust layer.
- Prepare the crumble topping: In a small bowl, combine the remaining 1/2 cup oat flour, 1/4 cup almond flour, brown sugar, and 1/4 teaspoon salt.
- Cut in the remaining 1/4 cup cold butter until the mixture forms small, pea-sized crumbles.
- Sprinkle the crumble topping evenly over the berry filling.
- Bake for 35 to 40 minutes, or until the topping is golden brown and the filling is bubbly.
- Let the bars cool completely in the pan on a wire rack (about 2 hours) before lifting them out using the parchment overhang and cutting them into squares.
Notes
- For a crispier crust, chill the pressed crust layer for 15 minutes before adding the filling.
- If you use frozen berries, do not thaw them first; use them directly in the filling mixture.
- The bars set best after cooling completely; cutting them warm results in a messy filling.
Nutrition
- Serving Size: 1 bar
- Calories: 245
- Sugar: 15
- Sodium: 110
- Fat: 16
- Saturated Fat: 7
- Unsaturated Fat: 9
- Trans Fat: 0
- Carbohydrates: 24
- Fiber: 2
- Protein: 4
- Cholesterol: 35