


Oh, you guys HAVE to stop buying that sad, packaged flatbread! Seriously, the kitchen smells absolutely incredible when you pull a fresh batch of homemade naan bread out of the oven, or even that super-hot skillet. I’ve spent years perfecting this recipe because I absolutely refused to believe that real, pillowy, charred naan was only possible inside a $5,000 clay oven. Trust me, I’ve definitely messed up batches that were tough as leather, but I finally cracked the code!
This straightforward Homemade Naan Recipe gets you that restaurant-style magic right on your stovetop or oven rack. We’re talking super soft, incredibly fluffy naan bread that actually puffs up exactly like it should. You don’t need specialized gear; you just need a little patience with the dough and a commitment to crank up that heat!
Why This Homemade Naan Recipe Delivers Restaurant Style Naan at Home
Honestly, this Homemade Naan Recipe is my absolute pride and joy because it skips all the fancy equipment drama. I know you want that pillowy center and those perfect dark char marks. My goal was simple: best Indian bread recipe that beats takeout. And we nailed it!
- You get that amazing softness because we use yogurt and a little bit of milk—it keeps the crumb tender.
- The high heat cooking method ensures maximum puff with minimal effort.
- No complicated resting times or weird ingredients needed for the dough.
- Plus, it’s incredibly fast once the dough has rested!
Achieving Puffy Indian Bread Texture Without a Tandoor
This is where people usually give up, but don’t worry! When you throw that thin piece of dough onto a screaming-hot cast-iron skillet—the tawa method works wonders. The intense, direct heat immediately traps the moisture inside the dough, turning it into steam. That steam forces the bread to puff right up! It’s the exact reaction you want, giving you that wonderfully light and Puffy Indian Bread experience every single time.
Ingredients for Perfect Naan Bread
When we talk about achieving that perfect, tender texture, you can’t just throw things in a bowl! The measurements here are super important for getting the right consistency when you’re making this Naan Dough with Yogurt. I always measure my water exactly—too cool and your yeast won’t wake up, too hot and you kill it immediately!
Here’s what you need:
1 1/2 cups warm water (It absolutely has to be between 105-115°F, or it won’t foam up!)
1 tablespoon sugar
2 1/4 teaspoons active dry yeast (This is for one full batch, so make sure you measure it precisely!)
3 cups all-purpose flour plus more for dusting later on
1 teaspoon salt
2 tablespoons plain yogurt (Don’t skip this! It’s key for the tenderness.)
2 tablespoons milk
2 tablespoons vegetable oil or melted ghee
Melted butter or ghee for brushing right after they come off the heat
Naan Dough with Yogurt: Ingredient Notes and Substitutions
Okay, let’s talk about the dairy, because this is where you can sneak in even more flavor! The yogurt is non-negotiable for me; it adds a slight tang and the acid helps tenderize the gluten in the flour, which means softer bread. If you don’t have plain yogurt, you can use sour cream in a pinch, but you might need to add a tiny splash more water.
If you want a *really* rich flatbread, my favorite substitution is swapping that 2 tablespoons of regular milk for buttermilk. Buttermilk does the acid magic even better than regular yogurt! Just make sure the temperature of the buttermilk isn’t ice cold either—let it sit on the counter for about 10 minutes before you add it to the yeast mixture so you don’t shock the yeast.
How to Make Naan Dough: Yeast Flatbread Instructions
Alright, now for the part that genuinely makes or breaks your Naan Bread experience: making the dough itself. This is where we start building that incredible texture. If you want that soft interior, you absolutely have to give the yeast what it needs to thrive. Don’t rush this process; it’s crucial for success. If you’re interested in other yeast projects, check out how to manage a starter here, although this naan recipe is much faster!
Follow these steps carefully for the best results when learning How to make Naan dough:
- First, we wake up the yeast! Gently stir your sugar into that warm water—remember, warm, not hot!—then sprinkle the yeast right on top. Let it sit until it gets foamy and happy. This usually takes about 5 to 10 minutes. If it doesn’t foam, you have to start over, sorry! Dead yeast equals flat bread.
- Next up is dumping everything else in. Add your flour, salt, yogurt, milk, and oil right into that foamy yeast bowl. Mix it all up until it looks shaggy and most of the flour is incorporated. Don’t worry if it looks rough at this stage.
- Now, dig your hands in! Turn that mixture out onto a lightly floured surface. You need to knead this dough for a solid 8 to 10 minutes. I know, it sounds long, but you are developing the gluten structure here, which is what gives the naan that stretch and chew. You’re done when it feels smooth, elastic, and no longer sticks stubbornly to your hands.
- Time for the first nap! Lightly oil a clean bowl—use the same one if you’re feeling lazy, I won’t tell!—and tuck your beautiful dough ball inside, turning it once so it gets coated in oil. Cover it tightly with plastic wrap or a damp kitchen towel.
The Critical First Rise for Soft and Fluffy Flatbread
This step separates the good naan from the *great* naan. You need a warm, draft-free spot for this dough to proof. A slightly warm oven that’s been turned off is my secret cozy spot, or just on top of the fridge! Let it sit for a full 1 to 1.5 hours, or until it has clearly doubled in size. You should be able to poke it gently, and the indentation should stay there for a few seconds.
If you rush this rise, your yeast hasn’t done its job creating those gases. That means when you try to cook it, you’ll end up with dense, tough Naan Bread that refuses to puff up. Patience here guarantees you get that glorious, soft interior we’re aiming for!
Preparing and Shaping Your Naan Bread
Okay, the dough is risen, it smells yeasty and wonderful, and it’s ready to be portioned out! Gently punch the air out of that beautiful mound of dough—it’s okay to be a little rough here; we’re essentially resetting the stage for the final moments before cooking. This part goes pretty quickly, so don’t let the enthusiasm from the first rise wear off!
I usually divide the entire batch into 8 equal pieces. If you have a kitchen scale, use it! Consistency matters if you want all 8 pieces to cook at the same rate. Once you’ve divided it, roll each section firmly between your palms to create nice, tight little balls. We need to let those muscles relax just a touch, so cover these little balls with a clean cloth and let them rest for about 15 minutes.
This short rest is the secret handshake before rolling. It lets the gluten relax after you’ve been handling it, which makes rolling so much easier. If you try to roll warm, tight dough, it fights back and shrinks immediately!
Now for the shaping! Forget perfect circles—real naan is always a little wonky. On a lightly floured surface, take one rested ball and roll it out into an oval or a classic teardrop shape. I try to get mine really thin, about 1/8 of an inch thick. Don’t press down too hard, or you’ll squeeze out all the wonderful air bubbles we worked so hard to create during the rise. Thinness is the key to getting those light bubbles when it hits the heat!
Cooking Naan Bread: The Easy Stovetop Naan Method (Tawa Naan Cooking Method)
Alright, drumroll please! This is the moment of truth for your Easy Stovetop Naan—the technique that lets us skip the Tandoor entirely. The single most important rule here is HEAT. You need your heavy-bottomed skillet, or better yet, a cast-iron tawa, to be screaming hot over medium-high heat. Seriously, let it heat up for a good five minutes before anything touches it.
And listen closely: we are cooking this dry. No oil, no butter, nothing in the skillet yet! Place one of your nicely rolled naans onto that bare, blazing hot surface. You’ll know it’s working when you see satisfying little bubbles start popping up on the surface in about a minute or two. That’s the steam doing its thing inside!
Once you see those bubbles, flip it over immediately. Cook the second side for just about one more minute until you get those beautiful brown and slightly charred spots. If you want the ultimate puffy result, you can serve this with my favorite garlic butter rice later! This whole stovetop dance is the core of the Tawa Naan Cooking Method.
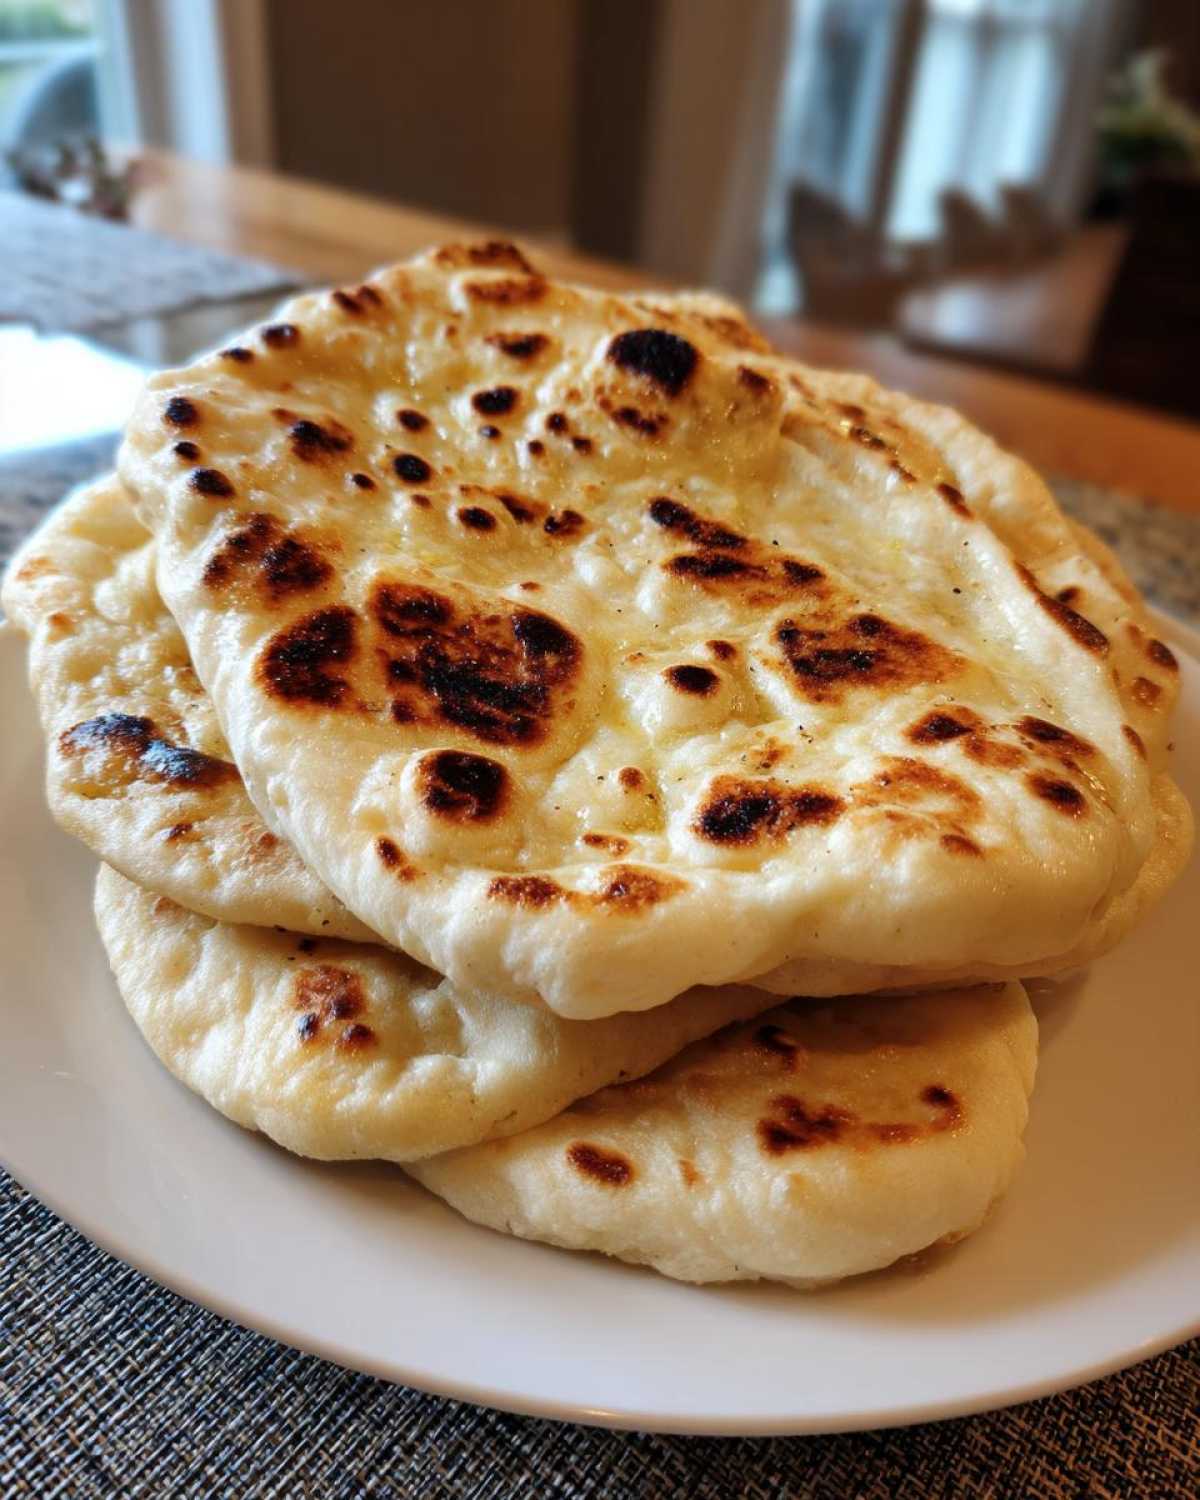
Optional Step: Puffing the Naan Over an Open Flame
If you have a gas stove, you can take this to the next level to get that full, cartoonishly puffy look that makes you think you’re eating out! Once the naan is mostly cooked on both sides on the tawa, use a pair of sturdy tongs to carefully lift the naan directly over the open flame.
Hold it there for just a few seconds—it should balloon up in an instant! Be super quick about this; you only want to puff it, not burn it black. If you smell smoke or see big flames licking too high, pull it away fast! This optional step is what truly nails that sought-after Restaurant Style Naan at Home appearance.
Alternative Cooking Method for Restaurant Style Naan at Home (Oven Baking)
Now, I know not everyone has a blazing hot gas burner, or maybe you just don’t trust yourself with the open flame thing—and that is totally okay! My backup method still gets you fantastic results, though the charring might be a little more uniform than the stovetop version. This is our go-to when I’m making a huge batch for a party!
To get that crisp bottom and the necessary oven spring, you need a dedicated baking surface inside your oven. You HAVE to preheat something heavy for this. I use either a pizza stone or, if I’m feeling lazy, I just flip an old, sturdy baking sheet upside down and preheat that. The key is placing it in the oven *before* you even turn the heat on!
Set your oven temperature high—we are talking 500°F (260°C). Let that stone or sheet heat up inside for at least 30 minutes. Once it’s scorching hot, carefully slide your shaped naan right onto that surface. Skip overcrowding the pan, just do one or two at a time! They bake super fast—usually just 3 to 5 minutes until they look delightfully blistered and puffed. If you’ve never tried baking bread this way, it’s brilliant for things like homemade breadsticks too!
Finishing and Serving Your Naan Bread
Listen, the second that naan comes off the skillet or out of that super-hot oven, you have to move fast! If you let it sit, it cools down and loses that amazing steam-created softness. Immediately brush the top of every piece generously with melted butter or ghee. That fat gets sucked right into the surface, making the outside shiny, soft, and adding all that marvelous richness we crave.
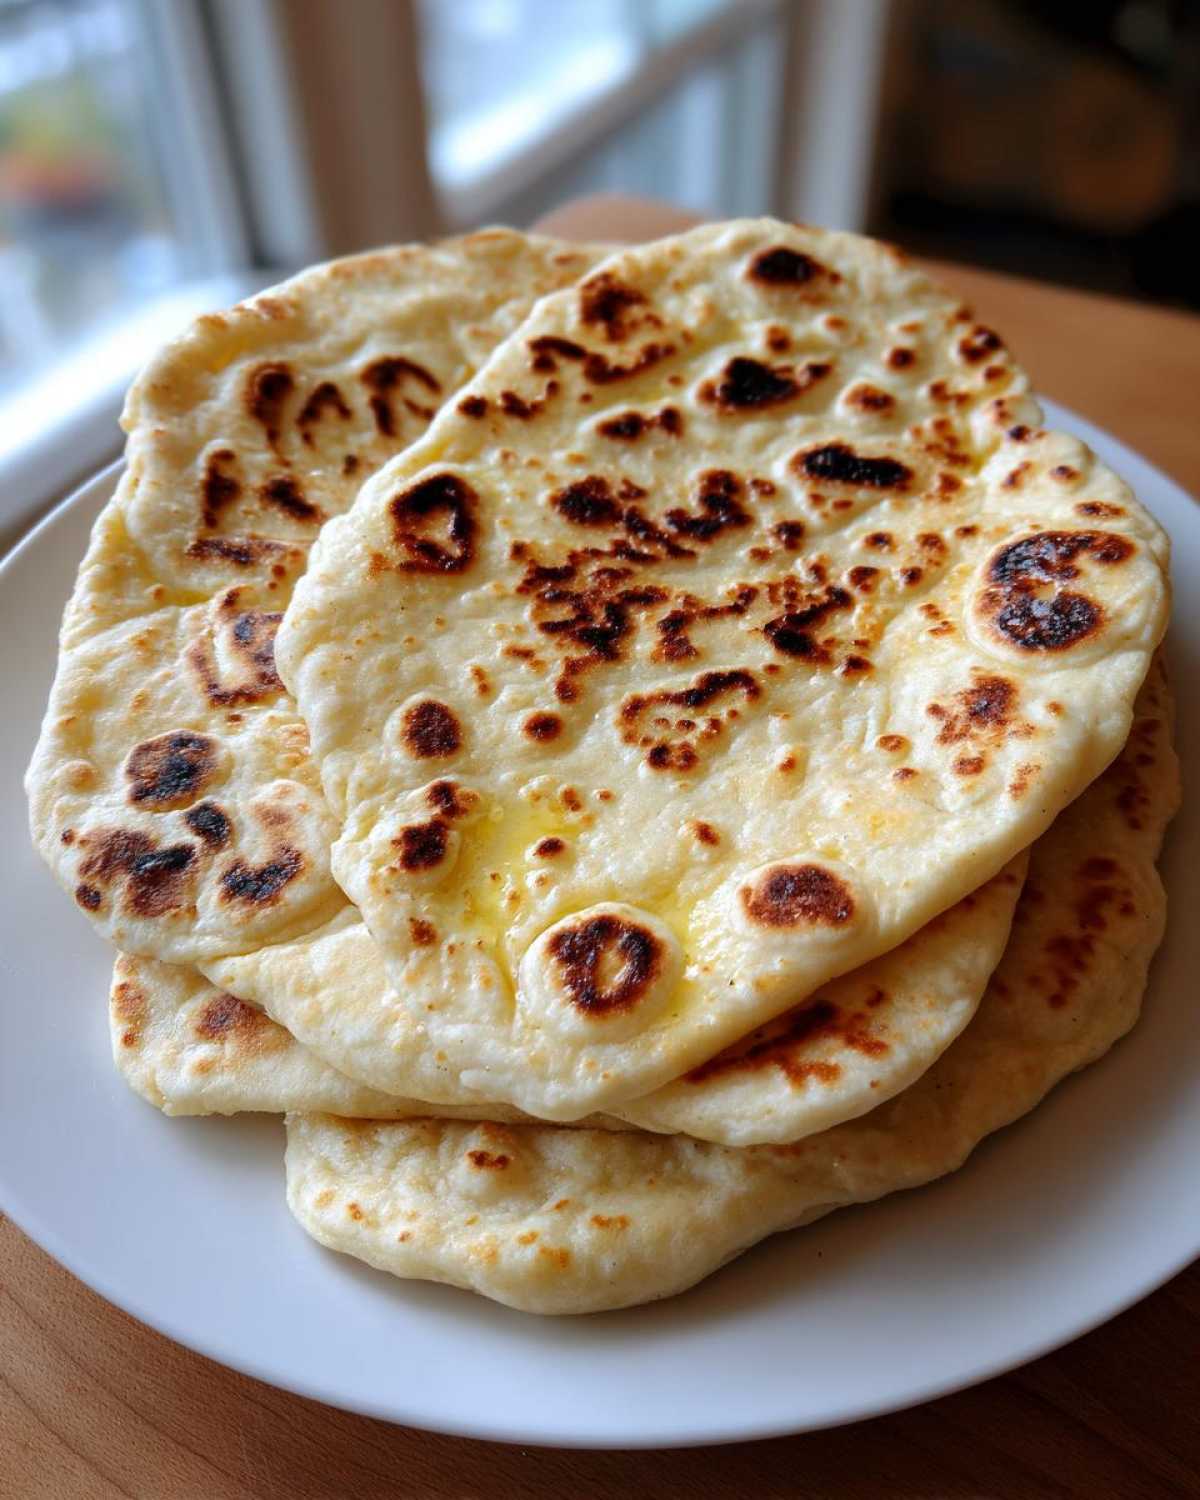
If you want to make it Garlic Naan (which is just never a bad idea, let’s be honest), you just mix a clove or two of crushed garlic into the melted butter before brushing. I often pair these with recipes like my super flavorful Chicken Marsala because the naan is just perfect for soaking up every last drop of sauce. This step truly cements this as the Best Indian Bread Recipe you’ll ever try.
You can’t just eat naan by itself—well, you *can*, but you shouldn’t! It’s the perfect vehicle. Use it to scoop up rich dals, pile it high with paneer curry, or just dip it straight into a good mango chutney. It’s meant for dipping and spreading, so make sure you have something delicious ready the minute they come off the heat!
Troubleshooting Common Naan Bread Issues
Okay, let’s talk real talk about the moments when this Naan Bread doesn’t behave. It happens to everyone, even me! We’ve covered the perfect dough and the perfect heat, but sometimes things go sideways. That’s totally fine! Troubleshooting is just part of the fun of making things from scratch. If your dough felt weird, or the final product wasn’t as soft as you hoped, here are the quick fixes I’ve learned over the years.
If your dough was way too sticky during kneading, don’t panic and dump a ton of flour in all at once! That just makes the final bread tough. Instead, add flour one tablespoon at a time while you’re kneading vigorously. You’re looking for a manageable dough that springs back slightly when poked, not one that feels like wet clay.
Similarly, if you added too much liquid, just let that dough rest a bit longer during the rise. Sometimes, resting allows the flour to fully hydrate, which magically tightens things up without adding extra dry ingredients. This is crucial for making great Naan Bread.
Why Did My Naan Bread Not Puff?
This is the number one question I get, and 99% of the time, the answer is the same: Your cooking surface was not hot enough! I cannot stress this enough—the skillet or tawa needs to be absolutely ripping hot before that dough even touches it.
If you flipped your naan and it just sat there looking sad and flat, pop that skillet back on the highest setting it has, let it heat for another five minutes, and then try your next piece. Another quick tip, especially if you’re using an electric stove, is to use the smallest burner and turn it to its maximum heat setting, even if it seems too high. That intense, direct heat is the only thing that creates instant steam pockets necessary for that beautiful, airy poof!
Frequently Asked Questions About Making Naan Bread
I always get peppered with questions after people try this recipe for the first time, so I figured I’d answer the most common ones right here. We’re covering everything from speeding things up when you’re short on time to making sure your leftovers stay soft! I sometimes whip up a batch of these when I’m making something like pastina soup because it’s the perfect vehicle for dipping.
Can I make Naan Bread without yeast?
That’s a tough one, and typically, I’d say no if you want that true, fluffy, chewy texture. Yeast is what creates those deep flavor notes and the internal structure that makes it feel like a proper flatbread, not just a pancake. If you are totally out of yeast, the absolute quickest fix is to substitute the yeast, sugar, and warm water with 1 teaspoon of baking soda mixed into your flour along with 1 cup of buttermilk instead of the milk/yogurt/water combination. It makes a respectable quick flatbread, but it won’t have that signature soft chewiness of our Naan Bread.
How long does this Naan Bread stay fresh?
If you’ve done everything right, these are best eaten hot, right out of the pan, smeared with garlic butter! That said, if you have leftovers—which you probably won’t, let’s be real—store them stacked in an airtight container at room temperature for up to two days. Do not put them in the fridge immediately; they toughen up horribly once chilled! To reheat, just give them a quick zap in the microwave for 10 seconds, or better yet, throw them back into that screaming hot tawa for 30 seconds per side. That brings the softness right back!
Can I use instant yeast instead of active dry yeast?
Yes, you absolutely can! This can help speed things up if you’re aiming for a Quick Naan Bread batch. Since instant yeast doesn’t need to be bloomed first, you can just mix the 2 1/4 teaspoons of instant yeast directly in with your dry ingredients (flour and salt). Just make sure the liquid you add (water, milk, yogurt) is still warm, not hot, so you don’t accidentally kill the yeast once it hits the liquid!
Is it important that I included the yogurt in my Naan Dough with Yogurt?
It’s more than important; it’s essential for texture! As I mentioned above, the slight acidity in the yogurt works hard to break down the gluten strands just enough during kneading. This means the final product is tender and tears apart easily instead of being dense and chewy like pizza dough. If you forget it, the texture suffers quite a bit!
PrintRestaurant Style Homemade Naan Bread

A straightforward recipe for making soft, fluffy naan bread at home using a stovetop or oven, achieving authentic texture without a tandoor.
- Prep Time: 20 min
- Cook Time: 15 min
- Total Time: 1 hour 45 min
- Yield: 8 servings
- Category: Side Dish
- Method: Stovetop or Baking
- Cuisine: Indian
- Diet: Vegetarian
Ingredients
- 1 1/2 cups warm water (about 105-115°F)
- 1 tablespoon sugar
- 2 1/4 teaspoons active dry yeast
- 3 cups all-purpose flour plus more for dusting
- 1 teaspoon salt
- 2 tablespoons plain yogurt
- 2 tablespoons milk
- 2 tablespoons vegetable oil or melted ghee
- Melted butter or ghee for brushing
Instructions
- Activate the yeast: In a large bowl, mix the warm water and sugar. Sprinkle the yeast over the top and let it sit for 5 to 10 minutes until foamy.
- Prepare the dough: Add the flour, salt, yogurt, milk, and oil to the yeast mixture. Mix until a shaggy dough forms.
- Knead the dough: Turn the dough out onto a lightly floured surface. Knead for 8 to 10 minutes until the dough is smooth and elastic.
- First rise: Place the dough in a lightly oiled bowl, turning to coat. Cover the bowl with plastic wrap or a damp cloth. Let it rise in a warm place for 1 to 1.5 hours, or until doubled in size.
- Divide and rest: Gently punch down the risen dough. Divide it into 8 equal pieces. Roll each piece into a ball. Cover the balls and let them rest for 15 minutes.
- Shape the naan: On a lightly floured surface, roll each dough ball into an oval or teardrop shape, about 1/8 inch thick.
- Cook on stovetop (Tawa method): Heat a heavy-bottomed skillet or cast-iron tawa over medium-high heat until very hot. Do not add oil. Place one piece of rolled naan onto the dry, hot skillet. Cook for 1 to 2 minutes until bubbles appear on the surface. Flip the naan. Cook the second side for about 1 minute until brown spots appear. For extra puffing, briefly place the naan directly over an open gas flame using tongs until it puffs up (optional).
- Cook in oven (Alternative): Preheat your oven to 500°F (260°C) with a baking stone or inverted baking sheet inside for at least 30 minutes. Place the shaped naan directly onto the hot stone/sheet and bake for 3 to 5 minutes until lightly browned and puffed.
- Finish: Brush the hot naan immediately with melted butter or ghee. Serve warm.
Notes
- For richer flavor, substitute milk with buttermilk.
- If you do not have active dry yeast, use 1 teaspoon of instant yeast and mix it directly with the dry ingredients.
- If your dough is too sticky, add flour one tablespoon at a time while kneading.
- If the naan does not puff, your cooking surface was likely not hot enough.
- Serve with curries, dals, or use it to scoop up dips.
Nutrition
- Serving Size: 1 piece
- Calories: 180
- Sugar: 2
- Sodium: 250
- Fat: 4
- Saturated Fat: 1
- Unsaturated Fat: 3
- Trans Fat: 0
- Carbohydrates: 32
- Fiber: 1
- Protein: 5
- Cholesterol: 5