


Oh my gosh, do you ever get those deep, nagging cravings for something totally unique? Lately, I’ve been dreaming about a snack that hits all the right notes: crispy outside, chewy inside, intensely cheesy, and guess what? Completely gluten-free! That’s why I’m sharing my absolute favorite method for making the most incredible brazilian cheese bread, or pão de queijo, you’ve ever tasted. Forget fancy mixers; my secret weapon is the blender. Seriously, it takes the guesswork out of mastering this staple snack. This recipe, built around tapioca starch, has become my go-to anytime I need an authentic brazilian snack in under an hour. I used to think mastering this classic—getting that perfect pull—was impossible, but trust me, since I switched to the quick blender method, I’ve nailed it every time. If you love fantastic gluten-free baking, you absolutely have to try this!
Why This Brazilian Cheese Bread Recipe Works So Well
There’s something magical about these little puffs. They come together so quickly, and you get that incredible chewy, cheesy texture that everyone loves. I keep coming back to this specific method because it truly delivers on the promise of a great pão de queijo without the fuss.
-
Naturally Gluten Free Cheese Bread
For all my friends watching their gluten, this is your moment! Because we rely entirely on tapioca starch, not wheat flour, these are inherently safe. It’s wonderful knowing you can grab a snack that tastes this authentic yet fits right into a strict dietary routine. That starchy base is the real secret here!
-
The Secret to Easy Brazilian Cheese Bread
Forget the traditional method where you slowly scald the starch—that takes practice! My favorite part is dumping everything into the blender. Seriously, the hot milk mixture hits the starch, and then the eggs and cheese follow. It cuts the prep time down to maybe five minutes flat. That speed makes this easy brazilian cheese bread recipe truly unbeatable when a craving hits!
Gathering Ingredients for Authentic Pão de Queijo
Now, let’s talk about what you need to pull off these amazing tapioca cheese rolls. Don’t worry, it’s a short list, but the quality of these specific items makes all the difference in getting that perfect *pão de queijo* texture. If you’ve ever wondered what makes this different from regular cheese bread, it all comes down to these core pieces. You’ll want to have everything ready to go since this recipe moves fast!
Here is what you need:
- 1 cup whole milk
- 1/2 cup vegetable oil (keep it neutral!)
- 1 teaspoon salt
- 2 cups tapioca starch (sweet or sour—more on that in a second!)
- 2 large eggs
- 1 cup shredded cheese—I love a mix to get the best flavor payoff!
If you’re looking for other savory bakes, you might enjoy my recipe for Italian Herb and Cheese Bread.
Tapioca Starch Clarity
This is the big one, the starchy foundation of our brazilian cheese bread! You will see recipes calling for either sweet (polvilho doce) or sour (polvilho azedo) tapioca starch. Sweet starch yields a slightly softer, more cake-like puff. Sour starch, which is fermented, gives you that extra tangy flavor and a chewier interior. Honestly? Either one works beautifully in this blender recipe! I usually grab whichever bag I have open, but if you want true Brazilian authenticity, try to locate the sour kind for a little zing.
Step-by-Step Instructions for Perfect Tapioca Cheese Rolls
Okay, this is where the magic happens, and honestly, it’s way faster than you think! First things first: go preheat your oven right now to 375°F (190°C). You want that sheet pan nice and toasty warm when the batter is ready. We are relying on the heat to give these tapioca cheese rolls that incredible puff!
If you’re feeling snacky already, you can check out my recipe for easy homemade breadsticks while the oven heats up.
Heating the Liquid Base
Grab a small saucepan and combine your milk, oil, and salt. Put it on medium heat. You aren’t trying to brown or reduce this mixture—you just need it to get piping hot, right to that moment before it really starts rolling into a full boil. That hot liquid needs to hit that starch just right to get the texture we want for our brazilian cheese bread. Pouring it while it’s hot helps gelatinize the starch, which is the whole reason these turn out chewy instead of crumbly.
Blending the Brazilian Cheese Bread Batter
Now for the fun, messy part! Put your 2 cups of tapioca starch right into the blender or food processor—whichever you chose! Carefully pour that hot milk mixture over the starch. Blend it until it looks like a thick, smooth paste. Don’t panic if it seems a little weird; that’s totally normal! Next, we add structure with the eggs. Add them one at a time, making sure the first is incorporated before you toss in the second. Finally, fold in your glorious shredded cheese. Remember, the resulting batter will be really sticky—it’s more like a thick, gooey paste than traditional bread dough. Don’t try to knead it!
Expert Tip: The batter should cling to the spoon but fall off in heavy, slow dollops. If it seems too runny, you can stir in half a tablespoon more tapioca starch, but usually, the hot liquid balances everything perfectly.
Baking Your Brazilian Cheese Bread to Golden Perfection
We’ve got this amazing, sticky batter, and now we need to treat it right in the oven! Get your baking sheet lined with parchment paper—you don’t want these cheesy beauties gluing themselves to the metal. Preheat that oven to 375°F (190°C); we need it hot for the blast-off moment!
Using two spoons or a small ice cream scoop (I prefer the scoop for uniformity!), drop rounded tablespoonfuls of the batter onto your prepared sheet. Don’t crowd them! They absolutely need about 2 inches of personal space to puff up into those round little clouds we know and love. They’ll spread a little, so give them room to breathe!
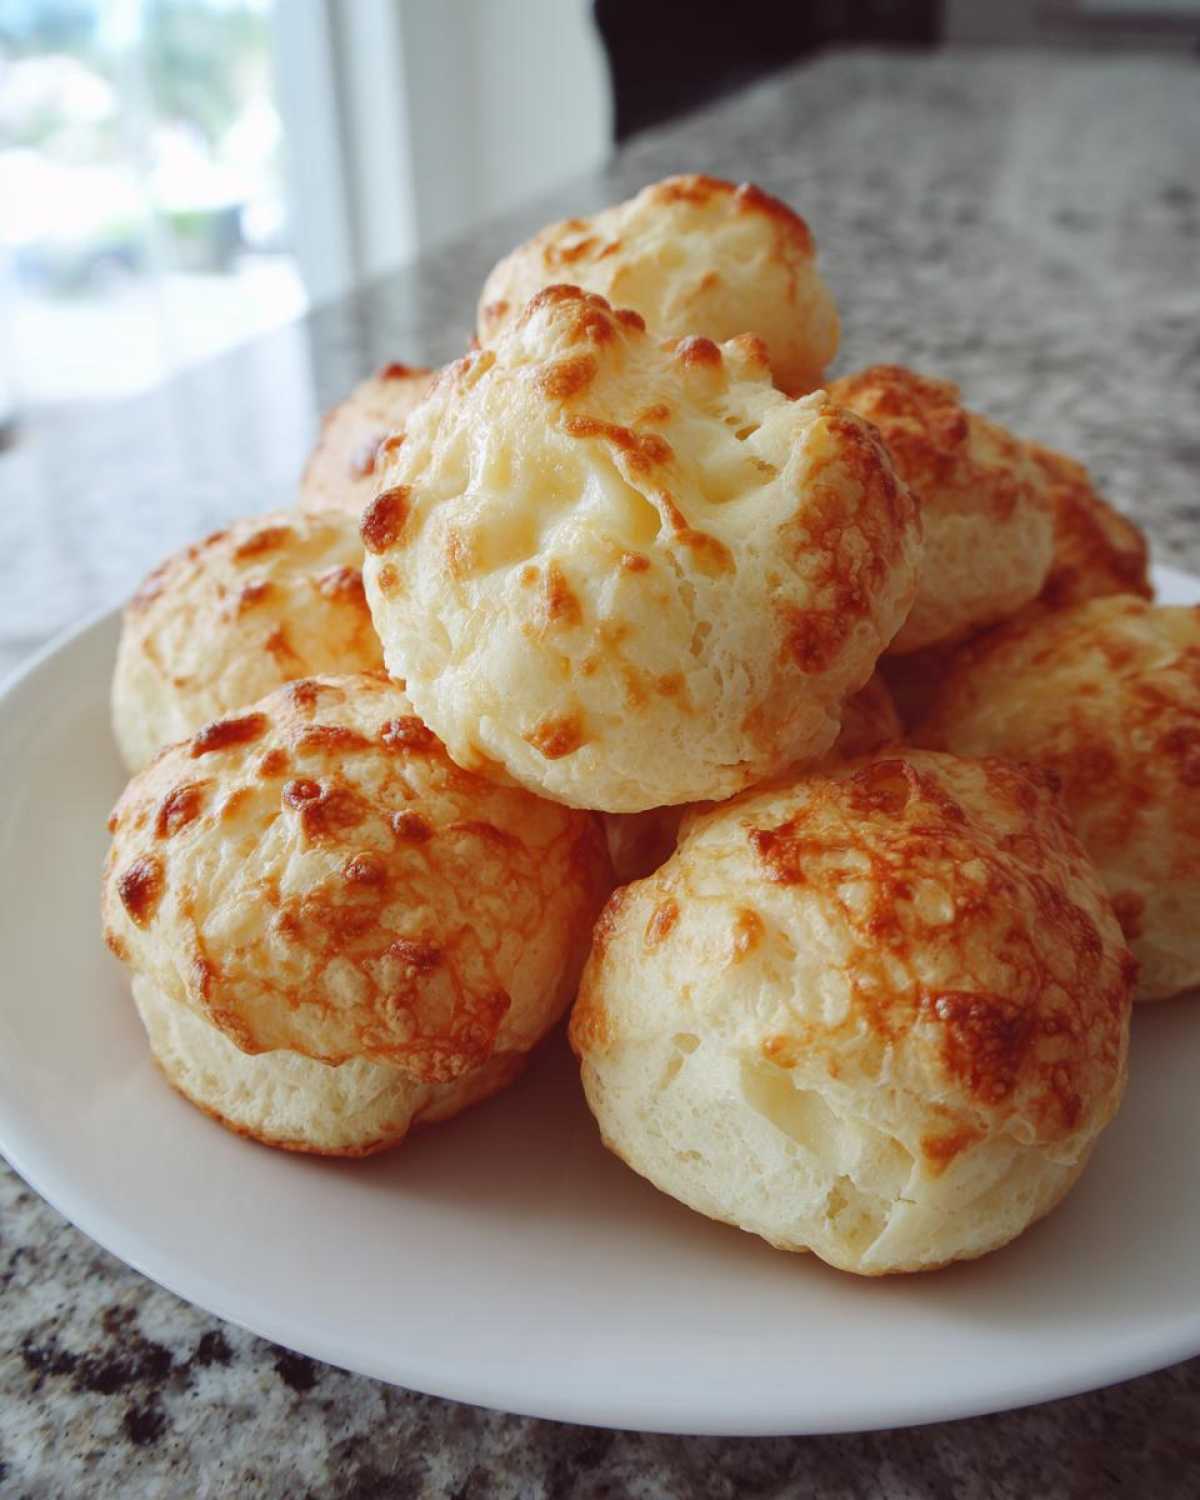
They only take 20 to 25 minutes, which is mind-blowing for something this delicious. You aren’t looking for a deep brown crust; we want them to look pleasantly puffed up and just lightly golden around the edges. When you pull your first batch of brazilian cheese bread out, let them cool for just five minutes on the pan. That little wait helps them set up so you get that perfect, satisfying chew when you bite in!

Alternative Cooking Methods: Air Fryer Cheese Bread Bites
Okay, I know we all love that classic oven bake, but let’s be real, sometimes you just need a small batch of cheesy goodness right now, and waiting for the big oven to heat up feels like an eternity. That’s why I absolutely adore making these as air fryer cheese bread bites! It’s the perfect modern shortcut, and honestly, the results are fantastic—super crispy on the outside.
If you’re looking to try other things in your air fryer, maybe check out my guide on the air fryer whole chicken recipe for a fantastic dinner idea!
The key here is not to be greedy with space! Since my brazilian cheese bread batter puffs up so much, you cannot overcrowd the basket. If you pile them in, you end up with steamed, flat cheese rolls instead of perfectly round puffs. Trust me, I learned that the hard way!

You want to work in small batches. Pop just three or four of those scooped dough balls into your air fryer basket at a time. We’re setting the temperature slightly lower than the conventional oven, going for 350°F (175°C). This gentle heat allows them to cook through without burning the outside before the middle sets.
Bake time is fast—it only takes about 10 to 12 minutes. You need to keep an eye on them after the 10-minute mark, though. Every air fryer is a little different, so peek in and check for that lovely golden color. They pop up beautifully, giving you these amazing, quick tapioca cheese rolls perfect for a snack attack!
Flavor Twists for Your Pão de Queijo
I love this recipe because while it tastes perfectly authentic right out of the oven, it’s also an amazing canvas for personalization! Once you master the base technique for your brazilian cheese bread, you can start playing around with the mix-ins. Why stick to just cheese when you can add a little punch? My favorite savory addition, hands down, is garlic powder. I tried mixing a teaspoon of garlic powder right in with the cheese, and suddenly my simple pão de queijo tasted like the most decadent appetizer!
If you’re looking for something with a little kick, you can absolutely add some heat. If you love spicy snacks, I highly recommend finely mincing a tablespoon of fresh jalapeño. It adds a wonderful freshness and a beautiful little surprise when you bite into the chewy center. If you enjoy baked spicy treats, you might also like my recipe for baked jalapeno poppers!
Here are the two easiest ways to jazz up your batter before you scoop them onto the pan:
- Garlic Power: Add 1 teaspoon of garlic powder directly into the blender along with the cheese. It deepens the savory flavor beautifully without changing the texture at all.
- Jalapeño Kick: Make sure you mince your jalapeño super finely—we want flavor, not huge chunks! Mix about 1 tablespoon into the batter right at the very end with the cheese.
Don’t be afraid to experiment once you know the base works! These tapioca cheese rolls are so forgiving, and adding these little twists just makes them even more addicting.
Make-Ahead and Storage Tips for Brazilian Cheese Bread
This is where this recipe becomes my ultimate entertaining secret weapon! Who wants to stand over the blender right when guests arrive? Not me! The best part about these brazilian cheese bread dough balls is that they freeze like a dream. You can do all the blending work ahead of time, which is a huge relief the day of a party.
When you have your sticky batter ready (right after you mix in the cheese is the perfect time to stop!), forget chilling the whole bowl. Instead, get a small baking sheet lined with parchment paper—this is crucial, because you don’t want these little nuggets sticking to each other!
Scoop out your dough balls exactly as you would when baking normally. Then, place the tray into the freezer for about an hour. You need them to get rock solid; this is what I call the ‘flash freeze.’ Once they are completely frozen through—no soft spots allowed—you can just dump all those hard little gems into a zip-top freezer bag. They will keep perfectly for storage this way for a couple of months. It’s so nice to have emergency pão de queijo on hand!
Baking from Frozen
When that craving hits and you *need* that cheesy goodness, you don’t even need to thaw them out! That’s the beauty of the tapioca starch holding things together. Just pull the frozen balls right out of the bag and place them on your prepared baking sheet, making sure you still give them good space.

Since they are coming straight from the freezer, they just need a little extra baking time to warm up and fully puff. I usually add about 5 to 10 minutes to the standard baking time. If your recipe normally takes 22 minutes, plan on 27 to 32 minutes when baking from frozen. They bake up hot and gooey, just like they were made fresh!
Storing Baked Rolls
If you actually manage to have any leftover baked gluten free cheese bread (which is rare in my house!), you can store them in an airtight container at room temperature for about two or three days. Honestly, they are best the day they come out of the oven, but they still smell amazing the next morning.
If they look a little sad on day two, don’t toss them! Reheating is key. Pop them back into a 300°F oven for about five minutes, or honestly, even 30 seconds in the microwave will revive that gooey center. If you want more tips on planning ahead for future bakes, you might find my methods for easy moist date nut bread helpful for long-term storage planning.
Frequently Asked Questions About Gluten Free Cheese Bread
I totally get it; when you’re trying a new recipe, especially one from another cuisine like this amazing brazilian cheese bread, you might have a few lingering questions! Don’t stress, I’ve been where you are. Here are some of the most common things folks ask me when they are trying to nail their first batch of pão de queijo.
If you still have questions after this, feel free to check out my main recipe index for more tips!
-
Can I use a different type of cheese in this brazilian cheese bread recipe?
Oh, definitely! While traditional recipes often use Minas cheese (which is hard to find here!), you want a cheese that melts well and adds some saltiness. Parmesan is brilliant because it’s salty and holds up to the heat. Mozzarella gives you that amazing stretch. I usually do half Parmesan and half mozzarella for the best of both worlds! Avoid super soft, watery cheeses, though, because they can throw off the balance of your sticky batter.
-
My batter seems too thin! What did I do wrong?
This is a classic worry with this recipe because the consistency of the gluten free cheese bread batter is so unique! It is supposed to be sticky, thick, and almost paste-like; it shouldn’t pour like a pancake batter. If yours is truly watery, it usually means the milk mixture wasn’t hot enough when it hit the tapioca starch, or maybe you accidentally added too much milk. If it’s thin, just carefully stir in an extra tablespoon of tapioca starch at a time until it pulls away from the sides of the blender jar more noticeably. It will still bake up fine!
-
How do I know if my pão de queijo is done baking?
Since we aren’t dealing with wheat flour, the visual cues are slightly different than what you might expect from a standard loaf. You’re looking for two main things: first, they should be nicely puffed up—they really inflate as they bake! Second, the exterior should turn a light, appealing golden brown. You don’t want them dark brown or hard; we are looking for that perfect light crust over a chewy interior. If they look set and golden at 20 minutes, they are ready!
-
Can I substitute the oil in this easy brazilian cheese bread?
The oil is important for ensuring these tapioca cheese rolls stay tender, but you can usually swap it out. Many people substitute melted butter instead, which gives you a deeper, richer flavor! Just ensure you use the same amount. You could also use another neutral oil, like canola, if that’s what you keep on hand. I wouldn’t recommend olive oil, though, because that strong flavor tends to overpower the delicate cheese.
Nutritional Snapshot of This Authentic Brazilian Snack
I know a lot of you are focused on enjoying the flavor experience, but since this is such an easy, naturally gluten-free snack, people often want to know how it fits into their daily intake! Keep in mind that these numbers are estimates based on using standard milk, oil, and a mix of Parmesan/Mozzarella for the cheese. Every kitchen is a little different, right? But this gives you a great baseline for enjoying your pão de queijo!
This snapshot is based on having made approximately 18 rolls:
- Serving Size: 1 roll
- Calories: About 110
- Fat: Roughly 6 grams
- Saturated Fat: Around 3 grams
- Carbohydrates: Approximately 11 grams
- Fiber: Very low, about 0.2 grams
- Protein: About 4 grams
- Sugar: Super low, around 0.5 grams (that’s just natural flavor compounds, not added sugar!)
As you can see, because we skipped all the wheat flour, the carb load is quite reasonable for a roll this chewy and satisfying. If you use a higher fat cheese, the fat content will tick up slightly, but that’s totally worth it for the flavor, in my opinion! Enjoy this authentic brazilian snack guilt-free!
Share Your Brazilian Cheese Bread Creations
Now that you have the secrets to making truly perfect, chewy, cheesy brazilian cheese bread using the quick blender method—it’s your turn! I get so excited when I hear from readers who conquered this recipe. Seriously, when you take that first bite of homemade pão de queijo, you have to tell someone!
Did you try the sour tapioca starch for that extra tang? Did you mix in some smoky provolone with your mozzarella? I’d absolutely love to hear about your experience. Tell me what cheese blend stole the show in your kitchen! Did your rolls puff up exactly like mine did?
Please take a minute and drop a rating right below this section. Five stars means you’re an official tapioca cheese rolls master! If you made any tweaks, like adding that jalapeño I mentioned, let us all know in the comments section. Sharing our successes and little kitchen adjustments helps everyone make better gluten free cheese bread.
And if you took a gorgeous picture of your golden-brown, pillowy brazilian cheese bread fresh out of the oven—don’t keep it to yourself! Tag me on social media so I can see your wonderful creations! You can certainly get in touch with me via my contact page too if you have any specific questions about storage or texture.
Happy baking, my friends! I can’t wait to see what you whip up!
PrintAuthentic Brazilian Cheese Bread (Pão de Queijo)

Make easy, naturally gluten-free Brazilian cheese bread using tapioca starch. This recipe uses a blender for a quick mix.
- Prep Time: 10 min
- Cook Time: 25 min
- Total Time: 35 min
- Yield: About 18 rolls
- Category: Snack
- Method: Baking
- Cuisine: Brazilian
- Diet: Gluten Free
Ingredients
- 1 cup milk
- 1/2 cup vegetable oil
- 1 teaspoon salt
- 2 cups tapioca starch (sweet or sour)
- 2 large eggs
- 1 cup shredded cheese (Parmesan, Mozzarella, or a mix)
Instructions
- Preheat your oven to 375°F (190°C). Lightly grease a baking sheet or line it with parchment paper.
- Combine the milk, oil, and salt in a small saucepan. Heat over medium heat until it just begins to boil.
- Place the tapioca starch in a blender or food processor. Pour the hot milk mixture over the starch. Blend or process until the mixture is smooth and well combined.
- Add the eggs one at a time, blending after each addition until incorporated.
- Stir in the shredded cheese until evenly distributed throughout the batter. The batter will be sticky.
- Drop rounded tablespoons of the batter onto the prepared baking sheet, leaving about 2 inches between each mound.
- Bake for 20 to 25 minutes, or until the cheese bread puffs up and the outside is lightly golden brown.
- Remove from the oven and let cool slightly before serving.
Notes
- For a flavor variation, add 1 teaspoon of garlic powder or 1 tablespoon of finely minced jalapeño to the batter with the cheese.
- You can freeze the unbaked dough balls. Place them on a tray in the freezer until solid, then transfer them to a freezer bag. Bake directly from frozen, adding 5 to 10 minutes to the baking time.
- If you prefer an air fryer method, place 3 to 4 dough balls in the basket and cook at 350°F (175°C) for 10 to 12 minutes, checking for doneness.
Nutrition
- Serving Size: 1 roll
- Calories: 110
- Sugar: 0.5
- Sodium: 150
- Fat: 6
- Saturated Fat: 3
- Unsaturated Fat: 3
- Trans Fat: 0
- Carbohydrates: 11
- Fiber: 0.2
- Protein: 4
- Cholesterol: 30