

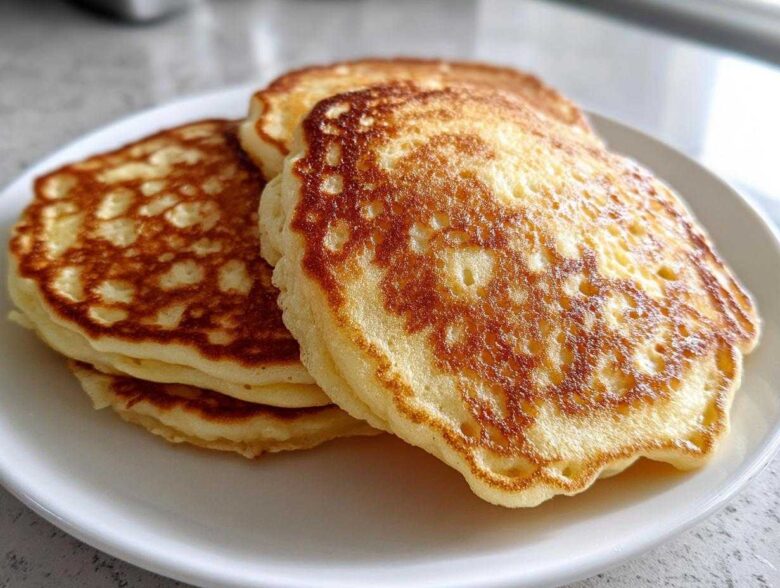
Oh, there is nothing—and I mean *nothing*—better than waking up on a Saturday morning and knowing you don’t have to rush to make breakfast. That stack of wonderfully light, slightly tangy discs waiting for you? That’s the dream! Finding the perfect recipe for moist, tall sourdough pancakes felt like stumbling upon buried treasure. I wasted so many mornings on flat, rubbery mistakes until I finally cracked the code using my neglected starter discard. If you want some seriously dreamy breakfast inspiration, check out how I make my classic fluffy pancakes too! Trust me, I perfected this batch last month for a surprise Sunday brunch, and everyone asked for the recipe immediately. This is it, folks: the ultimate recipe that uses up that precious discard and gives you fantastic, fluffy results whether you make them pronto or let them sit overnight!
Why This is the Best Sourdough Pancakes Recipe (EEAT Focus)
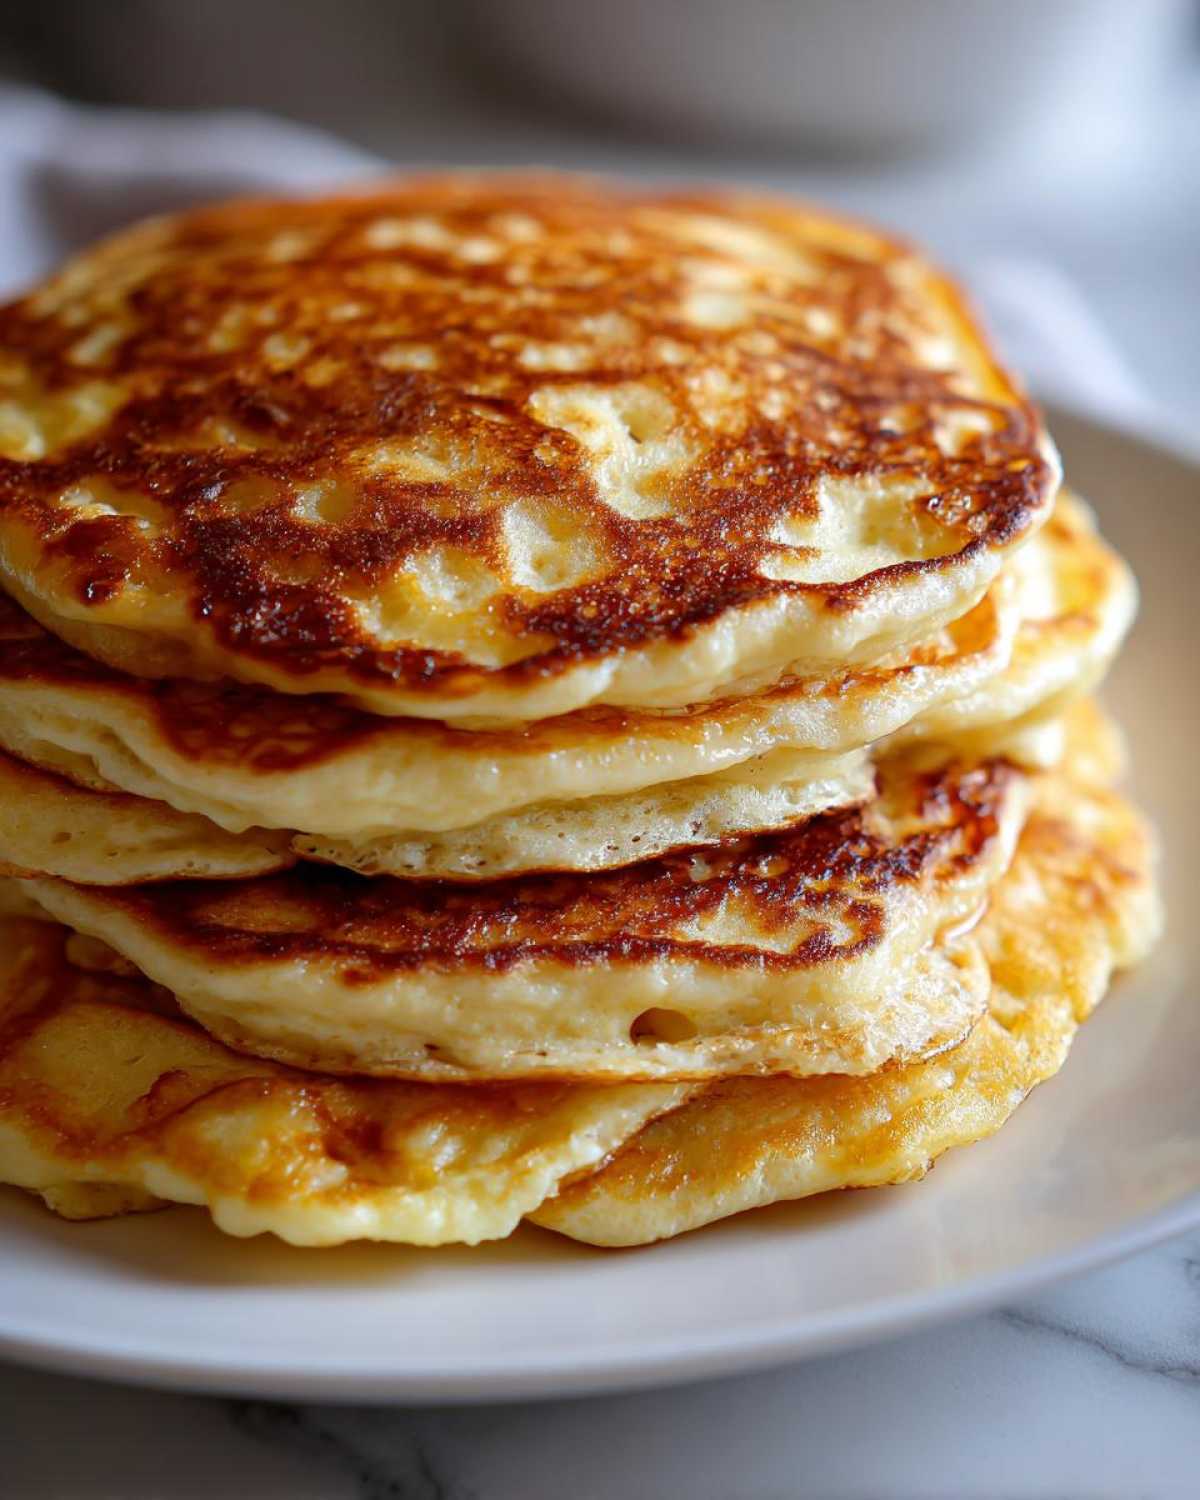
I stick to this recipe religiously because it delivers on every big promise: these are truly Fluffy Sourdough Pancakes that taste incredible! You get that perfect, subtle sour punch that makes any Tangy Sourdough Breakfast so satisfying, all while using up the starter you’d otherwise throw out. It’s the simplicity of using discard that makes this a weeknight win, but the result tastes anything but simple.
We nail the texture because of the chemical reaction happening in the bowl. We use just enough baking powder and soda to react with the slight acidity already present in the discard. This partnership is what creates unbelievable lift, ensuring you never end up with flat pancakes, even when you’re using the quick mixing method.
Achieving Maximum Fluffiness in Your Sourdough Pancakes
The secret to Light and Airy Pancakes isn’t stirring more; it’s stirring *less*! Seriously, when you mix the wet and dry ingredients, your mission is only to combine them. Stop stirring the second you don’t see big pockets of dry flour anymore. Lumps are your friends here!
If you mix too much, you activate the gluten in the flour, and gluten means chewy, tough pancakes. We want tender clouds, not flat frisbees. So, embrace the lumps! A quick 10-minute rest after mixing, even for the quick version, lets those chemical reactions finish their work and plumps up the batter beautifully before it ever hits the heat. You can see how I get similar lift in my oatmeal pancakes recipe, though this one is totally unique because of that sourdough tang!
Gathering Ingredients for Your Sourdough Discard Pancakes
Okay, let’s get our mise en place ready! You don’t need a complicated grocery run for this, which is why I love this Sourdough Discard Pancakes recipe so much. You’ll need one cup of that leftover starter discard—it can be unfed or just room temperature, no fussy feeding required here!
You also need one egg, a splash of milk, a tablespoon of melted butter, and just one tablespoon of sugar to balance things out. Then we hit the leavening: baking powder, baking soda, and salt. When measuring those dry guys, please be precise, especially the baking soda, because that’s key to the lift!
Ingredient Notes and Substitution Guidance
If you don’t have regular milk, skim, almond, or even oat milk works just fine—it won’t ruin the texture at all. Feel free to swap that tablespoon of melted butter for a neutral oil like canola or vegetable oil if that’s what you have handy for your Simple Sourdough Baking. It might make the edges slightly less rich, but honestly, it’s hardly noticeable when they are drowning in syrup!
The sugar amount is totally up to you. If you like an extra Tangy Sourdough Breakfast and plan on piling on sweet fruit, cut that sugar in half! Nobody is grading you on this breakfast, I promise. It’s all about making it work in your kitchen. Speaking of delicious additions, you can find my recipe for easy homemade garlic butter if you ever want to make pancakes savory!
How to Make Quick Sourdough Pancakes
Alright, you’re starving and need breakfast *now*. This is the Quick Sourdough Discard Breakfast method. You’ve already whisked your wet ingredients and your dry ingredients separately—that’s half the battle won!
Now we combine, and this is the most critical part: DO NOT MIX IT LIKE YOU MEAN IT. You need to gently fold the dry bowl into the wet bowl. I always use a spatula for this. Seriously, stop stirring the second the flour streaks are mostly gone. I can’t stress this enough: a lumpy batter equals light pancakes! If you mix until it’s smooth, you’re heading straight for a rubbery disaster. Don’t worry about those tiny pockets of dry mix; they disappear during the short rest period.
Get your griddle hot over medium heat. I always test mine by flicking a tiny drop of water on it—if it sizzles and evaporates right away, you’re golden. If it just sits there, wait a few more seconds! Lightly grease it if your pan needs it, but often the butter in the recipe is enough.
Spoon about a quarter cup of batter onto the surface for each pancake. Now, watch them closely! You’re looking for two main signs: first, bubbles start popping up all over the surface, and second, the edges start looking a little dusty and set. That whole process usually takes about 2 to 3 minutes.
When those signs appear, slide that spatula underneath and flip! The first side should be a beautiful, even, deep golden color. Cook the second side less—maybe just 1 to 2 minutes more—until it springs back lightly when you tap it. That’s how you guarantee beautiful Golden Brown Pancakes every single time. Serve these immediately while they’re piping hot, perhaps with some inspiration from my moist pistachio muffins recipe for whatever you’re craving later!
Preparing Overnight Sourdough Pancakes for Convenience
Okay, morning chaos is real, so sometimes I need my breakfast ready before I even have my coffee. That’s where the magic of making these sourdough pancakes ahead of time comes in! This overnight method is my secret weapon for stress-free weekend brunch.
The process is almost identical to the quick mix, but instead of heading straight for the griddle, you just pour your mixed-up batter—lumps and all—cover the bowl tightly with plastic wrap, and pop it right into the fridge. You want it to rest for at least eight hours, but honestly, 12 to 14 hours is where it really shines. You can let it go as long as 24 hours, too!
When you pull that batter out in the morning, it’s going to look thick. Like, really thick. Don’t panic! That super thick texture means the reaction has had plenty of time to do its best work, so we just add a little life back into it. I stir it very gently—again, we are not whipping it into submission here!
If it seems like a giant pancake brick in the bowl, add milk, just one tablespoon at a time, stirring minimally until it gets back to a thick but pourable consistency. You’ll still want it thicker than standard boxed pancake mix, though. Thicker batter equals taller pancakes! When you’re ready to cook, heat up your griddle and proceed exactly as we did in the quick method. Having this option means you never have to skip out on a delicious Overnight Sourdough Pancakes breakfast, even on the busiest days. It gives you so much more time to perfect your syrup choice!
If you love making things ahead of time, you absolutely have to check out my recipe for amazing slow-cooker cinnamon rolls that prep overnight! It saves so much scrubbing time in the morning.
Essential Tips for Perfect Sourdough Pancakes Every Time
Even with the best recipe, those little details can make the difference between a good stack and a *wow* stack! Since mastering these sourdough pancakes, I’ve learned a few non-negotiables that ensure I get that perfect, tender crumb and beautiful exterior every single time. This isn’t just about dumping ingredients together; this is about technique, baby!
First up: Heat management! This is where most people go wrong. They blast the heat to medium-high because they’re impatient, and you end up with pancakes that look cooked on the outside but are still gummy goo in the middle. You absolutely need to use medium heat. It gives the leavening agents time to create those bubbles and lets the heat penetrate the batter gently before the outside burns. If you’re cooking a big batch, you might even need to drop the heat slightly after the first couple of pancakes, as the griddle retains heat.
Remember that 10-minute rest I mentioned earlier? Even if you are using the quick method and you’re starving, give the batter 10 minutes on the counter after you mix the wet and dry ingredients. This rest time just lets the flour hydrate fully and allows that baking powder/soda magic to really start working its lift before it hits the pan. It’s such a small wait for such a big payoff in texture!
And finally, testing your griddle surface is crucial for those beautifully Golden Brown Pancakes. Don’t wait for the first pancake to burn to figure out the temperature! I always keep a tiny bit of butter or oil reserved specifically for testing. Drop a minuscule amount right in the center of where the next pancake will go. If it immediately starts sizzling gently and smoothly, you’re good to go. If it immediately smokes and disappears, take the pan off the heat for 30 seconds before wiping it clean and trying again. If it just sits there looking sad, your heat is too low!
These simple checks turn this Easy Sourdough Pancakes Recipe into a masterpiece every morning. If you love getting tips on baking perfection that goes beyond the recipe, you should definitely check out my tricks for the ultimate soft and chewy sugar cookies; the same principles of careful mixing apply!
Serving Suggestions for Your Tangy Sourdough Breakfast
Yesss, the pancakes are cooked, they are stacked high, and they are glorious! But what about the toppings? While I absolutely adore a classic drizzle of pure maple syrup—because it’s tradition, right?—the slight natural tang from the sourdough discard begs for something a little brighter to really make those flavors sing!
When I’m serving these up for a proper Weekend Brunch Recipes spread, I ditch the heavy candy flavors and go for fresh brightness. My absolute favorite way to finish these light-as-air stacks is with fresh, slightly tart berries. Think raspberries or sliced strawberries. The juice mixes beautifully with the warm syrup.
Another winner that plays perfectly against the sour note is a simple dusting of lemon zest mixed right into your powdered sugar. It perks up the whole plate! It’s like a little sunshine explosion on top of your sourdough pancakes. A dollop of lightly sweetened whipped cream (or crème fraîche if you’re feeling fancy) just pulls the whole experience together. It feels indulgent without being too heavy.
Now, I know my family usually sticks to sweet, but if you want to lean into the savory side—which works surprisingly well with that tangy edge—try a small pat of salted butter and maybe some crispy, crumbled bacon alongside the plate instead of syrup. It’s a little unexpected, but seriously delicious!
If you happen to have leftovers, or if you just need a little something extra sweet to go with them the next day, you have to check out my recipe for creamy maple fudge. It’s a perfect non-pancake treat to have for the week!
Storage and Reheating Sourdough Pancakes
I always make a double batch, even when I’m just cooking for myself, because trying to reheat these beauties properly is far better than making them fresh on a Tuesday morning. Plus, having a stack of leftover sourdough pancakes in the freezer feels like winning the breakfast lottery!
Storing them is super simple. Let them cool completely on a wire rack first. If you stack them while they are even slightly warm, the trapped steam is going to make them a gummy mess later—and nobody wants that sad, soggy texture! Once they are totally cool, lay them flat on a baking sheet separated by parchment paper and flash freeze them for about an hour.
After that initial freeze, you can transfer them into an airtight, freezer-safe bag or container. They keep really well like this for up to two months. I store mine with a little square of parchment between each one so they don’t stick together into one giant pancake hockey puck.
Now, reheating is the important part. I’ve tried the microwave, and honestly, it turns them into rubbery hockey pucks too, so I avoid it unless I’m truly desperate! The best methods both restore that slight crispness on the edge.
For a quick fix, you can pop them straight into the toaster! Yes, the toaster works great for individual pancakes. Just watch them—they usually take about two cycles on medium heat to warm all the way through without burning the outside.
If you’re reheating a whole stack for a family breakfast, use the oven. Lay the frozen pancakes out on a baking sheet (again, don’t overlap them!) and pop them into a 350°F oven for about 8 to 10 minutes. They come out perfectly warm, tender in the middle, and you can add that fresh butter on top just like they were made moments ago. It’s so easy, you’ll never waste leftovers again!
Speaking of easy freezer meals, if you ever make my meatloaf muffins, they freeze and reheat with the same fantastic results. Cooking once, eating twice is always the goal in my kitchen!
Frequently Asked Questions About Sourdough Pancakes
I always get questions when people try this recipe for the first time, and honestly, they are usually the same few concerns! It’s great that so many of you are jumping into the world of sourdough pancakes because once you get the hang of it, you won’t look back. Here are the things folks ask me about most often.
Can I use active, fed starter instead of discard?
That’s a great question! Yes, you technically can, but you have to adjust the recipe since an active, fed starter (one that has recently been fed and is bubbly and ready to bake with) is much more acidic and active than straight discard. If you use fed starter, I highly recommend you skip the baking soda altogether and perhaps reduce the baking powder slightly, or you’ll end up with pancakes that taste too soapy and might collapse after they rise.
For this recipe, the slight sourness of the discard is perfect because we are relying on the added leavening (powder and soda) to do the heavy lifting for our Fluffy Sourdough Pancakes. Stick to the discard if you can!
My pancakes are flat, what went wrong?
If your beautiful batter went into the pan looking like it had potential flare, only to emerge looking like sad, leathery discs, I probably know what happened—you mixed too much! This is the number one killer of light pancakes. Remember what I said about lumps being your friend?
If you mixed until the batter was completely smooth, you developed the gluten network, which makes bread tough, not fluffy pancakes. The other culprit is usually old baking powder or soda. Make sure yours are fresh! If they aren’t actively bubbling when you mix them with a little vinegar, it’s time for a trip to the store. Check out my About Us page if you want to read more about my baking philosophy!
How do I make these pancakes healthier?
I love that you’re looking to sneak in some healthy vibes! Since we are already using whole grains from the starter, we are off to a good start. For a slightly healthier take on this Easy Sourdough Pancakes Recipe, you have two easy swaps.
First, swap out the tablespoon of regular white sugar for a tablespoon of coconut sugar or use a liquid sweetener like maple syrup or honey instead. If you use maple syrup, however, cut back on the milk just a bit, since maple syrup is much wetter than sugar.
Second, you can swap out half of the flour your starter is made from (usually all-purpose) for whole wheat flour or even oat flour if you grind oats in a blender. Just keep the ratios the same or the texture might get a little heavier, but it’s a nice way to boost the fiber content for a more Healthy Stack of Pancakes!
Why do I have to use baking soda *and* baking powder?
That’s the magic combo for the best lift in most baking, especially when you bring in acidity from something like sourdough discard! Baking powder is double-acting, meaning it bubbles once when wet and again when heated. Baking soda, on the other hand, needs an acid to react immediately (and that acid is the natural sourness in the discard!).
Using both ensures that the batter has immediate lift when it hits the hot pan, *plus* a second burst of lift while it cooks through, giving you those incredible, high-rising cakes. It’s the secret to getting that towering height for your Weekend Brunch Recipes!
Next Steps After Making These Sourdough Pancakes
Now that you’ve got your stack of piping hot, beautifully tangy sourdough pancakes cooling slightly on your plate, don’t just disappear into the kitchen! I really, truly want to hear what you thought. Hearing back from you is the best part of sharing these recipes.
If these were a hit—and I know they will be, because they are amazing—please, please, please come back here and give this recipe a solid five stars! It helps other people find this winner when they are searching for their next breakfast adventure.
Also, I’d love to know how you served them! Did you go classic with butter and syrup? Did you try the lemon zest topping? Tell me your favorite topping combination in the comments below. Seeing what you pair with these is almost as much fun as eating them!
And if you snapped a picture of your gorgeous, golden stack—and you absolutely should have, because these look photogenic—please share it around! Tag me on social media so I can admire your work! Sharing this Easy Sourdough Pancakes Recipe with your friends is the highest compliment you can give me. Happy cooking, and I’ll see you over on the blog soon for the next batch!
PrintFluffy Sourdough Discard Pancakes
Make light, tangy pancakes using your leftover sourdough starter discard. This recipe works for a quick morning meal or an overnight preparation.
- Prep Time: 5 min
- Cook Time: 15 min
- Total Time: 20 min
- Yield: 6-8 pancakes
- Category: Breakfast
- Method: Griddle Cooking
- Cuisine: American
- Diet: Vegetarian
Ingredients
- 1 cup sourdough starter discard
- 1 large egg
- 1/4 cup milk (any type)
- 1 tablespoon melted butter or oil
- 1 tablespoon sugar
- 1 teaspoon baking powder
- 1/2 teaspoon baking soda
- 1/4 teaspoon salt
Instructions
- In a medium bowl, whisk together the sourdough discard, egg, milk, and melted butter until just combined. Do not overmix.
- In a separate small bowl, whisk together the sugar, baking powder, baking soda, and salt.
- Add the dry ingredients to the wet ingredients. Fold gently until just combined. A few lumps are fine; overmixing develops gluten and makes tough pancakes.
- If making immediately (Quick Method): Heat a lightly oiled griddle or nonstick pan over medium heat. Pour 1/4 cup batter per pancake onto the hot surface. Cook until bubbles appear on the surface and the edges look set, about 2-3 minutes. Flip and cook for another 1-2 minutes until golden brown.
- If preparing overnight (Overnight Method): Cover the batter and refrigerate for at least 8 hours or up to 24 hours. The next morning, stir the batter gently. If it seems too thick, add 1-2 tablespoons of milk. Cook immediately using the instructions above.
- Serve your pancakes warm with your preferred toppings.
Notes
- For extra fluffy pancakes, let the batter rest for 10 minutes before cooking, even if you are using the quick method.
- Adjust the heat so the pancakes cook through without burning the outside. Medium heat is usually best.
- If you prefer a tangier flavor, use older discard that has been sitting out longer before mixing.
Nutrition
- Serving Size: 2 pancakes
- Calories: 180
- Sugar: 3
- Sodium: 250
- Fat: 7
- Saturated Fat: 3
- Unsaturated Fat: 4
- Trans Fat: 0
- Carbohydrates: 24
- Fiber: 1
- Protein: 7
- Cholesterol: 50