

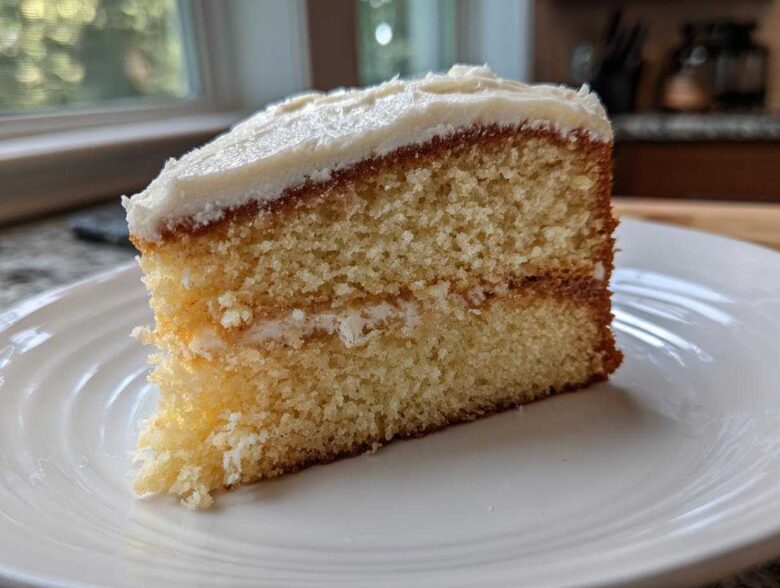
Okay, let’s talk about texture for a minute. I’ve spent years chasing that elusive cake that is unbelievably moist without feeling heavy, yet soft enough to melt right in your mouth. You know, the kind of cake layer that makes you close your eyes after the first bite? Well, friends, I finally cracked the code. This *vanilla cake recipe* isn’t just good; it’s my absolute favorite for any celebration, especially birthdays.
I tested batch after batch, tweaking sugars, milks, and fats, trying to replicate that bakery-level softness you usually only get from professionals. When I finally paired the right dry mix with my secret weapon (and no, I won’t spill *all* the secrets yet!), I knew I had hit gold. This is the ultimate, foolproof recipe for a soft, fluffy cake that tastes like pure happiness.
We aren’t just making a simple dessert here; we’re baking a memory. Get ready, because this is going to change how you think about homemade vanilla cake. You can find general baking tips over on my main blog page, but for now, let’s focus on this beauty!
Why This is the Best Vanilla Cake Recipe for You (Moist & Fluffy)
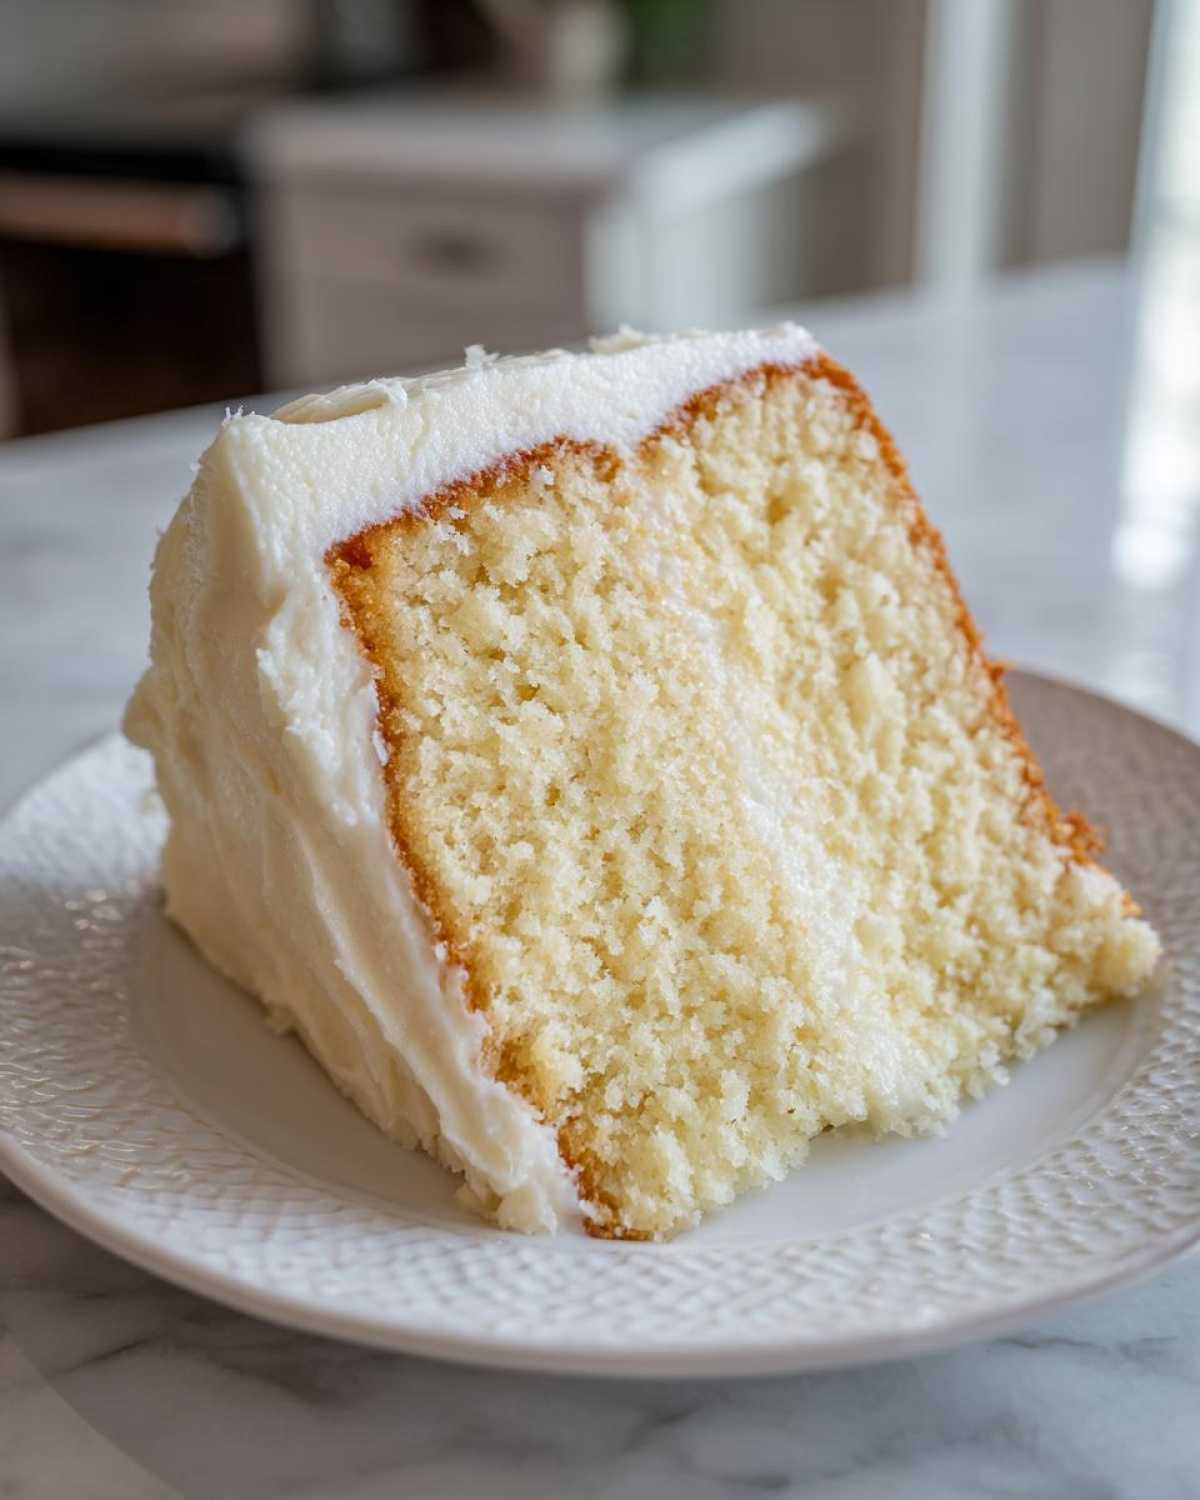
So, why am I calling this the Best Vanilla Cake Recipe out there? It all comes down to the texture, friend. Most vanilla cakes turn out dry or just okay, but this one consistently delivers that soft, velvety crumb we all dream about. It’s light, it screams celebration, and it honestly tastes like it came straight out of a high-end bakery.
The secret sauce, besides my extreme dedication to testing, is the use of sour cream. Yep! Don’t skip it! That little bit of acid reacts with the baking powder and keeps the entire structure incredibly tender. It’s what makes this a truly Fluffy Vanilla Cake From Scratch that stays moist days after you bake it. Trust me, once you see how easy this is, it’ll become your go-to. You can check out some other moist recipes, like my moist pistachio muffins, to see my track record!
Key Factors for a Perfect Vanilla Cake Recipe
- Fat balance: We use the perfect ratio of butter and liquid to give structure without heaviness.
- The Sour Cream Magic: It adds fat and acidity, guaranteeing the softest possible crumb structure every time.
- Gentle Mixing: We only mix until combined. Overdoing it? That’s how you get tough cake!
- Quality Vanilla: Because this is a vanilla cake, the quality of that extract really shines through.
Gathering Ingredients for Your Moist Vanilla Layer Cake
Alright, let’s get serious about ingredients. Getting the right structure for this Moist Vanilla Layer Cake means paying attention to details, especially temperature! I always tell people baking is chemistry, but personality is the flavor, right? So, when you measure, be precise. For the flour, I want you to spoon it into your measuring cup and then level it off—don’t scoop directly from the bag, or you’ll get too much!
We need two separate ingredient lists because while the cake layers are sturdy and soft, the frosting needs to be perfectly creamy to hold those layers up. Remember, room temperature eggs and milk are non-negotiable for the smoothest batter! This whole process flies by once you have everything ready to go.
Ingredients for the Soft Vanilla Sponge Cake
- 1 3/4 cups all-purpose flour (spooned and leveled, please!)
- 1 1/2 cups granulated sugar
- 1 tablespoon baking powder (make sure it’s fresh!)
- 1/2 teaspoon salt
- 1/2 cup unsalted butter, softened to room temperature, not melted!
- 2 large eggs, brought up to room temperature
- 1 teaspoon good vanilla extract
- 1 cup whole milk, at room temperature
- 1/2 cup sour cream, room temperature is best here too!
Ingredients for Homemade Vanilla Buttercream Frosting
This frosting is ridiculously good and so easy. It’s the perfect topping for your Vanilla Cake for Special Occasions.
- 1 cup powdered sugar (I usually sift this just in case there are lumps)
- 1/2 cup unsalted butter, softened (it should indent easily when pressed)
- 1 teaspoon vanilla extract
- 1 to 2 tablespoons milk or heavy cream (Use only what you need to get the right fluff!)
Step-by-Step Instructions for the Easy Vanilla Cake Recipe
This is where the magic happens! I promise you, this is a truly Easy Vanilla Cake Recipe. Even if you think you’re not great at baking, just follow these steps exactly, and you’ve got yourself a beautiful layer cake. We want to avoid over-mixing at all costs—that’s the biggest mistake people make when trying this Beginner Friendly Vanilla Cake!
Preparing the Cake Layers
First things first: get that oven hot! We need it at 350°F (175°C). While it heats up, grease and flour two 8-inch cake pans really well. Trust me, a sticky layer ruins the whole vibe! In your biggest bowl, whisk together all your dry stuff: flour, sugar, baking powder, and salt. Give it a good whisk to make sure the leavening agents are spread around!
Now, add the butter, eggs, and vanilla right into that dry mix. Start your mixer on low speed—be careful, it tends to splatter right away! Mix just until everything looks roughly combined, like a thick, shaggy dough. You can’t mess this up yet! Next, take your milk and sour cream in a separate little bowl, whisk them together quickly, and start adding that to the main batter slowly. Mix until it’s smooth; stop the minute you don’t see any more white streaks. That’s it for the batter!
Baking and Cooling the Fluffy Vanilla Cake
Divide that beautiful batter evenly between your two prepared pans. Pop them into the preheated oven right away. They need about 30 to 35 minutes. You’ll know they are done when a toothpick poked into the very center comes out clean or with maybe just a few moist crumbs attached—no wet batter allowed!
The cooling process is crucial for a Moist Vanilla Layer Cake. Let those layers chill out in the pans for a solid 10 minutes. This helps them firm up just enough so they don’t fall apart when you turn them out. After 10 minutes, carefully flip them onto a wire rack. They *must* be totally, completely cool—like, fridge-temperature cool—before you even think about frosting them. Warm cake melts buttercream instantly, and nobody wants soup for frosting!
Making the Creamy Vanilla Buttercream Frosting
While those layers are cooling down, we make the Homemade Vanilla Buttercream Frosting. Take your softened butter in a stand mixer (or use a hand mixer, it just takes a bit more elbow grease!) and beat it until it looks pale and creamy. This might take a couple of minutes, but it builds a great base. If you want to see my detailed mixing method, check out my guide on vanilla buttercream frosting!
Slowly, yes, *slowly*, add in that powdered sugar, alternating with the vanilla extract. If you dump it all in at once, you’ll be wearing frosting! Once it’s mostly combined, start adding the milk or cream, just one tablespoon at a time. You want that perfect, spreadable consistency. If it looks stiff, add another splash of liquid. The goal here is a super smooth, pipeable frosting that holds its shape!
Tips for Success with Your Classic Birthday Cake Recipe
Baking a truly spectacular Classic Birthday Cake Recipe isn’t just about following the steps; it’s about knowing the little secrets that elevate it from good to unforgettable. I’ve learned these tricks over years, and they make the difference between a beautiful cake and a ‘wow, this is bakery quality’ cake!
Achieving the Perfect Crumb Texture
If you want that soft, cotton-candy texture, you have to treat your ingredients right before they even hit the bowl. My biggest emphasis is always room temperature! If your eggs or milk are cold, they won’t emulsify properly with the softened butter, leading to a curdled-looking batter and a tighter crumb. That’s just science being annoying!
And please, for the love of fluffy vanilla, don’t go crazy whipping once the flour is in! Once you add the wet ingredients to the dry, you’re developing gluten, and too much gluten equals chewiness—we want soft, not chewy. Mix only until the last streak of flour disappears. If you’re worried about overmixing, you can check out how I handle my sugar cookie dough; the principle of gentle handling is the same!
Tips for Leveling and Stacking
If you want that gorgeous, tall Bakery Style Vanilla Cake look, you can’t just stack the layers as they come out of the pan. Most cakes, this one included, bake with a slight dome on top. Nobody wants their frosting sliding off the mountain in the middle!
My tip is simple: wait until the layers are completely cool, then use a long, serrated knife—or even better, a cake leveler if you have one—to gently slice that dome right off. Just take off the bare minimum needed to make the top perfectly flat. This gives you a stable surface for stacking and ensures your buttercream layer stays uniform between the layers. Those trimmed-off domes? They aren’t wasted—they’re the baker’s treat!
Make Ahead Vanilla Cake and Storage Instructions
Who doesn’t love a good plan? Baking for a big party can be stressful, which is why I always recommend making this cake ahead of time. It’s one of the best things about having a reliable Make Ahead Vanilla Cake recipe in your arsenal. The ingredients in this specific batter actually help it keep beautifully!
If you bake the layers one day ahead, they hold up wonderfully. Just let them cool completely on the wire rack. Once they are totally cool, wrap each layer tightly in plastic wrap—like, really tightly, almost shrink-wrapping them if you can. You can store these wrapped layers at cool room temperature for a full 24 hours. If you need to keep them longer, the fridge is fine, but let them sit out for an hour before frosting so they soften up again.
Now, when it comes to the fully assembled cake with the buttercream, things are slightly different. If you’re planning to serve it within 6 hours, it’s fine sitting on the counter, covered loosely with a cake dome. Because this frosting uses butter, it can get a little firm or sweaty if left out too long in a warm kitchen.
For longer storage, the fridge is your friend! The covered cake will keep well for up to 3 days in the refrigerator. When you’re ready to serve it, pull it out about an hour before slicing. Pop it on the counter with the dome off so that delicious buttercream can soften up a bit. It’s also surprisingly good when frozen! If you’re freezing the whole thing, make sure the frosting has completely set first, then wrap the whole cake in plastic wrap followed by a layer of foil. When you’re ready to use that frozen beauty, just thaw it, still wrapped, in the fridge overnight. I have a few tips on making things ahead over on my make-ahead chili planning post that apply to any good recipe!
Ingredient Notes and Substitutions for this Vanilla Cake Recipe
I get asked all the time: “What if I don’t have X?” Listen, I respect the game of substitution, but when you’re seeking the absolute *best* vanilla cake texture, you have to know what works and what might sabotage your beautiful layers. This recipe hinges on a few specific players, but luckily, there are a couple of well-vetted swaps if you’re stuck!
Let’s talk about the MVP: the sour cream. That’s what keeps this vanilla sponge tasting rich and keeps it from getting that crumb structure that flakes apart. If you’re totally out, buttermilk is your next best friend; use a straight 1:1 swap, and you’ll still get great moisture. If you only have plain Greek yogurt on hand, that works too, but you might want to thin it down *very* slightly with an extra splash of milk, as it tends to be thicker than sour cream. It’s so important to keep everything cool when you swap ingredients, too!
And vanilla! Oh, vanilla. Since this is a Perfect Vanilla Cake Recipe, the vanilla flavor needs to shine brightly. Please, please, please use pure vanilla extract. The imitation stuff just doesn’t have the depth or richness required here. It tastes… artificial. If you can splurge on clear vanilla, it’s great for keeping the cake color pale, but honestly, the dark brown extract adds subtle caramel notes that I actually prefer. If you’re curious about how I handle other pantry staples, I have some great notes on making homemade garlic butter that might interest you!
One quick note on the butter: I specified unsalted because we control the salt content ourselves with the recipe amount. If you absolutely must use salted butter, just cut the added salt in the dry ingredients measurement in half. Don’t try to swap the butter for oil unless you’re looking for a completely different, much spongier texture. Stick with the butter for this delicate recipe!
Serving Suggestions for Your Simple Vanilla Dessert
Now that you’ve poured your effort into this gorgeous cake, you deserve to serve it up in style! Even though this is already my ultimate, creamy, fluffy vanilla cake, sometimes a little something extra takes it over the top. It’s all about balancing that rich butter flavor and sweetness!
When I’m serving this up as a truly Simple Vanilla Dessert for a weeknight treat, I don’t fuss too much. A light dusting of powdered sugar is all you really need, honestly. But when guests come over, or if it’s a birthday, I love to add contrasting textures and tartness.
Fresh berries are always my first choice. Raspberries or sliced strawberries just cut through the richness of the vanilla buttercream perfectly. I usually just wash them, maybe toss them with a tiny pinch of sugar to bring out their juices, and pile them right next to or on top of a slice.
If you want something a little saucy, a very light drizzle of lemon curd is fantastic—it complements the inherent flavor profile without overpowering the vanilla. Or, if you have any homemade fruit compote lying around, that works wonders too! It’s simple, elegant, and doesn’t require breaking out the stand mixer again.
And because I love coffee more than anything, I highly recommend pairing a slice with a strong cup of coffee or maybe one of my quick blended drinks. You can find my recipe for a super easy protein coffee smoothie if you want a cold pairing!
Frequently Asked Questions About the Perfect Vanilla Cake Recipe
I know you’re probably eyeing that beautiful cake and wondering about the small details. It’s totally normal! We’ve answered the big questions, but here are a few more things people always ask me about achieving this Perfect Vanilla Cake Recipe consistency at home.
I’m happy to help troubleshoot, because nothing is worse than putting in all that work and having a sinking cake! If you’re interested in other baking troubleshooting tips, I write about dough failures way too often over on my pizza dough guide!
Can I substitute the sour cream in this vanilla cake recipe?
Oh, that wonderful sour cream! It’s the engine for the moisture in this Soft Vanilla Sponge Cake. If you are truly out, you can swap it with buttermilk 1:1. Buttermilk has the acid needed to tenderize the crumb. If you only have Greek yogurt, use that, but you might need to thin it down with a tablespoon of milk just to make sure the batter isn’t *too* thick. Don’t swap it for regular milk—that’s what gives the layers their density!
How do I ensure my vanilla cake layers are flat?
This is crucial for a successful layer cake! As I mentioned before, cake layers like this naturally want to dome a little bit in the center while baking. To get those perfectly flat tops that stack neatly, you need to use a very sharp, long serrated knife to trim off that dome once the cake is completely cool. It takes just a minute, but it ensures your layers sit flush against each other, making your frosting job look professional!
If you are planning this for a big event, leveling them the night before is the way to go. It’s honestly the difference between a gorgeous, professional-looking Classic Birthday Cake Recipe and one that looks a little tipsy!
We covered the main secrets, but if you have another burning question about your Fluffy Vanilla Cake From Scratch, feel free to drop it in the comments! I love hearing what you all come up with!
Estimated Nutritional Data for This Vanilla Cake Recipe
Okay, so while I’m more concerned with ‘how many slices can I sneak while taste-testing,’ I totally get that some of you are tracking macros or just curious! Transparency is super important here, and anything I post needs a little disclaimer, just like my full site disclaimer explains.
These numbers are based on the full recipe yielding 10 generous slices, using standard ingredient databases. Remember, if you use a different brand of butter or different sized eggs, these figures will shift just a tiny bit. It’s a guide, not gospel, but it gives you a great general idea of what you’re enjoying!
Here is the breakdown for one slice of this phenomenal, moist vanilla cake with buttercream:
- Calories: 420
- Sugar: 45g
- Fat: 22g
- Saturated Fat: 14g
- Carbohydrates: 55g
- Protein: 5g
- Cholesterol: 80mg
Because we use real butter and a good amount of sugar to keep this Vanilla Cake Recipe so delightfully moist and rich, you can see the sugar and fat content are present, as expected with a truly decadent dessert. But honestly, one slice of this super soft sponge cake is always worth it when you need a treat for a special occasion!
PrintClassic Moist Vanilla Layer Cake with Buttercream Frosting
A simple recipe for a soft, fluffy vanilla layer cake that stays moist, paired with a creamy vanilla buttercream frosting. This cake is perfect for birthdays and special occasions.
- Prep Time: 20 min
- Cook Time: 35 min
- Total Time: 55 min
- Yield: 10 servings
- Category: Dessert
- Method: Baking
- Cuisine: American
- Diet: Vegetarian
Ingredients
- 1 3/4 cups all-purpose flour
- 1 1/2 cups granulated sugar
- 1 tablespoon baking powder
- 1/2 teaspoon salt
- 1/2 cup unsalted butter, softened
- 2 large eggs
- 1 teaspoon vanilla extract
- 1 cup whole milk
- 1/2 cup sour cream
- 1 cup powdered sugar (for frosting)
- 1/2 cup unsalted butter, softened (for frosting)
- 1 teaspoon vanilla extract (for frosting)
- 1-2 tablespoons milk or heavy cream (for frosting)
Instructions
- Preheat your oven to 350°F (175°C). Grease and flour two 8-inch round cake pans.
- In a large bowl, whisk together the flour, sugar, baking powder, and salt.
- Add the softened butter, eggs, and vanilla extract to the dry ingredients. Beat with an electric mixer on low speed until just combined.
- In a separate small bowl, whisk together the milk and sour cream.
- Gradually add the wet mixture to the dry mixture, alternating with the milk/sour cream mixture, mixing until the batter is smooth. Do not overmix.
- Divide the batter evenly between the prepared pans.
- Bake for 30 to 35 minutes, or until a toothpick inserted into the center comes out clean.
- Let the cakes cool in the pans for 10 minutes before inverting them onto a wire rack to cool completely.
- To make the frosting, beat the softened butter until creamy. Gradually add the powdered sugar and vanilla extract. Add milk or cream one tablespoon at a time until you reach a smooth, spreadable consistency.
- Once the cakes are completely cool, frost and stack them.
Notes
- For an extra soft crumb, use room temperature eggs and milk.
- You can make the cake layers one day ahead and wrap them tightly in plastic wrap before storing them at room temperature.
- For a bakery style look, use a cake leveler to trim the tops flat before frosting.
Nutrition
- Serving Size: 1 slice
- Calories: 420
- Sugar: 45g
- Sodium: 250mg
- Fat: 22g
- Saturated Fat: 14g
- Unsaturated Fat: 8g
- Trans Fat: 0.5g
- Carbohydrates: 55g
- Fiber: 1g
- Protein: 5g
- Cholesterol: 80mg