

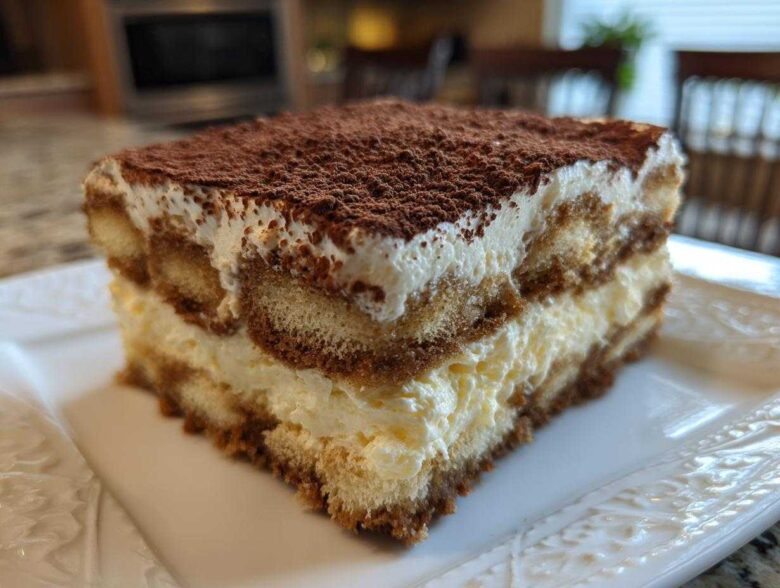
Oh my gosh, when I think of an elegant dessert that instantly transports me to a bustling Italian piazza, it has to be Tiramisu. Seriously, forget those complicated French pastries; this layered coffee beauty is where it’s at! I was so intimidated when I first looked up a tiramisu recipe years ago. I thought for sure I’d end up with soup instead of dessert. But trust me when I say this version changes everything.
This isn’t one of those fussy recipes that requires you to stand over a double boiler for an hour. Nope! This is my go-to, dead-simple, no-bake method that delivers that rich, authentic, creamy Italian flavor every single time. It sets up perfectly in the fridge, making it the ultimate secret weapon for hosting last-minute dinner parties or celebrating birthdays. It truly is the best tiramisu recipe ever.
Why This is the Best Tiramisu Recipe Ever (Easy & No-Bake)
When everyone claims they have the “best” anything, you listen skeptically, I get it! But this tiramisu recipe really does live up to the hype because it cuts out all the stressful parts. It’s my absolute favorite when I need a showstopper dessert that doesn’t require firing up the oven.
What makes this particular method shine? Let me lay it out for you:
- It’s completely no-bake! You’re just whipping and layering. No tempering, no baking timers to watch.
- The cream uses real mascarpone cheese, which gives you that uniquely smooth, decadent texture we all crave in an Authentic Italian Tiramisu.
- We are handling the egg yolks safely using a gentle heat proofing method, so you avoid the ‘raw egg’ anxiety but keep all that wonderful richness.
It comes together faster than you think, which means less time stressing in the kitchen and more time enjoying what matters. Seriously, if you need a Make Ahead Dessert Idea, this is it!
Ingredients for Your Classic Italian Tiramisu Recipe
Okay, gathering your supplies is honestly half the battle with any no-cook dessert. For this true Classic Italian Tiramisu, ingredient quality really matters, especially the coffee and the cheese. Don’t skimp on the mascarpone; cold, good quality stuff makes the whole thing creamy!
Here is what you need to round up before you start assembly:
- 6 large egg yolks
- 3/4 cup granulated sugar
- 1 1/2 cups heavy cream, cold
- 16 ounces mascarpone cheese, cold
- 2 cups strong brewed coffee, cooled (espresso is even better!)
- 1/2 cup coffee liqueur or dark rum (optional, but so good!)
- 2 packages (7 ounces each) ladyfingers (savoiardi)
- Unsweetened cocoa powder, for dusting
Make sure everything that needs to be cold—the cream and the mascarpone—comes right out of the fridge when you’re ready to mix. That keeps us on track for that perfect, light structure!
Ingredient Notes and Simple Substitutions for Your Tiramisu Recipe
You know, the wonderful thing about a tiramisu recipe is that once you nail the creamy part, you are golden. But I get tons of questions about playing around with the ingredients, which is totally fine! I always want this dessert to be accessible to everyone, even if you don’t keep rum lying around.
If you simply omit the coffee liqueur or the rum, no worries at all! Just add a little splash of good quality vanilla extract to the coffee soak. It still gives you that lovely depth of flavor without the alcohol. I’ve done it many times when my nieces and nephews are around, and honestly, you can barely tell the difference—it’s still so rich!
Handling the Egg Component in This Tiramisu Recipe
This is the big one everyone asks about! Remember how I briefly mentioned heating those yolks with sugar? That’s called pasteurization, and it makes the mixture safe and thick without cooking it into scrambled eggs. It’s super important here because it helps stabilize the mascarpone cream.
Now, if you are just *really* uncomfortable with heating the eggs at all, or you want an even quicker assembly, you can swap the whole yolk-sugar-cream process out. Use about a cup and a half of thick, pre-made pastry cream (make sure it’s totally cold!) instead of those first three steps involving the yolks and heavy cream. The texture remains beautifully creamy, promise, because the mascarpone does most of the heavy lifting!
Step-by-Step No Bake Tiramisu Instructions
Alright, let’s get down to business! This is where the magic happens. Since this is a no-bake affair, our technique is all about layering and gentle mixing to keep that incredible structure. Don’t worry about making this complicated; we are just following a clear path to perfect dessert heaven. Remember, the chilling time is non-negotiable—it’s basically the cooking process for this tiramisu recipe!
Preparing the Coffee Soak for the Ladyfingers
First things first: we need that coffee strong and ready to go. In a shallow bowl—one wide enough for dunking—mix your cooled strong coffee and your optional liqueur or rum right away. Set this aside so it has time to completely return to room temperature. You cannot dip those delicate ladyfingers into hot coffee; they will literally turn to mush before they even hit the pan! We want them moist, not swimming.
Creating the Creamy Mascarpone Dessert Base
This is the step that builds flavor and safety! You’ll want to gently heat your egg yolks and sugar over simmering water, whisking constantly until it gets thick, pale, and reaches 160 degrees Fahrenheit. Once it hits that temperature, take it off the heat immediately and let it cool down a bit—this is crucial!
Next, whip your cold heavy cream until it holds stiff peaks. In another bowl, just whisk the mascarpone until it’s smooth—don’t whip it too much or it gets grainy. Now, the folding part: you must gently fold that slightly cooled yolk mixture into the mascarpone first. Then, very carefully, fold in your whipped cream in stages. We are aiming for airy, not flat! This creates your beautiful Creamy Mascarpone Dessert base.
Assembling Your Layered Coffee Dessert
Time for the fun part! Take one ladyfinger and dip it *quickly* into the coffee mixture—I mean a one-second dunk on each side, tops. If you hesitate, it disintegrates! Line the bottom of your 9×13 dish with the dipped ladyfingers. Make sure they fit snuggly together.
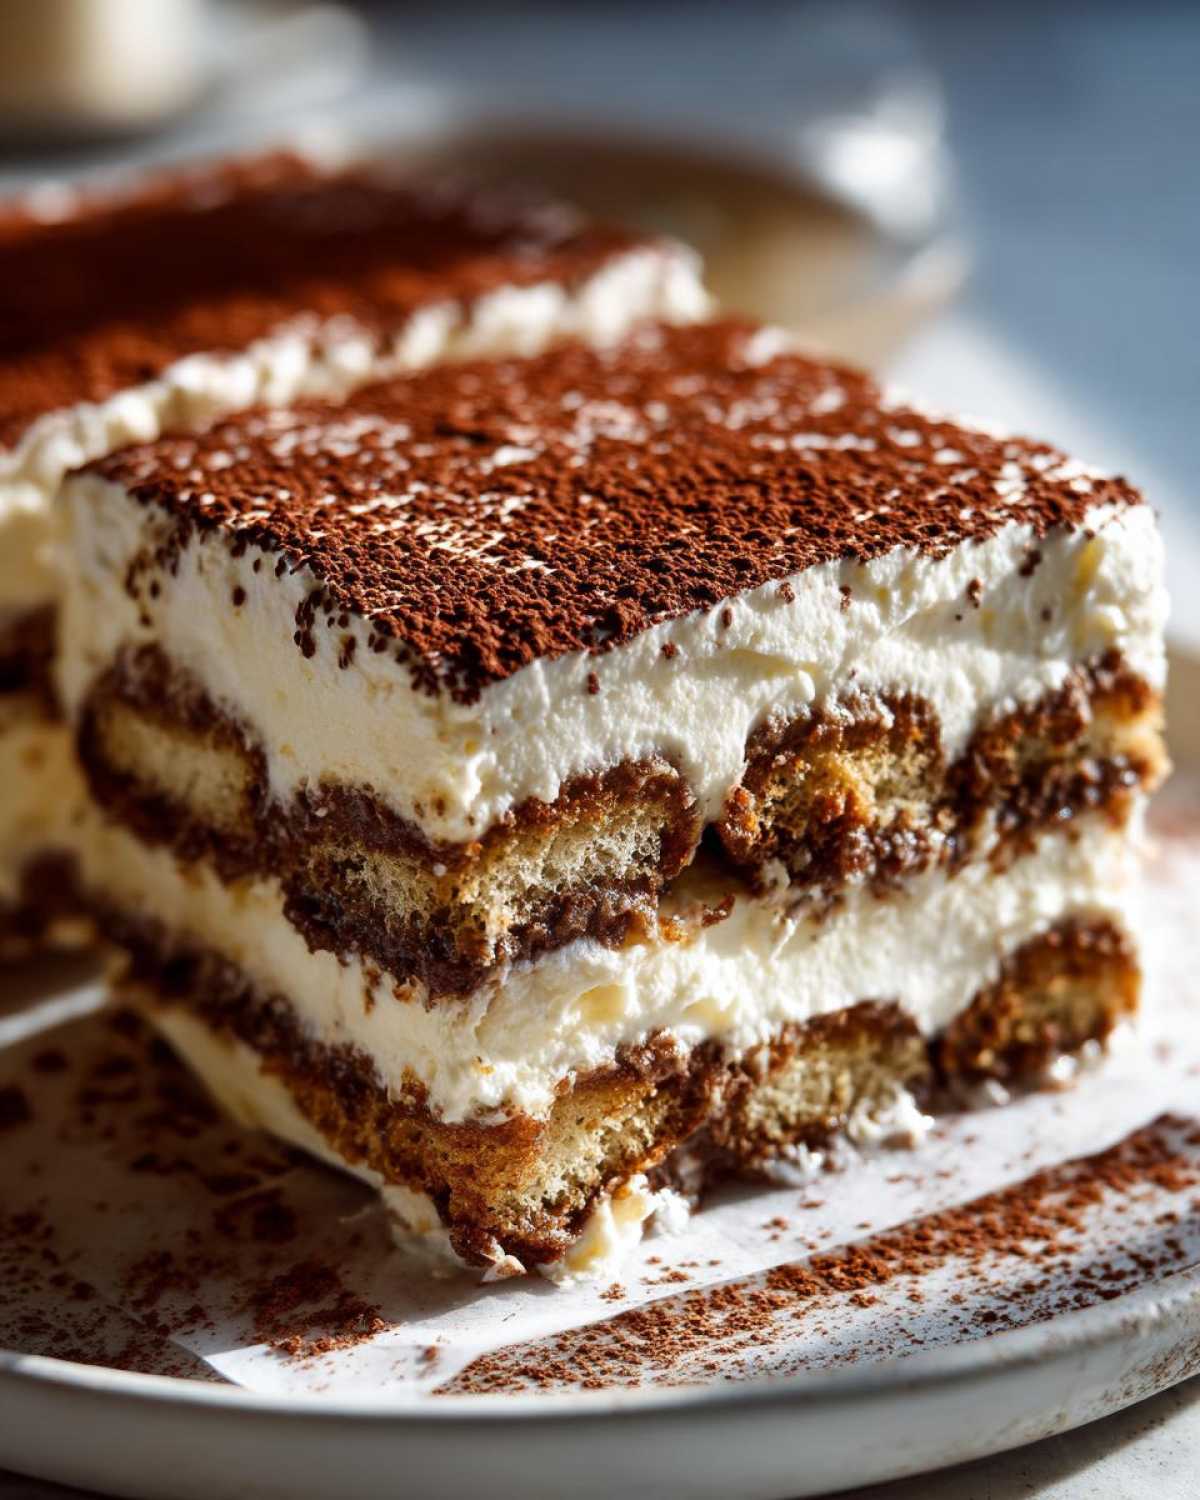
Now, spread half of your amazing mascarpone cream evenly over that biscuit layer. Repeat everything: a second layer of dipped cookies, and top it all off with the remaining cream. Smooth the top gently. Cover it tightly and shove it into the fridge for at least six hours, but honestly, overnight is when this amazing Layered Coffee Dessert truly becomes irresistible.
Tips for Success with Your Tiramisu Recipe Assembly
Even with the easiest tiramisu recipe, technique during assembly is everything! My first attempt, I swear, looked more like coffee-soaked sponge pieces floating in cream soup. Why? I let the ladyfingers soak too long! They absorb liquid instantly, so be quick—a quick dip and pull!
The other common disaster is the dessert weeping or not setting up right. This usually happens because the cream wasn’t stiff enough, or you didn’t wait long enough. I once tried rushing it after just four hours in the fridge for a last-minute party. It looked okay, but when slicing, it slumped right over! Now, I refuse to serve it unless it’s spent a full twelve hours chilling. That extra time makes all the difference for structure and flavor melding. Trust me, if you plan ahead, this dessert is guaranteed to be the star!
Make Ahead Dessert Ideas: Storing Your Tiramisu Recipe
This is where this tiramisu recipe really shines as a party saver! Seriously, you *have* to make this ahead of time. It tastes significantly better the next day. When chilling overnight, the coffee soaks fully into the ladyfingers, softening them perfectly, and the mascarpone flavors deepen up—it’s amazing how much better it gets!
Wrap your dish tightly with plastic wrap, making sure it doesn’t touch the cocoa dusting if you’ve already added it (if you haven’t dusted yet, wait until serving!). Keep it refrigerated. Since it’s a no-bake dessert, there’s no reheating needed! Just pull it out about 15 minutes before serving so it’s cold but not rock-hard. It’s the dream Dessert for Dinner Party!
Variations on the Classic Tiramisu Recipe
While I absolutely adore the traditional coffee and cocoa powder version, which is why this tiramisu recipe is structured the way it is, sometimes you want a little twist! You don’t need a whole new recipe; you just need to swap out a couple of flavor elements to create something new.
One of my favorite quick changes is swapping out the coffee soak. Instead of coffee, try making a simple blonde soak using limoncello or a very light lemon extract mixed with a little simple syrup. It turns the whole thing into a refreshing, bright dessert. You still dust it with cocoa, but the primary flavor shifts!
For a warmer spice, especially around the holidays, try swapping the cocoa dusting for powdered sugar mixed with a heavy hand of cinnamon and a tiny pinch of ground cloves. It feels completely different but uses the exact same creamy mascarpone base. See? Simple changes for big impact!
Frequently Asked Questions About This Tiramisu Recipe
I always get so many questions after people try this for the first time! It’s so classic, but because it has a few specific steps, it’s natural to wonder about the details. Since this is an Easy Homemade Tiramisu, I tried to keep the substitutions simple, but here are the things I hear most often about making this Classic Italian Tiramisu.
Can I make this Tiramisu Without Raw Eggs?
Oh, that’s one of the most common concerns! Yes, you absolutely can skip the eggs if you prefer! Remember how I mentioned the pastry cream substitution earlier? That’s your best bet for a genuine, creamy texture without using any egg yolk at all. Just use about a cup and a half of good quality, thoroughly chilled pastry cream instead of doing the yolk/sugar/whipped cream process. It gives you a wonderful, thick Creamy Mascarpone Dessert texture without the fuss.
What is the Best Way to Serve This Layered Coffee Dessert?
The absolute secret to beautiful presentation for this Layered Coffee Dessert is letting it chill completely—seriously overnight if you can manage it! When you are ready to slice, use a sharp, thin knife; dip the knife in hot water and wipe it dry between every single cut. This keeps the layers nice and clean when you serve it as a stunning Dessert for Dinner Party.
And don’t forget the final flourish! Wait until you are just about to bring it to the table before you dust that top layer generously with cocoa powder using a fine-mesh sieve. If you dust it too early, the moisture from the fridge will make the cocoa look damp and uneven.
You can find out more about my kitchen philosophy and why I love sharing these essential recipes right here on my site!
Nutritional Estimates for the Tiramisu Recipe
Now, look, I’m a home cook, not a licensed nutritionist, okay? So please take these numbers with a huge grain of salt! This is the tiramisu recipe we make for birthdays and big feasts, and frankly, we aren’t eating it for the vitamin content! These estimates are just based on the heavy cream, sugar, and mascarpone amounts we used in the recipe.
These figures are based on dividing the whole dessert into 10 generous slices. If you cut it smaller, the numbers change, of course! If you want all the fine print details about how I calculated this, you can check out my disclaimer page, but here’s the quick rundown if you’re curious about your Rich Chocolate Dusting Dessert:
- Serving Size: 1 slice
- Calories: 450
- Sugar: 35g
- Fat: 30g (with 18g saturated)
- Protein: 10g
- Cholesterol: 250mg (That’s why we only have it once in a while!)
Just enjoy this Indulgent Coffee Flavored Treat for what it is: an amazing, totally earned finish to a great meal. Don’t sweat the numbers too much!
PrintEasy No-Bake Classic Tiramisu Recipe
Follow these simple steps to make an authentic, creamy Italian Tiramisu dessert using mascarpone cream. This no-bake recipe is perfect for dinner parties and can be made ahead of time.
- Prep Time: 30 min
- Cook Time: 0 min
- Total Time: 6 hr 30 min
- Yield: 10 servings
- Category: Dessert
- Method: No-Bake Assembly
- Cuisine: Italian
- Diet: Vegetarian
Ingredients
- 6 large egg yolks
- 3/4 cup granulated sugar
- 1 1/2 cups heavy cream, cold
- 16 ounces mascarpone cheese, cold
- 2 cups strong brewed coffee, cooled
- 1/2 cup coffee liqueur or dark rum (optional)
- 2 packages (7 ounces each) ladyfingers (savoiardi)
- Unsweetened cocoa powder, for dusting
Instructions
- Prepare the coffee mixture: In a shallow bowl, combine the cooled coffee and the coffee liqueur or rum, if using. Set aside.
- Make the cream base: In a heatproof bowl set over a saucepan of simmering water (do not let the water touch the bowl), whisk the egg yolks and sugar constantly until the mixture is pale yellow and thick, reaching 160 degrees Fahrenheit (about 8-10 minutes). This pasteurizes the yolks. Remove from heat and let cool slightly.
- Whip the cream: In a separate large bowl, beat the cold heavy cream until stiff peaks form. Set aside.
- Combine mascarpone: In another bowl, gently whisk the cold mascarpone cheese until smooth.
- Fold together: Gently fold the cooled egg-sugar mixture into the mascarpone until just combined. Then, gently fold in the whipped cream in two additions until the mixture is uniform and airy. Do not overmix.
- Assemble the dessert: Quickly dip each ladyfinger into the coffee mixture, ensuring it is coated but not soggy. Arrange a single layer of dipped ladyfingers in the bottom of a 9×13 inch baking dish.
- Layer the cream: Spread half of the mascarpone cream mixture evenly over the ladyfingers.
- Repeat layers: Create a second layer of dipped ladyfingers, followed by the remaining mascarpone cream.
- Chill: Cover the dish tightly with plastic wrap and refrigerate for at least 6 hours, or preferably overnight, to allow the flavors to meld and the dessert to set.
- Serve: Before serving, generously dust the top layer with unsweetened cocoa powder using a fine-mesh sieve. Slice and serve cold.
Notes
- If you prefer not to use raw or pasteurized egg yolks, you can substitute them with 1 1/2 cups of good quality, thick pastry cream, ensuring it is cooled before mixing with the mascarpone.
- For a richer coffee flavor, use espresso instead of brewed coffee.
- Use good quality, firm ladyfingers; soft cookies will disintegrate when dipped.
Nutrition
- Serving Size: 1 slice
- Calories: 450
- Sugar: 35
- Sodium: 120
- Fat: 30
- Saturated Fat: 18
- Unsaturated Fat: 12
- Trans Fat: 0
- Carbohydrates: 38
- Fiber: 1
- Protein: 10
- Cholesterol: 250