

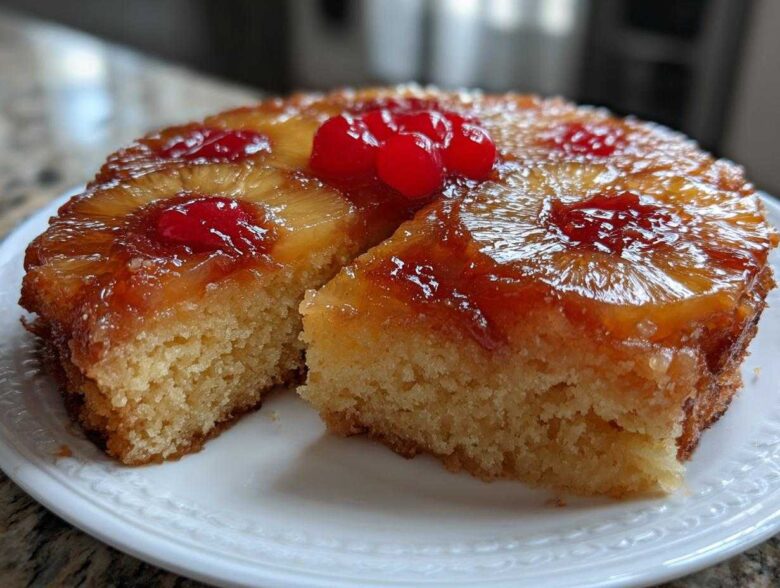
Oh my gosh, when I think about the desserts that shout ‘happy gathering’ or ‘cozy weekend treat,’ nothing beats those bright, sticky retro desserts! They just feel like home, don’t they? If you’re anything like me, you’ve tried a few recipes that left you with burnt edges or a soggy mess on top. Well, stop right there! After years of testing and fiddling—seriously, years—I have finally landed on what I truly believe is the ultimate, easy, and incredibly moist pineapple upside down cake.
This isn’t just another recipe; this is *the* recipe that guarantees that perfect, glistening topping every single time. We nail that buttery, caramelized pineapple layer and pair it with a vanilla cake base that stays wonderfully tender long after it leaves the oven. Forget the complicated steps; this classic comes together faster than you think! I’m excited to share all my secrets with you, starting with where you can find more fun baking projects over at my main blog page.
Why This Is the Best Pineapple Upside Down Cake Recipe
You need a cake that performs, right? This recipe is hands-down my go-to when I need something impressive but truly simple. I promise you, using fresh ingredients for this Best Pineapple Upside Down Cake delivers unbelievable results without needing any box mixes or fancy tricks. It’s the perfect blend of ease and nostalgia!
- It creates that unbelievably gorgeous, glistening, caramelized topping that everyone fights over.
- The cake itself is unbelievably moist—it never goes dry, even if you bring leftovers to a potluck the next day!
- It’s made completely from scratch, but I promise it’s faster than you think.
- It’s a showstopper fit for any family gathering or simple weekend baking session.
Key Attributes of Our Pineapple Upside Down Cake
What makes this so good? It’s all about that buttery glaze that gets perfectly sticky underneath the fruit. We bake it just long enough so the cake structure is light and fluffy, really complementing the tender, sweet pineapple. You get that beautiful textural contrast with every single bite—that’s the magic!
Ingredients for Your Classic Pineapple Upside Down Cake
Okay, preparation is everything when you’re making a showstopper like this! For this Pineapple Upside Down Cake Recipe, everything needs to be ready to go because the topping part moves really fast. You’ll notice we need butter in two different states—melted for the topping, and softened for the cake batter. Don’t just eyeball the softened butter; it really needs to be pliable for that light texture!
Here is what you’ll need for this from-scratch cake:
- 1/2 cup unsalted butter, softened (for the topping—this will be melted later!)
- 3/4 cup packed light brown sugar (crucial for that dark caramel)
- 1 (20 ounce) can pineapple slices in juice, drained (but hang onto that juice!)
- 10 maraschino cherries, stems removed
- 1 1/2 cups all-purpose flour
- 1 1/2 teaspoons baking powder
- 1/2 teaspoon salt
- 1/2 cup unsalted butter, softened (for the batter)
- 3/4 cup granulated sugar
- 2 large eggs
- 1 teaspoon vanilla extract
- 1/2 cup milk
- 1/4 cup reserved pineapple juice
Ingredient Notes and Substitutions for Pineapple Upside Down Cake
Listen, the canned pineapple is your best friend here, honestly. Make sure you drain those slices completely, but don’t toss that juice! That reserved juice is the secret ingredient that gives the cake batter a slight tropical tang and keeps it super moist. It’s what helps us achieve that overall Moist Pineapple Cake feel.
If you’re making those gorgeous Caramelized Pineapple Rings, don’t skimp on the dark brown sugar for the bottom layer; that molasses content is what gives the topping that deep, rich color when it bakes. If you’re out of maraschino cherries or just don’t love them, you can totally swap them out! I’ve tried dried cranberries or even just plopping a small chunk of candied ginger in the center hole of the pineapple slice. It looks just as pretty!
Also, make sure your milk and eggs are room temperature if you have time. It just helps everything blend smoother when you start bringing the batter together.
Step-by-Step Instructions for the Perfect Pineapple Upside Down Cake
Alright, time to bring this beauty together! The beauty of this pineapple upside down cake is that we build the presentation first, and then layer the cake right on top. It’s like making a delicious, edible mosaic before baking. Just stick closely to these steps, especially around the flip, and you’ll be a star!
I’ve added a link here to my easy homemade garlic butter, just in case you need to whip up some savory dishes another time, but for now, focus on that sugar and butter!
- First things first: Preheat your oven to 350°F (175°C). And this is important—do *not* grease your 9-inch round cake pan. We want the topping to stick magically to the pan so it releases perfectly later!
- Melt that first batch of 1/2 cup butter in a small saucepan over medium heat. Once it’s totally liquid, whisk in your 3/4 cup of light brown sugar until it looks like thick, bubbly caramel. Pour this sugary mixture evenly across the bottom of your ungreased pan. That’s your foundation!
- Now for the fun part. Take your drained pineapple slices and arrange them over that brown sugar base. Try to cover the bottom well. Then, gently nestle one maraschino cherry right into the center hole of every single pineapple ring.
- In a separate, medium bowl, whisk together the flour, baking powder, and salt. This is your dry mixture. Set it aside for just a minute. We’re keeping things very organized here.
- In your main mixing bowl, you’ll cream together the remaining 1/2 cup of softened butter and the granulated sugar. You need to beat this until it looks truly pale yellow and fluffy—this traps the air we need for a nice rise.
- Beat in your two large eggs, making sure each one is fully incorporated before you add the next. Then stir in that teaspoon of vanilla.
- Now we add the dry ingredients and the liquids back and forth. Gradually add the dry mixture to the wet ingredients, alternating with the milk and that reserved pineapple juice. You must begin AND end with the dry ingredients (so: Dry, Wet, Dry, Wet, Dry). Mix until it’s *just combined*. Seriously, if you see a small white streak of flour, stop mixing! Overmixing is the enemy of a Moist Pineapple Cake!
- Very, very carefully, pour all that lovely cake batter right over the pineapple and cherry layer. Use a spatula to gently spread it toward the edges to cover all the fruit evenly. Don’t stir the topping!
- Bake this tropical dream for 35 to 40 minutes. You know it’s done when a wooden pick inserted right into the center comes out totally clean.
- This step requires patience! Let the cake cool in the pan sitting right on a wire rack for exactly 10 minutes. Not 5, not 15. Ten minutes is the sweet spot.
- Put on your oven mitts—safety first! Place a serving plate upside down over the top of the cake pan. Keeping a tight grip on both the pan and the plate, quickly and confidently flip the whole stack over!
- Lift the pan off slowly. If you see any stray topping pieces sticking to the bottom of the pan, don’t panic! Just gently lift them off with a thin spatula and place them right back where they belong.
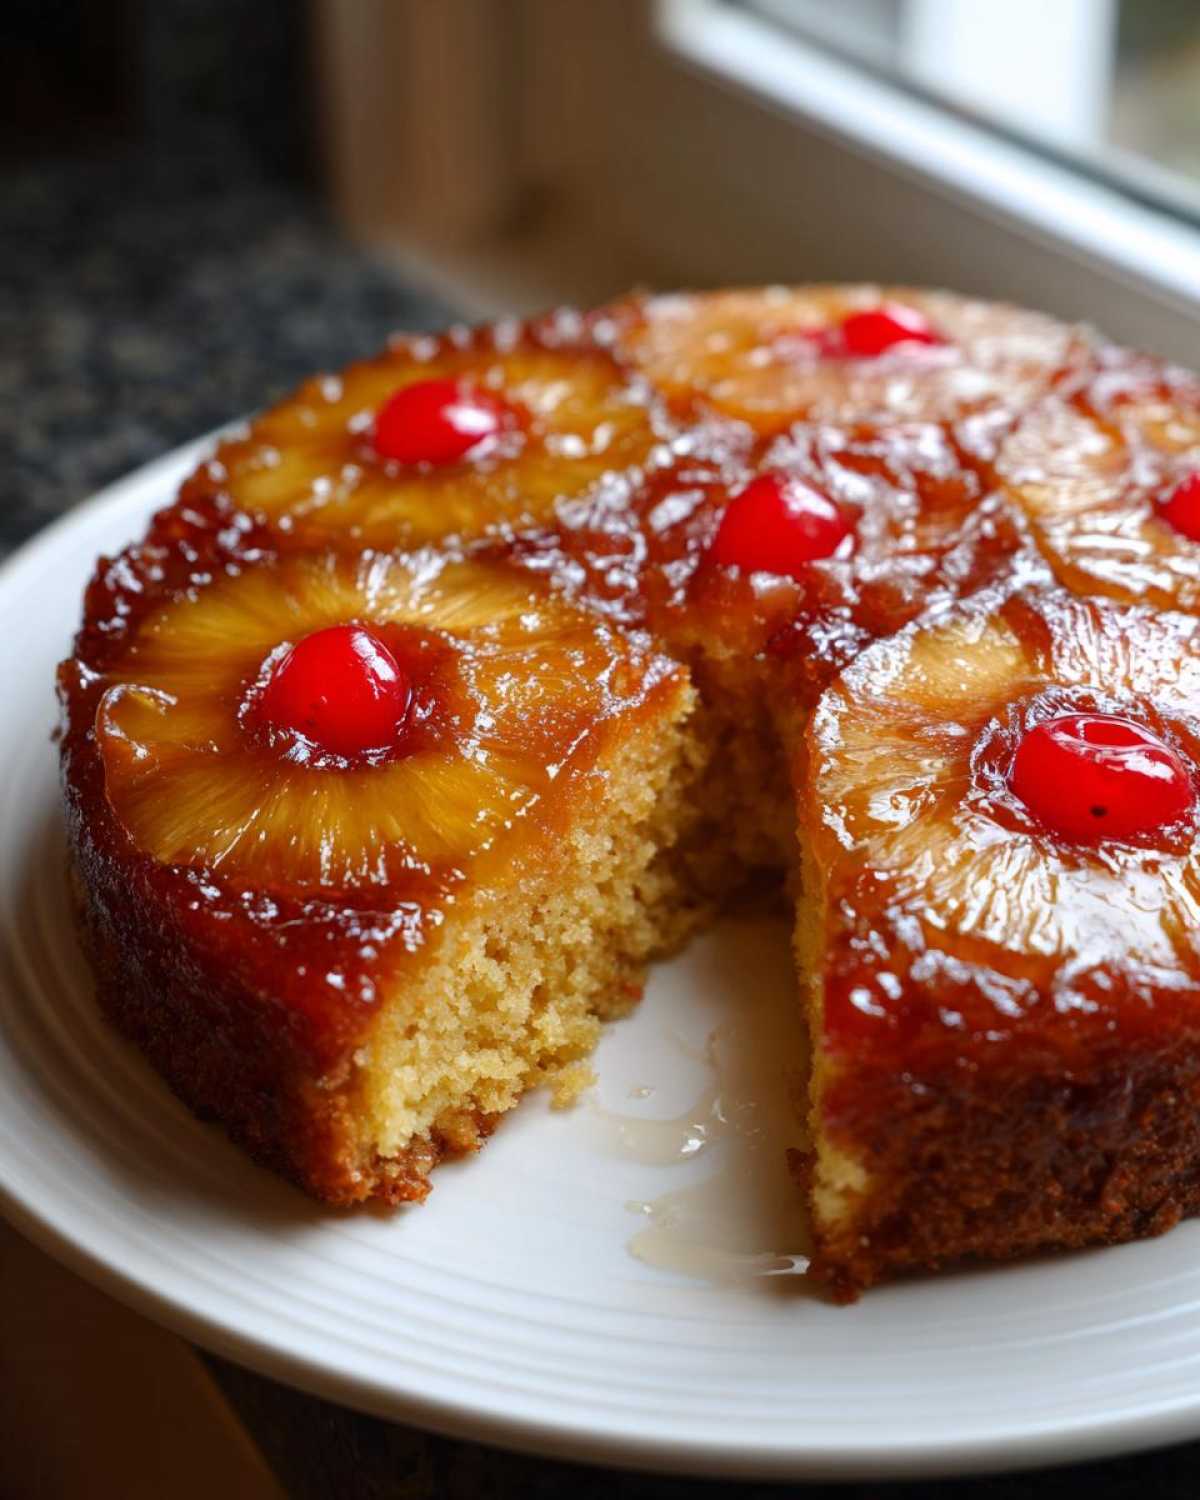
Creating the Caramelized Pineapple Rings Topping
This is the showstopper bit, the very reason we make this dessert! The first thing you do after preheating is melt the first 1/2 cup of butter—it should be totally liquid. You stir in that rich brown sugar right in the saucepan until it’s smooth—it should look like a beautiful, thick sauce. You pour that sauce straight into the bottom of the *ungreased* pan. That melted sugar and butter needs to coat everything evenly! Then you arrange those pineapple slices so they look perfect. Remember that little cherry goes right in the middle of each ring? That completes the visual perfection of your Caramelized Pineapple Rings before the batter even hits it!
Mixing the Moist Pineapple Cake Batter
Once your topping is set, you switch gears to the cake itself. The rule here is to treat the butter and sugar with respect. You have to cream that second batch of softened butter with the white granulated sugar until it’s light, almost fluffy, and pale. This traps air bubbles for that tender crumb—don’t rush it! When you alternate adding the dry ingredients (flour mix) and the wet components (milk and reserved pineapple juice), you are fighting gluten development, my friend. If you mix everything together too fast or too long, you squeeze those air bubbles out, and suddenly you’ve got a dense brick instead of a light, Moist Pineapple Cake!
Flipping Your Pineapple Upside Down Cake Successfully
This is where nervous bakers often freeze up, but it’s easy if you trust the process! After baking, the absolutely most important thing is that 10-minute cooling window. If you flip it immediately, the hot topping will run everywhere and shred your cake. If you wait too long—say, an hour—the sugar will re-harden into cement and glue the cake to the pan! Ten minutes lets it cool just enough to set but not seize up.
When you flip it, use sturdy oven mitts, steady the plate firmly on top of the pan, and flip confidently in one quick motion. If a pineapple piece decides to play hide-and-seek and stays stuck to the bottom of the pan, don’t freak out! Just gently lift it out with a thin metal spatula and place it back where it belongs on top of your gorgeous pineapple upside down cake!
Tips for an Easy Pineapple Dessert Experience
I know we all love that from-scratch flavor, but let’s be real, sometimes we need maximum reward for minimum fuss! That’s why I love this recipe, because it truly delivers an Easy Pineapple Dessert without a ton of heavy lifting. Since the base batter is so straightforward, we can play around with the serving formats!
If you’re baking for a humongous crowd, you don’t have to scale the entire recipe up and try to gauge if a giant sheet cake will invert properly. Instead, use those notes I included! You can easily double the batch and bake it in a large Bundt pan—just expect it to take maybe 15 to 20 minutes longer in the oven than the standard round cake. Keep an eye on the center!
For parties where everyone grabs their own plate, make Mini Pineapple Upside Down Cakes! Pop the entire topping mixture into greased muffin tins, fill each cup about two-thirds full with batter, and reduce the baking time way down—usually about 20 minutes. They look so cute and individual, too! It makes serving such a Simple Tropical Dessert situation.
If you’re ever looking for other straightforward, bakery-style treats that are just as easy, you should check out my secrets for moist pistachio muffins. Sometimes simple is best, and this cake proves it!
Variations on the Classic Pineapple Cake
While I am a huge traditionalist when it comes to the pure, unadulterated beauty of the Classic Pineapple Cake done in a round pan, it’s fun to shake things up sometimes! The gorgeous simplicity of the batter in this Pineapple Upside Down Cake Recipe means it takes to variations beautifully. It’s all about changing the vessel or adding a little something extra to the topping!
When I am making this for a holiday gathering, I absolutely love boosting the depth of flavor in that caramel layer. Instead of just using light brown sugar for the topping mix, try using dark brown sugar. Wow! It gives the pineapple rings a significantly deeper, almost molasses-like caramel flavor that is just divine.
Another fun textural element to toss into that topping *before* you pour the batter over it? Coconut flakes! Sweetened flakes work best. Just scatter a light layer over the cherries and pineapple. It adds a little chewiness that pairs perfectly with the tropical fruit. If you are looking for other fruit cake ideas for swapping—like maybe using oranges or cherries instead—I’ve got a great cranberry orange cake recipe that uses a similar pan style if you want more inspiration!
Making it a Pineapple Bundt Cake
So, you want that dramatic, fluted look? Fantastic choice! Making a Pineapple Bundt Cake is nearly the same process, but you need a little more batter and definitely a little more baking time. The recipe as written is perfect for a standard 9-inch round cake, but for a typical 10-cup Bundt pan, you’ll want to increase the entire recipe by half again. Don’t worry about adjusting the topping ratios too much—the extra batter just fills up the space.
Because a Bundt pan is generally deeper than a standard flat cake pan, heat takes longer to penetrate the center. This means you need to keep checking on it! Start checking around the 55-minute mark instead of 40. You are looking for that clean toothpick test, just like always!
Whipping Up Mini Pineapple Upside Down Cakes
If you’ve ever had to serve dessert to a bunch of kids, or maybe you just want to make sure everyone gets their own perfect portion, making them individually is the way to go! This is where the recipe shines for ease. You’ll use a standard muffin tin.
Follow the instructions exactly for making the topping, but instead of pouring it into one big pan, equally share the melted butter and brown sugar across the bottom of 10 to 12 muffin wells—no greasing needed otherwise! Then arrange one pineapple slice and one cherry in each tin. Remember to use just a bit less batter in each cup since they are shallower. You’ll shave off a ton of baking time; start checking them around the 20-minute mark. They come out looking adorable and perfectly portioned, which is a huge win for any baker!
Serving Suggestions for Your Pineapple Upside Down Cake
Once you’ve successfully flipped that beautiful, gleaming pineapple upside down cake, the question becomes: how should I serve this masterpiece? Honestly, you don’t need much because the caramelized topping brings so much flavor, but a little something extra can take it from great to legendary, especially if you are taking it to a big event!
This cake is a natural choice for all those big events. It travels well and looks amazing on a buffet table, making it a top-tier Dessert for Potluck entries. It’s one of those wonderful, reliable Family Gathering Cakes that everyone recognizes and loves right away.
My personal favorite way to serve it is warm, maybe just slightly warm, alongside a scoop of vanilla bean ice cream. The contrast between the warm, sticky, buttery fruit and the icy, cool cream? Perfection. The ice cream melts slightly into the caramel, creating its own little sauce right on the plate.
If you aren’t into ice cream, a simple, unsweetened dollop of fresh whipped cream is wonderful. It adds lightness without competing with the sweetness of the pineapple. For a little extra flair, sometimes I’ll grate a bit of fresh lime zest right over the top of the cream before serving. If you’re looking for something different for your next gathering that’s still easy and crowd-pleasing, you have to try my recipe for the best soft, chewy classic snickerdoodles!
Storing and Reheating Your Pineapple Upside Down Cake
I know we always *hope* there will be leftovers of this glorious pineapple upside down cake, but it usually disappears fast! Still, it’s good to know how to keep this beauty tasting fresh, especially since that lovely topping can sometimes get a little… sticky when stored.
Here’s the deal on storage: Because this cake is so rich with butter and sugar, it can sit out on the counter longer than a typical cream-filled cake. If you covered it loosely with a cake dome or foil, it’s perfectly fine at room temperature for a good 24 hours. I find the texture of the cake itself is actually best when it’s not chilled!
If you need to keep it longer, say for two or three days, absolutely cover it well and stick it in the refrigerator. Once it’s chilled, the topping will feel very firm, almost like fudge, which can make slicing a bit tricky. Don’t worry, though—we can bring that buttery glaze right back to life!
When it’s time to reheat, never microwave the whole thing! That steam just makes the cake soggy. Instead, I take the slice I want out of the fridge and let it sit on the counter for about 30 minutes to take the chill off. Then, pop that single slice into a toaster oven or a regular oven set to a very low heat—like 300°F—for maybe 5 to 7 minutes. You just want it warm through. This gentle heat softens that caramel topping right back up, making the whole slice gooey and perfect again. Trust me, reheating it this way makes it taste almost freshly baked!
Frequently Asked Questions About Pineapple Upside Down Cake
You know I’ve made this cake a million times, so if you have questions, I probably have an answer! It seems like everyone worries about that flip or whether they can manage it on a busy night. Don’t worry, this Pineapple Upside Down Cake Recipe is so forgiving!
Can I make the pineapple upside down cake ahead of time?
You absolutely can prep ahead, which is great for big holiday meals! I would highly recommend preparing the entire topping—the melted butter/brown sugar mixture and arranging the pineapple and cherries—the night before and just covering the pan tightly. That part can chill right in the fridge. Then, the next day, let it sit on the counter for 30 minutes while the oven heats up, then just mix your batter fresh and pour it over!
However, I strongly advise against baking the cake ahead of time. A baked cake is never as amazing as one cooled just 10 minutes and flipped fresh. That buttery glaze will be too firm if it sits too long after baking!
What is the secret to a non-sticky pineapple upside down cake?
This is the million-dollar question, right? The non-sticky secret is a two-part combo, and both parts are mentioned in the instructions! Part one: Do not grease your pan at all before pouring in the melted butter and brown sugar mixture. That sugar mixture has to form its own sticky, non-stick barrier against the metal. Part two: You MUST let the cake rest for exactly 10 minutes after it comes out of the oven before flipping. That brief rest allows the caramel to cool slightly so it clings to the cake when you turn it over, instead of sticking stubbornly to the pan bottom. If you miss that 10-minute window, you might end up with bits stuck behind, so set a timer!
Is this recipe considered a Retro Dessert Recipe?
Oh my gosh, yes! This is the king of Retro Dessert Recipes! Most people associate this style of cake with the 1950s and 60s, and it’s pure sunshine on a plate. It’s one of those wonderful, vibrant throwback dishes that instantly makes everyone smile because it’s so familiar and comforting. That bright color and sticky sweetness just screams nostalgia! It definitely captures the warm, familiar feeling of a true Classic Pineapple Cake from days gone by. I find myself craving this every time I want something classic and fun!
If you’re looking for other tried-and-true favorites that never fail, you should take a look at my homemade teriyaki sauce recipe—it’s another one I’ve perfected over the years!
Estimated Nutritional Data for Pineapple Upside Down Cake
Now, I always tell folks these numbers are just my best guess based on standard measurements, so view them as estimates rather than a strict diet plan! After all, we’re baking an amazing, buttery dessert here. This information is calculated for one generous slice of the pineapple upside down cake, assuming you get 8 servings out of the whole batch.
Keep in mind that the actual nutritional facts can swing a bit based on the exact brand of butter, sugar, or pineapple juice you use, but this gives you a solid baseline:
- Serving Size: 1 slice
- Calories: 350
- Sugar: 35 grams (Yep, it’s a treat, but that sugar is what makes the caramel!)
- Fat: 18 grams (We need that butter for richness!)
- Saturated Fat: 11 grams
- Carbohydrates: 45 grams
- Protein: 4 grams
- Cholesterol: 75 mg
It’s a classic, rich dessert, so enjoy that slice guilt-free! If you want to see more of the simple recipes that dominate my kitchen rotation, maybe take a peek at my homemade teriyaki sauce recipe—it’s one of my secret weapons for weeknight meals!
PrintClassic Easy Pineapple Upside Down Cake

Make this moist, buttery Pineapple Upside Down Cake from scratch. It features perfectly caramelized pineapple rings and is simple enough for any occasion.
- Prep Time: 15 min
- Cook Time: 40 min
- Total Time: 55 min
- Yield: 8 servings
- Category: Dessert
- Method: Baking
- Cuisine: American
- Diet: Vegetarian
Ingredients
- 1/2 cup unsalted butter, softened
- 3/4 cup packed light brown sugar
- 1 (20 ounce) can pineapple slices in juice, drained (reserve juice)
- 10 maraschino cherries, stems removed
- 1 1/2 cups all-purpose flour
- 1 1/2 teaspoons baking powder
- 1/2 teaspoon salt
- 1/2 cup unsalted butter, softened
- 3/4 cup granulated sugar
- 2 large eggs
- 1 teaspoon vanilla extract
- 1/2 cup milk
- 1/4 cup reserved pineapple juice
Instructions
- Preheat your oven to 350°F (175°C). Do not grease your 9-inch round cake pan.
- Melt 1/2 cup butter in a small saucepan over medium heat. Stir in the brown sugar until dissolved. Pour this mixture evenly into the bottom of the cake pan.
- Arrange the drained pineapple slices over the brown sugar mixture in the pan. Place one maraschino cherry in the center of each pineapple ring.
- In a medium bowl, whisk together the flour, baking powder, and salt. Set aside.
- In a separate large bowl, cream together the remaining 1/2 cup softened butter and granulated sugar until light and fluffy.
- Beat in the eggs one at a time, mixing well after each addition. Stir in the vanilla extract.
- Gradually add the dry ingredients to the wet ingredients, alternating with the milk and reserved pineapple juice, beginning and ending with the dry ingredients. Mix until just combined. Do not overmix.
- Carefully pour the cake batter over the pineapple and cherry layer in the pan. Spread gently to cover the fruit evenly.
- Bake for 35 to 40 minutes, or until a wooden pick inserted into the center comes out clean.
- Let the cake cool in the pan on a wire rack for 10 minutes.
- Place a serving plate upside down over the cake pan. Wearing oven mitts, carefully flip the cake and plate over together. Lift the pan off the cake. If any topping sticks, gently place it back onto the cake.
- Serve warm or at room temperature.
Notes
- For a Bundt cake, increase the recipe by half and adjust baking time as needed.
- To make individual mini cakes, use muffin tins and reduce the baking time to about 20 minutes.
- If you prefer a deeper caramel flavor, use dark brown sugar for the topping.
Nutrition
- Serving Size: 1 slice
- Calories: 350
- Sugar: 35
- Sodium: 250
- Fat: 18
- Saturated Fat: 11
- Unsaturated Fat: 7
- Trans Fat: 0
- Carbohydrates: 45
- Fiber: 1
- Protein: 4
- Cholesterol: 75