

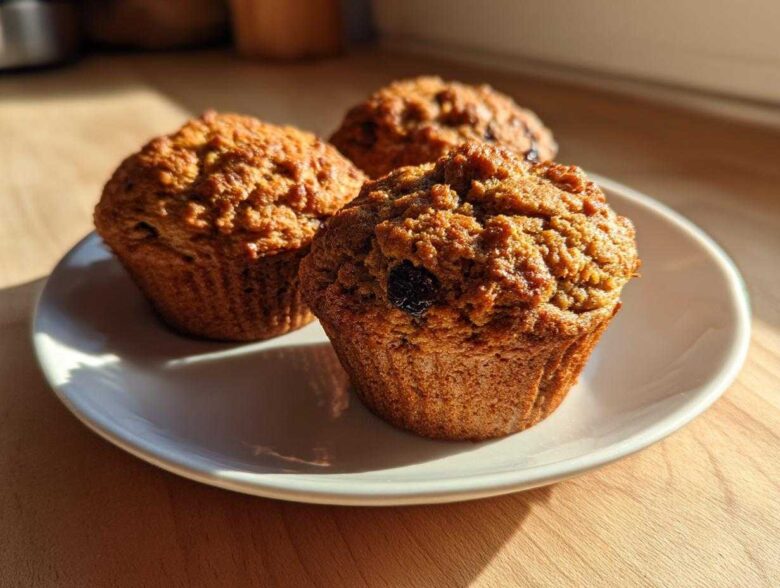
Oh, breakfast staples. Every busy week needs them, right? But honestly, how many times have you tried to make something healthy—something loaded with fiber—only to end up with little dry hockey pucks? I swear, I spent years trying to nail the perfect balance. It’s frustrating when you want something wholesome that tastes like it came straight from a classic bakery case. Well, trust me when I say I finally cracked the code. After countless batches of tweaking buttermilk ratios and soaking times, I have landed on the absolute best bran muffins recipe. These are reliably moist, packed with wholesome goodness, and they taste like a real treat, even though they are fantastic for keeping you full all morning long.
Why These Are the Best Bran Muffins You Will Ever Make
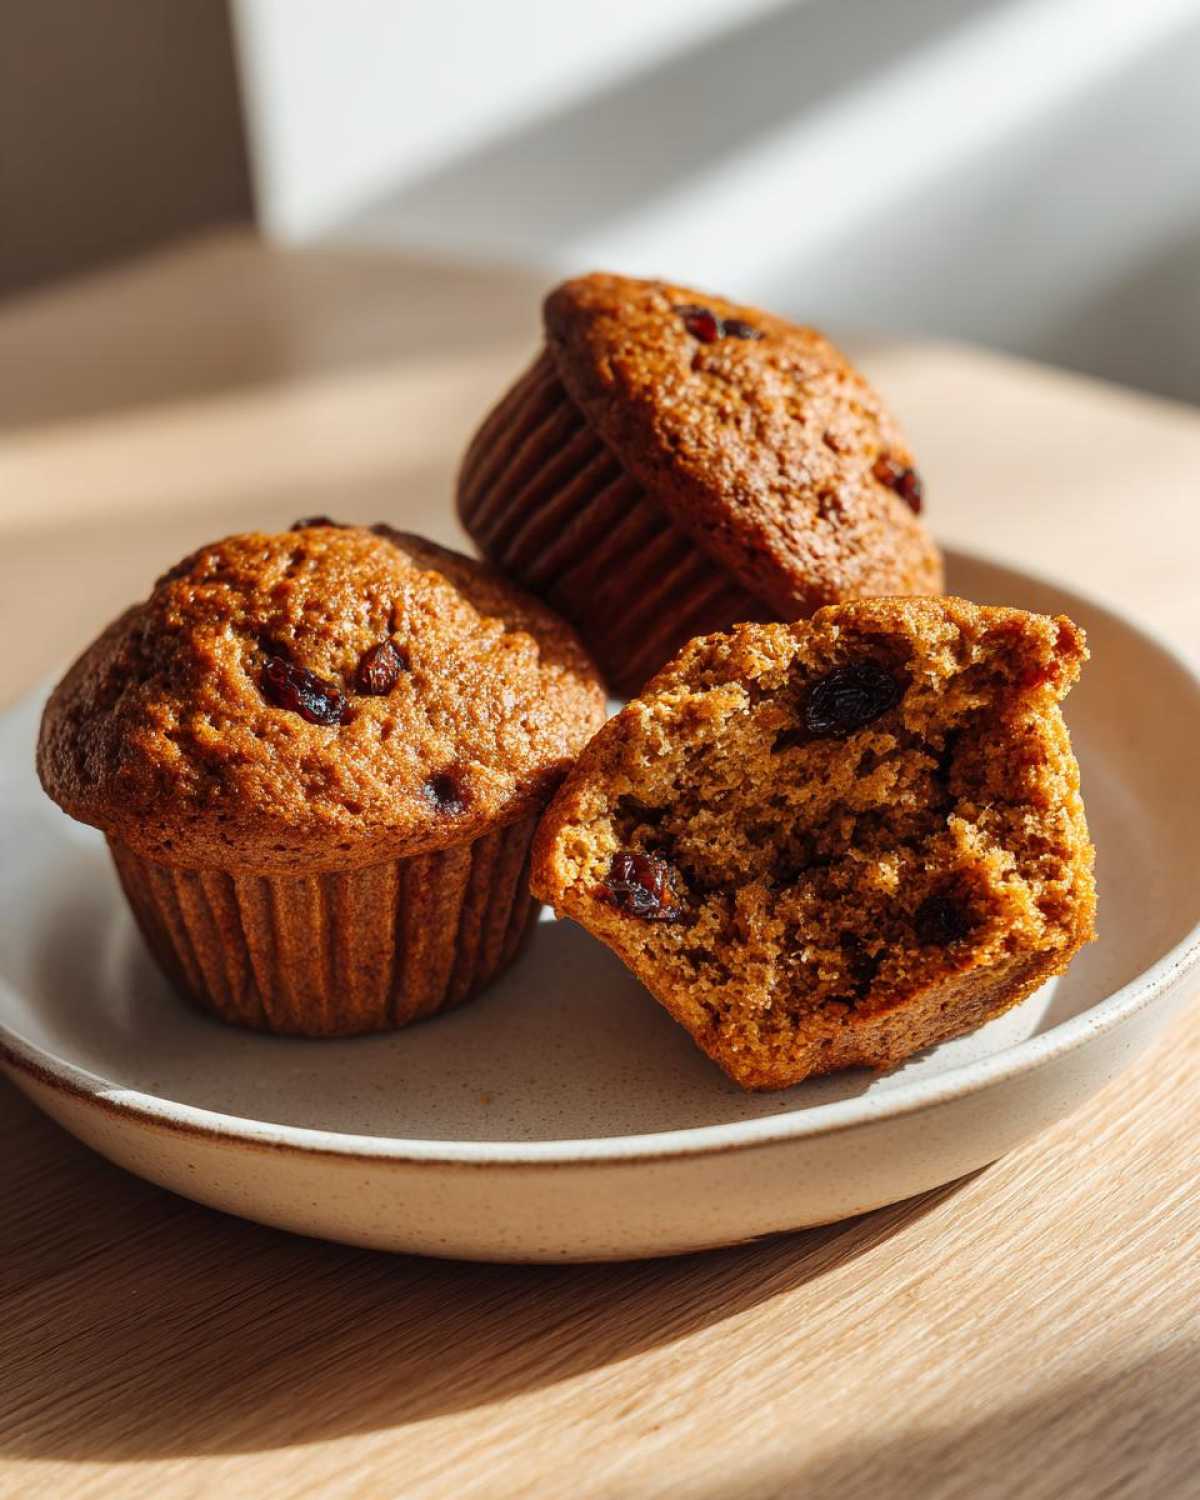
I’m telling you, these aren’t your grandma’s dry, crumbly bran muffins—unless your grandma was a secret genius baker! These are the gold standard. I’ve tested every trick in the book, trying to make a healthy muffin that doesn’t taste like cardboard, and these bran muffins win every single time. They are sturdy enough to handle a hearty breakfast but tender enough to rival any classic bakery treat.
- They are genuinely soft and stay moist for days, even when stored properly.
- They pack a serious fiber punch, making them perfect for starting your day the right way.
- Prep time is lightning fast—you’re looking at less than 30 minutes total from start to eating!
- They actually freeze beautifully, which is a lifesaver for busy mornings.
If you are looking for something along the lines of softer, sweeter versions, be sure to check out my moist pistachio muffins recipe too, but for pure, wholesome bran, stick here!
Achieving Superior Moisture in Your Bran Muffins
The secret lies in the wet ingredients, hands down. We use buttermilk, which reacts perfectly with the baking soda to give a lovely lift, but the real trick is that initial soaking time we do with the wheat bran. That, combined with the right amount of oil and the option of swapping in applesauce, locks in moisture so well you’ll forget you’re eating whole grains. They are truly glorious Moist Bran Muffins.
The High Fiber Muffins Advantage for Breakfast
When you’re grabbing something in a hurry, you want it to count. These are fantastic High Fiber Muffins. The four grams of fiber per muffin really help keep you satisfied until lunch, which is exactly what I want from my Healthy Breakfast Muffins. It means I can feel good about eating two of them!
Essential Ingredients for Perfect Bran Muffins
I always keep these basics stocked because you never know when you’ll need to whip up a batch of these! I promise you don’t need any fancy, exotic powders or anything weird here. It’s all simple, pantry-friendly stuff. The key is getting the amounts just right, especially that buttermilk—don’t skip it! You’ll notice the raisins are optional, but I usually throw them in because those little bursts of chewy sweetness cut through the earthiness of the bran so perfectly. Having these on hand means you can always whip up a batch of homemade bran muffins!
- 1 cup wheat bran
- 1 cup buttermilk
- 1/2 cup packed brown sugar
- 1 large egg
- 1/4 cup vegetable oil
- 1 teaspoon vanilla extract
- 1 1/2 cups all-purpose flour
- 1 teaspoon baking soda
- 1/2 teaspoon salt
- 1/2 cup raisins (optional)
Simple Muffin Baking: How to Prepare These Bran Muffins
This is honestly one of the easiest recipes I have. It’s just two bowls and almost no active time! The hands-on part is quick, which is why these make such great grab and go breakfast options. Everything comes together fast, but you have to respect the bran’s need for a little soak time—that’s non-negotiable for the best texture!
Prepping the Tin and Soaking the Bran
First things first: get that oven blazing! Preheat to 400 degrees F (200 degrees C). I always line my 12-cup tin with paper liners; it just makes clean-up zero effort. Now for the magic. In a medium bowl, mix your single cup of wheat bran right into the buttermilk. Set a timer for exactly ten minutes. You need that bran to fully hydrate and soften up before you do anything else. This step is what keeps things from getting crunchy later on!
Mixing the Batter for Tender Bran Muffins
Once those ten minutes are up, walk back over to your bran and buttermilk bowl. Stir in your egg, oil, and vanilla. Just mix until they’re incorporated. In a totally different bowl, whisk your flour, baking soda, and salt together—this keeps all the leavening agents distributed nicely. Now, add those dry ingredients to the wet ones. Here’s the major warning: only mix until you see the last streaks of flour disappear. Seriously, stop stirring! Overmixing is the enemy of the moist bran muffins dream. If you’re using raisins, gently fold them in right at the very end.
Baking Times and Cooling for Homemade Bran Muffins
Ladle that gorgeous batter into your prepared cups, filling them about two-thirds full. They bake fast because of that high heat! Pop them in for 15 to 18 minutes. You know they’re done when a toothpick stuck in the center comes out clean. Don’t even try to pull them out straight away, though! Let them sit in that hot pan for about five minutes. It helps them set up before you transfer everything to a wire rack to finish cooling. This gentle approach helps ensure you get perfect homemade bran muffins every time. If you want more quick ideas for meals, check out my main breakfast category!
Ingredient Notes and Substitutions for Bran Muffins
What I love most about a simple recipe like this is how flexible it is! You probably noticed I listed raisins as optional. If you’re not a fan of raisins, no problem! Other fruits work wonderfully here. I often swap them out for half a cup of finely diced apple or even some overripe banana if I have some hanging around needing to be used up. These little additions help keep things moist and add a little extra sweetness naturally.
Now, let’s talk fiber sources since that’s why we are making these, right? If you happen to only have oat bran on hand instead of wheat bran, you *can* absolutely make the switch. If you use oat bran, you’ll just need to let that initial mixture with the buttermilk soak for about 15 minutes instead of 10. Oat bran is a little thirstier, so giving it that extra five minutes ensures it hydrates completely, giving you great muffins. I found a lovely banana oatmeal muffins recipe if you want to venture into that territory later, but this substitution works right here!
Since we are aiming for naturally sweetened muffins without relying on tons of refined sugar (the brown sugar is doing most of the heavy lifting here), you might want a moisture boost without adding more fat. My biggest pro tip for an E-E-A-T boost? Substitute half a cup of that buttermilk with applesauce or mashed banana. It keeps the flavor clean but adds incredible softness. It’s my little secret weapon for making sure these stay tender and never heavy!
Make-Ahead and Storage for Freezer Friendly Muffins
This is where these bran muffins really shine during a busy week. Honestly, baking a double batch is the best idea because they are practically designed to be eaten on the go after they’ve been frozen. I use them all the time for quick snacks or emergencies when I realize I have nothing healthy for breakfast!
The most important step here is patience. You must let the muffins cool completely, and I mean *completely*, before you even think about bagging them up. If you seal them while they are still warm, you are just guaranteeing gross condensation, and that will make them soggy overnight. Transfer them to a wire rack and let them sit until they are totally room temperature—usually about an hour after they come out of the oven.
Once they are cool, stash your freezer friendly muffins into a heavy-duty, freezer-safe zip-top bag. I try to push out as much air as possible before sealing it tight. If you’re smart about it, these last beautifully for up to three months in the deep freeze. I even label the bag with the date because otherwise, I forget what’s hiding in there!
When you need one, just grab it the night before and let it thaw on the counter. If you’re desperate and need one warmed up *right now*, they microwave like a dream. Five to ten seconds is usually all it takes to bring back that soft texture. If you’re prepping a lot of meals for the freezer, you might want to check out my tips for freezing breakfast burritos too, because consistency is everything when you’re meal prepping!
Tips for Success with Your Bran Muffins Recipe
Even though this recipe is so straightforward, I’ve picked up a few little tricks over the years that make the difference between a *good* bran muffin and an absolutely stunning one. Think of these as my little secrets for keeping things reliable!
First, while the recipe calls for buttermilk, make sure that buttermilk is close to room temperature before you add it to your wet ingredients. I know, I know—sometimes we just want to grab it straight from the fridge, but cold dairy drastically cools down your egg and oil mixture. When the temperatures clash, it can sometimes prevent that perfect emulsification we need for a light crumb. So take it out of the fridge when you start prepping your dry ingredients.
Second, when you’re testing for doneness, don’t just rely on the toothpick in the dead center. Because these muffins are so dense and moist, sometimes the very center can still look a bit wet even when they are perfectly baked. I always check two spots: one near the center and one slightly closer to the edge of the muffin cup. If both come out with just barely visible moist crumbs clinging to them, they are *done*. If the toothpick is completely dry, yank them out—they might be on the edge of overbaking!
Finally, if you find yourself short on time and you can’t soak the wheat bran for the full ten minutes, here’s the backup hack: warm the buttermilk slightly on the stove or in the microwave until it’s just warm to the touch—not hot, just warm! This drastically speeds up the softening process for the bran. It rarely gives me the exact same result as letting it sit, but in a pinch for quick homemade bran muffins, it works like a charm!
Serving Suggestions for These Healthy Breakfast Muffins
Okay, so now you’ve got these beautifully moist, hearty muffins cooling on the rack—what are you going to do with them? Part of the joy of having such a reliable recipe for healthy breakfast muffins is knowing you have portable fuel ready to go! They truly shine when paired with something simple, but they taste great all by themselves, too.
Of course, the classic way to eat any good muffin is warm, sliced in half, and slathered with a little softened butter. Since our recipe has that sturdy crumb, it holds up perfectly to a generous spread without falling apart. That rich butter melts right into the nooks and crannies!
If you prefer something tangy, I highly recommend a nice schmear of cream cheese. The slight tang is just divine against the slightly sweet, earthy flavor of the bran. I often use a whipped cream cheese because it spreads easier on a still-slightly-warm muffin, which is a major bonus when you’re trying to get out the door quickly.
But let’s be honest, most days, these muffins are my main breakfast feature alongside a big mug of coffee. If you’re looking for a fantastic liquid pairing that makes this a truly complete, fast breakfast, you absolutely have to try pairing one of these muffins with a smoothie! I have this amazing coffee smoothie recipe that gives me the caffeine boost I need and a little extra protein to power through the morning rush. It’s the ultimate grab and go breakfast combination, and you’ll feel amazing eating it!
Frequently Asked Questions About Bran Muffins
I get so many questions about this recipe once people start baking it, which just proves how much everyone loves a good, hearty muffin! Most of the confusion comes around making sure that texture stays perfect or figuring out swaps for ingredients. Here are the things people ask me the most when they are trying to achieve that Classic Bakery Muffins feel at home.
Can I make these bran muffins without buttermilk?
Oh, totally! Buttermilk is great because of how it interacts with the baking soda, but if you don’t keep it stocked (I get it, it’s not a daily staple for everyone), you can easily make your own substitute. This is essential when you’re focusing on wheat bran recipes but are missing one dairy item. Just measure out one cup of regular milk—whole milk is best, but 2% works fine—and stir in one tablespoon of white vinegar or fresh lemon juice. Let that sit on the counter for about five minutes until it starts to look just slightly curdled. That’s your homemade buttermilk substitute, ready to go!
Are these muffins considered ‘Naturally Sweetened Muffins’?
That’s a great question, and it depends on how strict you are! We aren’t using zero sugar, but we are using packed brown sugar instead of refined white sugar, which brings a touch of molasses flavor and depth. Because they are so high in fiber (that lovely 4 grams per serving!), they feel much less heavy and sweet than a standard cake-style muffin. So, I consider them a much healthier choice and certainly leaned toward the naturally sweetened muffins side of the spectrum compared to something made entirely with white flour and white sugar. The fiber helps your body process the sugar much more slowly!
What is the best way to store the remaining bran muffins at room temperature?
If you’re planning to eat them within three to four days, you can absolutely keep them out on the counter. But you have to treat them right! Don’t just leave them in the paper bag they came in, as that traps moisture and makes them gummy. Place them in a large, airtight container. If you have a ton of paper liners left, you can even put a small square of paper towel in the bottom of the container first, then layer your muffins in a single layer if possible, or just place them in loosely packed. They stay fresh and wonderfully moist this way for about 3-4 days, tops, before I start recommending the freezer for longer storage!
Nutritional Estimates for These Bran Muffins
I always like to put this information out there because knowing what you’re putting into your body is important, especially when you’re making a conscious choice for a high-fiber, healthier breakfast. These numbers are estimates based on the basic ingredients, not including any extra fruit. If you add a lot of raisins or swap in a sweeter applesauce, the sugar and calories will shift a little. As always, this estimate is a general guide, so if you need exact counts for dietary reasons, you should check out my official disclaimer page regarding nutrition tracking.
- Serving Size: 1 muffin
- Calories: 195
- Sugar: 11g
- Fat: 7g
- Carbohydrates: 31g
- Fiber: 4g
- Protein: 5g
Moist High-Fiber Bran Muffins

A simple recipe for classic bran muffins that stay moist and are excellent for make-ahead breakfasts or snacks.
- Prep Time: 10 min
- Cook Time: 18 min
- Total Time: 28 min
- Yield: 12 muffins
- Category: Breakfast
- Method: Baking
- Cuisine: American
- Diet: Vegetarian
Ingredients
- 1 cup wheat bran
- 1 cup buttermilk
- 1/2 cup packed brown sugar
- 1 large egg
- 1/4 cup vegetable oil
- 1 teaspoon vanilla extract
- 1 1/2 cups all-purpose flour
- 1 teaspoon baking soda
- 1/2 teaspoon salt
- 1/2 cup raisins (optional)
Instructions
- Preheat your oven to 400 degrees F (200 degrees C). Line a 12-cup muffin tin with paper liners or grease well.
- In a medium bowl, combine the wheat bran and buttermilk. Let this mixture sit for 10 minutes to allow the bran to soften.
- Add the brown sugar, egg, oil, and vanilla extract to the bran mixture. Stir until just combined.
- In a separate bowl, whisk together the flour, baking soda, and salt.
- Add the dry ingredients to the wet ingredients. Mix only until the flour streaks disappear. Do not overmix. Fold in the raisins if you are using them.
- Divide the batter evenly among the prepared muffin cups, filling each about two-thirds full.
- Bake for 15 to 18 minutes, or until a toothpick inserted into the center comes out clean.
- Cool in the pan for 5 minutes before transferring them to a wire rack to cool completely.
Notes
- For extra moisture, you can substitute 1/2 cup of the buttermilk with applesauce or mashed banana.
- These muffins freeze well. Cool them completely, place them in a freezer-safe bag, and freeze for up to three months. Thaw overnight on the counter or reheat briefly in the microwave.
- If you prefer oat bran, substitute the wheat bran with oat bran, but you may need to increase the soaking time to 15 minutes.
Nutrition
- Serving Size: 1 muffin
- Calories: 195
- Sugar: 11
- Sodium: 190
- Fat: 7
- Saturated Fat: 1
- Unsaturated Fat: 6
- Trans Fat: 0
- Carbohydrates: 31
- Fiber: 4
- Protein: 5
- Cholesterol: 25