

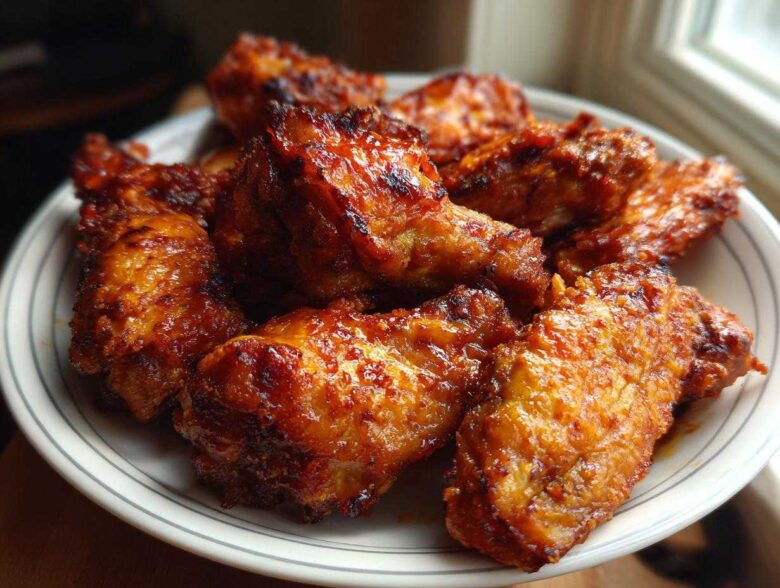
Okay, stop what you’re doing right now. If you’ve ever sighed over soggy oven wings or spent a fortune on deep-fried takeout because you just couldn’t get that crunchy coating at home, this recipe is about to change your life. Seriously. I spent years trying every trick in the book—more heat, less heat, flipping constantly—before I cracked the code for truly Extra Crispy Baked Chicken Wings. The secret isn’t a special fryer; it’s one tiny pantry staple doing all the heavy lifting. Trust me, once you coat these babies in baking powder, you’ll never go back. I managed to nail that perfect, crackly skin that screams Game Day without ever turning on the deep fryer. You’re going to love how these chicken wings bake up!
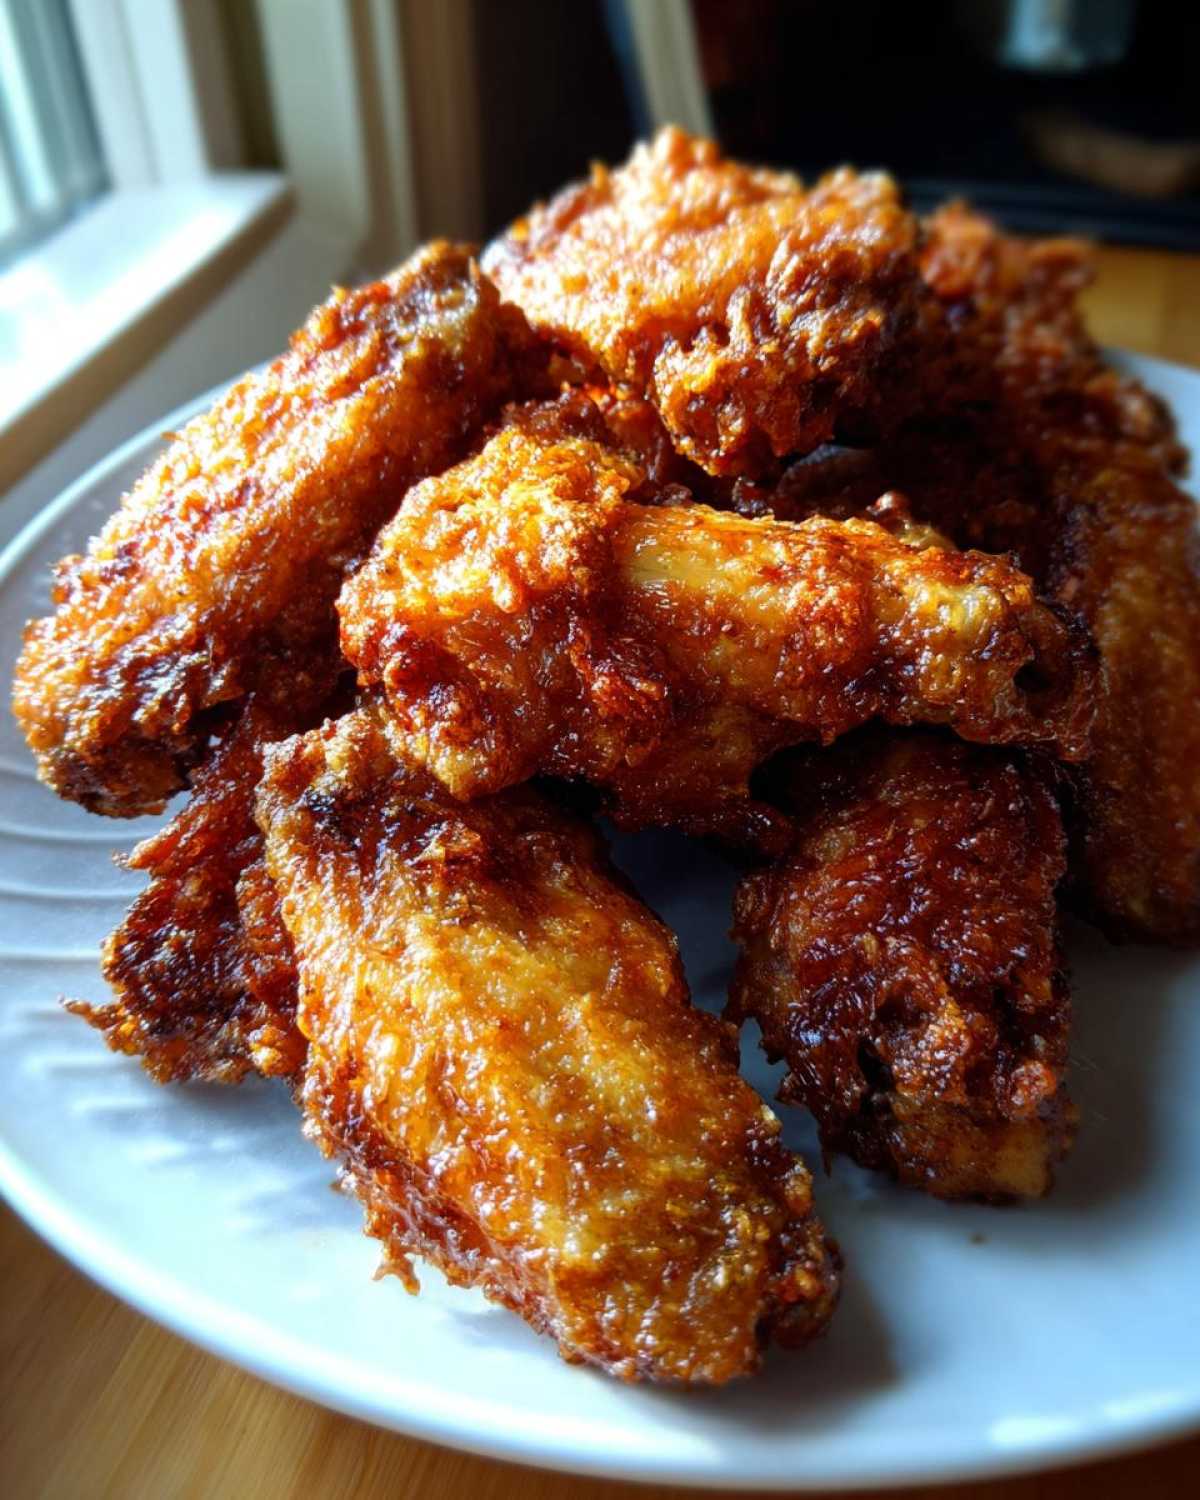
We’re focusing on getting you Juicy Inside Crispy Outside Wings using simple oven power. I’ll walk you through the exact process so you can pull out wings that look and taste like they came from your favorite sports bar appetizer menu. It’s seriously foolproof, and you can use this dry-rub base for almost any sauce you love later on.
Because this technique works so well, I actually have an entire separate post dedicated to making them in the new-fangled air fryer, too, if you want to check out that method as well: Crispy Air Fryer Chicken Wings Recipe. But first, let’s master the oven!
Why These Oven Baked Wings Are the Best Crispy Chicken Wings
I know what you’re thinking. Baked wings? Isn’t that just a sad, slightly warmer version of boiled chicken? Absolutely not! That’s the old way of thinking, and frankly, I used to believe it too, until I discovered the magic of baking powder. This simple trick is the key to getting magnificent No Fry Chicken Wings. The baking powder actually dries out the skin slightly as it bakes, creating these incredible little bubbles that turn into your crispy armor.
When you combine that coating with proper air circulation—we’ll cover the wire rack trick in a minute!—you get wings that are unbelievably crunchy on the outside while staying super juicy inside. It’s the ultimate goal for any batch of Game Day Chicken Wings. Forget dealing with gallons of hot oil. This is my go-to, reliable method for achieving that coveted crackly skin every single time. I have a whole breakdown on the science behind this technique if you want to dive deep into the best way to handle chicken skin: Best Chicken Wing Technique.
Achieving Perfect Texture with Our Easy Wing Recipes
The result is just stunning—golden brown, slightly blistered skin that snaps when you bite into it. Honestly, you’ll be shocked they came out of your standard home oven! This really is one of the best Easy Wing Recipes because the prep is so quick, and the payoff in texture is huge. The skin gets beautifully crackly, leaving you with tender meat underneath.
Ingredients for Extra Crispy Baked Chicken Wings
Getting this right starts with perfect measuring. Don’t stress, though; the ingredient list is super short! We aren’t making a complicated marinade here; we are building the perfect dry coat first. This list is exactly what I use for my standard two-pound batch, which feeds about four hungry people, or eight if they are just snacking during the game!
Here is what you need lined up on the counter:
- 2 lbs chicken wings, separated into flats and drumettes
- 1 tablespoon baking powder (it absolutely must be baking powder, not baking soda—don’t mix those up!)
- 1 teaspoon salt
- 1/2 teaspoon black pepper
- 1/2 teaspoon garlic powder
See? So easy! The key here is making sure your baking powder is fresh and that you pat those wings stone-cold dry. That’s probably the most important pre-step, and we’ll talk all about it when we get to the instructions, but having these items ready makes the actual mixing a breeze. Having everything measured out gives you the confidence boost you need when you know you’re set up for success!
The Best Chicken Wing Technique: Step-by-Step Instructions
Okay, we’ve got our ingredients measured. Now, let’s get into the technique that separates good oven wings from truly legendary ones. This is where the magic happens, and it all boils down to water management. If you skip a step here, you won’t get that satisfying crunch you’re looking for on your chicken wings!
First things first: Crank that oven up! We need serious heat to start blasting that moisture away. Preheat your oven to 425°F (220°C). While it’s heating, get your baking sheet ready. I always line mine with aluminum foil because cleanup is nobody’s favorite activity. The real secret to the setup, though, is placing a wire rack on top of that foil. This is crucial! It lets the hot air circulate completely around every single piece of chicken, ensuring the bottom doesn’t steam in its own drippings. This rack setup is the key to that all-over golden color.
Prepping Your Chicken Wings for Maximum Crispiness
Before anything touches the seasoning mix, the wings have to be bone-dry. I mean it—use paper towels and pat, pat, pat them until they feel almost suede-like to the touch. If you have time, pull them out of the package and leave them uncovered in the fridge for an hour; that cold air dries the skin beautifully. But if you’re in a rush, just use as many paper towels as necessary!
Once they are dry little beauties, grab your bowl with the mix: baking powder, salt, pepper, and garlic powder. Toss those wings in! You want every surface drenched in that powder mixture. Shake off the excess once everything is lightly and evenly coated. Don’t be shy here; this dry coating is your ticket to crispy skin glory. You’re building the foundation for a perfect Party Appetizer Wings platter!
Baking the Chicken Wings to Golden Perfection
Now it’s time to arrange them on that prepared wire rack in a single layer. And I mean single layer! If they are touching, they will steam and stick together. Give them breathing room so that hot air can get in there and work its drying magic. Once they are spaced out, slide them into that 425°F oven.
The timing is split, so pay attention! Bake them for exactly 20 minutes. You’ll start to smell that savory, roasting aroma—it’s heavenly! After 20 minutes, carefully take the tray out. Use tongs to flip every single wing over so the other side gets its turn to crisp up. Pop them back in for another 20 to 25 minutes. You are looking for a deep golden brown color and skin that looks tight and slightly blistered. If you gently tap one with tongs, it should sound firm, not damp.
Remember, if you plan on saucing them right away, take them out just as they hit that perfect color. If you want them super crackly and plain, give them an extra five minutes! If you’re looking for more inspiration on using your oven for amazing results, check out how I get my potatoes unbelievably crunchy without frying: Air Fryer Baked Potato Recipe. It uses similar heat principles!
Saucing Your Party Appetizer Wings
Alright, the wings are out of the oven, they are golden, they are crackling, and they are ready for their big moment! Remember, this dry-rub method is amazing because it gives you a perfect, slightly tacky base—it’s like a blank canvas for whatever flavor you’re craving. These are the ultimate Crowd Pleaser Appetizers, whether you serve them naked or sauced up.
The critical timing here is right after they come out of the oven. While they are still piping hot is the absolute best time to toss them into your sauce. That heat helps the sauce adhere beautifully and really locks in the flavor, meaning your Game Day Chicken Wings look professionally finished.
Quick Buffalo Wing Sauce Tip
You cannot go wrong with classic Buffalo flavor, right? Making a quick, authentic Buffalo Wing Sauce is dangerously easy. You just need good quality hot sauce—Frank’s RedHot is my go-to—and some melted unsalted butter. The ratio I usually start with is two parts hot sauce to one part melted butter. Whisk them together until they are emulsified and creamy. Toss your hot, crispy wings in that mixture immediately until they are beautifully coated in that signature tangy orange glaze. Don’t forget a side of ranch or blue cheese for dipping!
Making Honey Garlic Wings
If you like sweet and savory, Honey Garlic Wings are where it’s at. They look so glossy and delicious when finished! For a super quick glaze, you can mix soy sauce, honey, a splash of brown sugar, and some minced garlic in a small saucepan and let it simmer just until the sugar dissolves and it thickens slightly—maybe three minutes tops. If you want to get really fancy and skip the saucepan entirely, you can whip up a similar glaze using my full recipe for Honey Garlic Chicken and just toss the wings in that thickened glaze right at the end. It’s sticky, sweet, and totally addictive!
If you want to explore other sticky profiles—maybe something Asian-inspired—I have a fantastic homemade teriyaki recipe that works wonders on these baked wings too, check out the details here: Homemade Teriyaki Sauce Recipe. The point is, because the skin is so crispy, it can handle wet sauces without immediately turning into mush!
Tips for Success with Oven Baked Chicken Wings
Now that you know the main steps, I want to share a few extra things I’ve learned over the years. These little adjustments make the difference between a good tray of wings and a tray worth bragging about—you know, the kind of tips a real cook shares over the fence!
First up: the baking powder quality. I mentioned it when we listed ingredients, but I want to hammer this home: try to find aluminum-free baking powder if you can. Most brands work fine, but sometimes the aluminum-based ones can leave a slightly metallic aftertaste if you use too much. Since we are coating these things completely, avoiding that potential off-flavor is worth the effort. It’s a tiny detail, but it matters for pure flavor!
If you are worried about soggy skin, you need to use your oven light! I know we flipped them halfway through, but sometimes the lower half just needs a little extra attention, especially around the 35-minute mark. If the top looks done but you’re worried about the bottom, carefully lift one or two wings with tongs and just take a peek underneath. If they still look pale or damp, bump the heat up to 450°F for the last five minutes only. That little blast of extra high heat firms up any lingering soft spots.
Here’s a fun one for next time: If you are making a dry rub like Lemon Pepper Wings instead of saucing them, you can actually skip the sauce step entirely and let them bake for a full hour, flipping every 20 minutes instead of 25. This dries the skin out even more, making it shatteringly crisp, almost like a potato chip coating. It’s a different texture, but amazing if you don’t want any mess!
Finally, never crowd the pan! I said it before, but it bears repeating. If you try to squeeze in an extra half-pound of wings onto that wire rack, you’re just asking for steamed, sad results. If you have a big crowd, use two baking sheets. Air circulation is the secret sauce for these Oven Baked Wings, so treat your oven rack like precious real estate!
Variations: Air Fryer Chicken Wings and Other Flavors
I know that while the oven method is phenomenal, sometimes you just want the speed and convenience of an air fryer, especially if you’re making a smaller batch for a quick weeknight dinner. The beauty of our baking powder technique is that it transitions perfectly to the air fryer! You still use the exact same dry coating mixture—the salt, pepper, garlic powder, and, yes, the baking powder—to prep those wings.
The main difference when switching to your basket is the cook time and temperature. You’ll want to preheat your air fryer to about 380°F (195°C). You can’t cook them all at once, though; air fryers need that space around the food to work their magic, just like the oven rack! Cook them in batches for about 18 to 20 minutes, shaking the basket vigorously halfway through. They cook a little faster because the heat is so direct, but you still get that fantastic crunchy skin! You can find a full step-by-step guide on adapting this for even crispier results over here: Air Fryer Baked Potato (yes, it’s a potato recipe, but the technique for crispy skin is identical, and I explain the fan dynamics!).
If you’re not into saucing up your batch, you can easily pivot to a totally dry rub favorite: Lemon Pepper Wings! Instead of just salt, pepper, and garlic powder in your coating mix, swap out the garlic powder for half a teaspoon of lemon pepper seasoning, and then, once they come out of the oven or air fryer, dust them liberally with even more dry lemon pepper seasoning while they are still hot. They develop a wonderfully tart and savory crust that vanishes quickly when everyone digs in!
Storing and Reheating Your Homemade Chicken Wings
We’ve all been there—you make a huge batch of chicken wings for the party, and suddenly everyone’s too full, or maybe you just had too much fun watching the game! Fear not, because these wings actually store better than most because that baking powder crust helps keep them from getting instantly soggy overnight.
The golden rule for storage is to let them cool down completely before you try to seal them up. If you put hot wings into an airtight container, the steam gets trapped, and you’re basically guaranteeing a soft, sad texture when you open it later. Once they reach room temperature, transfer them to an airtight container and pop them in the fridge. They stay perfectly fine for about three to four days, though honestly, they are best within the first 48 hours.
Now, the reheating part is where most people ruin their hard work, so listen to me closely: Do NOT, I repeat, do NOT try to reheat these in the microwave! That’s the fastest way to undo all that glorious crisping we did earlier. The microwave just steams them back to life, and you end up with squishy skin or, worse, rubbery meat.
If you want that Extra Crispy Baked Chicken Wings texture back, you have two fantastic options that bring that crunch right back:
First, the oven is reliable. Preheat your oven to about 375°F (190°C). Place the wings directly on a foil-lined baking sheet (no rack needed this time, just to keep things simple). Heat them for about 8 to 10 minutes. This gentle heat warms them through and dries out that skin again beautifully. They’ll be hot and almost as good as fresh!
Second, and this is my preference if I’m reheating a small batch for myself? The air fryer! Set the air fryer to 370°F (188°C) and cook them for just 5 minutes. Seriously, five minutes! They come out piping hot, perfectly seasoned, and with that glorious snapped skin we worked so hard to achieve. It’s the fastest, crunchiest way to enjoy leftovers!
Frequently Asked Questions About Crispy Chicken Wings
I know you might still have a few lingering questions about mastering the baking powder trick for these Oven Baked Wings. It’s totally normal! When you’re trying to nail that perfect texture, you want zero guesswork. Here are the top things I always get asked when people try this technique for the first time.
Does the baking powder actually change the taste of my chicken wings?
This is the #1 concern, and I promise you, the answer is no, not if you use the right amount! When we talk about what makes these the Best Crispy Chicken Wings, we are talking about using about one tablespoon for two pounds of wings. That’s just enough to lightly coat the skin and help it dry out during baking. Once they are baked at that high heat (425°F!), any slight taste from the powder is completely neutralized. If you overdo it—like if you use way too much and it looks like a thick snowdrift—then yes, you might get a tiny metallic taste, but that just means you need to shake off the excess before baking!
Can I use frozen chicken wings for this recipe?
Oh, honey, please don’t even try it! This is maybe the most crucial point for achieving that Juicy Inside Crispy Outside Wings texture. Frozen means moisture, and moisture is the absolute enemy of crispiness. If you try to coat frozen wings, the baking powder will turn into a sticky paste, and you’ll end up with rubbery, wet skin. You must start with wings that are either fresh or, if you bought them frozen, thaw them completely and pat them bone-dry for at least an hour before you even think about mixing them with the seasoning. It’s worth the extra planning time, trust me!
What is the best internal temperature for safely cooked wings?
Safety first, always! Since these are Homemade Chicken Wings, we want to make sure they are cooked through and safe, especially if you are serving them to a crowd. The USDA recommends poultry reach 165°F (74°C) internally. I usually pull mine out when my meat thermometer hits about 170°F because the residual heat carries them just a bit higher while they rest, and it guarantees that they are cooked perfectly through the bone. If they are 165°F but still look a little pale, just give them another 5 minutes!
I don’t have a wire rack. Can I just put these directly on the foil?
You *can*, but then they won’t be the “best” version, right? Putting them directly on the foil means the bottom half sits right in the rendering fat and juices. It basically steams the bottom of the wing instead of baking it. If you absolutely cannot find a rack—maybe check your toaster oven or check out my About Us page for general kitchen advice on substitutes!—then you have to flip them much more often, maybe every 10 minutes, to try and prevent sogginess. But for the truly perfect crust on all sides, that wire rack is non-negotiable for these Easy Wing Recipes!
Nutritional Estimates for These Chicken Wings
Okay, so we all know that when we are making crowd-pleasing appetizers like these incredible, crispy beauties, we aren’t exactly counting celery sticks! But I always get questions about what goes into the final tally, especially since these are baked and not fried—a definite win in my book. So, I pulled up the estimates for the base recipe before you toss them in your fantastic homemade Buffalo Wing Sauce.
Here is a breakdown based on the four servings we aimed for in the recipe. Remember, this estimate is just for the seasoned, baked wing itself; the final sodium and fat content will change dramatically depending on whether you use my rich Honey Garlic Wings glaze or a creamy ranch coating!
Our estimates are per serving (about 4 wings):
- Calories: 250
- Sugar: 0g
- Sodium: 350mg
- Fat: 16g
- Saturated Fat: 5g
- Unsaturated Fat: 11g
- Trans Fat: 0g
- Carbohydrates: 1g
- Fiber: 0g
- Protein: 24g
- Cholesterol: 80mg
Now, please take this chart with a grain of salt, just like you would for any recipe you find online! These numbers are just estimates calculated using standard ingredients for the base seasoning mix. If you tweak the salt because you prefer a sauceless approach, or if you manage to find leaner wings, these numbers are going to shift. It’s a great guideline to show you that these Savory Chicken Bites are surprisingly low in sugar since we rely on the baking powder texture rather than heavy sugary marinades for crispiness!
PrintExtra Crispy Baked Chicken Wings with Baking Powder
Make extra crispy chicken wings in the oven without deep frying. This recipe uses baking powder for a dry skin texture perfect for game day.
- Prep Time: 10 min
- Cook Time: 45 min
- Total Time: 55 min
- Yield: 4 servings
- Category: Appetizer
- Method: Baking
- Cuisine: American
- Diet: Low Lactose
Ingredients
- 2 lbs chicken wings, separated into flats and drumettes
- 1 tablespoon baking powder (not baking soda)
- 1 teaspoon salt
- 1/2 teaspoon black pepper
- 1/2 teaspoon garlic powder
Instructions
- Preheat your oven to 425°F (220°C). Line a baking sheet with aluminum foil and place a wire rack on top of the foil.
- Pat the chicken wings completely dry using paper towels. This step is crucial for crispiness.
- In a large bowl, combine the baking powder, salt, pepper, and garlic powder.
- Add the dried chicken wings to the bowl and toss them thoroughly until every piece is lightly and evenly coated with the baking powder mixture.
- Arrange the coated wings in a single layer on the wire rack, ensuring there is space between each piece for air circulation.
- Bake for 20 minutes.
- Flip the wings over.
- Bake for another 20 to 25 minutes, or until the wings are golden brown and very crispy.
- Remove from the oven and immediately toss with your favorite sauce, such as Buffalo or Honey Garlic, if desired. Serve hot.
Notes
- Use aluminum-free baking powder for the best results.
- For the crispiest skin, do not skip drying the wings thoroughly before coating.
- If you prefer a sauceless wing, increase the salt and pepper slightly before baking.
Nutrition
- Serving Size: 4 wings
- Calories: 250
- Sugar: 0
- Sodium: 350
- Fat: 16
- Saturated Fat: 5
- Unsaturated Fat: 11
- Trans Fat: 0
- Carbohydrates: 1
- Fiber: 0
- Protein: 24
- Cholesterol: 80