

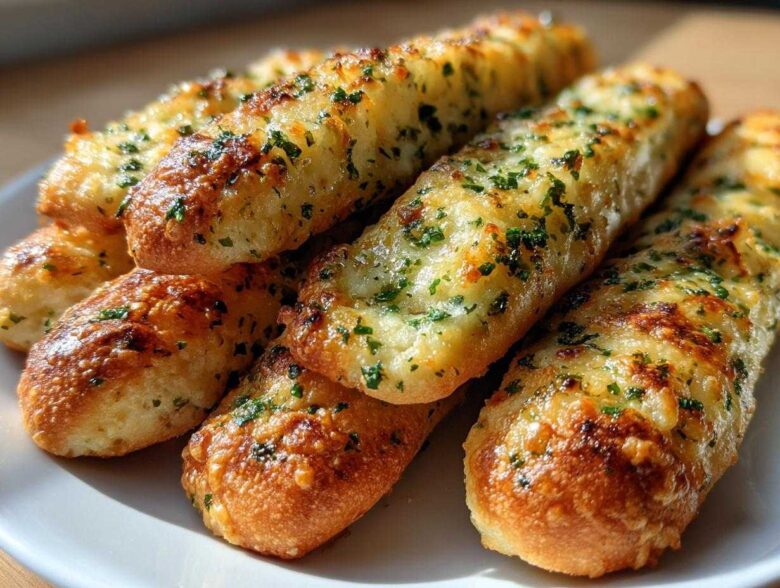
Okay, let’s be honest. Sometimes you’re just making dinner, maybe a pasta bake or a big soup, and you realize what’s missing: that warm, buttery thing you usually have to drive out for. I’m talking about those unbelievably soft, pillowy, slightly chewy breadsticks—the kind you can’t stop eating before the main course even hits the table. For years, I tried every recipe claiming to be the best, but they always ended up too crusty or too dense. I finally cracked the code after testing dough hydration levels and butter ratios until my kitchen smelled like pure heaven. Trust me, these Soft and Chewy Olive Garden Copycat Breadsticks are the real deal. They use a simple Homemade Dough Recipe, but it’s the Garlic Parmesan Breadsticks topping that truly makes them unforgettable.
Why You Will Love These Soft Breadsticks (Olive Garden Breadsticks Copycat)
Seriously, you have to stop dreaming about those restaurant magic wands of dough and start making them yourself! I know why everyone searches for this particular recipe because I was right there with you. These aren’t just any homemade breadsticks; they are engineered for maximum softness and chew.
Here are the reasons why this version is going straight into your ‘Favorites’ folder:
- They absolutely nail the texture! We’re talking pillowy soft on the inside and perfectly chewy, never crunchy, like the best dinner side dish bread you can imagine.
- The flavor payoff is huge. That rich, savory Garlic Parmesan Breadsticks topping melts right in, and you can even use my super easy guide for the best garlic butter if you want to make extra.
- It’s based on our reliable Homemade Dough Recipe, which takes the guesswork out of yeast doughs.
- It’s the definitive Olive Garden Breadsticks Copycat. No more takeout required!
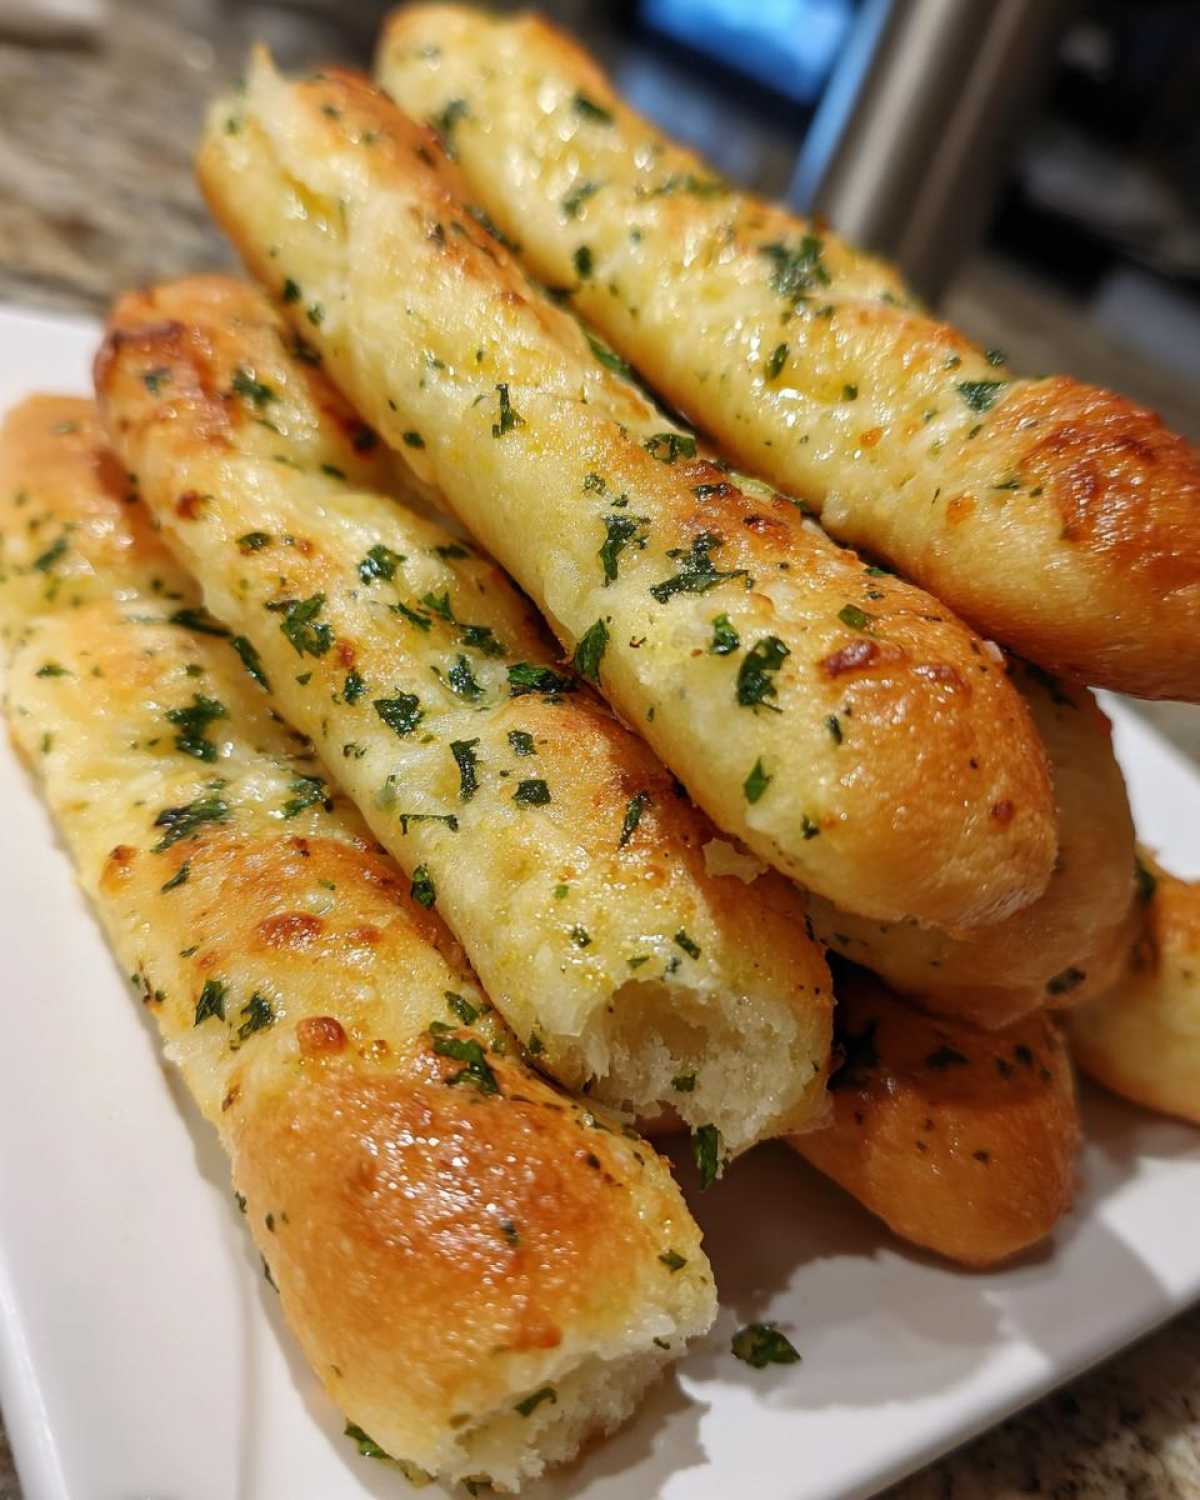
Essential Ingredients for Perfect Homemade Breadsticks Recipe
You can’t cheat greatness, especially when making restaurant-style breadsticks at home. The difference between an okay breadstick and one that makes people ask for seconds always comes down to the quality of your ingredients. I’ve listed everything out here, split into the dough structure and that unbelievable coating. Pay special attention to the water temperature—that tiny detail is what convinces the yeast to wake up and work its magic!
Don’t even think about skipping the fresh stuff on the topping; jarred garlic just won’t give you that big, bold flavor we are aiming for here.
For the Breadsticks Dough
This is the foundation for that soft, chewy breadsticks texture we crave. Make sure your water is perfectly warm for your yeast activation—aim for that sweet spot between 105–115 degrees F. Too cold, and the yeast sleeps; too hot, and you kill it! Oops.
- 1 cup warm water (105-115 degrees F)
- 2 1/4 teaspoons active dry yeast
- 1 teaspoon sugar
- 2 1/2 cups all-purpose flour, plus more for dusting
- 1 teaspoon salt
- 2 tablespoons olive oil, plus more for greasing
For the Garlic Parmesan Breadsticks Topping
This is where the flavor explodes! I insist you use real, good quality Parmesan cheese—the stuff you grate yourself off the block. It melts far better than the powdery tubs and adds a necessary savory bite that elevates these from simple appetizer bread sticks to something truly special.
- 1/2 cup (1 stick) unsalted butter, melted
- 4 cloves garlic, minced
- 1/2 cup grated Parmesan cheese
- 2 tablespoons fresh parsley, chopped
Step-by-Step Instructions for Chewy Breadsticks
Okay, getting homemade breadsticks right is all about timing and patience, especially during the rising stage. It might feel like a long process, but honestly, most of that time is just waiting for the dough to do the heavy lifting! We want fluffy, soft breadsticks, and that starts right here with activating the yeast properly.
First things first, get your yeast working! Grab a big bowl and mix up the warm water, the yeast, and that tiny bit of sugar. Let it sit there for about five to ten minutes. If it gets foamy on top, you’re good to go! If it doesn’t foam, well, your water might have been too cold or too hot, and you’ll have to try that step again—don’t add the flour yet!
Next, pour in the flour, salt, and the two tablespoons of olive oil. Mix everything until it looks a little wild and shaggy, like a messy nest. Now, dump that shaggy mess onto a surface dusted lightly with flour. This is where the hard work starts! You need to knead this dough for a solid five to seven minutes. You’re looking for smooth and elastic—it should feel resilient under your hands when you push it. That kneading is the absolute secret to those chewy breadsticks!
Once it’s beautifully smooth, grease up a clean bowl with a bit more oil and put your dough baby inside. Cover it tight and let it rest in a warm spot for at least an hour, maybe a little more, until it has doubled in size. Seriously, don’t rush the rise!
When it’s doubled, punch it down gently. Divide that beautiful dough into 12 even pieces. Now, roll each piece out into a long rope, about ten to twelve inches long—think the length of your forearm. Lay them on a baking sheet lined with parchment paper. Cover them up again for a quick 20-minute nap while you crank that oven up to 400 degrees F. They only need 10 to 12 minutes to bake—look for them to be just barely golden brown!
While they bake, whip up the topping! Melt that stick of butter and just gently warm up the minced garlic, Parmesan, and parsley in a small pot for about a minute until you can really smell that garlic goodness. IMPORTANT: Don’t let that butter brown, we just want fragrant warmth!
The final, glorious step: As soon as those breadsticks hit the counter, brush them heavily with that garlic butter. They soak it right up, and that’s what locks in the moisture. Serve them right away. If you want to dive deeper into making doughs that cooperate, check out my tips on stovetop bread techniques too!
Expert Tips for Restaurant Style Breadsticks Success
Now that you’ve got the recipe down, let’s talk about taking these from ‘good homemade breadsticks’ to truly restaurant style perfection. Bakers think about things like environmental humidity and exact oven calibration, and that’s what separates a decent batch from an amazing one. My biggest piece of advice for achieving that signature soft interior the second they come out of the oven is treating the butter like gold.
You must brush that garlic butter on the second they leave the heat! The residual heat acts like a steamer, pushing the buttery coating deep into the surface of the hot dough. If you wait even three minutes, they’ll start firming up, and you lose that incredible absorption. I always keep my butter ready to go right next to the oven mitts.
If you’re looking for more insight into managing dough structure—which is key for these soft babies—you should really look into how I handle my foolproof pizza dough. The principles for strength and stretchiness are almost identical!
Troubleshooting Common Breadsticks Issues
If you followed the recipe perfectly and things still went a little sideways, don’t panic! It happens to everyone. Here are the two main things that crop up when making these easy breadsticks.
If your dough barely rose or your breadsticks came out dense, you likely rushed the kneading or the first rise. Yeast needs time and warmth to build those necessary air bubbles. Next time, tuck the bowl into a slightly warm spot, maybe next to a preheating oven, to encourage growth.
If your breadsticks came out dry, chances are you baked them too long. Remember, 10 to 12 minutes is the goal at 400 degrees F. If you’re unsure, pull one early! You can always pop it back in for two minutes, but you can’t put moisture back once it’s gone. Aim for that very light golden color—they continue cooking slightly as you brush them with the final topping.
Variations: Making Cheesy Breadsticks or Italian Breadsticks
This basic recipe for soft breadsticks is so sturdy, it’s practically begging you to customize it! Since everyone seems addicted to Cheesy Breadsticks—and honestly, who can blame them?—I wanted to give you a couple of quick ways to jazz up that buttery coating. This is the fun part where you make the recipe uniquely yours!
If you need that extra layer of gooey goodness, you’re going to use the residual heat right after you pull the sticks out of the oven. For great Cheesy Breadsticks, simply sprinkle an extra tablespoon of Parmesan cheese right on top of the fresh garlic butter brushing. If you want to lean into full Mozzarella Breadsticks territory, wait about 30 seconds after brushing, blanket them lightly with low-moisture mozzarella, and pop them under the broiler for just 60 seconds—watch them like a hawk so they don’t burn!
For a more classic Italian feel, skip the extra cheese and stir in a teaspoon of dried oregano and basil into your melted butter topping instead. It gives the breadsticks a completely different aromatic profile. If you love the cheesy flavor profile, you absolutely must check out my recipe for Cheesy Garlic Knots—they use a similar concept!
Make Ahead Breadsticks and Storage Instructions
I get it. Sometimes you don’t have an hour and a half to let dough proof, or maybe you’re planning a big dinner party and need to prep everything in advance. The brilliant news is that these soft breadsticks handle advance preparation beautifully! This recipe is fantastic when made ahead, which is why I always list it as a perfect option when I’m planning meals. You can leverage this recipe for Make Ahead Breadsticks with minimal effort.
For the dough itself, you can totally do the first rise (Step 4) by placing the covered, oiled bowl into the fridge overnight—up to 24 hours! The cold slows the yeast down, developing a deeper, richer flavor while you sleep. Just remember to pull it out an hour before you want to shape them so they warm up enough to handle easily. No one wants to wrestle with cold, stiff dough when trying to make those long, chewy ropes.
Once they are baked (after brushing with the garlic butter—do NOT top them ahead of time!), storage is super easy, but quick results are the goal. Keep them in an airtight container at room temperature for up to three days. If you store them in the fridge, they get sturdy and lose that wonderful breadsticks softness. I highly recommend prepping a big batch of chili to go with them since you can make that ahead too! You can see my tips for make-ahead chili to complete the meal planning!
Reheating to restore that fresh-baked texture is simple. If you only have a few, maybe 30 seconds in the microwave works in a pinch, but for the whole batch, wrap them loosely in foil and pop them into a 350 degree F oven for about 5 to 7 minutes. That gentle heat brings back the fluffiness perfectly. Don’t reheat them too many times, though; after the second reheat, they start to lose their structural integrity.
Serving Suggestions for Your Homemade Breadsticks
Okay, you’ve got a platter of these gorgeous, garlicky, buttery sticks cooling, and you need a partner for them! These aren’t just leftovers; they are a star Dinner Side Dish Bread waiting for their moment. I used to feel guilty making something so delicious just to serve alongside an entree, but honestly, they deserve it.
The natural pairing, of course, is Italian, which is why they are the ultimate appetizer bread sticks for dipping. Anything saucy is your friend here. Naturally, they are incredible with a hearty spaghetti and meatballs, but they are also fantastic for soaking up the last bits of sauce from Chicken Parmesan.
But don’t limit them to Italian food! I love bringing these out when we have big, cozy meals. They are absolutely divine dipped into something creamy, like a good stew or a thick, hearty soup. They are surprisingly good paired with my recipe for Creamy White Chicken Chili—seriously, try dipping a warm breadstick into that white chili; it’s a game-changer!
If you are having a casual gathering, serve them alongside a selection of simple dips. Think marinara, obviously, but also try a sharp Gorgonzola dip or even just plain garlic aioli. These buttery breadsticks are so versatile; they disappear no matter what you serve them with!
Frequently Asked Questions About These Breadsticks
Even with the best recipe, you might have a question pop up while you’re waiting for that dough to rise! I’ve totally been there, staring into the bowl wondering if I messed up the yeast activation or worried if these incredible restaurant-style breadsticks would turn out right. Here are some of the things folks ask me most often about getting these perfect chewy breadsticks.
Can I make these breadsticks without an oven?
That’s a great question, especially if you’re looking for a truly Quick Bread Recipe and the weather is blazing hot outside! While the absolute best, softest texture comes from the oven because of how dry heat bakes the exterior evenly, you *can* jury-rig them. If you have an air fryer, you can bake them at 370 degrees F for about 6 to 8 minutes, but you might need to do them in batches so they don’t overcrowd. If you try the stovetop, you’d need a heavy cast iron skillet with a lid, but you risk burning the bottom before the inside cooks through. Honestly, for this specific soft dough recipe, the oven really gives you the authentic result.
What is the secret to making the breadsticks so soft?
If you want maximum softness, it comes down to two non-negotiable things! First, you HAVE to let that dough have a full, happy rise. That is how you develop the tender air pockets inside, which prevents density. Second, and this is just as crucial, is the garlic butter topping timing. You must brush that fatty, garlicky goodness onto the breadsticks the absolute second they come out of the oven. The heat of the breadstick melts the butter and carries it deep inside—that’s what locks in the moisture and keeps them incredibly soft and chewy for hours!
Nutritional Estimate for One Serving of Breadsticks
Now, I know most of us aren’t counting calories when a basket of warm, garlic-drenched breadsticks shows up at the table, but for those who need a rough idea, this information is here! Remember, since we are making these from scratch using real butter and grated Parmesan, these numbers are just an estimate. Your exact brands and how much of that extra cheesy topping you slather on will definitely change things. We calculated this based on 12 breadsticks, so if you end up eating more (and trust me, it happens!), the totals will creep up!
Think of this as a rough guideline for one fluffy breadstick, keeping in mind that flavor impact is what truly matters here!
- Serving Size: 1 breadstick
- Calories: 185
- Fat: 8.5g
- Saturated Fat: 4.5g
- Trans Fat: 0.2g
- Cholesterol: 18mg
- Sodium: 280mg (This is higher because of the salt in the dough and the Parmesan!)
- Carbohydrates: 23g
- Fiber: 1g
- Sugar: 1.5g
- Protein: 5g
These values assume you are eating the standard version coated in the Garlic Parmesan Breadsticks topping. If you load it up with extra mozzarella, you’ll see that fat and sodium jump up considerably, but the payoff in flavor is totally worth the occasional indulgence!
PrintSoft and Chewy Olive Garden Copycat Breadsticks with Garlic Parmesan Butter
Make soft, chewy breadsticks at home that taste just like the restaurant favorite, topped with a rich garlic parmesan butter coating.
- Prep Time: 25 min
- Cook Time: 12 min
- Total Time: 1 hour 47 min
- Yield: 12 breadsticks
- Category: Appetizer
- Method: Baking
- Cuisine: American
- Diet: Vegetarian
Ingredients
- 1 cup warm water (105-115 degrees F)
- 2 1/4 teaspoons active dry yeast
- 1 teaspoon sugar
- 2 1/2 cups all-purpose flour, plus more for dusting
- 1 teaspoon salt
- 2 tablespoons olive oil, plus more for greasing
- 1/2 cup (1 stick) unsalted butter, melted
- 4 cloves garlic, minced
- 1/2 cup grated Parmesan cheese
- 2 tablespoons fresh parsley, chopped
Instructions
- Activate the yeast: In a large bowl, combine the warm water, yeast, and sugar. Let stand for 5 to 10 minutes until foamy.
- Mix the dough: Add the flour, salt, and 2 tablespoons of olive oil to the yeast mixture. Mix until a shaggy dough forms.
- Knead the dough: Turn the dough onto a lightly floured surface and knead for 5 to 7 minutes until smooth and elastic.
- First rise: Place the dough in a lightly oiled bowl, turning to coat. Cover the bowl with plastic wrap and let it rise in a warm place for 1 to 1.5 hours, or until doubled in size.
- Shape the breadsticks: Punch down the dough. Divide it into 12 equal pieces. Roll each piece into a long, thin rope, about 10 to 12 inches long. Place the shaped breadsticks on a baking sheet lined with parchment paper.
- Second rise: Cover the breadsticks loosely and let them rest for 20 minutes.
- Preheat and bake: Preheat your oven to 400 degrees F (200 degrees C). Bake the breadsticks for 10 to 12 minutes, or until lightly golden brown.
- Prepare the topping: While the breadsticks bake, melt the butter in a small saucepan. Stir in the minced garlic, Parmesan cheese, and parsley. Heat gently until the garlic is fragrant, about 1 minute. Do not brown the butter.
- Coat the breadsticks: Immediately after removing the hot breadsticks from the oven, brush them generously with the garlic butter mixture. Serve warm.
Notes
- For extra cheesy breadsticks, sprinkle an additional tablespoon of Parmesan cheese over the buttered sticks immediately after brushing.
- If you prefer a quicker rise, place the covered dough in a slightly warm oven (turned off) for 30 minutes.
- You can use store-bought pizza dough for a faster version, but the texture may differ slightly.
Nutrition
- Serving Size: 1 breadstick
- Calories: 185
- Sugar: 1.5
- Sodium: 280
- Fat: 8.5
- Saturated Fat: 4.5
- Unsaturated Fat: 4.0
- Trans Fat: 0.2
- Carbohydrates: 23
- Fiber: 1
- Protein: 5
- Cholesterol: 18