

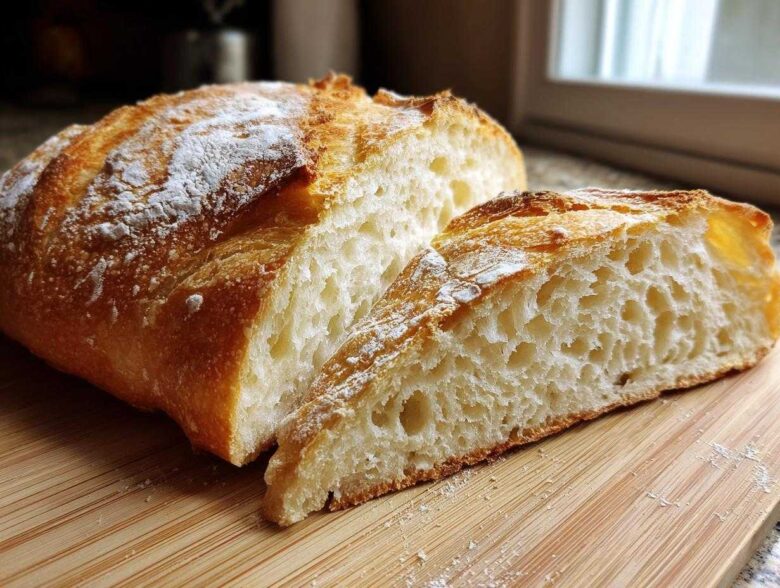
Oh my goodness, can you smell that? That rich, yeasty scent that announces to the entire neighborhood that something truly wonderful is happening in your kitchen? That’s the smell of success, my friends, and it comes courtesy of this **french bread** recipe. When Jacob first started baking, he could handle sourdough, but I needed a blueprint! That’s why I obsessed over finding the perfect formula that gives us that amazing bakery-style crunch on the outside while keeping the inside wonderfully soft and fluffy. Trust me, you don’t need years of training for this. This is our go-to, quick recipe that Amelia (the planner) approves of because it keeps the timeline tight, and Jacob (the artist) loves because the results look gorgeous! If you want to know more about how we collaborate in the kitchen, you can check out our story over at Taste Portfolio.
Why This Homemade French Bread Recipe Works for Beginners
I know what it’s like to stare at a recipe that calls for shaping, proofing, and steam injection and instantly feel overwhelmed. But grab your measuring cups because this loaf has been fully vetted by me, the resident skeptic! We designed this to be a super manageable project, even if you’ve only ever made toast.
For all you planners out there who need tangible results fast, here is why this will be your new favorite simple yeast bread:
- It’s genuinely quick—we’re aiming for a gorgeous, golden loaf in under two hours total!
- It delivers that perfect contrast: a beautifully soft, fluffy interior that practically melts.
- It creates that stunning, crackly crust you usually only find at the bakery.
- It’s a fantastic foundation for learning how yeast behaves, making it perfect for anyone learning beginner bread baking.
Achieving Bakery Style Bread Texture at Home
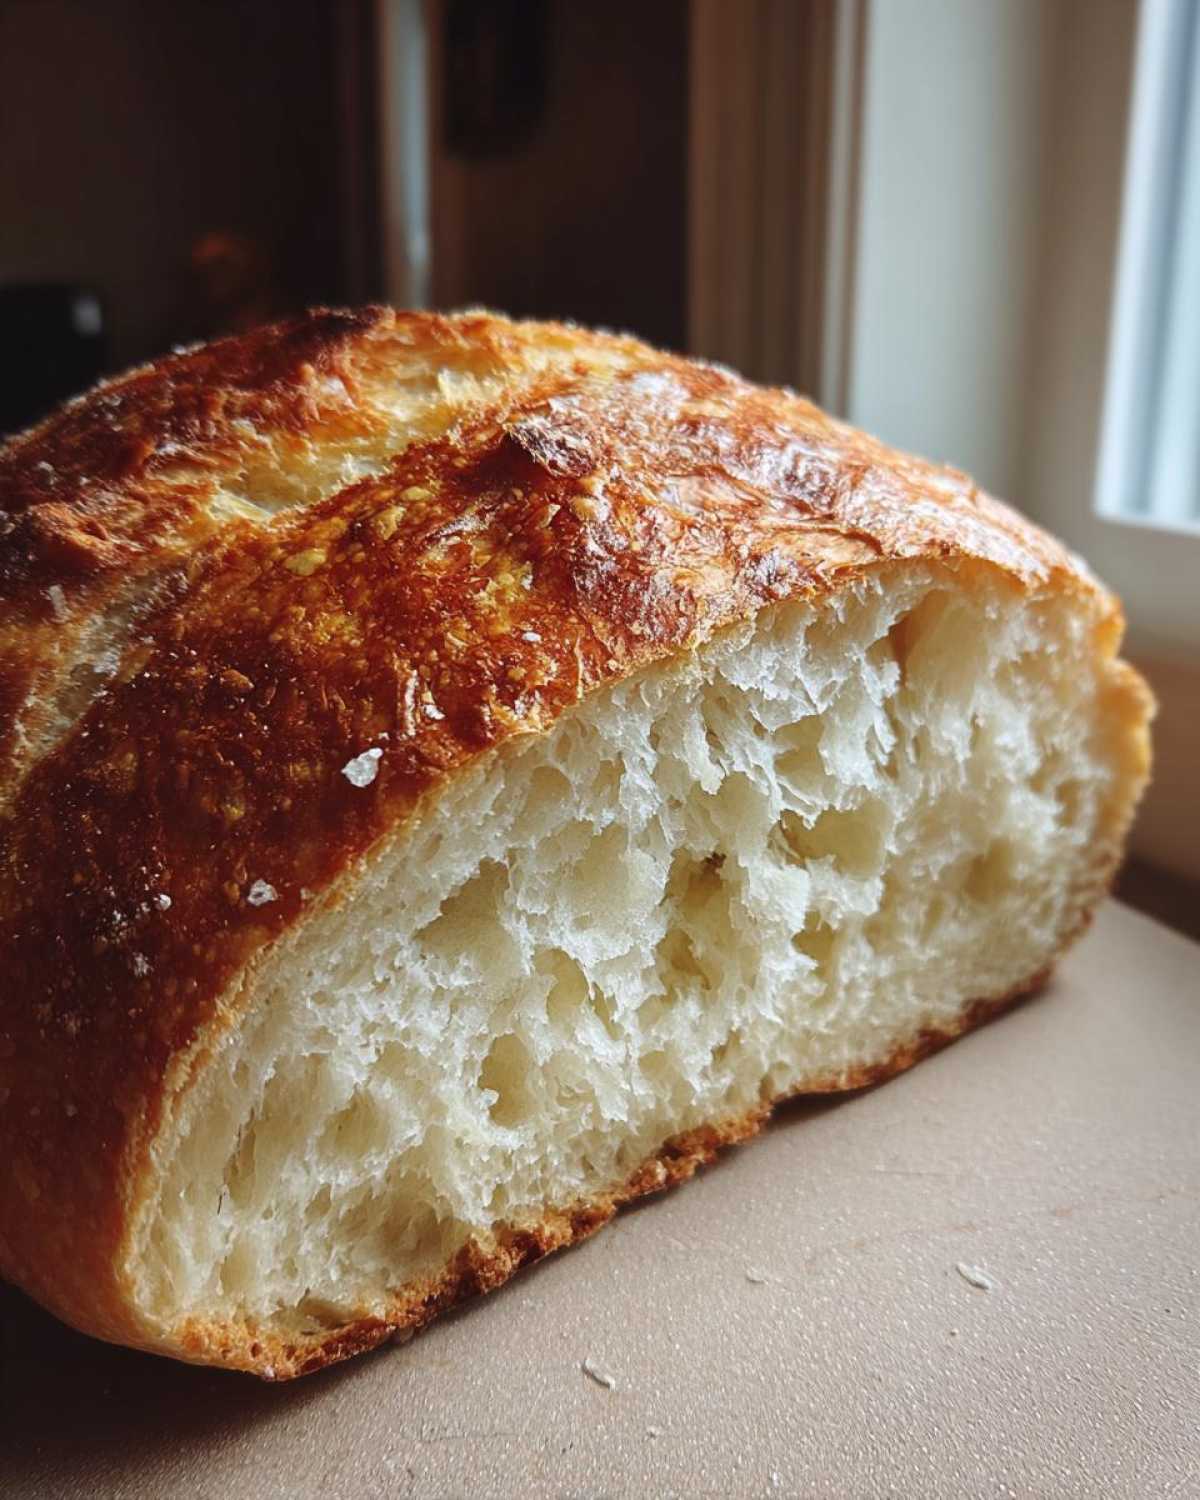
The magic here isn’t luck; it’s method. You get that soft fluffy interior because we use the right ratio of water to flour, which hydrates the dough perfectly. Forget those dense, heavy loaves! To get that shatteringly crisp exterior, we employ a slight trick later on—the steam bath. When you bake bread hot and fast with steam present, the crust stays pliable long enough to puff up beautifully before hardening into that coveted crunchy shell. It’s easier to pull off than you might think!
Gathering Ingredients for Your Easy French Bread
Okay, time to get organized! Since I cover the planning side of our projects, I can tell you that having every single thing ready to go before the yeast even hits the water makes this whole process stress-free. This list is short, which is another reason this is such a fantastic, easy homemade French bread recipe to start with. Don’t skimp on the measurements here; precision is what turns flour and water into a tender crumb bread!
Here are the exact supplies you need for two beautiful loaves:
- 1 packet active dry yeast (that’s generally about 2 1/4 teaspoons, but check your packet just in case!)
- 1 1/2 cups warm water. Now, this is important: Jacob insists it needs to be between 105°F to 115°F. If it’s too cold, the yeast won’t wake up. Too hot, and you’ll kill it! I usually just stick my clean finger in; it should feel noticeably warm, but not hot enough to hurt.
- 1 tablespoon granulated sugar. This is the yeast’s breakfast.
- 3 1/2 to 4 cups all-purpose flour. We generally start with 3.5 cups and add more during kneading.
- 2 teaspoons salt. Don’t forget this; it controls the yeast and adds all the flavor!
- 2 tablespoons olive oil, plus more for greasing up that bowl later.
- 1 egg white, beaten with 1 teaspoon water. This is our simple egg wash for that golden shine.
That’s it! No complicated starters or fancy dough conditioners needed. Just good old-fashioned baking staples coming together to make the best homemade bread you’ve ever tasted.
Step-by-Step Instructions for Perfect French Bread
Now that we have our ingredients organized (Amelia’s favorite part!), we get to the fun part—turning that shaggy mix into a beautiful, elastic dough. This process takes patience, but since we aren’t rushing anything critical, you’ll find the handling is very intuitive. We are making a simple yeast bread here, so let’s take it one stage at a time. Remember, the goal is that tender crumb bread look we all love! If you’re looking for other ways to use up your next batch, think about making a quick garlic butter to dip this bread into; I have a great recipe for that on the blog.
Activating Yeast and Mixing the French Bread Dough
First things first: wake up the yeast! Follow Step 1 exactly. Combine your warm water, sugar, and yeast in a large bowl. We have to let this sit for a good 5 to 10 minutes. I always tell Amelia, “If you don’t get bubbles, you start over!” Jacob usually squints at the thermometer like he’s defusing a bomb, but I stick to my finger test—if it feels like a nice, warm bath, you’re gold. Once it’s foamy, you’ve got happy yeast! Next, you stir in the salt, 3 1/2 cups of flour, and the oil. Mix it until it looks like a shaggy mess. Don’t panic; the best homemade bread starts looking a little messy.
Kneading and the First Rise for Fluffy Loaf Recipe
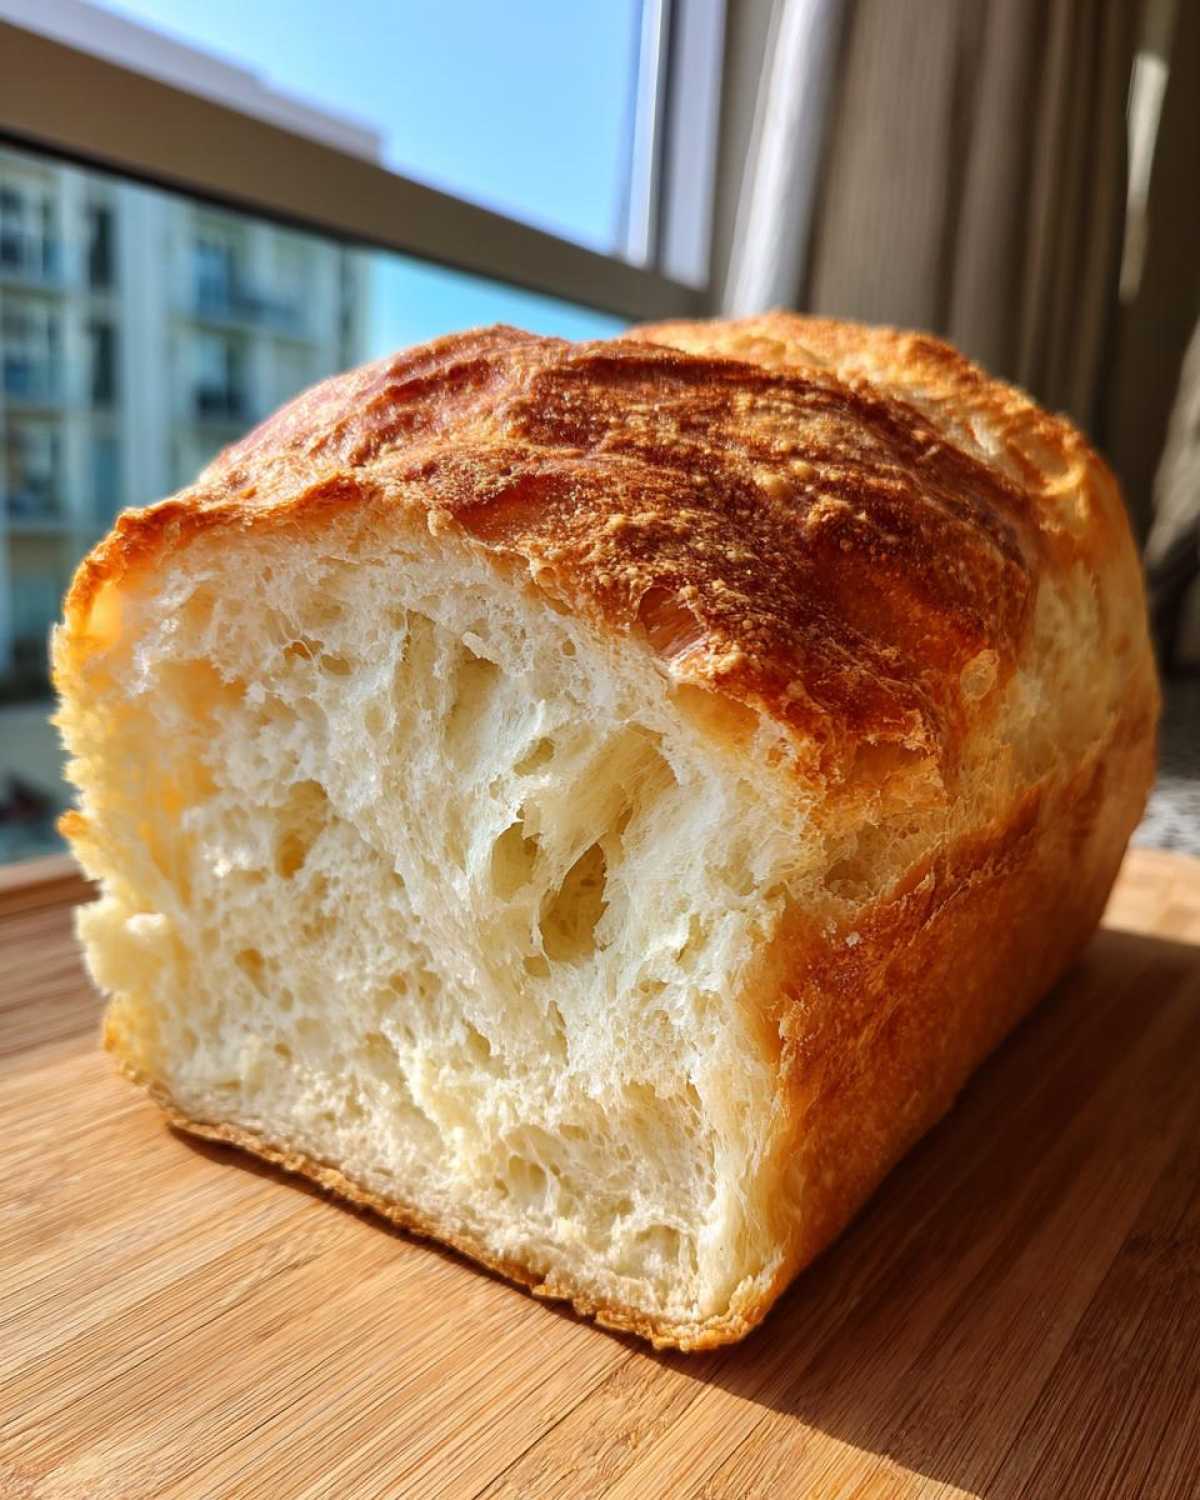
Time to put in a little elbow grease! Turn the shaggy dough out onto your counter, lightly floured. You need to knead this for a solid 8 to 10 minutes. Keep adding that extra flour only as needed until the dough feels smooth and elastic, but still holds just a tiny bit of tackiness. If it’s sticking horribly, add more flour, but the less flour you add now, the better your final texture will be! Once it’s smooth, oil your bowl, plop the dough in, cover it up, and let it rest for 60 to 90 minutes. That long, slow first rise is what builds those big flavor notes we want in this Quick French Bread Recipe.
Shaping and Baking Your Homemade French Bread
When the dough has doubled, gently punch it down—it’s okay to deflate it a bit! Divide it in half and gently shape each piece into a long loaf, about 12 to 14 inches. Let them rest for a final 30 minutes while your oven gets screaming hot to 400°F. Right before sliding these beauties in, score the top three or four times diagonally with a very sharp knife or razor blade—this helps control the expansion. Then, give it that egg white wash for shine. If you want that famous Crusty Exterior Bread, this is when you put a shallow pan of water on the bottom rack of your oven to create necessary steam. Bake for 20 to 25 minutes until golden brown, and listen for that hollow sound when you tap the bottom!
Baking Homemade Bread Tips for Success with French Bread
I promised you some insider secrets beyond just the steps, and this is where Jacob shines. He’s like an encyclopedia of little baking hacks that take a perfectly fine loaf and make it unbelievable. Honestly, most of these tips came from Jacob noticing little things I was doing wrong when I first started following recipes!
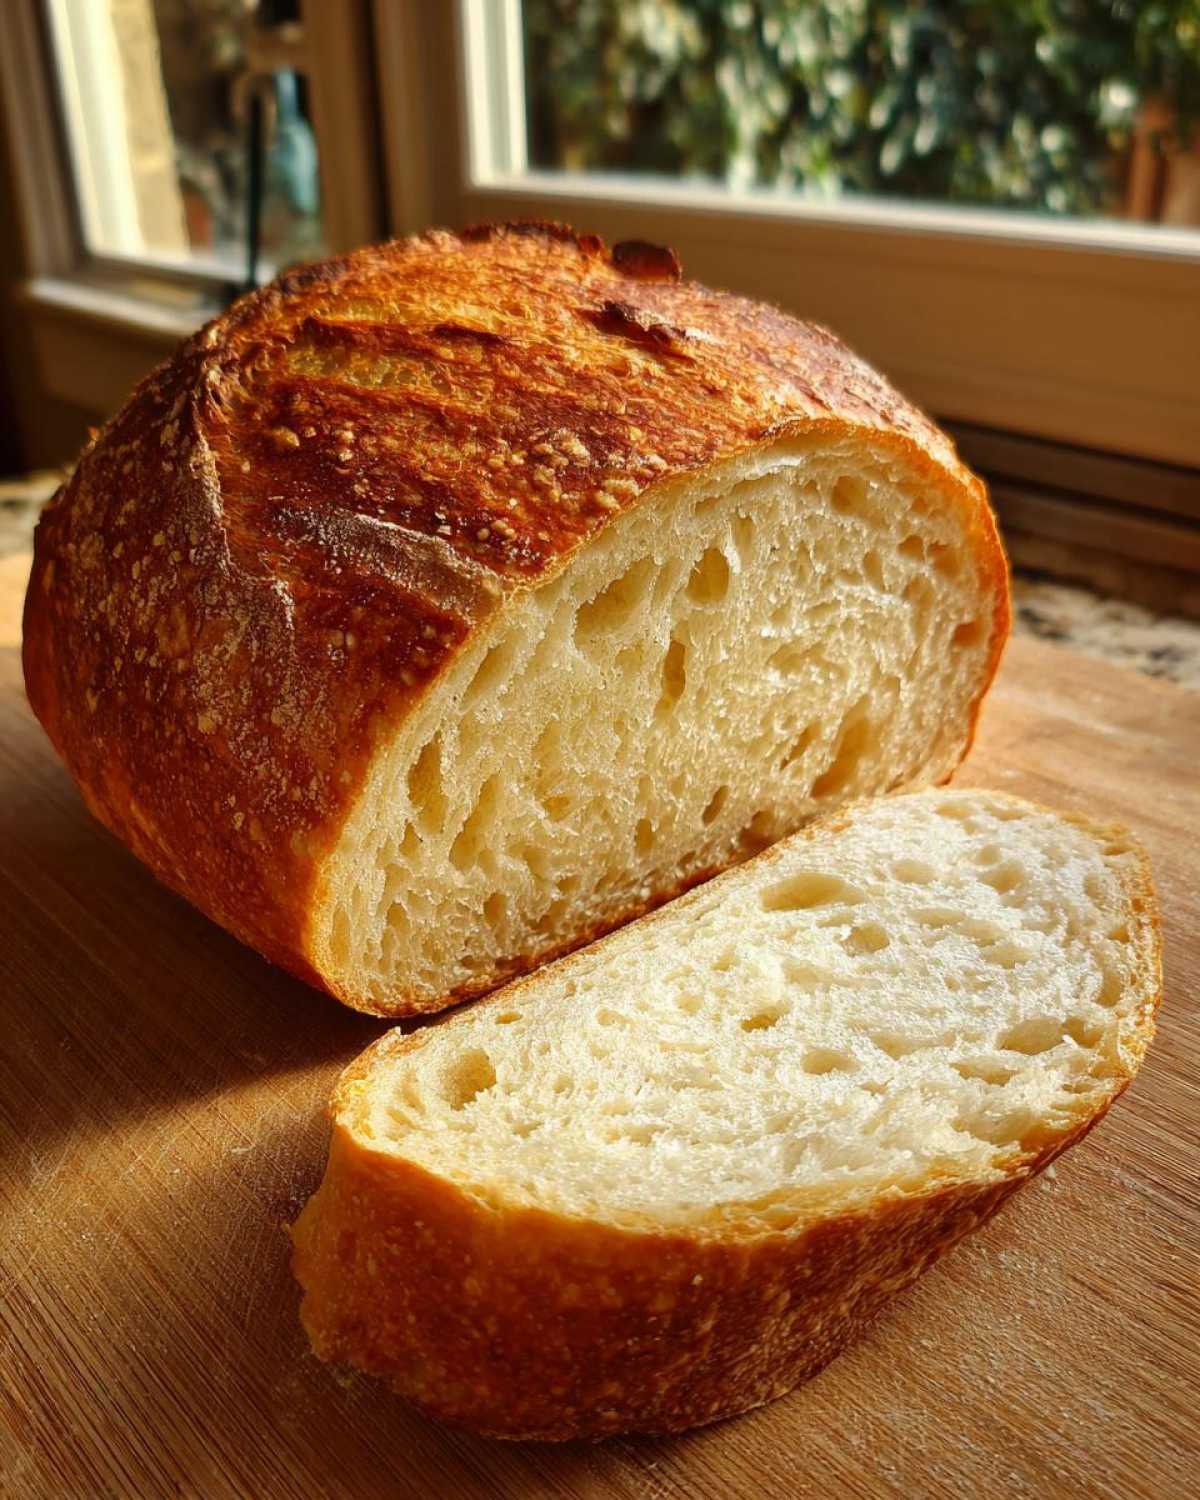
If you want that amazing, shatteringly crisp crust that makes people ask where you bought your artisan bread, steam is your absolute best friend. The number one tip we always share is putting a shallow pan of water on the bottom rack while the oven preheats. That steam keeps the surface of your dough soft long enough for a great oven spring, giving you that beautiful crusty exterior bread.
Also, a little flavor boost: if you have time, placing the dough in an oven that is turned off but has the light on makes for a faster, warmer environment for the second rise. And finally, don’t forget, this bread for sandwiches is best served warm, maybe dipped in some spicy olive oil. That’s Jacob’s favorite way to test if our loaves are ready!
Serving Suggestions for Your Tender Crumb Bread
So, you’ve done it! You’ve conquered the kneading, you’ve managed the steam, and now you’re staring at two gorgeous, golden loaves cooling on the rack. Congratulations! This is where the fun shifts from baking to eating. Because this loaf has such a wonderful texture—that soft, fluffy loaf recipe filling blending perfectly with a crunchy outside—it works beautifully in so many ways. It’s way more versatile than just a quick side dish!
For a weeknight meal, you absolutely cannot beat serving this as a dinner side bread. Just slice it thick, warm it up again (a quick spritz of water and 5 minutes in a 350°F oven fixes any stale crust!), and serve it alongside anything saucy. Think about your favorite pasta dishes or maybe a comforting stew. It’s perfect for dipping up every last bit!
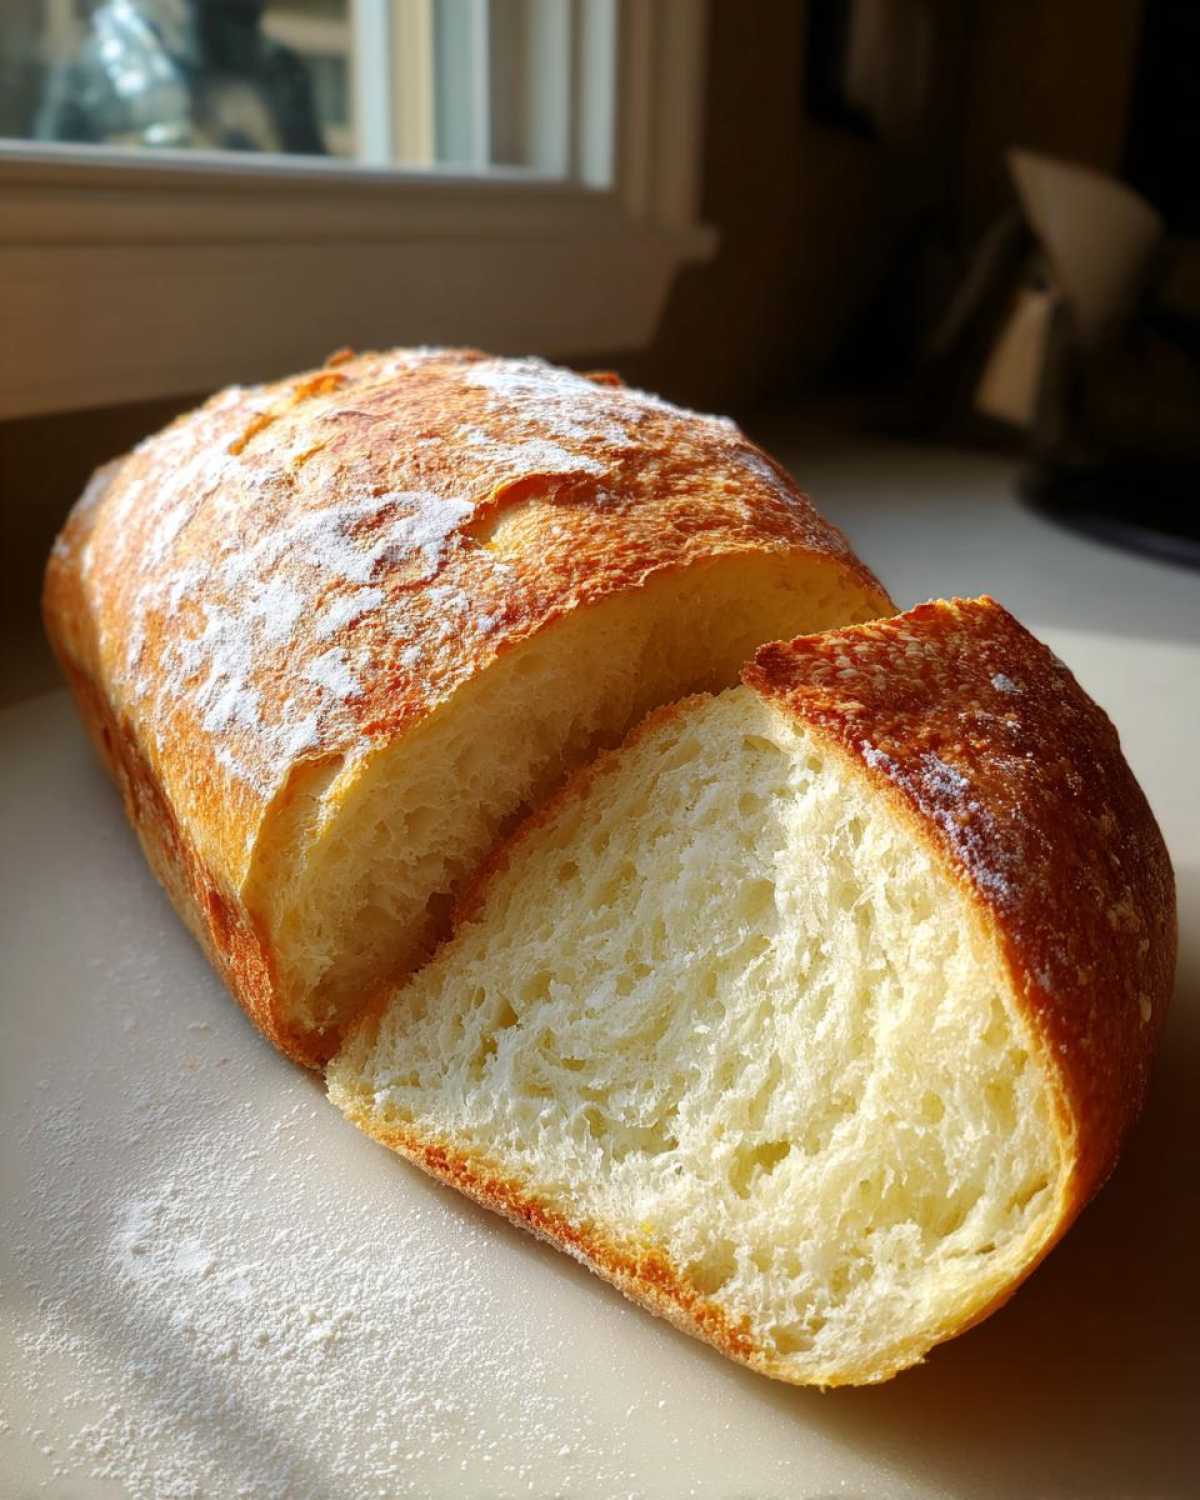
But don’t stop there! This bread makes the absolute best bread for sandwiches because the crust holds up without being impossible to bite through, and that tender crumb inside keeps things soft. I often use leftovers for amazing, thick-cut grilled cheese, or we make open-faced melts with mozzarella and pesto.
Jacob and I love pairing our loaves with simple, homemade dips. While he’s usually busy making something spicy, I have a fantastic, easy recipe for homemade teriyaki sauce that would be completely unexpected but delicious alongside thick slices of this bread. You can find that recipe right here on the site, too!It’s all about building that flavor portfolio, right?
Storing Your Freshly Baked French Bread
Oh, the agony of having leftover bread! Honestly, I rarely have to worry about this because Jacob always devours the entire loaf right away, but if you’re more responsible than he is, you need a plan.
Never, ever put your beautiful loaf in the refrigerator! Seriously, don’t do it. The fridge turns bread stale way faster than room temperature does, and we want to protect that soft interior. Keep the loaves on the counter wrapped loosely in a clean kitchen towel or inside a paper bag for up to two days.
Need to refresh that crust? That’s easy! If you want the crunch back, just spritz the outside lightly one more time with water and pop it into a 350°F oven for about 5 to 7 minutes. It’ll come out smelling and feeling brand new. This simple trick works wonders!
Frequently Asked Questions About Making French Bread
I’ve compiled the questions I get most often from our readers—and the ones Jacob and I argued about back when we were first figuring this all out! Baking bread is usually about nailing technique, so these little tweaks should help you nail that fluffy loaf recipe perfectly.
How can I turn this simple yeast bread recipe into baguettes?
That’s a common question! If you want to make a smaller, crusty artisan bread shape, you can absolutely use the same dough. Instead of dividing it into two long 12-inch loaves, divide the dough into four or six smaller portions. Shape them into tight, slender tubes, often called batards or mini baguettes. You’ll need significantly less rising time for the second proof—maybe only 20 minutes—and the baking time might drop by about five minutes. Just remember to score them nicely before baking for that classic look!
My dough isn’t rising! What is going wrong?
This is the most frustrating thing when you are trying to learn to make homemade French bread recipe! If your dough isn’t rising after an hour, 99% of the time it’s the water temperature. Remember I mentioned 105°F to 115°F? If the water was too chilly, the yeast stayed asleep. If it was boiling hot, the yeast died off. If you are sure your yeast was fresh and the water was perfect, try moving the bowl to a warmer spot. Sometimes my kitchen stays too cool, so Jacob moves my bowl into the oven with *just* the light on—it creates a perfect little warm cave for the dough to wake up in. You can find more troubleshooting help on our foolproof dough guide.
Can I really skip kneading and still get a soft interior?
For this specific recipe, I would strongly advise against skipping the kneading altogether. We need that 8 to 10 minutes of kneading to develop the gluten structure, which is what gives the crusty exterior bread that slight chew and structure. If you completely skip it and just rely on the rise, you’ll likely end up with bread that crumbles apart easily—not great for using as bread for sandwiches! If you can’t knead for 10 minutes, you can use the ‘stretch and fold’ method every 30 minutes during the first rise. That builds structure with less physical effort.
Why do I need the egg wash and the steam?
These two steps are non-negotiable if you want that beautiful bakery look! The beaten egg white wash is pure decoration; it guarantees a deep golden-brown color and a slight sheen on the crust. The steam, which comes from that pan of hot water mentioned above, is functional. It delays the crust from setting, allowing the dough to puff up as large as possible (the oven spring). This creates that airy interior. Once the temperature inside the oven drops a bit, the crust firms up, sealing in all that wonderful softness. It’s how we achieve that stunning bakery style bread finish!
Nutritional Estimate for Homemade French Bread
Now, I know Amelia is all about planning projects, but forecasting exact nutrition for homemade bread is always a little tricky, right? Jacob always points out that if I use a heavier hand with the olive oil brushing, the numbers shift slightly! So, these figures are an estimate based on the ingredients listed above and serving size being one slice of the two final loaves. Think of this as a helpful guideline as you incorporate this delicious bread into your diet.
For the most accurate info regarding our process, you can always read our full site disclaimer here, but generally, for one estimated slice, here’s what you’re looking at:
- Serving Size: 1 slice
- Calories: 150
- Fat: 2g
- Saturated Fat: 0.5g
- Trans Fat: 0g
- Cholesterol: 0mg
- Sodium: 250mg
You’ll also see great benefits from this simple yeast bread:
- Carbohydrates: 29g
- Fiber: 1g
- Protein: 5g
- Sugar: 1g
See? It’s wonderfully simple food! We aren’t loading this up with added fats or sugars beyond what’s necessary to get that perfect tender crumb. It’s a classic, wholesome loaf that pairs perfectly with virtually anything on your dinner table. I love that we can make something this pure right here in our own kitchen instead of relying on mystery additives from the store.
Share Your Soft Fluffy French Bread Creations
Whew! We made it! Doesn’t it feel amazing to have that fresh, crusty bread cooling on your counter? I’m sitting here already planning what we’ll pair this batch with—maybe just butter and a sprinkle of flaky salt, because honestly, it needs nothing else.
Now that you’ve seen the blueprint—the detailed plans Amelia lays out—it’s Jacob’s turn to shine with the artistry! I truly hope you found this recipe approachable and that your kitchen smells as incredible as ours does right now. If you gave this a try, I absolutely need to know how it went!
Please take a moment to rate this french bread recipe right down below. If you had any triumphant moments where you nailed the crust or achieved that perfect interior chew, leave a comment! I love hearing about the successes. I always enjoy seeing how others paired it, perhaps even trying out a fast option like the one found here—check out this speedy loaf!
If you managed to get a photo before your family devoured the whole thing (which happens to us constantly!), share it over on social media and tag us! We want to see your gorgeous, homemade loaves. It really completes our portfolio when we see other people building their own delicious memories. You can always browse our other projects on the main blog page.
Happy baking, everyone!
PrintEasy Homemade French Bread with Soft Fluffy Interior
Learn how to bake bakery-style French bread at home. This simple recipe delivers a soft, fluffy crumb and a satisfyingly crusty exterior, perfect for dinner or sandwiches.
- Prep Time: 20 min
- Cook Time: 25 min
- Total Time: 1 hour 55 min
- Yield: 2 loaves
- Category: Baking
- Method: Baking
- Cuisine: French
- Diet: Vegetarian
Ingredients
- 1 packet active dry yeast (about 2 1/4 teaspoons)
- 1 1/2 cups warm water (105°F to 115°F)
- 1 tablespoon granulated sugar
- 3 1/2 to 4 cups all-purpose flour
- 2 teaspoons salt
- 2 tablespoons olive oil, plus more for greasing
- 1 egg white, beaten with 1 teaspoon water (for egg wash)
Instructions
- Activate the yeast: In a large bowl, combine the warm water, sugar, and yeast. Let this mixture sit for 5 to 10 minutes until it becomes foamy.
- Mix the dough: Add 3 1/2 cups of the flour, salt, and 2 tablespoons of olive oil to the yeast mixture. Mix with a wooden spoon until a shaggy dough forms.
- Knead the dough: Turn the dough out onto a lightly floured surface. Knead for 8 to 10 minutes, adding the remaining flour gradually until the dough is smooth and elastic. It should be slightly tacky but not sticky.
- First rise: Lightly grease a large bowl with olive oil. Place the dough in the bowl, turning to coat. Cover the bowl with plastic wrap or a clean kitchen towel. Let the dough rise in a warm place for 60 to 90 minutes, or until it has doubled in size.
- Shape the loaves: Gently punch down the dough. Divide it into two equal pieces. On a lightly floured surface, shape each piece into a long, even loaf, about 12 to 14 inches long.
- Second rise: Place the shaped loaves on baking sheets lined with parchment paper, leaving space between them. Cover loosely and let them rise again for 30 minutes. Preheat your oven to 400°F (200°C) during the last 15 minutes of this rise.
- Prepare for baking: Score the top of each loaf three or four times diagonally with a sharp knife or razor blade. Brush the tops lightly with the egg white wash.
- Bake: Bake for 20 to 25 minutes, or until the crust is golden brown and the loaves sound hollow when tapped on the bottom.
- Cool: Transfer the finished French bread to a wire rack to cool completely before slicing. Enjoy your homemade bread!
Notes
- For a crispier crust, place a shallow pan of water on the bottom rack of the oven while preheating to create steam.
- If you want a quicker rise, place the dough in an oven that is turned off but has the light on.
- This tender crumb bread is excellent served warm with butter or used for sandwiches.
Nutrition
- Serving Size: 1 slice
- Calories: 150
- Sugar: 1
- Sodium: 250
- Fat: 2
- Saturated Fat: 0.5
- Unsaturated Fat: 1.5
- Trans Fat: 0
- Carbohydrates: 29
- Fiber: 1
- Protein: 5
- Cholesterol: 0