

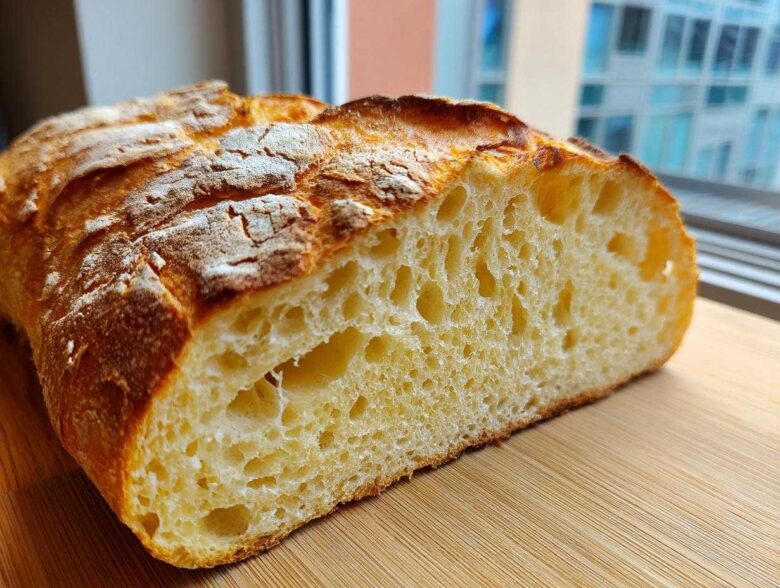
Listen, if you’ve ever walked into a real Italian bakery and just inhaled that amazing, toasty aroma, then you know the goal. For years, I thought making real, **Italian bread** at home was this impossible, complicated mess involving fancy steam setups and techniques reserved for real pros. Every time I tried, I ended up with something closer to a dense brick than that beautiful, crackly loaf!
But folks, I cracked the code. This isn’t just another recipe; this is the one. I’m handing you my absolute favorite **Easy Crusty Italian Bread** recipe that guarantees you get that signature crisp crust on the outside while the inside stays super soft and wonderfully chewy. Seriously, the first time I pulled this out of the oven, the *crack* sound the crust made was pure music. It’s genuinely perfect for any beginner looking to conquer homemade bread!
Why This Easy Crusty Italian Bread Recipe Works for Beginners
I get it—baking scares people, especially when you’re aiming for that genuine bakery vibe. But this **Italian bread** recipe really is designed to hold your hand. We skip the really long, overnight fermentation times, making it surprisingly quick for such an amazing final product. You don’t need fancy equipment, just a regular oven and a bit of patience during the rises!
- No fussy starters or complicated pre-ferments are necessary!
- The ingredient list is super short—you probably have everything right now.
- It’s fast enough that you can decide at lunchtime you want fresh bread for dinner.
Achieving Bakery Style Bread at Home
That gorgeous, bubbly, shatteringly crisp crust? That all comes down to one simple trick we sneak in during the bake: steam. You’ll notice in the instructions we put a shallow pan on the bottom rack before the oven even heats up. When that hot water hits the heat, it creates a humid environment. Because this is such a simple recipe, mastering this technique helps you feel like a pro. If you’ve ever wanted to try a quick flatbread, you might enjoy checking out our easy homemade naan bread!
This steam keeps the exterior of the dough soft just long enough for the bread to expand beautifully in the heat. Once the steam cooks off, the crust has a chance to dry out and crisp up into that perfect golden shell you’re looking for.
Tips for a Soft and Chewy Interior in Your Italian Bread
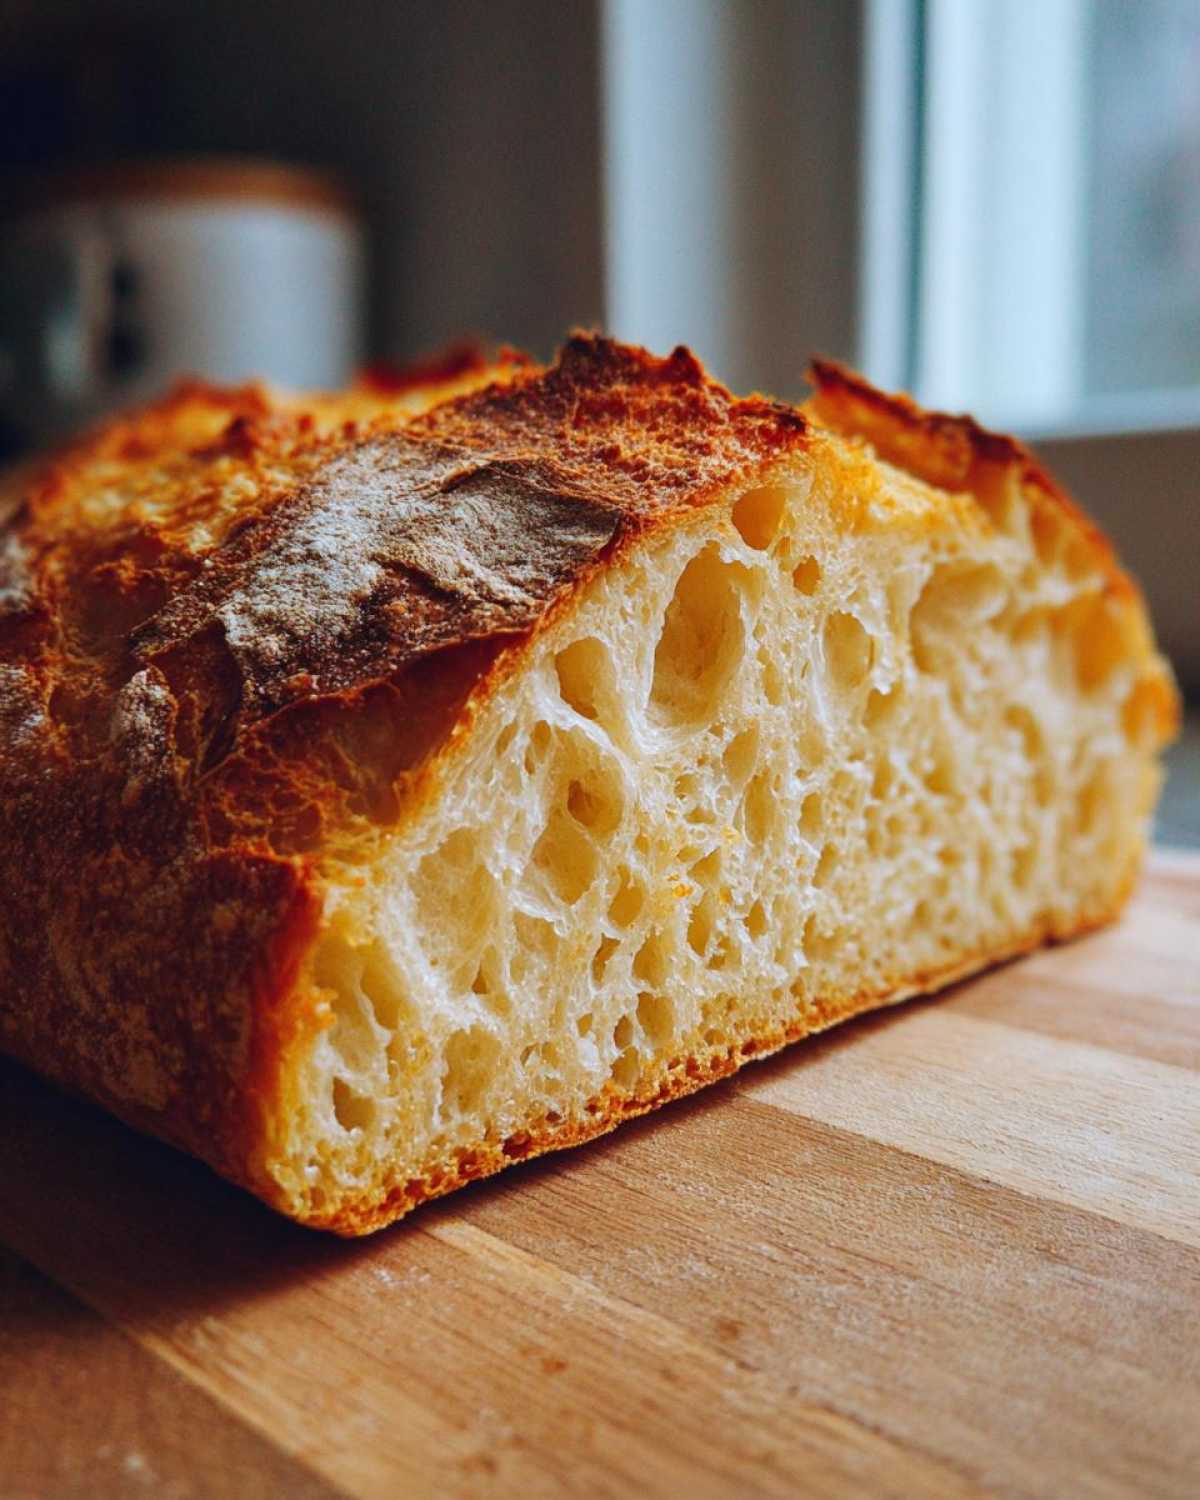
The texture inside is just as important as the crust, right? We want that airy, slightly elastic crumb that begs for dipping in sauce. The key here is twofold: proper kneading and letting it have its nap time.
Make sure you actually hit that five-to-seven-minute mark when kneading; that develops the gluten structure needed for chewiness. Then, don’t rush that first rise! Letting your **Italian bread** dough fully double in size gives the yeast time to create those soft pockets. Trust me; skipping the rise is the quickest way to a hockey puck!
Simple Bread Ingredients for Perfect Italian Bread
The beauty of this recipe is how few things it asks of you! Seriously, this **Italian bread** comes together with just five core items. You don’t need specialty flours or obscure additives. Here’s exactly what you’re grabbing:
- 3 cups all-purpose flour
- 1 teaspoon instant dry yeast
- 1 1/2 teaspoons salt
- 1 1/4 cups warm water (about 105-115°F)
- 1 tablespoon olive oil
Now, here is my number one expert tip, and you have to listen up: the water temperature is everything! If it’s too cold, your yeast won’t wake up excited. If it’s practically boiling, you’ll kill the little guys instantly. Aiming for that sweet spot between 105 and 115 degrees Fahrenheit guarantees an enthusiastic rise.
Ingredient Notes and Substitutions
You asked about flour, and honestly, good standard all-purpose flour works perfectly here. Don’t feel like you need to go out and buy bread flour; this recipe is forgiving! We call for instant dry yeast because it lets us skip a step, but if all you have is active dry yeast, no sweat!
If you are using active dry yeast, just mix it right into the warm water first and let it sit for about five minutes until it gets foamy. That foam is your visual cue that the yeast is alive and ready to party with the flour!
How to Prepare Your Crusty Italian Bread Recipe Step-by-Step
If you’ve ever thought making great **Italian bread** was like rocket science, trust me when I say it’s mostly about the rhythm. We’re keeping this super straightforward, but there are a few places where you absolutely cannot cheat—namely, the kneading and the patience during the rising stages. Get these down, and you’re golden!
Mixing and Kneading for the Best Italian Bread Dough
First things first, whisk the dry stuff—flour, yeast, and salt—in a big bowl. Then, make a little well in the middle and pour in your warm water and that little bit of olive oil. Mix it gently with a wooden spoon until it totally looks like a messy, shaggy dough. Don’t worry if it seems too wet; that’s normal! Turn that whole mess out onto a lightly floured counter.
Now, here’s where you get your workout in! You need to knead this for a solid 5 to 7 minutes. Don’t stop early! You are pushing and folding until that sticky mess transforms. When it’s done, it should feel smooth, almost satiny, and be nice and elastic when you stretch a bit of it. This kneading is what prevents the bread from being gummy later!
The Crucial Proofing and Steaming Steps for Crispy Crust Italian Bread
Pop that perfectly kneaded dough into an oiled bowl, cover it, and let it chill out in a warm spot for about an hour to an hour-and-a-half. You should see it double in size—this is critical for the final texture of your **Italian bread**! Once risen, gently punch it down and shape it into a lovely loaf. Let it rest again for about 30 minutes while the oven gets roaring hot to 425°F.
This next part is non-negotiable for the crust: steam! While it’s resting that final 30 minutes, put a shallow pan on the bottom rack. Just before you slide your loaf in, score the top with a sharp knife—it looks so professional! Then, quickly pour a cup of boiling water into that hot, shallow pan and shut the door right away. That blast of steam ensures you get that amazing, shatteringly crispy Italian bread crust we’re aiming for!
Once that crust is setting up, I love brushing mine with some melted garlic butter right after it comes out of the oven for extra flavor. If you want a recipe for that, I’ve got the easiest homemade garlic butter recipe imaginable!
Tips for Success Making Artisan Bread Recipe Easy
Okay, now that you’ve mastered the main steps, I want to share a few little cheats that really push this from being ‘pretty good’ bread to ‘wow, did you buy this?’ I’m talking about those tiny details that make all the difference in your final loaf.
Remember that note about spraying the oven walls? You absolutely have to try that if you want the crispiest crust possible. During the first 10 minutes of baking—while the oven is full of that initial steam from the water pan—quickly open the door (be fast!) and give the oven walls a quick spritz three times with a clean water bottle. Be careful, it splatters, but that extra moisture is what keeps the skin elastic while the inside sets up perfectly. This technique really makes achieving an artisan bread recipe easy to execute at home.
On the scoring part, listen, my first few attempts looked terrible—just clumsy slashes. But scoring isn’t just for looks! It tells the bread where to burst open gracefully instead of ripping randomly along the side while it bakes. I found that using a super sharp razor blade or a very sharp paring knife held at a shallow 45-degree angle works best. Don’t be shy; a confident 1/2-inch deep slash across the top is usually all you need!
Also, if you’re rushing the cooling process, you’re cutting yourself short! Resist all urges to slice the loaf immediately when it comes out. That heat is still working inside, setting the structure. If you slice it when it’s piping hot, the steam escapes too fast and you end up with a gummy texture inside, which defeats the whole purpose of our soft and chewy interior!
Serving Suggestions for Your Warm Italian Loaf
Okay, the Italian bread is cooled slightly, the crust is crackling just right, and the smell filling your kitchen is unreal. Now comes the best part: what are you going to eat this glorious loaf with? I swear, having fresh, crusty bread on hand elevates any weeknight meal from zero to hero in about thirty seconds flat.
Because this bread has such a substantial, crispy exterior and a soft, airy inside, it stands up beautifully to anything wet or heavy. It’s not shy! It’s ready to soak up every last drop of flavor on your plate, which is exactly what a good loaf should do.
What to Serve with Italian Bread
You’ve got options here that go way beyond just butter, though warm butter is never a bad choice, trust me! Here are my top three ways to use this **Warm Italian Loaf** that maximizes its texture:
- Dipping in Hearty Sauces: This is non-negotiable. If you’re making any kind of tomato sauce—whether it’s a simple marinara or a rich meat sauce—you need this bread. You need wide, thick slices for scraping the bottom of the bowl clean. If you want a really special sauce to pair this with, you have to try my recipe for authentic slow-simmered Bolognese sauce.
- The Ultimate Sandwich Base: Because this bread is sturdy, it’s my go-to for massive, fully-loaded Italian subs or even just quality grilled cheese. The crust holds up against juicy tomatoes and meats without getting soggy right away.
- Alongside Soups and Stews: Think heavy minestrone or a thick vegetable soup. You can cube this sturdy bread, toast it slightly, and use it to make crostini, or just use whole chunks to soak up broth.
Honestly, once people realize they’ve got this kind of quality bread baked right at home, they’ll start expecting it at every dinner!
Storage and Reheating Instructions for Homemade Italian Bread
So, you’ve managed to resist eating the entire loaf in one sitting. Congratulations! Now we have to talk about keeping this beautiful **Italian bread** in top condition. The biggest problem with homemade bread, especially one with a crisp crust, is that it stales fast if you store it incorrectly. Forget those plastic grocery bags!
If you plan on eating the entire loaf within about 24 hours, the best way to store it is right on the counter, cut-side down, wrapped only in a clean paper bag or a designated linen bread bag. The paper allows the crust to breathe. Yes, the crust will soften slightly because of the enclosed moisture, but the crumb stays soft. If I wrap it in plastic, that crust turns into stale leather overnight, and nobody wants that.
If you need it to last longer than a day—unlikely, but I’ll allow it—the freezer is your friend. Make sure the bread has cooled completely! Then wrap it tightly in plastic wrap first, and then seal it in a heavy-duty freezer bag. It’ll keep beautifully for a couple of months.
The reason this is important is because the reheating process relies on a good crust to work its magic. You can’t re-crisp a crust if it’s already completely gone soft and leathery from improper storage. Luckily, bringing this **Italian bread** back to life is super simple!
To reheat any leftover loaf, whether it’s day-old or frozen, you want dry, intense heat. Preheat your oven—or even a toaster oven if you’re just warming up a slice—to about 350°F (175°C). If the bread was frozen, thaw it for about an hour on the counter first. Pop the entire loaf (or just large chunks, if you prefer) directly onto the oven rack, no pan needed. Bake it for just 5 to 7 minutes. That quick blast of dry heat sucks the moisture out of the crust, bringing back that wonderful crackle and leaving the inside soft all over again!
Frequently Asked Questions About This Quick Italian Bread
I know you have questions! When you’re attempting bakery-quality results, especially if you’re trying out a **quick Italian bread** recipe for the first time, it’s smart to double-check things. I’ve gathered the questions I always get asked about this recipe, so let’s clear up any last-minute confusion before you preheat that oven!
Can I make this Italian Bread recipe without kneading?
Well, this specific version? I highly recommend you don’t skip that 5 to 7 minutes of kneading we talked about. That’s what builds the strength for a proper chew. If you are absolutely set on a no-knead situation, you *can* make a much wetter dough and let it rise for hours longer, but you won’t get the texture this recipe is famous for—that perfect balance we want in our **Italian bread**. If you want to explore faster options that skip the elbow grease, check out the tips on fast rising bread recipes that emphasize yeast activity over physical manipulation.
How long does this Soft and Chewy Italian Loaf stay fresh?
Because this recipe uses water and yeast but no strong preservatives, it shines brightest on Day One! Expect this **Soft and Chewy Italian Loaf** to be perfect for about 24 hours when stored properly at room temperature (remember, paper bag!). By Day Two, the crust will definitely have softened considerably, but the inside will still taste great. If you need longer storage, please use the freezer method we discussed for the best results!
Estimated Nutritional Data for This Simple Bread
I know some of you are tracking macros or just curious about what goes into this amazing loaf, so here is the estimated nutritional breakdown. Please take this with a grain of salt—literally!
The numbers below are calculated based on the five ingredients in the recipe, yielding one large loaf, and dividing that into 12 generous slices. How you eat it, of course, heavily influences the actual final tally, especially if you slather it with butter or dunk it deep into marinara sauce!
Remember, this is just a guide based on my calculations, but it gives you a good ballpark idea of what you’re working with in this **Simple Bread Ingredients** masterpiece:
- Serving Size: 1 slice
- Calories: 180
- Sugar: 1g
- Sodium: 350mg
- Fat: 1g
- Saturated Fat: 0g
- Unsaturated Fat: 1g
- Trans Fat: 0g
- Carbohydrates: 38g
- Fiber: 2g
- Protein: 6g
- Cholesterol: 0mg
It’s wonderful to see that for a bread this filling, the fat and sugar content stays really low. That’s the beauty of working with simple flour, yeast, and water! Enjoy every bite, knowing you made it yourself!
Share Your Golden Brown Italian Loaf Baking Journey
Alright, you’ve gone through the rising, you’ve mastered the steam, and now you’ve got a **Golden Brown Italian Loaf** cooling on your rack! I absolutely need to know how it went! Baking is so much better when we share the results, so please, don’t keep that gorgeous crust a secret.
Did you get that satisfying crackle when you sliced into it? Did the inside turn out soft and chewy like promised? Jump down to the comments section right below this and leave me a rating! Your feedback truly helps other bakers know they can master this recipe too. I read every single comment, and I love hearing about your successes.
If you snapped a picture of your beautiful **crusty bread**, please share it on social media! Tag me so I can see your handiwork. There’s nothing that makes my day faster than seeing the wonderful creations people make using these methods.
If you’re looking for more easy baking inspiration, make sure you browse through the rest of the recipes on the blog—I’m always testing new ways to make complicated things simple!
Happy baking, friends. Now go slather that warm bread with something delicious!
PrintEasy Crusty Italian Bread

Make bakery-style Italian bread at home with a crisp crust and a soft, chewy interior. This recipe is simple enough for beginners.
- Prep Time: 15 min
- Cook Time: 30 min
- Total Time: 2 hours 15 min
- Yield: 1 large loaf
- Category: Bread
- Method: Baking
- Cuisine: Italian
- Diet: Vegetarian
Ingredients
- 3 cups all-purpose flour
- 1 teaspoon instant dry yeast
- 1 1/2 teaspoons salt
- 1 1/4 cups warm water (about 105-115°F)
- 1 tablespoon olive oil
Instructions
- In a large bowl, mix the flour, yeast, and salt together.
- Add the warm water and olive oil to the dry ingredients. Mix with a wooden spoon until a shaggy dough forms.
- Turn the dough out onto a lightly floured surface. Knead for 5 to 7 minutes until the dough is smooth and elastic.
- Place the dough in a lightly oiled bowl, turning to coat. Cover the bowl with plastic wrap or a clean kitchen towel. Let the dough rise in a warm place for 1 to 1.5 hours, or until doubled in size.
- Gently punch down the risen dough. Shape it into a loaf or two smaller rounds. Place the shaped dough on a baking sheet lined with parchment paper.
- Cover the loaf loosely and let it rest for 30 minutes. Preheat your oven to 425°F (220°C) during this rest time. Place a shallow pan on the bottom rack for steam.
- Before baking, lightly score the top of the loaf with a sharp knife. Pour 1 cup of hot water into the shallow pan on the bottom rack to create steam.
- Bake for 25 to 30 minutes, or until the crust is deep golden brown and the internal temperature reaches 200°F (93°C).
- Remove the bread from the oven and let it cool completely on a wire rack before slicing.
Notes
- For an extra crispy crust, spray the oven walls with water three times during the first 10 minutes of baking.
- If you do not have instant yeast, use active dry yeast and let it proof in the warm water for 5 minutes before adding the flour.
- This bread is excellent served warm with pasta sauce or used for hearty sandwiches.
Nutrition
- Serving Size: 1 slice
- Calories: 180
- Sugar: 1
- Sodium: 350
- Fat: 1
- Saturated Fat: 0
- Unsaturated Fat: 1
- Trans Fat: 0
- Carbohydrates: 38
- Fiber: 2
- Protein: 6
- Cholesterol: 0