

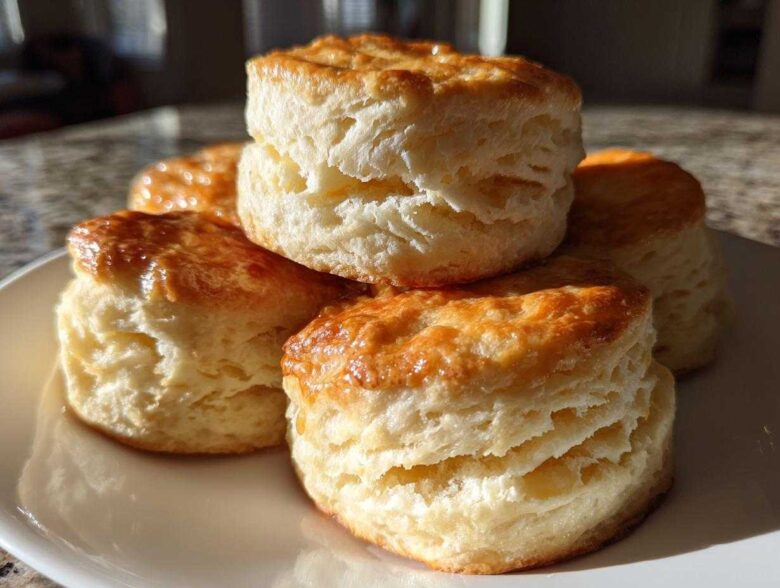
If you’ve ever taken a bite of a biscuit that was just… sad—flat and tough—you know my pain. For years, my baking was plagued by hockey pucks! But trust me, getting those sky-high, melt-in-your-mouth rounds is truly possible. I’m sharing the technique that finally unlocked the magic for me, resulting in the best homemade buttermilk biscuits you’ll ever taste. They are ultra flaky, beautifully tender, and completely made from scratch. It all comes down to keeping things icy cold, and I’m going to show you exactly how I do it!
Why You Need This Fluffy Biscuit Recipe for Perfect Buttermilk Biscuits
Honestly, there are a million recipes out there, but this one keeps everyone asking for my secrets. I didn’t just want standard biscuits; I demanded those tall, distinct layers you see in the best Southern kitchens. If you’re ready to upgrade your breakfast game, here’s why this recipe for buttermilk biscuits is the only one you’ll ever need:
- They Actually Rise! We are talking serious height here. This technique locks in all the steam needed to puff those layers up, making for incredibly tall biscuits that look just gorgeous on the plate.
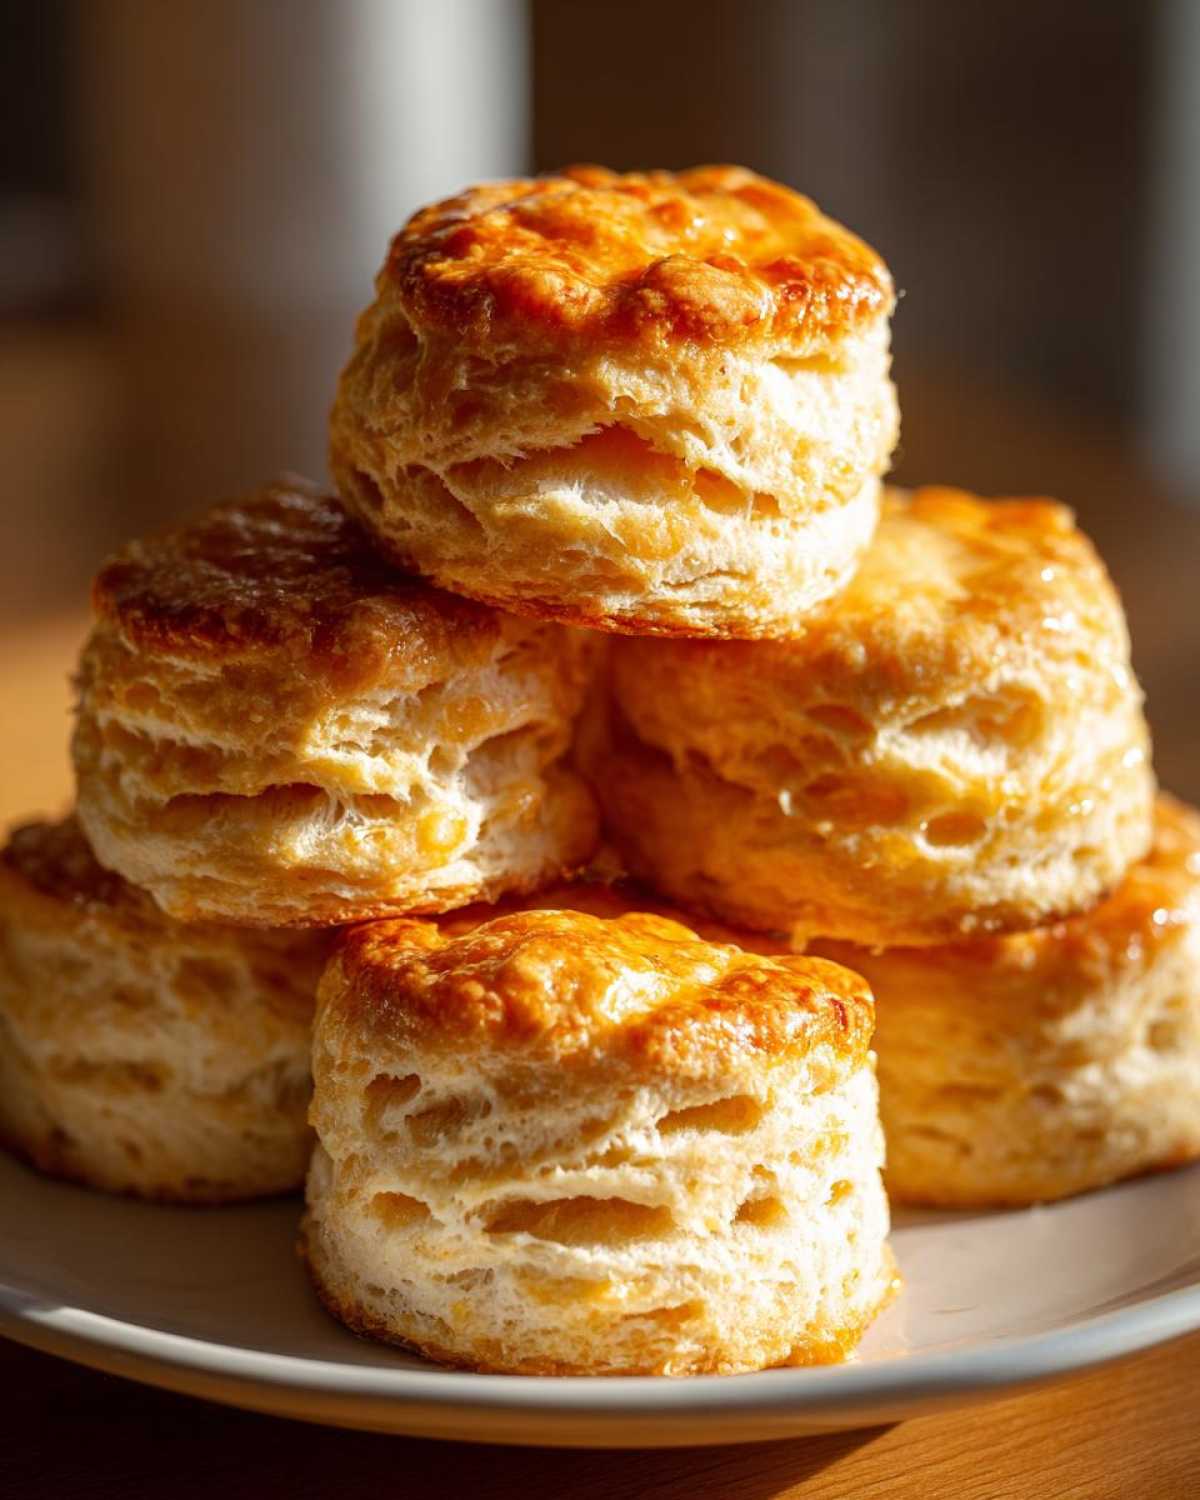
- Layers, Layers, Layers: The folding technique I use ensures you get flaky, pull-apart layers every single time. You can actually see the separation when you pull them apart—pure heaven!
- Unbeatable Tenderness: Thanks to the cold butter and minimal mixing, these are tender all the way through. They practically dissolve in your mouth, no heavy chewing required.
- That Classic Buttery Flavor: We use enough good, cold butter to make them rich and decadent, perfect for soaking up gravy or just topping with a little jam.
- So Quick It’s Shocking: Even though these are “from scratch,” they come together faster than most recipes let on. We’re looking at less than 30 minutes total, which is fantastic speed for such a great payoff. If you love speedy breakfast wins, check out my guide on easy fluffy oatmeal pancakes too!
Ingredients for Ultra Flaky Buttermilk Biscuits
Okay, listen up, because ingredient temperature is non-negotiable here. I can’t stress this enough: everything needs to be ICE COLD. This is how we guarantee those amazing layers people talk about when they rave about my buttermilk biscuits. You’ll need your dry goods whisked together first, of course. For the fat, use one half cup of unsalted butter, cut into small cubes and kept frigid. And the star? Three-quarters of a cup of the coldest buttermilk you can get your hands on. Keep those ingredients close to the freezer until the moment you add them to the flour mixture, or you risk losing that beautiful rise! You can find my favorite recipe for sweet potato biscuits if you want another twist on Southern baking!
Essential Equipment for Making Tall Buttermilk Biscuits
You don’t need a thousand fancy gadgets, but having the *right* tools makes all the difference when working toward the **best Southern biscuits**. When I first started my journey into buttermilk biscuits, I used whatever I had, but upgrading these two or three things really sped up my learning curve.
First, you absolutely need a good pastry blender. Trying to use two forks is a workout, and using your hands melts the butter too fast. A pastry cutter helps you slice through that cold butter and flour much quicker, keeping those butter chunks intact. Those chunky butter pieces are literally what turn into steam pockets!
Next up: the cutter! Skip the cheap ones. You want a sharp, straight-sided biscuit cutter. If you twist it when you press down—and trust me, we all do this at first—you seal the edges. That sealing stops them from climbing high. Also, make sure your baking sheet is ready; I usually line mine with parchment paper, which works perfectly for easy cleanup after all that buttery goodness. If you are looking for other dough work, check out my tips for easy homemade pizza dough!
Step-by-Step Instructions for Perfect Buttermilk Biscuits
Getting these **buttermilk biscuits** perfect is all about rhythm and keeping things cool. I’ve written down the steps exactly as I do them every time to ensure they come out tall and buttery. Seriously, follow this sequence and you won’t end up with flat, dry bread. Always start by getting your oven to 425°F (220°C) so it’s screaming hot when the dough is ready!
Preparing the Dry Mix and Cutting in the Butter
First things first: whisk your flour, baking powder, baking soda, and salt together in a big bowl. This mixes everything evenly so you don’t get a bite that sinks because of too much leavening. Now for the key part! Add in all those cubes of ice-cold butter. You need to work that butter into the flour until it looks like coarse crumbs; think oats or dried peas. If the butter melts even a little bit, your final biscuits won’t be flaky, so work quickly! Those pea-sized chunks are what create the pockets of air we need for lift.
Mixing the Dough and Creating Layers for Fluffy Biscuit Recipe
Pour in all your cold buttermilk at once. Use a fork—not your hands, seriously—and just bring the mixture together until it looks messy. I call it ‘shaggy.’ Stop mixing immediately! Overmixing develops gluten, and gluten makes tough biscuits. Turn that shaggy mass onto a lightly floured surface. Gently press it into a rough rectangle about an inch thick. Now we layer! Fold the dough into thirds, like folding a business letter. Turn the dough 90 degrees and pat it down again gently to about 3/4 inch thick. That one fold does most of the work for that fantastic layered texture!
Cutting and Baking Your Tender Buttermilk Biscuits
Time to cut! Grab your sharp, straight-sided cutter. Press straight down into the dough and lift straight up. Do not, under any circumstances, twist the cutter! Twisting seals those beautiful layers we just worked so hard to create. You can place your **tender buttermilk biscuits** close together on the sheet if you like softer sides, or spread them out if you want crisp edges. Brush the tops lightly with extra buttermilk—that helps them brown up nicely—and pop them into that hot oven. They bake fast, usually 12 to 15 minutes, until they are beautifully tall and golden brown on top. If you want to dive deeper into the science behind this, check out my post on baking techniques for biscuits!
Tips for Success with Homemade Buttermilk Biscuits
We’ve covered the steps, but honestly, the success of these **buttermilk biscuits** hinges on a few tiny details I’ve learned from years of messy trial and error. Don’t skip these pointers, or you risk losing that glorious height! The absolute number one rule in my kitchen for flaky bread of any kind is temperature control. If you feel the dough starting to warm up while you’re working it, just stop!
If your kitchen is running hot, pop the bowl of flour and butter back in the fridge for ten minutes before mixing. If you’re concerned about the cut dough squares, chilling them in the freezer for ten minutes right before they hit that hot oven is my secret weapon. That blast of cold sets the butter structure perfectly so it explodes when it hits the heat!
Remember the cutter? I mentioned it before, but it bears repeating because it’s so important for achieving those tall and flaky biscuits. You must press straight down and lift straight up. Think of it like a plunger, not a saw. If you twist that cutter even slightly, you crimp the edges of the dough together. When the edges are sealed, the biscuit can’t expand upward where it wants to go, and you end up with a beautiful, golden brown, but stubbornly flat top! A clean cut is a high rise, every time!
Also, don’t be shy about using enough buttermilk to just bring the dough together. If it looks dry, add maybe a teaspoon more, but that’s it. Too much liquid leads to sticking and flattening. When they come out golden brown, I love brushing them right away with melted butter while they cool slightly. Serve them warm with my absolute favorite recipe for homemade gravy pairings—you won’t regret it!
Ingredient Notes and Substitutions for Buttermilk Biscuits
Look, I know life happens! Sometimes you’re ready for perfect Saturday morning baking, but the store was out of real buttermilk. Don’t throw in the towel! While I truly believe this recipe is built around that tangy, rich flavor, we can improvise. If you find yourself in that dreaded dairy aisle missing buttermilk, all is not lost for your buttermilk biscuits!
The general rule for substitution is that you need an acidic element to react with the baking soda we tossed in with the flour mix. This reaction is what helps get that light, fluffy lift! You can easily make a substitute: just take whatever regular milk you have—whole milk is best if you have it—and mix in one tablespoon of white vinegar or lemon juice for every cup of milk. Let it sit on the counter for about five to ten minutes. It will curdle slightly and thicken up. That’s your DIY buttermilk ready to go!
Now, let’s chat butter. I insist on unsalted butter because I need to control the salt level myself, but if you only have salted, just pull back on the teaspoon of salt in the dry mix. Can you use margarine or shortening? Sure, technically. But I wouldn’t promise you the same melt-in-your-mouth texture. Shortening might make them tall, but it won’t give you that beautiful, caramelized golden crust and deep flavor that real butter provides. If you must substitute the butter (maybe for dietary reasons), use a mix of shortening and a good quality vegan butter to try and capture some of that richness. If you’ve never tried my sweet potato biscuits, you might find that substitution opens up even more possibilities in your kitchen!
Serving Suggestions for Classic Southern Cooking
When you’ve got perfect, warm, buttery rounds fresh from the oven, you can’t just eat them plain—that feels like a crime, right? These **Homemade Buttermilk Biscuits** are the backbone of really great comfort food baking, and they always demand a partner on the plate. If you ask anyone from the South, they’ll tell you the first thought is always gravy.
There is nothing that beats cracking one of those tender biscuits open, fluffing the layers with a fork, and letting a river of hot, savory gravy spill right into all those nooks and crannies. Seriously, it’s an experience. I actually put together my foolproof method for making the thickest, creamiest white gravy imaginable; you absolutely must check out my post on homemade gravy pairings!
But biscuits aren’t just for gravy, even if that’s my favorite way to eat them! These are also fantastic as quick dinner rolls. They soak up the juices from pot roasts or smothered chicken beautifully. If you’re looking for a sweet path, skip the savory stuff and serve them warm with strawberry preserves or that rich apple butter you made last fall. The buttery texture makes any simple topping feel fancy. They provide the perfect soft base for any hearty meal!
Frequently Asked Questions About Buttermilk Biscuits
Why didn’t my buttermilk biscuits rise tall?
Oh, this is the classic sad-biscuit moment! Usually, if your **buttermilk biscuits** don’t rise, it comes down to one of three culprits: your butter wasn’t cold enough, you twisted the biscuit cutter instead of pressing straight down, or you overworked the dough until it got tough. Remember, the steam trapped by the cold pockets of fat is what creates the lift! If you suspect you twisted, try cutting the dough again, but be super gentle on the press-and-lift motion next time. For more tips on perfect Southern texture, check out my guide on the best Southern biscuits!
Can I use regular milk instead of buttermilk in this recipe?
I highly recommend using real buttermilk because its acidity reacts perfectly with the baking soda for maximum fluff, but look, we all run out sometimes! You can absolutely make a quick substitute. For every cup of regular milk you need, just stir in one tablespoon of white vinegar or plain lemon juice. Let it sit on the counter for about five minutes until it looks slightly curdled. That’s your homemade buttermilk, and it works great in this recipe. It’s the best fix when you’re craving these Southern-style rounds right now!
How far ahead can I prepare the dough for Homemade Buttermilk Biscuits?
You have a little flexibility here! For the absolute best texture, it’s ideal to cut the biscuits and bake them right away. However, if you need to get ahead—and who doesn’t?—you can place the cut rounds on the baking sheet, cover them tightly with plastic wrap, and chill them in the refrigerator for up to 12 hours. When you’re ready to bake, pop them straight from the fridge into the preheated oven; you might need to add just 2 or 3 minutes to the baking time. This chilling action keeps the butter super firm, which is great for those layers!
What’s the secret to that flaky texture in the Best Southern Biscuits?
It’s the folding, hands down! Most people just cut the dough once, but that doesn’t build the internal structure. The magic happens when you gently pat the dough into a rough rectangle, fold it like a letter (into thirds), rotate it, and pat it down again. This creates multiple layers of dough separated by thin sheets of butter. When those layers hit the 425°F heat, the butter steams and forces the dough layers apart, leaving you with those incredible, flaky separations you want in the **best Southern biscuits**.
Storing and Reheating Your Homemade Buttermilk Biscuits
If you manage to have any of these incredible buttermilk biscuits left over—which is a feat in itself because they never last long in my house—you need to treat them right! Storing them incorrectly is the fastest way to turn that lovely, tender crumb into something chewy and stale. They are definitely best eaten the day you make them, preferably still warm, but let’s talk about leftovers.
For short-term storage, say, for lunch the next day, wrap them tightly in plastic wrap or tuck them into an airtight container at room temperature. They generally stay pretty decent for about 24 hours this way. If you need them to last longer than that, you’ll want to move them into the refrigerator. Once refrigerated, they firm up a bit, so plan on needing a good reheating session to bring them back to life.
Reheating is where you restore that bakery-fresh magic! Forget the microwave; that’s guaranteed fluff-killer. The absolute best way is in a conventional oven or, even better, a toaster oven if you’re just warming up one or two. Preheat your oven to about 350°F (175°C). Lay your cooled biscuits directly on the rack or on a small sheet pan. Let them bake for about five to eight minutes. You just want them hot all the way through. This process dries out the surface just enough to bring back that perfect crisp exterior without drying out the tender inside.
If you’re making a massive batch and know you won’t eat them all right away, you can freeze them! Cool them completely first. Wrap the biscuits tightly in plastic wrap, then place them inside a zip-top freezer bag. This double layer protects them from freezer burn. When you’re ready, defrost them loosely in the fridge overnight, and then follow the reheating instructions above. Seriously, mastering the reheat means you can enjoy perfect buttermilk biscuits anytime you want! If you’re tired of reheating and just want something quick and sweet, you should see how fast my recipe for easy bakery moist pistachio muffins comes together!
PrintUltra Flaky and Tender Southern Buttermilk Biscuits
Make tall, flaky, and tender buttermilk biscuits from scratch using this simple technique for classic Southern flavor.
- Prep Time: 15 min
- Cook Time: 15 min
- Total Time: 30 min
- Yield: 8 biscuits
- Category: Breakfast
- Method: Baking
- Cuisine: American
- Diet: Vegetarian
Ingredients
- 2 cups all-purpose flour
- 1 tablespoon baking powder
- 1 teaspoon baking soda
- 1 teaspoon salt
- 1/2 cup (1 stick) cold unsalted butter, cut into small cubes
- 3/4 cup cold buttermilk, plus extra for brushing
Instructions
- Preheat your oven to 425°F (220°C). Line a baking sheet with parchment paper or lightly grease it.
- In a large bowl, whisk together the flour, baking powder, baking soda, and salt.
- Add the cold butter cubes to the flour mixture. Use a pastry blender or your fingertips to cut the butter into the flour until the mixture resembles coarse crumbs with some pea-sized pieces of butter remaining.
- Pour in the cold buttermilk all at once. Use a fork to mix until just combined. Do not overmix; the dough will look shaggy.
- Turn the dough out onto a lightly floured surface. Gently pat the dough into a rough rectangle about 1 inch thick.
- Fold the dough into thirds, like a letter. Turn the dough 90 degrees and gently pat it down again to about 3/4 inch thick. This folding creates layers.
- Use a 2-inch biscuit cutter to cut straight down through the dough. Do not twist the cutter, as twisting seals the edges and prevents rising.
- Place the cut biscuits close together on the prepared baking sheet for softer sides, or slightly apart for crispier sides.
- Brush the tops lightly with extra buttermilk.
- Bake for 12 to 15 minutes, or until the biscuits are tall and golden brown on top.
- Serve warm, optionally brushed with melted butter.
Notes
- Keep all ingredients, especially the butter and buttermilk, very cold for the best rise and flakiness.
- For extra tall biscuits, chill the cut dough pieces in the freezer for 10 minutes before baking.
- Do not twist the biscuit cutter; press straight down to maintain the layers you created.
Nutrition
- Serving Size: 1 biscuit
- Calories: 250
- Sugar: 1
- Sodium: 450
- Fat: 13
- Saturated Fat: 8
- Unsaturated Fat: 5
- Trans Fat: 0
- Carbohydrates: 29
- Fiber: 1
- Protein: 5
- Cholesterol: 30