

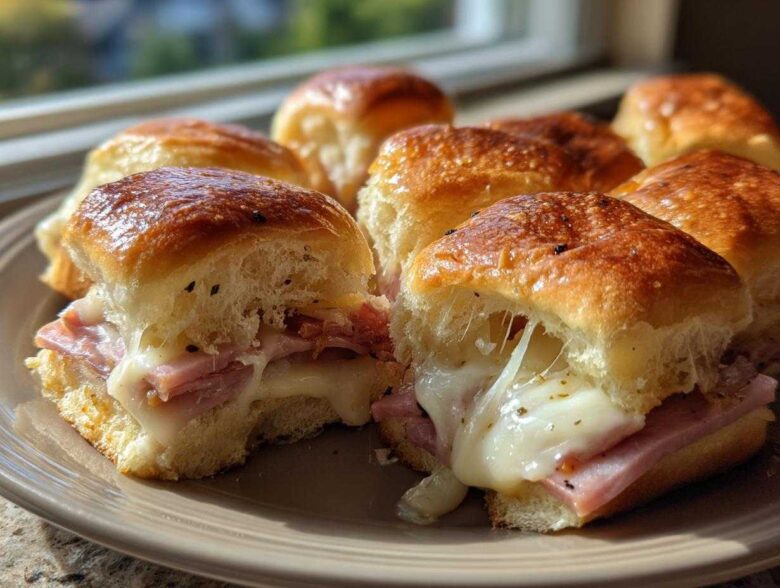
Oh my gosh, are you ever hosting? I mean *really* hosting? Whether it’s the big game, a holiday open house, or just needing something spectacular that doesn’t require me to stand over a stove all night, nothing beats the sheer magic of these Ham and Cheese Sliders. Seriously, they are my secret weapon. I made these for my nephew’s graduation party last weekend, and people were practically fighting over the last sheet pan!
Forget fussy layered sandwiches or tiny canapés. These sliders use the miracle of Hawaiian sweet rolls—you know, the ones that are already perfectly portioned?—and they bake up into this glorious, melty single unit. But the real game-changer, the thing that makes everyone ask for the recipe, is that buttery, tangy mustard glaze we brush right on top. Trust me, once you bake these, you’ll never look at party food the same way again.
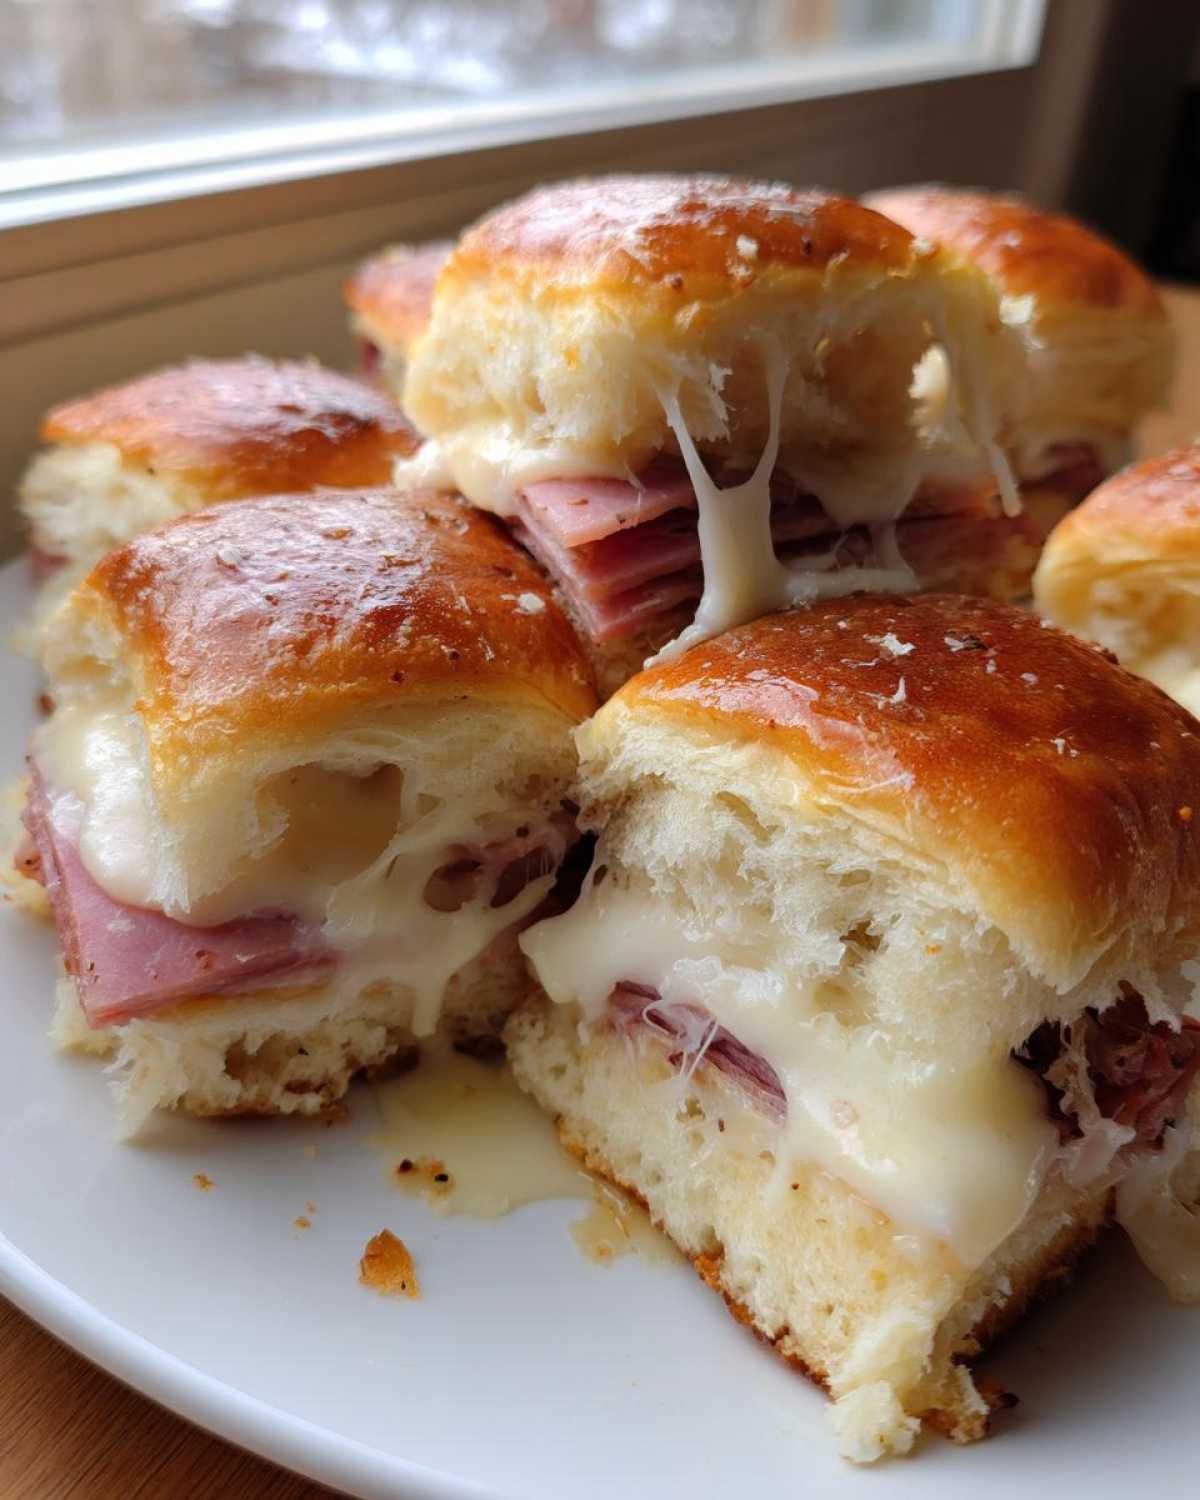
It makes clean-up a breeze, too! If you’ve been dreaming of an easier way to handle crowd-pleasing appetizers, you absolutely have to check out how these come together, right before you toss them in the oven. While you’re thinking about party food, you might want to check out my recipe for easy cream cheese sausage balls; they make great company for these sliders!
Why You Need These Ham and Cheese Sliders for Your Next Party
Honestly, these aren’t just good food—they are *strategy*. When you’re feeding a crowd, you need something that disappears fast but doesn’t stress you out. These little baked beauties are my absolute go-to for quality and quantity!
- Minimal hands-on time means I can actually mingle!
- They travel perfectly; just wrap them tight.
- The combination of savory ham, salty cheese, and sweet dough is irresistible.
- They reheat like a dream, which is rare for party food.
If you’re looking out for other amazing drinks to pair with snacks, make sure to check out my recipe for easy, big-batch hot cocoa mix if the weather turns chilly!
Perfect for Tailgate Food and Game Day Sliders
Listen, when you’re setting up shop in a parking lot or doing a buffet line, you want zero serving utensils and zero mess. These are grab-and-go perfection. You just lift one little square, and boom, you’ve got a complete, warm, cheesy sandwich without losing half the filling on the walk over.
The Magic of Baked Sliders on Hawaiian Rolls
The secret sauce here is 100% those sweet orange rolls. When you bake them together under that glaze, they steam just a bit, keeping the inside super soft! While they are great for any event, they totally shine as Hawaiian roll sliders. The sweetness of the bread marries perfectly with the sharpness of the Swiss cheese and that savory ham layer. It creates a flavor bomb in every bite!
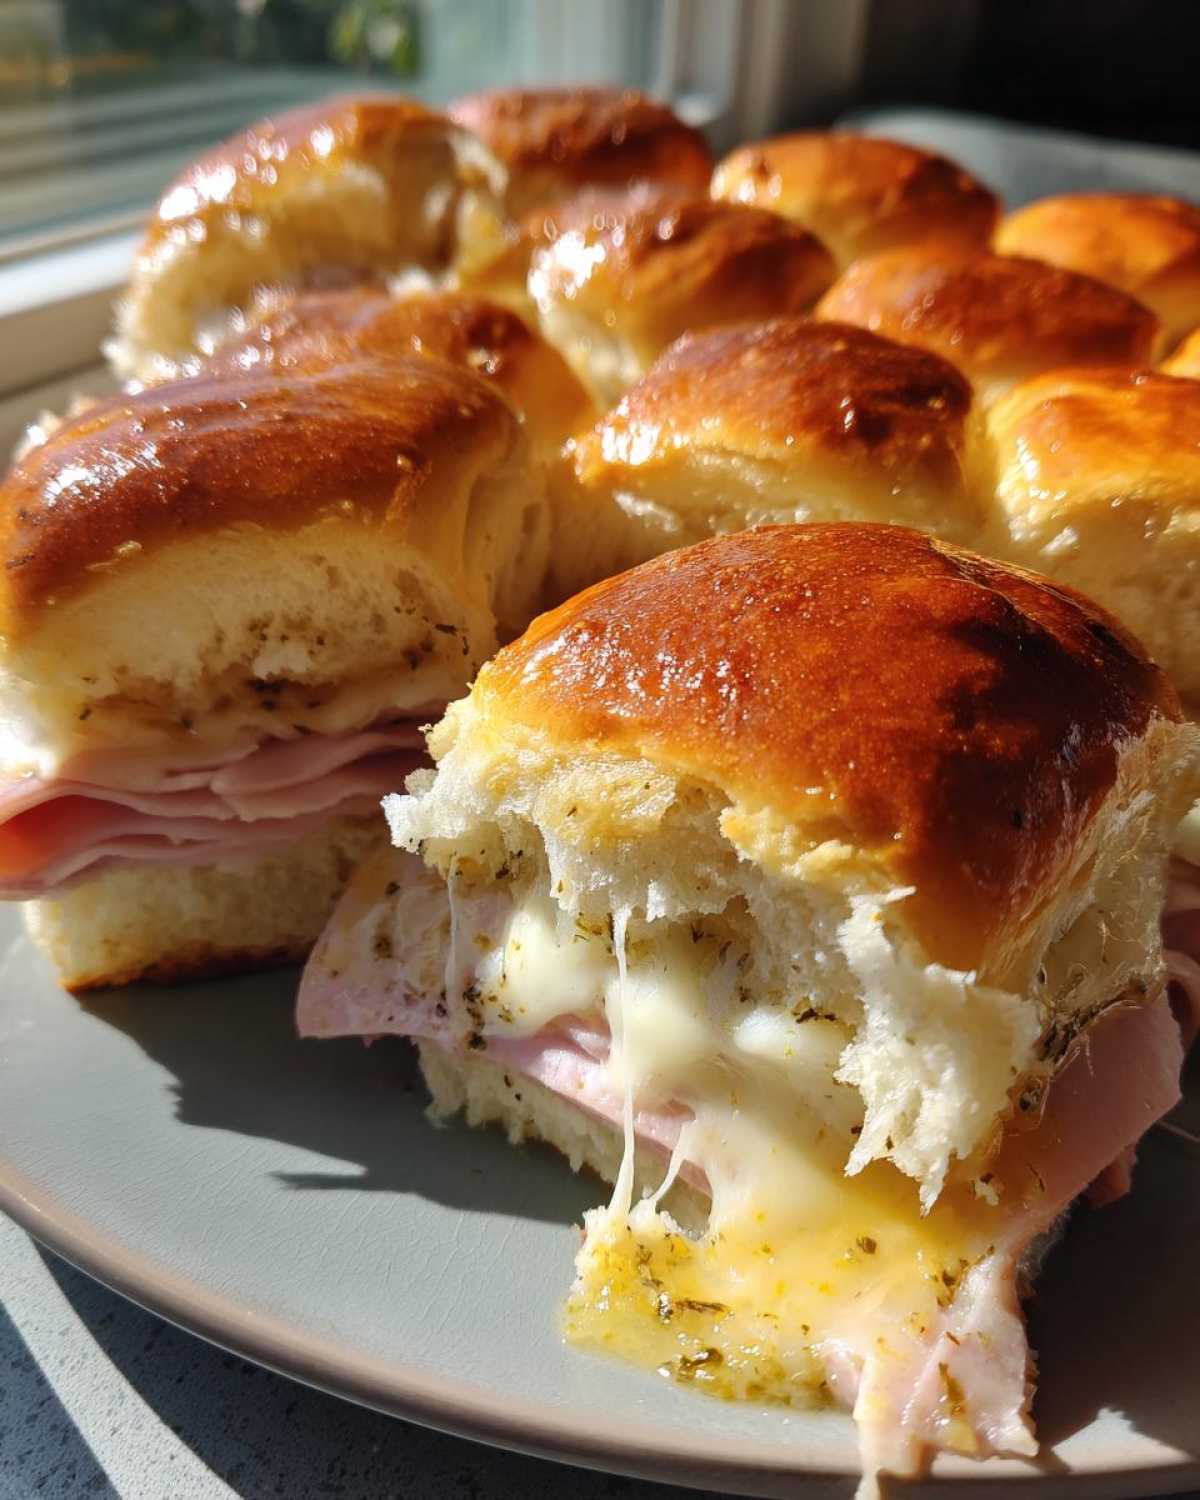
Gathering Ingredients for Your Ham and Cheese Sliders
Okay, before we get into the fun part—the assembly—we need our cast of characters lined up. The brilliance of these ham and cheese sliders is that they use almost no prep work, but you have to have the right stuff in the right form! I always make sure my ham is paper-thin from the deli because thick slices just won’t melt properly when baked.
For the main structure, you absolutely need that 12-count package of Hawaiian sweet rolls, still connected. Don’t try to pull them apart first—remember, we’re slicing through them like one big slab later!
Here is the full lineup you’ll need for about 12 incredible party sandwiches:
- One full package (12 count) of those glorious Hawaiian sweet rolls.
- One pound of deli ham, thinly sliced. Yes, thin! We need it to melt seamlessly.
- One pound of thinly sliced Swiss cheese. This combination is the classic, and it holds up so well when baked.
- Four tablespoons of unsalted butter that you’ll melt down.
- Two tablespoons of Dijon mustard. Don’t skimp on the Dijon; we need that tang!
- One tablespoon of Worcestershire sauce—this adds unbelievable depth.
- One teaspoon of poppy seeds for that little bit of crunch on top.
Make sure you have your butter fully melted before you start whisking that glaze together. If you’re looking for other great appetizer ideas now that you’re stocking up, you should definitely take a peek at my best ham salad recipe; it’s amazing for lunch the next day!
Step-by-Step Guide to Making Ham and Cheese Sliders
This is where the magic really happens, and honestly, it takes less time than finding matching Tupperware lids! The process is straightforward, but paying attention to the slicing and the layering ensures these ham and cheese sliders come out absolutely perfect. Before you even touch the rolls, remember to set your oven to 350 degrees Fahrenheit and get that 9×13 dish greased up a little so nothing sticks.
If you’re interested in pairing these with a classic side dish, check out my thoughts on making scalloped potatoes and ham—it makes the ultimate comfort meal!
Preparing the Rolls and Layers for Ham and Cheese Sliders
The most crucial part of the assembly is slicing the entire package of rolls horizontally, like you are making one gigantic, connected sandwich. Keep the top and bottom halves intact! Place the bottom half into your prepared dish. Now, stack it up: evenly layer all that thin ham first, and then cover it completely with all the Swiss cheese. Pop the top half of the rolls right on top. It should look a little silly—like one giant, pale, uncut loaf.
Creating the Buttery Mustard Glaze for Your Baked Sliders
While your oven is still warming up, grab a little bowl. We need to whisk together that beautifully savory glaze that makes these baked sliders famous. Melt your butter completely, then whisk in the Dijon mustard until it’s totally smooth. Now add the Worcestershire sauce. You want this mixture combined perfectly so there are no streaks of pure butter or mustard when you brush it on. Once it’s all happy together, take a pastry brush and go over the top surface of the rolls until every single little roll top is coated!
Baking and Finishing Your Ham and Cheese Sliders
Cover the dish tightly with aluminum foil—this traps the steam and melts that cheese wonderfully. Bake it covered for 15 minutes EXACTLY. Then, take the foil off and bake for another 5 to 10 minutes until the tops get that lovely, slight golden brown color. This is important: let them rest! Five minutes on the counter after they come out of the oven is non-negotiable. This lets the cheese settle down just enough so that when you slice them apart using that slice-through technique, they don’t fall apart!

Expert Tips for Perfect Ham and Cheese Sliders Every Time
Now that you know the basic steps, here are the little secrets I’ve picked up over the years to make sure these sandwiches turn out restaurant-quality every single time. Trust me, a couple of small tweaks make a huge difference when you’re serving a crowd!
My biggest piece of advice revolves around timing because you don’t want sad, soggy rolls when your guests arrive. Also, the very last step—the slicing—is non-negotiable if you want perfect, clean portions.
Make Ahead Appetizers Assembly Window
This is where these shine for holiday parties and game day planning! You really can assemble the whole thing—the rolls, the ham, the Swiss, everything—up to four hours before you plan to eat. Just put the tops on, brush with the glaze, and then cover the whole baking dish tightly with plastic wrap or foil. Pop it straight into the fridge.
When you’re ready to bake, you just need to remember one thing about these make ahead appetizers: add about 5 to 10 extra minutes to that initial covered baking time. The cold pan needs more time to heat all the way through before the cheese starts melting properly. Don’t skip that extra time, or you’ll end up with cold centers!
If you’re planning a big spread and need something crunchy to balance out all the soft slider goodness, you absolutely have to check out my recipe for easy homemade breadsticks. They fly off the plate!
Ingredient Notes and Substitutions for Ham and Cheese Sliders
I get asked all the time about tweaking the ingredients, and look, I’m all about making things work for *your* kitchen. While this recipe for ham and cheese sliders is definitely designed around the classic combo, you can absolutely make swaps! Just know that the sweet/savory balance might shift a tiny bit.
When it comes to cheese, the star here is Swiss. It gets that beautiful pull and has that slightly nutty, earthy flavor that cuts through the sweetness of the Hawaiian rolls. But if someone in your house is a sworn enemy of Swiss cheese—maybe you have a picky eater—Provolone is a decent substitute. It melts beautifully, but it’s milder, so you might want to up the Dijon in your glaze just a hair.
Now, let’s talk ham quality. I’m insisting on deli ham for a reason. You want that paper-thin cut. Pre-packaged, ultra-processed ham slices are usually thicker and can sometimes be overly salty or weirdly textured after baking. If you *must* use pre-sliced, try to find the highest quality, low-sodium option you can, and maybe even dice it up slightly instead of layering whole pieces.
You could also try using smoked turkey instead of ham for a different take—they’re still great party sandwiches! While you’re swapping ingredients around, if you ever need a lighter lunch option, you might want to check out my recipe for cottage cheese chicken salad; it’s fantastic on crackers!
Serving Suggestions for These Party Sandwiches
So, you’ve got these incredible, warm, savory-sweet party sandwiches ready to go, but what do you put next to them on the platter? You need something that offers a little contrast, right? Because these sliders are so rich with butter, cheese, and sweet bread, something crunchy or acidic really helps balance out the plate.
I often make a huge batch of crisp, crunchy side salads. They give people a break from the richness! If you want something super simple that cuts right through the richness of the Swiss and ham, you have to try my favorite vinaigrette. It keeps the slaw tasting fresh instead of soggy.
You can find the instructions for that bright side dish here: easy crunchy cabbage salad vinaigrette. It’s always the first thing gone after the sliders!
Storing and Reheating Leftover Ham and Cheese Sliders
If, and I mean *if*, you actually have any of these incredible ham and cheese sliders left over—because usually, they vanish the second I pull the foil off—you’ll want to know how to keep them good until the next day. Nobody wants a soggy slider when they reheat them, right? That chewy, buttery top crust is half the joy!
The key here is to keep the air out. Once they are totally cool, just slide them back into an airtight container. I usually just use the same 9×13 dish and press plastic wrap right down onto the top layer before putting the lid on. This prevents them from getting that weird fridge smell, and honestly, they keep perfectly for two or maybe three days like this.
Now for reheating—and please listen to me on this one! You *can* use the microwave. Sure. But it will turn that beautiful golden top soft and mushy. If you want to bring them back to life and get that slight crispness back, the oven is your best friend. You should totally check out how I reheat my leftover mashed potatoes into crispy cakes; the principle is similar—low and slow heat helps:
- Preheat your oven to a low setting, maybe 300 degrees Fahrenheit.
- Place the sliders (still connected or separated) on a baking sheet. If you can, put down a little parchment paper first.
- Bake them covered loosely with foil for about 10 minutes. This warms them through gently.
- Take the foil off for the last 3 to 5 minutes. This lets the top dry out just a touch and crisp up again.

Using the oven keeps the texture miles better than just nuking them for 30 seconds. These sliders are amazing the next day for a quick lunch, especially if you pair them with something sharp, like pickles or leftover mashed potato cakes if you happen to have those too!
Frequently Asked Questions About Ham and Cheese Sliders
I always get so many questions when I post photos of these on social media because people want to know every little detail before they make them for their big event! These game day sliders are pretty simple, but a few tweaks can really make them work perfectly for your needs. I tried to cover all the bases below, but if you have another question, drop it in the comments!
If you are thinking about other snacks for your party spread, you should look at my easy pizza muffins—they go fast!
Can I use a different type of cheese besides Swiss in these Hawaiian roll sliders?
You totally can! While the classic Swiss and ham sliders combo is beloved because the nutty flavor of the Swiss plays so well with the sweet roll, if you aren’t a fan, grab Provolone or even Medium Cheddar. Cheddar melts great, but be warned that it doesn’t offer that slightly earthy background note that the Swiss brings to the party.
How long can I keep the assembled Ham and Cheese Sliders refrigerated before baking?
This is one of the greatest things about these! You can assemble the whole thing perfectly, glaze and all, and keep them covered tightly in the fridge for up to four hours. Just remember that little baking adjustment—you need to add that extra 5 to 10 minutes to the initial covered baking time so everything gets evenly hot.
What is the best way to reheat leftover game day sliders?
If you have these beauties left over, please, please, please skip the microwave if you value texture! The best way to revive your game day sliders is in the oven at about 300 degrees. Bake them loosely covered with foil first until they warm all the way through, and then take the foil off for the last few minutes. That brings back just enough of that lovely baked surface instead of steaming them into a sad lump!
Nutritional Snapshot of This Recipe
Okay, let’s talk numbers for a second. I know when you’re making these amazing ham and cheese sliders for a party, you aren’t really worried about macros, but it’s good to have an idea, right? This recipe is designed for simplicity and flavor bomb status, so they aren’t exactly light eats, but they are perfectly portioned as a single slider serving.
These estimates are based on using standard deli ham, conventional Swiss cheese, and the full mustard glaze recipe, serving 12 total. Remember, these are always estimates because the brands I use might be richer in sodium or fat than the ones you grab this week! If you’re looking for something lower carb that still hits that savory note, you should absolutely check out my cheeseburger bowl recipe—it’s shockingly good for cutting carbs!
Here is what you can expect from one perfect, cheesy slider:
- Serving Size: 1 slider
- Calories: 280
- Fat: 14g (Remember, 7g of that is Saturated Fat—worth it!)
- Carbohydrates: 25g
- Protein: 15g
- Sugar: 8g (Hello, Hawaiian rolls!)
- Sodium: 750mg (The ham and cheese definitely bring the salt!)
- Fiber: 1g
See? Totally reasonable for a fantastic party sandwich. If you’re aiming for lower sodium, just look for low-sodium deli ham, and that will shave a few hundred milligrams right off the top. Enjoy them warm!
Share Your Experience Making Ham and Cheese Sliders
I can’t tell you guys how much joy it gives me when you try my recipes, especially crowd-pleasers like these ham and cheese sliders! Seriously, seeing your beautiful, cheesy trays pop up in my feed is the best reward for me.
I really want to know if you tried these for your big game day spread or that crazy family holiday we talked about. Did the mustard glaze turn out just right? Did the kids leave you any leftovers to try reheating the next day?
Please don’t be shy! Head down to the comments below and leave a rating for the recipe—a quick five-star review lets everyone else know these are worth making. And if you took a picture of your finished, golden-brown tray, tag me on social media! Seeing your success stories keeps me inspired to keep testing and perfecting new recipes for you all. You can always find more of my latest kitchen experiments over at my main blog page!
PrintBaked Ham and Cheese Sliders with Mustard Glaze

Assemble easy ham and cheese sliders on Hawaiian rolls with a buttery mustard topping and bake until golden brown for simple party sandwiches.
- Prep Time: 10 min
- Cook Time: 25 min
- Total Time: 35 min
- Yield: 12 servings
- Category: Appetizer
- Method: Baking
- Cuisine: American
- Diet: Vegetarian
Ingredients
- 1 (12 count) package Hawaiian sweet rolls
- 1 pound thinly sliced deli ham
- 1 pound thinly sliced Swiss cheese
- 4 tablespoons unsalted butter, melted
- 2 tablespoons Dijon mustard
- 1 tablespoon Worcestershire sauce
- 1 teaspoon poppy seeds
Instructions
- Preheat your oven to 350 degrees Fahrenheit. Lightly grease a 9×13 inch baking dish.
- Slice the entire package of Hawaiian rolls horizontally, keeping the rolls connected. Place the bottom half of the rolls in the prepared baking dish.
- Layer the sliced ham evenly over the bottom rolls.
- Layer the sliced Swiss cheese evenly over the ham.
- Place the top half of the rolls over the cheese layer.
- In a small bowl, whisk together the melted butter, Dijon mustard, and Worcestershire sauce.
- Brush the mustard mixture evenly over the top of the rolls. Sprinkle with poppy seeds.
- Cover the baking dish tightly with aluminum foil.
- Bake for 15 minutes. Remove the foil and bake for another 5 to 10 minutes, or until the cheese is melted and the tops are lightly golden.
- Let the sliders rest for 5 minutes before slicing them apart between the rolls. Serve warm.
Notes
- You can assemble these sliders up to 4 hours ahead of time. Cover and refrigerate them before baking. Add 5 to 10 minutes to the initial covered baking time if baking directly from the refrigerator.
- Use a serrated knife to carefully cut through the connected rolls after baking for easy serving.
Nutrition
- Serving Size: 1 slider
- Calories: 280
- Sugar: 8
- Sodium: 750
- Fat: 14
- Saturated Fat: 7
- Unsaturated Fat: 7
- Trans Fat: 0
- Carbohydrates: 25
- Fiber: 1
- Protein: 15
- Cholesterol: 40