

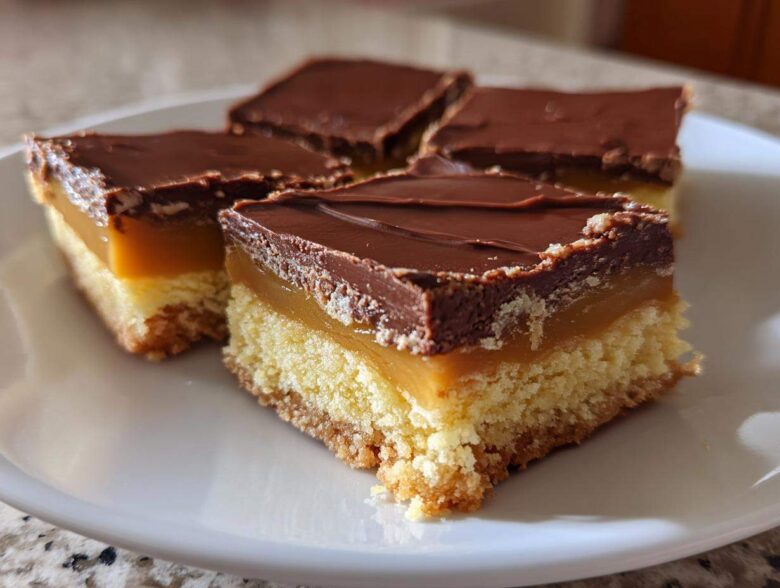
Oh my goodness, are you ever craving that perfect snap of chocolate followed by that impossibly chewy caramel and that buttery, crumbly base? I know I am, usually around 3 PM on a Tuesday! Store-bought candy bars are fine, but they never quite hit the spot, right? That’s why I spent what felt like ages perfecting this recipe for Homemade Twix-Style Cookie Bars. After tackling everything from fussy layered cakes to tricky bread doughs, I can honestly say nailing the three key layers—the shortbread, the rich caramel, and the smooth chocolate coating—gives me so much satisfaction. Trust me when I say once you nail this ratio, you won’t look back!
Why You Will Love These Homemade Twix Cookie Bars
Seriously, ditch the wrapper and whip up a batch of these homemade versions. You absolutely need to experience the layers coming together fresh from your own kitchen. It’s a game changer!
- That perfect, shatteringly crisp yet buttery buttery shortbread crust that melts right in your mouth.
- The caramel layer? It’s truly gooey and rich—nothing like the stiff stuff you find in packages. We are talking real, gooey caramel desserts bliss here.
- It’s ridiculously easy! You don’t need special equipment for this from scratch candy making; just a mixer (or elbow grease!) and a pan.
- This recipe replicates that famous pairing of textures perfectly, making them truly irresistible chocolate coated sweets.
- They hold up so well for cookie exchanges or parties because they are sturdy once chilled, making them great holiday cookie exchange favorites.
- You can cut them into whatever size you want—from satisfyingly huge squares to perfect little bite sized candy treats.
- Forget the long ingredient list of the real thing; we keep the components simple while delivering maximum flavor payoff for these decadent layered bars!
Ingredients Needed for Perfect Twix Style Bars
Okay, gathering your supplies is half the battle, but honestly, these ingredients are mostly pantry staples. It’s all about using the right amounts to get that signature chewiness and snap! If you ever want to dive deeper into amazing layered baking, check out my thoughts on my favorite layered recipes, but for now, let’s focus here. We need to keep things organized because every layer earns its spot!
For the Buttery Shortbread Crust
This is the foundation, and it has to be perfect! We need that classic, crumbly, melt-in-your-mouth texture that defines the buttery shortbread crust. Get your butter softened—and I mean *softened*, not a puddle!
- 1 cup unsalted butter, softened
- 1/2 cup granulated sugar
- 2 cups all-purpose flour
- 1/4 teaspoon salt
For the Gooey Caramel Layer
This is where the magic happens! This combination makes the rich, gooey caramel desserts experience complete. See how precise we have to be with the corn syrup and the condensed milk? That balance is everything for the chew factor.
- 1 (14 ounce) can sweetened condensed milk
- 1/2 cup light corn syrup (don’t leave this out, it keeps it flexible!)
- 1/2 cup packed light brown sugar
- 1/4 cup heavy cream
- 1 teaspoon vanilla extract
For the Rich Chocolate Topping
We want this layer shiny and smooth—the perfect final coat of chocolate coated sweets. The little bit of coconut oil is my secret weapon here; it makes the chocolate super glossy and helps it set up nicely when chilled.
- 1 1/2 cups semi-sweet chocolate chips
- 2 tablespoons coconut oil
Step-by-Step Instructions for Homemade Twix Cookie Bars
Alright, put on your apron because this is where the real fun begins! Making these from scratch feels like true from scratch candy making, but it’s honestly so satisfying when it comes together in those distinct layers. After you check out my tips for amazing homemade breadsticks (a totally different baking challenge!), you’ll appreciate the simplicity here. Remember, precision matters when layering, especially with the caramel, so pay attention to those cool-down times. We don’t want a runny mess!
Baking the Buttery Shortbread Crust
First things first, get that oven warming up to 350°F (175°C). And please, for the love of easy cleanup, line that 8×8 inch pan with parchment paper, making sure you leave some overhang on two sides—that’s your built-in lifting handle later! Now for the dough: cream that softened butter and sugar until it’s fluffy, then mix in the flour and salt until it looks like coarse crumbs. You need to press this dough down firmly and evenly into the bottom of the pan. Don’t be shy; pack it in there! Bake it for about 15 to 18 minutes. You want the edges to just start looking lightly golden brown, but stop before they darken too much, or your shortbread will be too crisp, not perfectly tender.
Creating and Setting the Gooey Caramel Layer
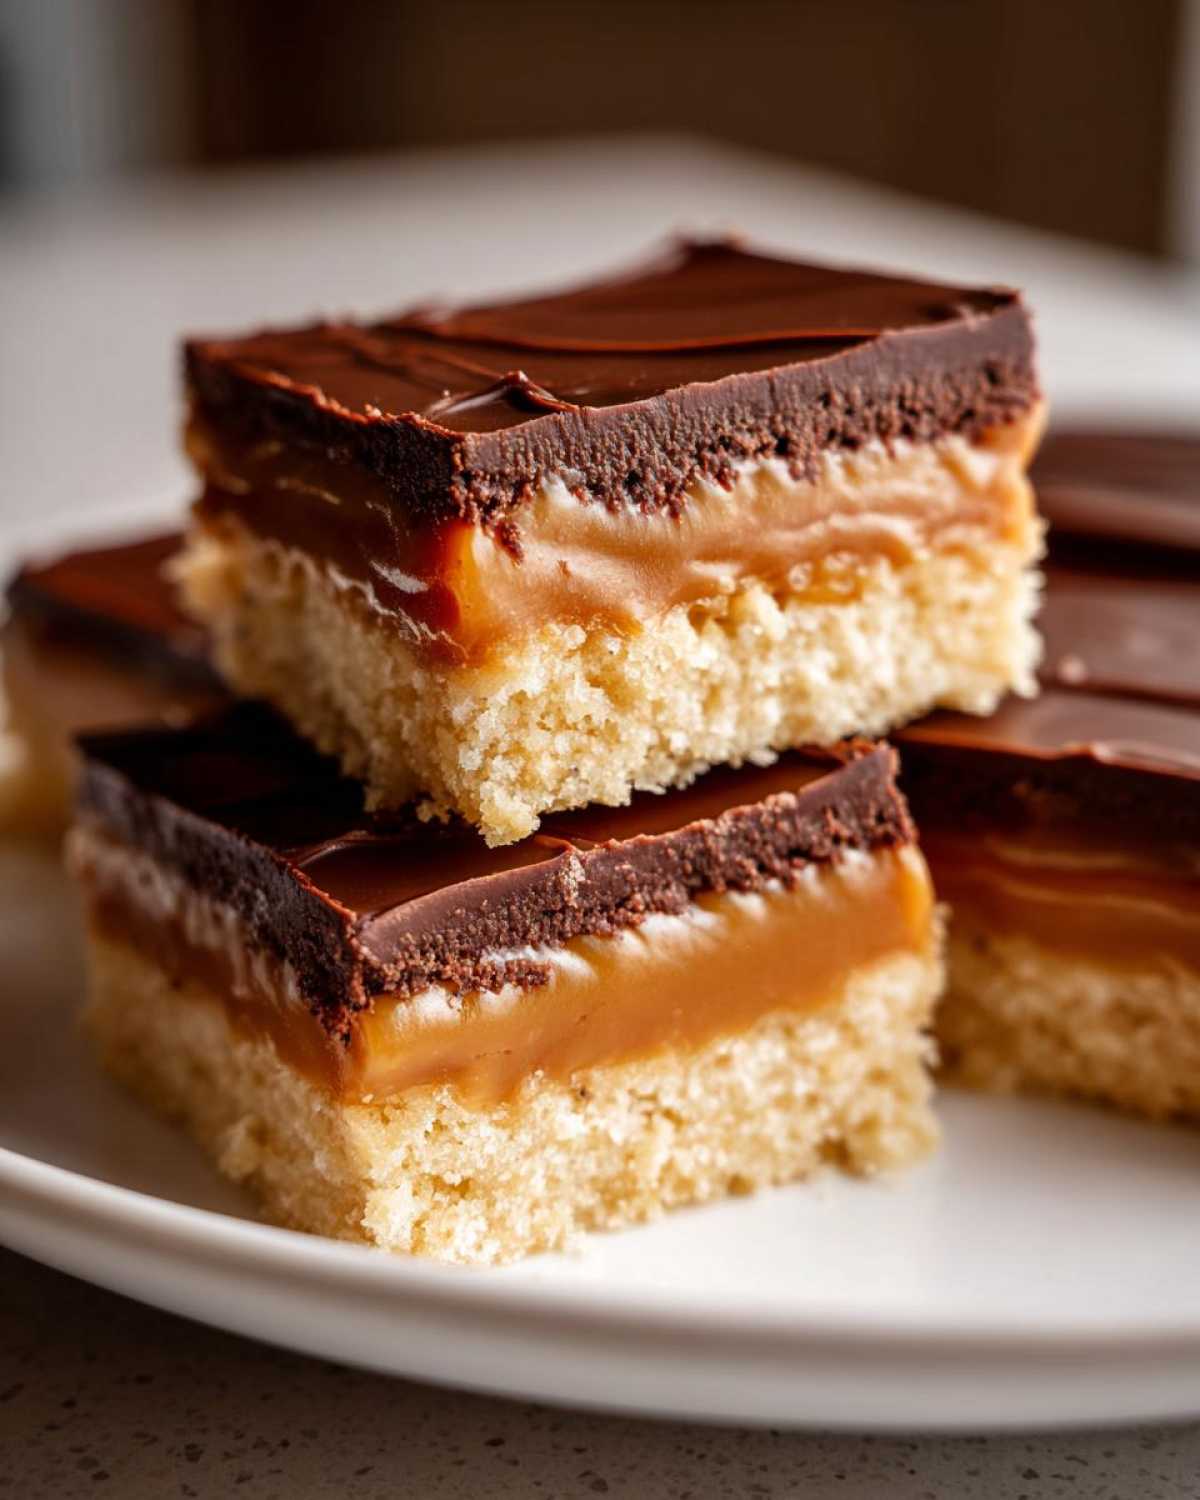
While the shortbread cools down just a bit, we move straight to the gooey filling. Grab a medium saucepan. Toss in your sweetened condensed milk, the corn syrup (yes, the whole amount, it’s for texture!), brown sugar, and heavy cream. Set that over medium heat. You absolutely must stir this constantly while it heats up. Once it hits a gentle boil, knock the heat down low and let it simmer for 5 minutes, stirring frequently so it doesn’t scorch. Take it off the heat right away and stir in your vanilla. Pour that glorious, thick caramel directly over the slightly cooled crust, spreading it out evenly. Back into the oven it goes for just 10 more minutes. This little second bake sets the caramel perfectly. Once done, you have to let it cool completely, and then pop the whole thing into the fridge for at least 2 hours. Seriously, don’t rush the chilling; firm caramel is essential for a clean slice later!
Finishing with the Chocolate Coated Sweets Topping
Once that caramel layer is rock solid from the fridge, we move to the chocolate blanket! I melt my chips and coconut oil together in a microwave-safe bowl. Zap it for 30 seconds, stir it really well, and repeat until it’s completely smooth and looks glossy. That coconut oil helps it set nicely when it chills, giving you those beautiful chocolate coated sweets.
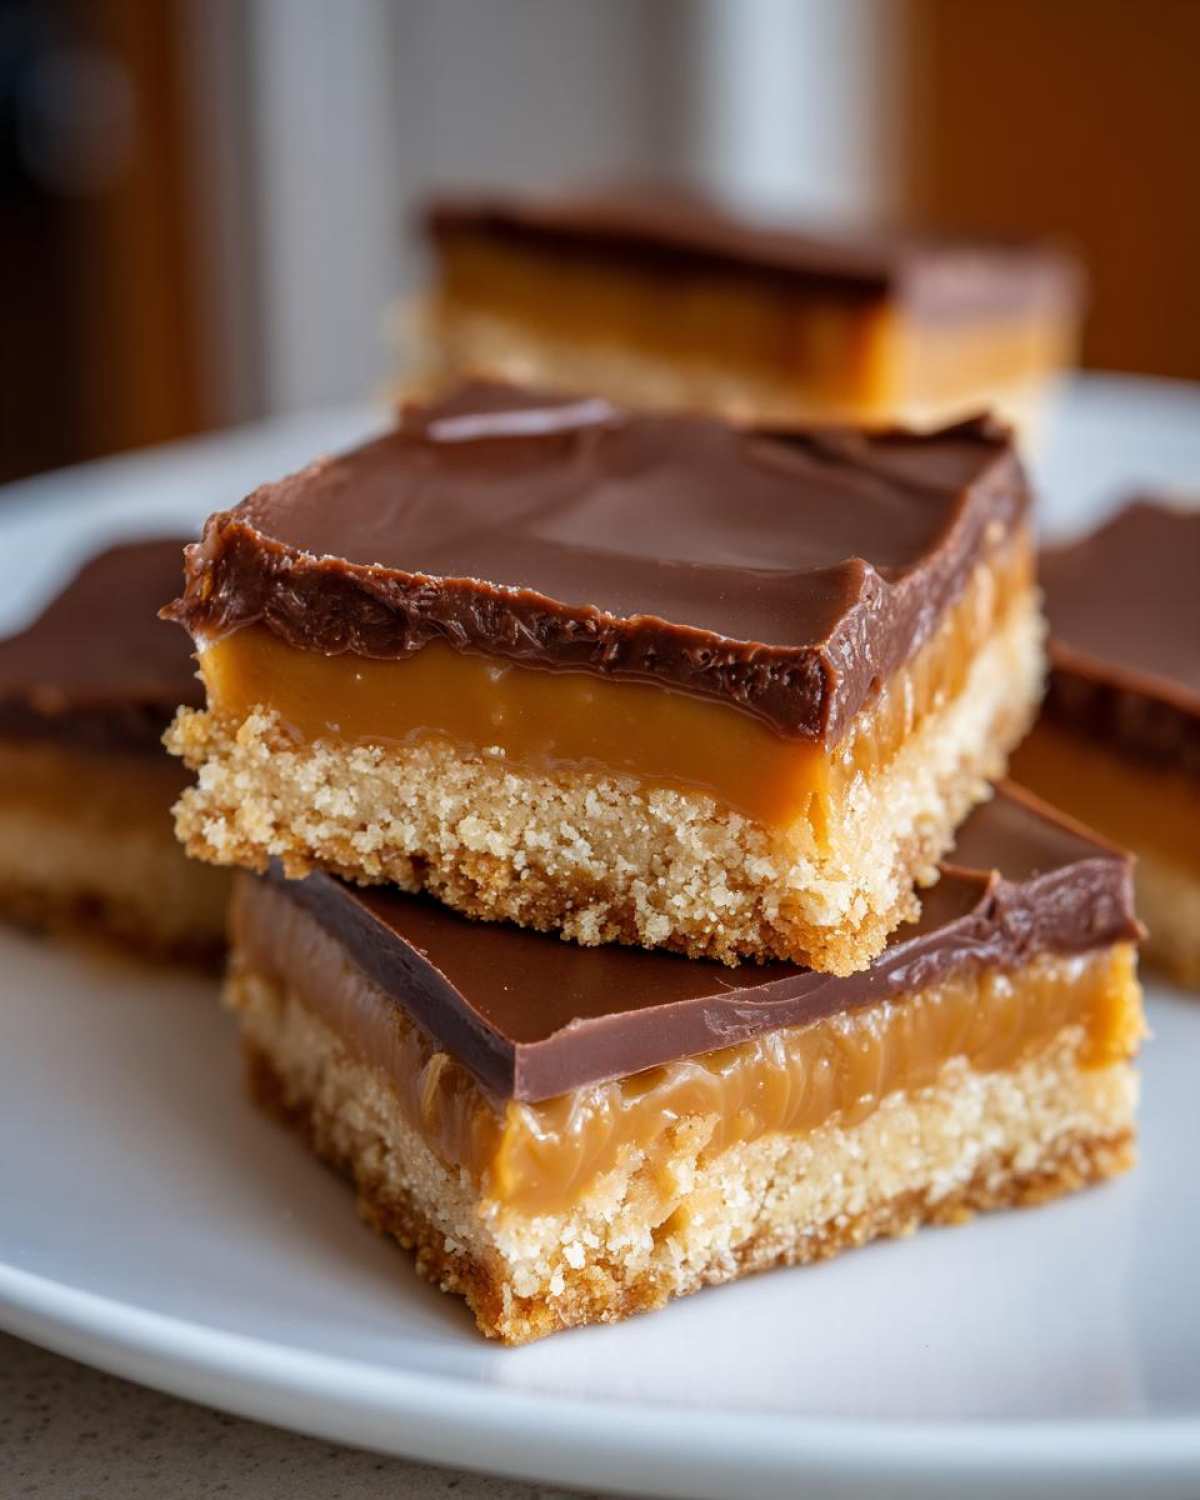
Gently pour all that melted chocolate over the firm caramel layer and use an offset spatula—or maybe just the back of a spoon, I won’t judge!—to spread it right to the edges. Back into the fridge for one final chill, maybe 30 minutes, just until that chocolate topping is set enough so you can touch it without leaving a fingerprint. Then, stand back, grab the parchment paper overhang, lift the whole slab onto a cutting board, and use a big, sharp knife to cut them into whatever size pleases your sweet tooth!
Tips for Success Making Your Twix Copycat Recipe
Okay, even with the perfect recipe, fine-tuning the process is what takes these homemade candy bar bars from good to absolutely legendary! I’ve picked up a few tricks over the years, especially when dealing with sticky caramel and sharp chocolate layers. These little bits of wisdom are pulled straight from my experience baking batches for my family and testing what works best for that perfect texture.
Let’s talk about the cut, because nobody wants ugly bars, right? My biggest revelation was realizing that temperature dramatically affects how cleanly the knife slices through the layers. You absolutely must use a large, sharp knife for cutting these layers—a small paring knife just drags the caramel everywhere! Dip that big knife into a tall glass of hot water, wipe it totally dry, and then make your cut. Repeat that process for every single slice. It seems fussy, but it gives you those incredibly neat edges, just like the real thing!
Another thing Grandma always taught me, which applies perfectly here: pay attention to your crust baking time. If you want that soft, tender melt underneath everything, don’t let that shortbread crust bake until it’s deeply brown. If you feel like your oven runs hot, just knock off those last two minutes of baking time listed in the instructions. That slight under-bake, compensated for by the moisture in the caramel layer, keeps the base wonderfully tender.
Regarding the chocolate coating—you have options, and they all taste amazing! While the recipe calls for semi-sweet chips because that’s usually the best balance, don’t hesitate to try milk chocolate if you want it sweeter, or go dark if you want a richer contrast to that sweet caramel. Just remember the coconut oil helps everything flow beautifully, no matter which chip you choose. It keeps that coating from getting dull or seizing up on you. Honestly, these little adjustments are what make the difference when trying to achieve that professional, copycat candy recipe quality at home!
Variations on the Classic Twix Inspired Dessert
Now that you’ve mastered the classic three-layer approach, why stop there? This buttery shortbread base is so versatile, and layering is what makes these bars so fun! I love experimenting, especially when I need to use up random pantry items or just want to shake up our weekend treat rotation. Think of the base recipe as your jumping-off point for some seriously delicious layered dessert bars.
My absolute favorite little twist is playing with the shortbread crust itself. If I want a little extra crunch, I’ll fold about a half cup of finely chopped pecans or walnuts right into the dough before I press it into the pan. Toasting them lightly first really wakes up their flavor, which pairs surprisingly well with that sweet caramel layer. For a totally different texture, try swapping out half of your all-purpose flour for almond flour. It gives the shortbread a really lovely, slightly denser mouthfeel, almost like a refined snickerdoodle base, just waiting for the caramel!
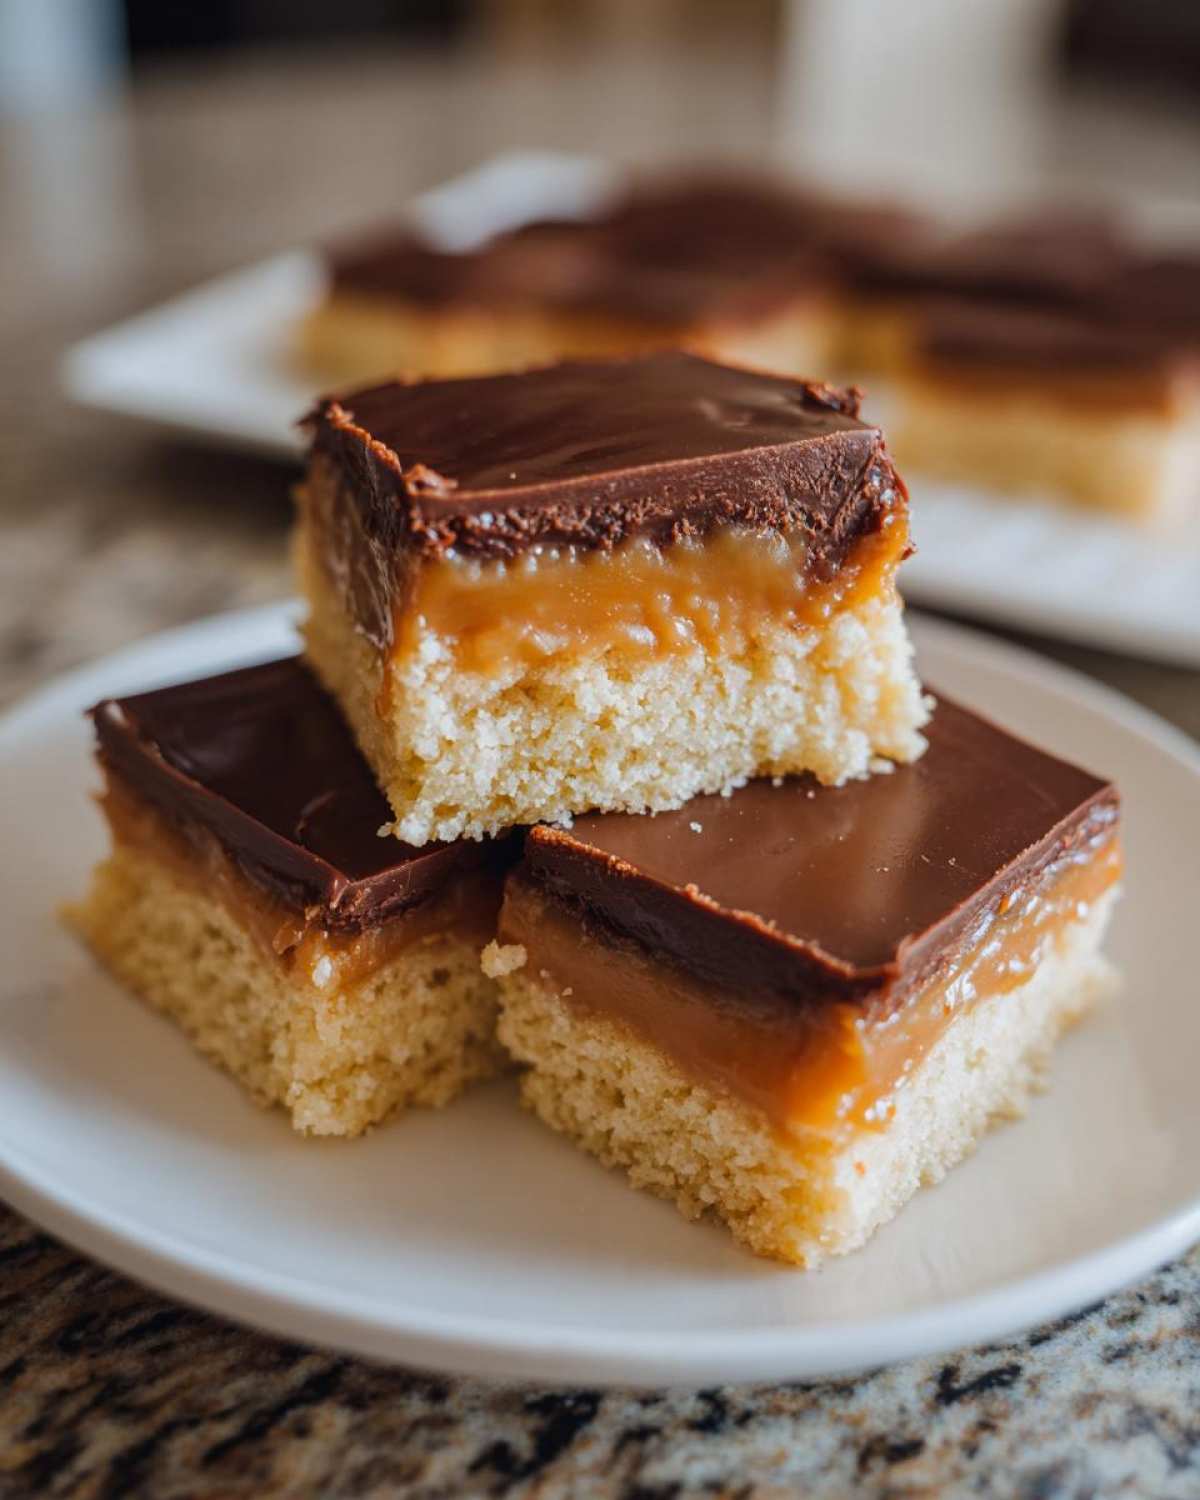
And we can’t forget the chocolate! The recipe uses semi-sweet, which I think is the most balanced, but if you’re making these for true dark chocolate lovers, go for an intense 70% cacao chip blend. Or—and this is big for holidays—use white chocolate chips for the topping! White chocolate and caramel are already best friends. If you do the white chocolate, though, make sure the caramel layer is very, very firm after chilling, or the white topping might melt and mix with the caramel slightly when spreading.
If you ever want to try making healthier candy bar alternatives (though these bars are certainly an indulgence!), you could try replacing half of the corn syrup with maple syrup mixed with a bit of apple sauce, though I’ll be honest, it changes the caramel consistency quite a bit. For an easy variation that feels almost like two different desserts in one pan, try drizzling that warm melted chocolate *before* you spread it all over. Drizzle lines across the caramel layer, then use a knife to gently swirl the chocolate into the caramel for a beautiful marbled effect before letting it set. It looks super professional!
Storage and Make-Ahead Tips for Layered Twix Bars
One of the absolute best parts about making these decadent layered bars is that they actually *need* time to chill! That means they are practically designed to be made ahead of time, which takes so much pressure off when you’re prepping for a big party or trying to get a head start on holiday baking. Honestly, I always plan to make these at least a day before I need to serve them, and they always come out better the next day!
Once the chocolate layer is completely set (after that final fridge chill), the bars are ready to be stored. Because they have that delicious, gooey caramel center, they really do best when kept cool. I store mine tightly sealed in an airtight container right in the refrigerator. You can stack them, but put a piece of parchment paper between the layers just so the chocolate doesn’t stick to the layer below. Stored this way, they hold that perfect texture—firm caramel, set chocolate—for a solid five to seven days. They are one of those rare treats that seem to improve the day after you make them!
Can These Be Frozen for Later?
Absolutely! If you’re looking to bake a huge batch for future snacking or just want to stash away some favorites from your cooking marathon, freezing is fantastic. The shortbread base freezes beautifully. Cut the bars into whatever squares or rectangles you plan to serve them as *before* you freeze them. Then, stack them in a freezer-safe container, making sure to separate each bar with parchment paper squares. This prevents them from fusing together, which is crucial for bars with delicate chocolate coatings.
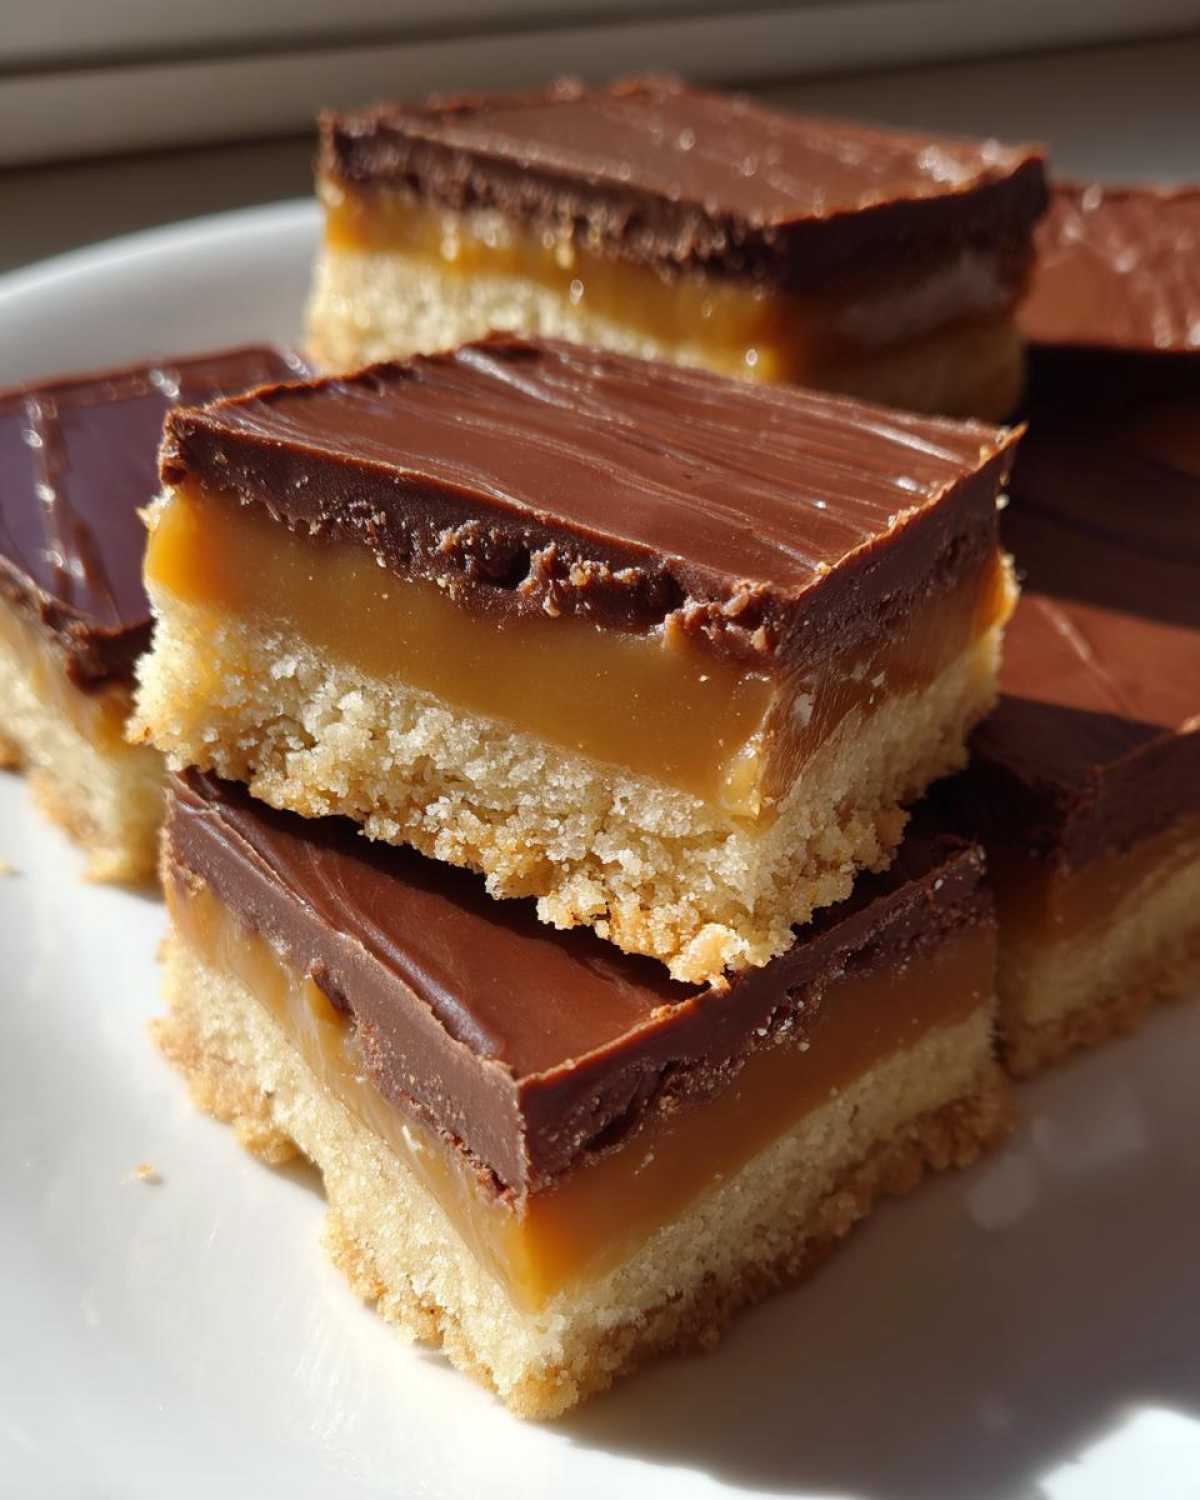
They last beautifully in the freezer for up to two months. When you’re ready to eat them, all you need to do is pull out the desired amount and let them thaw on the counter for about 30 minutes, or speed things up by popping them in the fridge for an hour. Then, you can serve them slightly chilled, which gives you that perfect snappy texture on the chocolate! This is such a great trick for having quick dessert recipes ready to go whenever the craving hits!
The Perfect Temperature for Serving
This is subtle, but it makes a big difference once you’ve gone to all this trouble making your copycat candy recipes! If you serve them straight from a cold fridge, the chocolate coating might be a tiny bit too hard, and the shortbread might feel too firm. If you leave them out on the counter all day, the caramel might start to ooze if your kitchen is warm.
My favorite happy medium is letting them sit out on the counter for about 20 to 30 minutes before serving. This gives the chocolate just enough time to soften up slightly, and the caramel comes back to that perfect, chewy-but-not-messy consistency. It works great for casual snacking or if you’re bringing them in for a party. Keep the leftovers refrigerated, of course, but always follow the 30-minute thaw rule for the best bite!
Frequently Asked Questions About Homemade Twix Treats
I get so many messages after people try these bars, and I love hearing about your successes! It’s actually a really fun recipe to customize once you’ve nailed the classic layers. Here are the questions I hear most often regarding making these bars perfectly, especially when trying to turn them into fun, bite sized candy treats!
Can I make this recipe No Bake Twix Inspired?
That’s a great question for when the weather is scorching hot! To be totally honest, skipping the bake on the shortbread crust usually results in a crust that’s too crumbly and sandy for this recipe to shine. The baking process combines the flour and butter just enough so the crust holds up to the heavy caramel. If you absolutely need a no-bake version, I strongly suggest looking up a dedicated no-bake cookie base, perhaps crushing up some crisp shortbread cookies and mixing them with melted butter, then pressing that mixture in to chill immediately. It won’t be the same, but it keeps that cool, layered feel, great for those no bake Twix inspired moments!
How do I get the perfect snap on the chocolate coating?
This is all about the fat you mix in with the chips! The recipe already calls for coconut oil, which is a fantastic trick because it helps the chocolate flow smoothly and sets up with a cleaner break than just melted chips alone. If you want that super professional, loud *snap* when you bite into the chocolate layer, you need to ensure you’re not overheating those chips. Work in short bursts in the microwave, stirring every time, until only a few lumps remain, then stir until they melt from residual heat. Keep the chocolate around 90°F (32°C) to 91°F (33°C) if you can check the temperature—that’s the sweet spot for a shiny, snappy finish when it cools back down!
What is the best way to make these into Bite Sized Candy Treats?
Oh, I love making these small! They become instantly more dangerous because it’s easier to eat five of them than one huge square! If you want bite sized candy treats that look like mini candy bars, the easiest way is to slice the whole slab into thin rectangles—maybe 1 inch by 2 inches—after the chocolate is fully set. Use the hot water knife trick I talked about earlier for super clean edges. I learned so much about clean slicing when I was mastering homemade breadsticks, and the same principle applies here!
If you want more of a truffle/bonbon shape, you can actually press the chilled caramel layer into mini muffin liners after baking the crust. Then, just pour a small amount of melted chocolate over the top of each one. These mini versions need less chilling time overall, too, which is a bonus if you’re rushing! They are just perfect for little party platters and make fantastic easy chocolate caramel bars when served this way.
Estimated Nutritional Data for This Twix Dessert
Now, I have to give you the standard disclaimer that I am a cook, not a certified nutritionist! Haha! These numbers are just my best estimate based on standard ingredient databases for the serving sizes listed. Since we are dealing with a glorious combination of butter, sugar, and chocolate, these are firmly in the ‘delicious treat’ category rather than the ‘everyday snack’ category. You know what they say: everything in moderation, especially when it tastes this good. If you’re really trying to track specific macros, you might want to run the exact brands you use through a calculator, but this gives you a solid overview!
These estimates are based on cutting the final slab into 16 approximately equal pieces:
- Calories: 350
- Total Fat: 21g
- Saturated Fat: 12g
- Total Fat: 21g
- Total Carbohydrates: 38g
- Sugar: 35g
- Protein: 4g
- Cholesterol: 45mg
If you’re ever looking for lighter pancake inspiration—though it tastes absolutely nothing like this decadent dessert—you can take a peek at my almond flour pancakes recipe! But honestly, when you make these layered bars, you deserve every single bit of the richness these numbers show. Enjoy every slice!
Share Your Homemade Candy Bar Recipe Creations
Okay, now it’s your turn! I’ve shared all my little secrets for getting that shortbread just right and making sure the caramel is perfectly chewy. But honestly, the very best part of sharing these copycat candy recipes is seeing them come to life in *your* kitchens. Did your chocolate topping set up perfectly shiny? Did you manage to get those clean slices on your first try? I genuinely want to know!
Please, if you make these irresistible layered dessert bars, pop over and leave a comment below! A quick rating right under the recipe card tells me what you thought, even if it was just one sentence. It helps other bakers decide if they should start whipping up a batch!
And if you snapped a picture—oh, I live for the photos! Tag me on social media if you post them. Seeing your gorgeous, glossy chocolate tops and hearing how much your family loved having homemade candy around is the biggest reward for all that creaming and stirring. Don’t forget to check out my main recipe blog for more sweet (and sometimes savory!) adventures. Happy baking, everyone!
PrintHomemade Twix-Style Cookie Bars
Make rich, layered cookie bars that copy the shortbread, caramel, and chocolate coating of a classic candy bar.
- Prep Time: 25 min
- Cook Time: 35 min
- Total Time: 60 min
- Yield: 16 bars
- Category: Dessert
- Method: Baking
- Cuisine: American
- Diet: Vegetarian
Ingredients
- 1 cup unsalted butter, softened
- 1/2 cup granulated sugar
- 2 cups all-purpose flour
- 1/4 teaspoon salt
- 1 (14 ounce) can sweetened condensed milk
- 1/2 cup light corn syrup
- 1/2 cup packed light brown sugar
- 1/4 cup heavy cream
- 1 teaspoon vanilla extract
- 1 1/2 cups semi-sweet chocolate chips
- 2 tablespoons coconut oil
Instructions
- Preheat your oven to 350°F (175°C). Line an 8×8 inch baking pan with parchment paper, leaving an overhang on two sides for easy removal.
- Prepare the shortbread crust: In a large bowl, cream together the softened butter and granulated sugar until light and fluffy.
- Gradually mix in the flour and salt until a crumbly dough forms. Press the dough evenly into the bottom of the prepared pan.
- Bake the crust for 15 to 18 minutes, or until the edges are lightly golden. Let it cool slightly while you prepare the caramel.
- Prepare the caramel layer: In a medium saucepan, combine the sweetened condensed milk, corn syrup, brown sugar, and heavy cream.
- Heat the mixture over medium heat, stirring constantly, until it reaches a gentle boil. Reduce the heat to low and cook for 5 minutes, stirring frequently, until the mixture thickens slightly. Remove from heat and stir in the vanilla extract.
- Pour the warm caramel evenly over the partially cooled shortbread crust. Return the pan to the oven and bake for an additional 10 minutes.
- Remove from the oven and let the bars cool completely to room temperature, then chill in the refrigerator for at least 2 hours until the caramel is firm.
- Prepare the chocolate topping: Place the chocolate chips and coconut oil in a microwave-safe bowl. Microwave in 30-second intervals, stirring well after each interval, until the chocolate is smooth and fully melted.
- Pour the melted chocolate over the chilled caramel layer, spreading it evenly to cover the entire surface.
- Refrigerate the bars for another 30 minutes, or until the chocolate is set.
- Use the parchment paper overhang to lift the bars from the pan. Cut into squares or rectangles before serving.
Notes
- For a cleaner cut, use a large, sharp knife dipped in hot water and wiped dry between each slice.
- If you prefer a slightly softer shortbread, reduce the baking time for the crust by 2 minutes.
- You can substitute milk chocolate or dark chocolate for the semi-sweet chips based on your preference.
Nutrition
- Serving Size: 1 bar
- Calories: 350
- Sugar: 35
- Sodium: 110
- Fat: 21
- Saturated Fat: 12
- Unsaturated Fat: 9
- Trans Fat: 0
- Carbohydrates: 38
- Fiber: 1
- Protein: 4
- Cholesterol: 45