

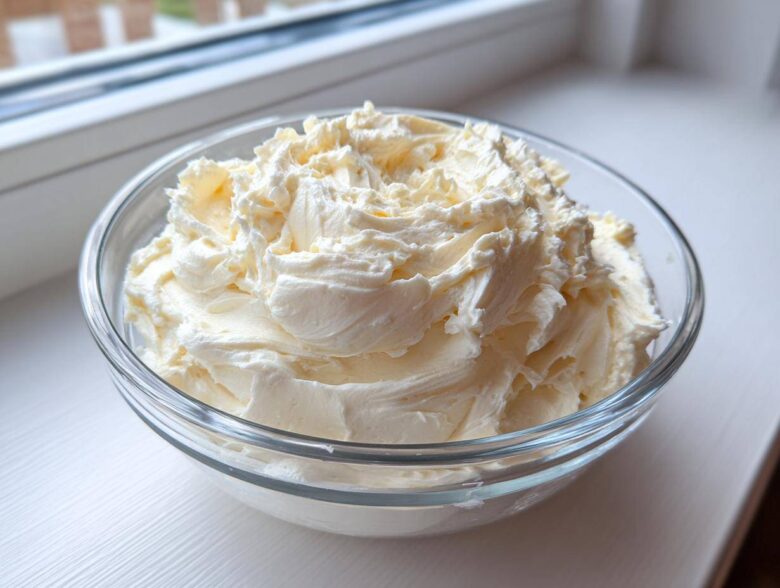
You know, a cake is only as good as the layer it’s wrapped in. Seriously! It’s the unsung hero of any birthday party or holiday celebration. For years, I struggled, trying to get that perfect, creamy-yet-sturdy topping that wouldn’t melt before the candles were lit. Well, I cracked the code! This classic, **vanilla buttercream frosting** recipe—the American style—is the absolute best. It whips up in under ten minutes, it’s ridiculously stable for piping, and honestly, it tastes miles better than anything you buy in a tub at the store. If you want decorating success without the headache, especially when making treats like my famous sugar cookies that need a firm topping, check out the full guide for the ultimate recipe.
Why This is the Best Vanilla Buttercream Frosting for Cakes (American Style)
What makes this the absolute **best vanilla frosting for cakes**? Simple: speed and performance. I can genuinely whip up a batch of this **fluffy buttercream icing** in about ten minutes flat, start to finish. That speed means I’m never stressed before a big event!
Because this is an American buttercream, it relies on a high ratio of powdered sugar, giving it fantastic structure. Trust me, this stability is exactly what you need for piping borders or making those perfect rosettes on cupcakes. When I’m rushing to frost everything before a party, like my famous sugar cookies or my perfectly firm cookie icing, I know this frosting won’t sag or weep.
It’s rich, it’s sweet, and it holds its shape beautifully down to the last crumb. It’s the reliable staple you’ll reach for every single time from now on!
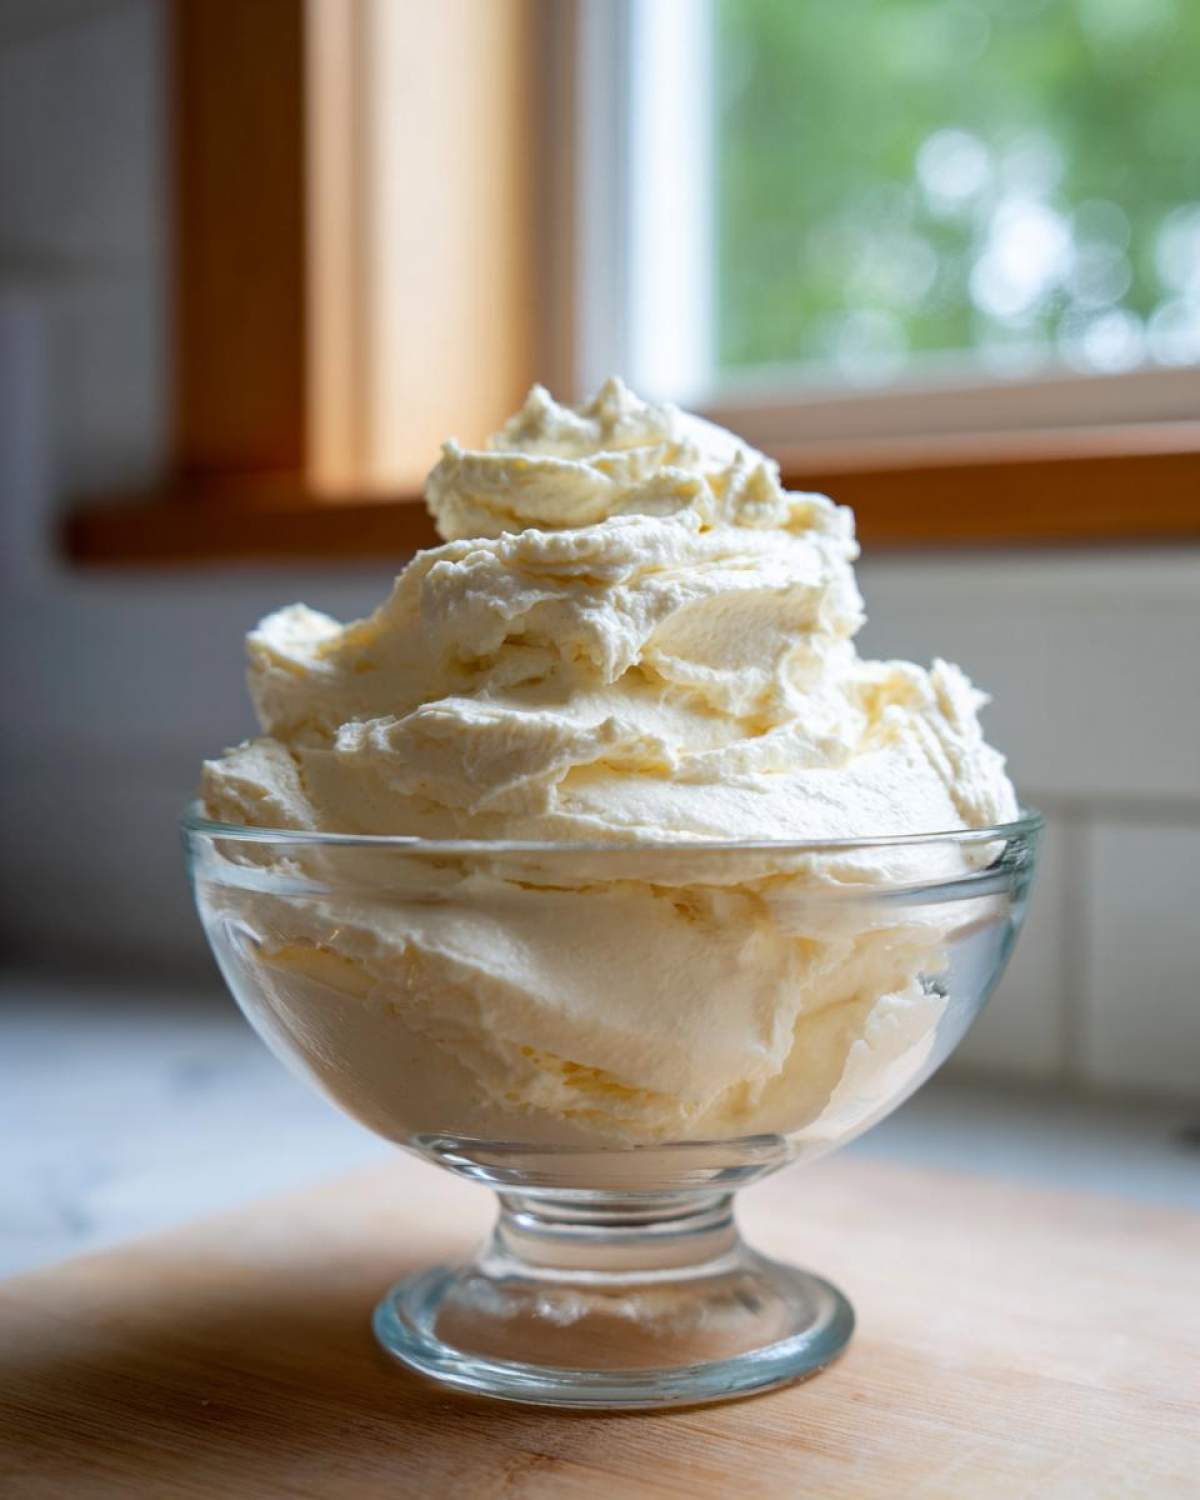
Gather Your Ingredients for the Perfect Vanilla Buttercream Frosting
Okay, the secret to this ultra-creamy texture starts right here with the components. Because this is a no-cook, quick recipe, the quality of what goes in really matters. For the absolute best result, make sure your butter is perfectly softened—not oily or melted! You’ll be relying on the good stuff.
- 1 cup unsalted butter, softened
- 4 cups powdered sugar, sifted (Make sure you sift this, otherwise you’ll have lumps!)
- 1 teaspoon pure vanilla extract (Use the real stuff, please!)
- 1/4 teaspoon salt
- 2 to 4 tablespoons heavy cream or whole milk (This is where we adjust the texture!)
Once everything is measured out, you’re ready to go. See how simple that list is? It’s all about getting those basic elements working together perfectly, especially when testing out my favorite homemade butter recipes, which taught me about proper creaming!
Step-by-Step American Buttercream Tutorial for Piping Consistency Frosting
This whole **American buttercream tutorial** moves lightning fast, but you can’t rush the mixing! Precision here is what guarantees that smooth, professional finish, making it the perfect **piping consistency frosting**. We’re aiming for maximum air incorporation for that light, fluffy result. Don’t forget to stop every couple of steps to scrape down the bowl—I can’t tell you how many times I’ve gotten lazy, and the frosting on the bottom was just buttery chunks! Keep scraping! If you are looking for other quick frosting methods, check out my tips for easy bakery moist pistachio muffins, which gives you an idea of how specific steps really change the outcome!
Achieving Creamy Vanilla Frosting Recipe Texture
First up, get that softened butter going in your mixer. Beat it alone until you’re sure it’s totally smooth, which usually takes about two minutes. Then, and this is vital, add the sifted powdered sugar slowly, little by little, keeping the mixer on low speed. If you dump it all in high, you’ll wear your kitchen ceiling—trust me on that sugar cloud fiasco!
Adjusting Your Vanilla Buttercream Frosting Liquid Content
After you’ve whipped it until it looks fluffy, it’s time to introduce your heavy cream or milk. Add this liquid, one tablespoon at a time. This is how we dial in the final texture. If you want a softer **creamy vanilla frosting recipe** for spreading right away, use three or four tablespoons. But if you need it stiff for sharp piping details later, stop at two tablespoons and just give it a really hard final whip!
If you accidentally add too much liquid and it gets sloppy, don’t panic; just throw in one extra tablespoon of powdered sugar at a time until it firms back up to handling consistency.
Tips for Success: Mastering Your Homemade Vanilla Frosting
Getting that perfect, dream-like texture for your **homemade vanilla frosting** sometimes requires just a little extra TLC, even with this easy base recipe. Remember, butter temperature is everything! For a beautiful **creamy vanilla frosting recipe**, your butter must be truly softened—you should be able to press a finger into it easily, but it shouldn’t look greasy or melted at all.
If you’re planning on doing detailed piping work, always lean toward using less liquid initially. You can always thin frosting out, but fixing frosting that’s too runny is a pain! If you find your finished batch gets a little sloppy while you’re decorating because your kitchen is too warm, just pop the bowl into the fridge for about ten minutes to chill it down. Then give it one quick re-whip before you keep going.
These little fixes ensure that whether you’re spreading it on my classic snickerdoodles or loading up a layer cake, this frosting performs perfectly!
Quick Cupcake Frosting Variations Using This Vanilla Buttercream Frosting Base
The beauty of this **vanilla buttercream frosting** is that it’s the perfect blank canvas! Once you master the base technique, you’ve got a foundation for almost endless flavor without firing up the stove. If I’m out of time but need something different for a crowd—say, some bright flavor for a spring gathering—I just mix in an extract or some powder.
For an instant decadent treat, try turning it into a **quick cupcake frosting** chocolate version. After you complete step 4 (when you’ve added the milk/cream), just whisk in about 1/2 cup of high-quality unsweetened cocoa powder. I usually add an extra splash of milk because cocoa powder tends to dry things out a bit, but just keep mixing until it’s that deep, gorgeous color you want!
Or, if citrus is calling your name, whisk in the zest of one large lemon or orange along with the vanilla in Step 3. That brightness is incredible on chocolate cakes, or I always use it when I’m frosting my chocolate-based baked goods, like those fudgy brownies!
Storage and Reheating Instructions for Vanilla Buttercream Frosting
So, what happens when you have too much frosting? (Spoiler: It never happens, but just in case!) This amazing **vanilla buttercream frosting** is pretty happy sitting out on your counter if you’re using it the same day. If you’re keeping it longer, pop it into an airtight container in the fridge.
It’s super important to know how to bring it back to life! If you chill it, a quick 10-minute rest on the counter helps it soften just enough, but you *must* re-whip it with your electric mixer afterwards. That re-whipping gets all the air back in so it’s fluffy again for frosting those fudgy date brownies or whatever amazing thing you’re decorating next!
Serving Suggestions for This Classic Dessert Topping
You’ve made the perfect batch of **vanilla buttercream frosting**, so now what? While it’s obviously amazing slathered on a layer cake, this versatile **classic dessert topping** can do so much more! I always make extra precisely so I can move on to other fun treats.
Try using a thin layer as the gooey center for my peanut butter cup cookies—it bonds them perfectly! It also makes a fantastic, thick topping for simple chocolate brownies, especially my fudgy Oreo brownies. If you keep it stiff, you can even use a star tip to pipe swirls onto sugar cookies!
Frequently Asked Questions About Making Vanilla Buttercream Frosting
I know you might have a few lingering doubts—that’s completely normal when you’re trying out a new staple recipe! We’ve all been there, worrying about sugar levels or if we have the exact right ingredients on hand. I’ve pulled together the common sticking points so you can bake with confidence.
Can I make this without heavy cream? (Addressing buttercream without heavy cream)
Yes, absolutely! You don’t strictly need heavy cream for this **vanilla buttercream frosting** to be successful. Heavy cream just adds richness, but I often use regular whole milk when I’m out, or even a splash of half-and-half if that’s all I have. If you must avoid dairy, you can use a non-dairy milk alternative, but I’d stick to the minimum amount (2 tablespoons) because those alternatives tend to be thinner than cream!
How do I prevent it from tasting too sweet?
This is the number one complaint about American buttercream, but it’s so easy to fix! The key to balancing the sweetness in this **creamy vanilla frosting recipe** is salt and pure vanilla extract. Don’t skip the 1/4 teaspoon of salt—it’s crucial for cutting through the sugar. Also, using a high-quality, robust vanilla extract makes a huge difference to the overall flavor profile.
Can I use salted butter instead of unsalted?
You certainly can, but you have to adjust that salt measurement! If you use salted butter, leave out the 1/4 teaspoon of salt listed in the recipe completely. Since butter brands vary so much in salt content, I always prefer starting with unsalted butter so *I* control the seasoning. It just gives you more control over your final **homemade vanilla frosting**!
How long does this frosting take to set up for decorating?
Since this is a no-cook recipe, it sets up faster than cooked buttercreams! If you’re piping detailed designs, I find that letting the finished product sit out for about 15 to 20 minutes once you’re happy with the consistency helps it firm up just enough to hold those sharp edges beautifully. If you need it faster, chill it briefly, but remember to whip it again!
If you’re looking for even more ways to make your desserts shine, check out my guide to making fluffy oatmeal pancakes, which teaches a great whipping technique!
Nutritional Data for Easy Buttercream Frosting Recipe
If you’re curious about what goes into this batch of glorious, **easy buttercream frosting recipe**, here are the estimated breakdowns per serving size. Remember, these numbers are just guidelines, and they’ll change slightly depending on exactly how much milk or sugar you use for your final consistency!
- Serving Size: 1/4 cup
- Calories: 350
- Sugar: 45g
- Sodium: 50mg
- Fat: 19g (12g Saturated)
Nutritional Data for Easy Buttercream Frosting Recipe
If you’re curious about what goes into this batch of glorious, **easy buttercream frosting recipe**, here are the estimated breakdowns per serving size. Remember, these numbers are just guidelines, and they’ll change slightly depending on exactly how much milk or sugar you use for your final consistency! Keep in mind baking is an art, and precision in measurements can swing these totals!
- Serving Size: 1/4 cup
- Calories: 350
- Sugar: 45g
- Sodium: 50mg
- Fat: 19g (12g Saturated)
The Best Classic Vanilla Buttercream Frosting for Piping
Make this simple American buttercream frosting. It whips up quickly, resulting in a creamy, fluffy texture perfect for piping decorations on cakes and cupcakes.
- Prep Time: 10 min
- Cook Time: 0 min
- Total Time: 10 min
- Yield: About 4 cups
- Category: Dessert Topping
- Method: Mixing
- Cuisine: American
- Diet: Vegetarian
Ingredients
- 1 cup unsalted butter, softened
- 4 cups powdered sugar, sifted
- 1 teaspoon pure vanilla extract
- 1/4 teaspoon salt
- 2 to 4 tablespoons heavy cream or whole milk
Instructions
- Place the softened butter in a large mixing bowl. Beat the butter with an electric mixer on medium speed until it is smooth and creamy, about 2 minutes.
- Gradually add the sifted powdered sugar, one cup at a time, mixing on low speed until combined after each addition.
- Add the vanilla extract and salt. Increase the mixer speed to medium-high and beat for 3 minutes until the mixture is light and fluffy. Scrape down the sides of the bowl as needed.
- Add the heavy cream or milk, one tablespoon at a time, beating well after each addition until you reach your desired spreading or piping consistency. Start with 2 tablespoons.
- If the frosting is too thick, add more liquid, one teaspoon at a time. If it is too thin, add more powdered sugar, one tablespoon at a time.
- Beat on high speed for a final minute to incorporate air for maximum fluffiness before using.
Notes
- For the smoothest texture, ensure your butter is truly softened but not melted.
- If you need a very stiff consistency for detailed piping work, use only milk or reduce the liquid to the minimum needed.
- If the frosting becomes too soft while working, chill it for 10 minutes and then re-whip it briefly.
Nutrition
- Serving Size: 1/4 cup
- Calories: 350
- Sugar: 45
- Sodium: 50
- Fat: 19
- Saturated Fat: 12
- Unsaturated Fat: 7
- Trans Fat: 0
- Carbohydrates: 48
- Fiber: 0
- Protein: 0
- Cholesterol: 60