

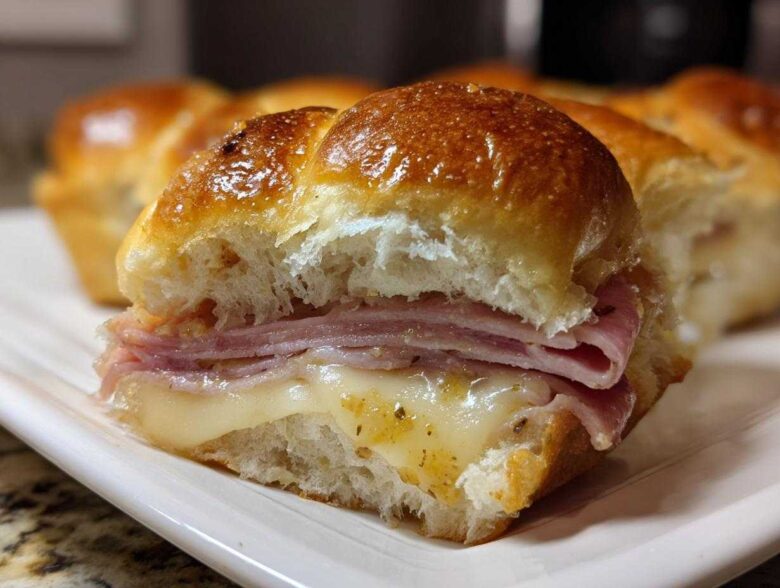
Okay, listen up, because when it comes to feeding a crowd without spending all day chained to the stove, I have cracked the code. Forget those sad, dry sandwiches you sometimes get stuck with at potlucks! I’m talking about the absolute dream of party food: my amazing **ham and cheese sliders**. Seriously, these baked wonders on those sweet Hawaiian rolls, drenched in that sharp, buttery mustard glaze? They disappear first, every single time.
I’ve made these for every tailgate, holiday, and impromptu gathering for the past decade. You use a whole package of rolls, slice them once, pile on the good ham and Swiss, smother it in the sauce, and bake until golden brown. It’s almost too easy, but trust me, the resulting flavor is restaurant-quality. When I serve these, people always ask for the recipe because they look way fancier than the 20 minutes of effort they actually take!
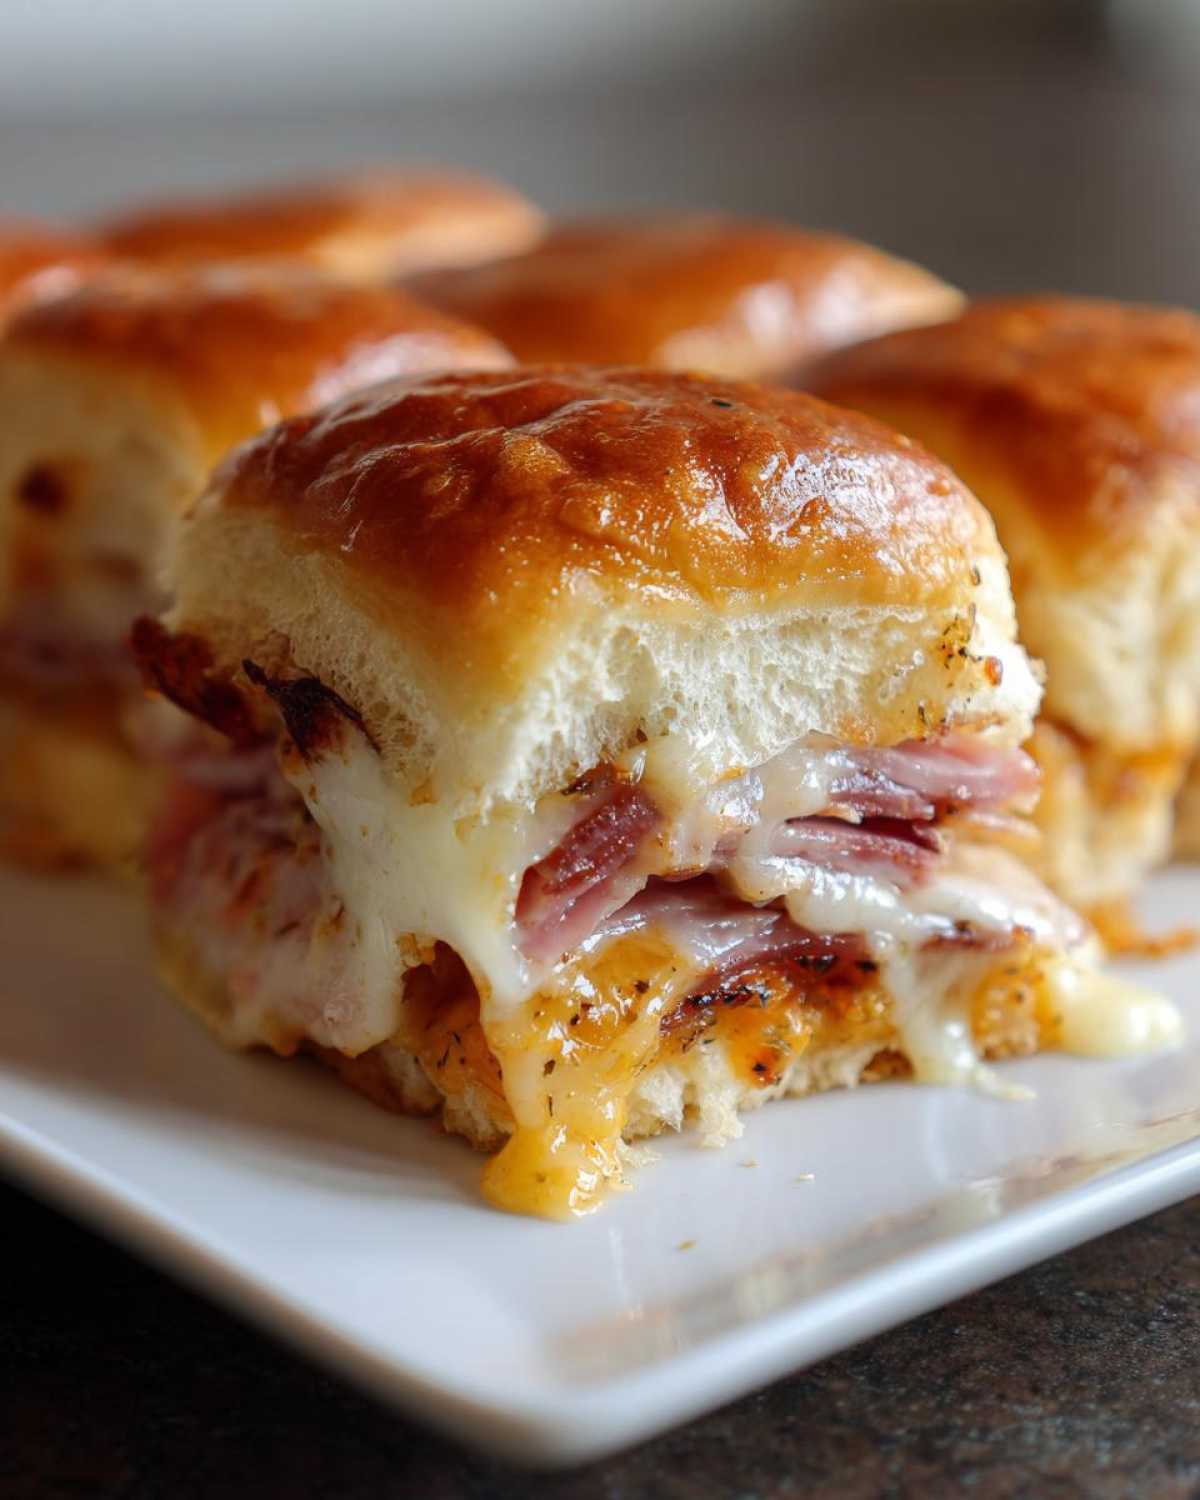
We don’t just make these for big holidays, either. If you’ve got hungry teenagers or you’re heading out to watch the game, these are the ultimate main event appetizer. I even keep a stash of Hawaiian rolls just for these sliders. They are my secret weapon for stress-free entertaining, and you can check out my super simple chili cheese dip recipe for another crowd-pleaser to serve alongside them!
Why You Will Love These Ham and Cheese Sliders
- Instant Crowd-Pleaser: These are the ultimate party sandwiches; the sweet Hawaiian rolls combined with savory ham and melted Swiss cheese is a flavor combination no one can resist.
- Unbeatable Ease: You can assemble this massive batch of baked sliders in under 20 minutes flat before they even see the oven. It’s just slicing, layering, and topping!
- Perfect for Events: Whether it’s a huge tailgate or a small get-together, these are portable, easy to serve, and handle big crowds perfectly.
- Truly Make Ahead Appetizers: You can prep the entire dish the night before, cover it, and stick it in the fridge. Less stress on party day for you!
- That Glaze: Honestly, the buttery mustard glaze is everything. It soaks into the rolls while baking, making the tops crispy and the inside perfectly soft and savory.
I’m telling you, once you try these Hawaiian roll sliders, you’ll wonder how you ever hosted a party without them. They come out beautiful—golden brown and smelling incredible—and they are proof that the simplest recipes are often the absolute best.
Essential Ingredients for Perfect Ham and Cheese Sliders
We keep this super simple, which is what makes these the best game day sliders. You don’t need a million specialty items, but the quality of what you use really shines through, especially with that glaze. When I think of these Hawaiian roll sliders, I think of rich butter and tangy mustard doing the heavy lifting!
Here is exactly what you need to grab. It’s all standard stuff, except maybe having those sweet rolls on hand.
- You need 12 count of those wonderful Hawaiian sweet rolls. That sweetness is non-negotiable!
- Get about one pound of your favorite deli ham—make sure it’s thinly sliced so it layers nicely and doesn’t bunch up.
- Twelve slices of good quality Swiss cheese. Swiss and ham sliders are a classic pairing for a reason.
- For that incredible topping, melt 6 tablespoons of unsalted butter. I use real butter; don’t try to cheat here!
- You’ll need 2 tablespoons of Dijon mustard—the smooth kind usually works best.
- One tablespoon of Worcestershire sauce for a little salty depth.
- One teaspoon of onion powder.
- One teaspoon of poppy seeds to sprinkle on top for texture.
That’s the whole shopping list! It’s a short list, so every ingredient matters for making these amazing baked sliders.
Assembling Your Ham and Cheese Sliders on Hawaiian Rolls
Alright, this is where the magic starts! First things first, preheat that oven to 350 degrees Fahrenheit and get a 9×13 inch baking dish ready—I always give mine a quick spray of non-stick, just in case!
Now, for the crucial step that makes these the best Hawaiian roll sliders: take your whole package of sweet rolls and, here’s the secret, slice them horizontally *once* with a sharp knife, keeping them all connected on the bottom tray! It’s so satisfying when you get that perfect, unbroken bottom layer. Place that bottom half into your prepared dish.
Next comes the layering. We do the ham first, spreading about a pound of that good, thin deli meat evenly over the bread. Then, top it right away with 12 slices of Swiss cheese. Don’t be shy; make sure every bit of ham is covered! Now, take the top half of the rolls and gently place them right over the cheese. See? It’s already looking like a giant, glorious sandwich cake!
If you’re making these ahead of time—which is genius, by the way—you can totally assemble everything up to the glazing part, cover it tight, and pop it in the fridge for up to four hours. Honestly, I love doing that the night before a big game day!
Creating the Buttery Mustard Glaze for Ham and Cheese Sliders
While the sliders are chilling or waiting for their moment, you whip up the glaze that turns these sandwiches into legendary party food. Grab a small bowl; we’re combining the richness here! Whisk together your 6 tablespoons of melted butter with those 2 tablespoons of Dijon mustard, the Worcestershire sauce, and the onion powder. Whisk it until it’s fully combined and looks decadent.
Take a pastry brush, which is much better than licking the spoon afterward, and brush that whole mixture right over the top of the connected rolls. You want a nice, even coat! Don’t forget to finish it off by sprinkling those poppy seeds all over. Those tiny seeds give the top crust a fantastic little pop when they bake. I actually use a similar technique when I make my ham and cheddar roll-ups; the topping really makes the flavor sing!
Baking Instructions for Golden Baked Sliders
Now that these amazing ham and cheese sliders are assembled and covered in that beautiful glaze, it’s their moment to shine in the oven. Remember, we preheated everything to 350 degrees Fahrenheit, right? That lower temperature lets everything heat through gently without burning the sweet rolls.
First, cover the baking dish tightly with aluminum foil. This is key! The foil traps the steam, which melts all that Swiss cheese perfectly and lets the buttery mustard glaze soak down into the bread instead of just crisping up the top layer too fast. Bake it covered for about 15 minutes. You’ll start smelling how good your kitchen is about five minutes into this stage, I promise!
After 15 minutes, pull the dish out—carefully, it’ll be hot! Take the foil off completely. Now we bake them uncovered for another 5 to 10 minutes. This second step is how you get those gorgeous, crackly, golden-brown tops on your baked sliders. You want the cheese fully melted and bubbling, and the top crust should look toasted, not burnt!
Right out of the oven, don’t just tear into them! Let them rest on the counter for a good 5 minutes. This resting time lets all those wonderful juices settle back into the rolls. Trust me on this one; cutting them too soon is messy!
Tips for Success with Your Ham and Cheese Sliders
Okay, we’ve pulled these beauties out of the oven, shiny and brown. Since we baked the whole slab of party sandwiches together, the final step—the actual serving—needs a little finesse so you don’t end up with a messy pile of bread and cheese!
The absolute number one tip I can give you comes right after that 5-minute resting period I mentioned. Do not try to pull these apart with your fingers right away! You need a good, long, sharp knife. I mean it: use a serrated knife, like the big one you use for bread.
You want to gently saw through the rolls where the individual sandwiches are separating. Don’t push down hard, or you’ll squash all the lovely fluffiness. Letting them rest, combined with using that serrated knife, is how you execute the perfect “slice-through technique.” Each slider comes out looking nice and clean, ready to go. If you cut too early, all that melted cheese oozes out and sticks to your serving platter. Nobody wants a sticky cheese fight!
Another thing I’ve learned over the years, especially when serving these as tailgate food, is temperature. These are amazing piping hot, but they’re still fantastic warm. If you’re planning a big buffet, just toss them onto a slow cooker set to the VERY lowest warm setting, uncovered, just to keep them from cooling down too much. I use a similar philosophy when I make my Reuben bake casserole when I need to keep it warm for hours.
Finally, don’t be tempted to skip that resting time to try and get them out quicker. Those 5 minutes let the structure firm up just enough. It makes all the difference between a perfect, fluffy slider and a slightly deflated one. Patience pays off, especially with these simple yet perfect game day sliders!
Make Ahead Appetizers: Preparing Ham and Cheese Sliders Early
I know, I know, the best part of these ham and cheese sliders is that warm, gooey, melted cheese, but honestly? These are truly fantastic as make ahead appetizers. If you’re like me and hosting means trying to juggle three things at once, you absolutely need to do the prep work ahead of time. This recipe is so sturdy, it handles the chilling process like a champ!
You can assemble the entire thing—bottom rolls, ham, cheese, top rolls—right there in your 9×13 inch dish. Once it’s all stacked, secure that pan incredibly tightly with plastic wrap, or use a lid if you have one that fits well, and pop it straight into the refrigerator. You have a window of about four hours this way. I usually do mine right after the kids go to bed the night before a big event like a holiday breakfast or a massive tailgate.
When you pull them out of the fridge the next morning, they’ll be cold, but don’t panic! That buttery mustard glaze will have soaked in even deeper, which is actually a bonus for flavor absorption. However, since the rolls are cold, we just need to give them a little extra time to heat through to that perfect, melty temperature. You’ll still follow the recipe exactly: brush on the glaze and sprinkle the poppy seeds.
Here’s the adjustment you need to make for baking straight from the refrigerator: stick to the first step, covering them tightly with foil, and bake for 15 minutes like normal. But then, instead of the 5 to 10 minutes uncovered, you’re going to need to add about 5 minutes total to that final uncovered bake time. We want to ensure that cheese in the middle gets nice and gooey all the way through. Trust me on this—I use a similar trick when prepping my holiday strata the night before; that little bit of extra time makes all the difference!
If you plan ahead, you get crispy tops, melty centers, and you avoid scrambling around baking right when your guests walk in the door. It’s the best hack for serving up amazing party sandwiches without the stress!
Serving Suggestions for Game Day Sliders
Honestly, these ham and cheese sliders are so substantial they could be the entire meal, but if you’re setting up a proper spread for game day sliders or your next tailgate, you need something amazing to go alongside them!
Because the rolls are already sweet and savory, you want dips that offer a little bit of tang or extra cheesy comfort. Forget anything too heavy! A great option is a sharp, slightly spicy chip dip. Personally, I always bring my creamy beer cheese dip recipe when I serve these; it perfectly balances the sweetness of the Hawaiian rolls.
If you need something greener, stay away from heavy salads and go for quick pickles or crisp coleslaw to cut through the richness of the Swiss and ham. These little powerhouses disappear fast, so make sure you have plenty of snacks ready!
Storage and Reheating Instructions for Leftover Ham and Cheese Sliders
Oh, leftovers! If you actually end up with any of these dreamy ham and cheese sliders—which, let’s be honest, is a feat in itself—storage is super important. We want to protect that soft, sweet texture of the Hawaiian rolls, right?
First thing: don’t let them sit out too long. If you have a few stragglers at the end of the party, let them cool down slightly, maybe 30 minutes, and then you need to get them airtight. Scoop any remaining sliders into a sturdy, airtight container. Make sure they aren’t squished together; try to stack them in a single layer if you can, or use wax paper between layers if you have to stack them up.
They’ll keep just fine in the refrigerator for about two to three days. They’re still good, but the glaze tends to make the bottom a little soft after that first night. Nobody wants a soggy slider!
Now, for reheating. This is crucial, because the microwave is the enemy of a perfectly baked slider. What happens in the microwave? Steam! And steam turns those golden, fluffy tops into sad, wet sponges. We absolutely do not want that!
The oven is your best friend here for reviving these party sandwiches. Preheat your oven to about 325 degrees Fahrenheit. Place your leftovers—separated if possible—on a baking sheet. If you’re only reheating a couple, just put them on a piece of foil. Bake them for about 8 to 12 minutes. You just want them heated through to melt that Swiss cheese again and bring back a little bit of that wonderful crispness to the top crust.
If you are desperate and only reheating one slider, the toaster oven works great too, just watch it closely so the poppy seeds don’t burn! See? Even leftovers from a feast can be delicious if you treat them right!
Frequently Asked Questions About Hawaiian Roll Sliders
Can I use different cheese besides Swiss in these sliders?
Absolutely! While I swear by the classic Swiss and ham sliders combination—the Swiss melts beautifully and has a slightly nutty flavor that complements the sweet roll—you can totally switch it up! Cheddar works great, especially a sharp white cheddar, and it gives the baked sliders a more vibrant color. Provolone is another fantastic choice if you want something milder and stretchier. Just make sure whatever you choose melts well!
What is the best type of ham to use for these party sandwiches?
For game day sliders, I always reach for good quality, thinly sliced deli ham. You want something already cooked, obviously! I prefer honey ham or black forest ham because they have a bit more flavor than plain boiled ham. The key is “thinly sliced.” If your ham is too thick, when you slice through the connected rolls later, the ham bunches up and makes the sandwich uneven. Thin slices stack flat and distribute that salty flavor perfectly across all 12 sliders.
Can I freeze these ham and cheese sliders before baking?
I haven’t personally frozen them assembled, but I know a few readers who have had success! If you decide to freeze the assembled, unbaked dish (before you put the glaze on!), wrap it super tightly in plastic wrap, maybe add a layer of foil, and freeze it for up to a month. When you go to bake them, you must thaw them completely in the fridge overnight first. Then, you’ll need to add about 5 to 8 minutes to the covered baking time to make sure everything gets piping hot in the middle.
How do I reheat leftovers so they don’t get soggy?
The microwave is going to ruin the glorious texture of those sweet Hawaiian rolls, so please avoid it! The absolute best way to revive your leftover ham and cheese sliders is in the oven. Pop them on a baking sheet at about 325 degrees Fahrenheit for, say, 10 minutes. This warms everything through and, if you leave them unwrapped for the last couple of minutes, it helps crisp the top back up again. It works like a charm! Speaking of quick cooking that deserves good reheating, you should check out my tips for my chicken fried rice—leftovers are always better the second time around when handled correctly!
PrintBaked Ham and Cheese Sliders with Mustard Glaze

Assemble easy ham and cheese sliders on Hawaiian rolls with a buttery mustard topping. Bake until golden for a simple party appetizer.
- Prep Time: 15 min
- Cook Time: 25 min
- Total Time: 40 min
- Yield: 12 sliders
- Category: Appetizer
- Method: Baking
- Cuisine: American
- Diet: Vegetarian
Ingredients
- 12 Hawaiian sweet rolls
- 1 pound thinly sliced deli ham
- 12 slices Swiss cheese
- 6 tablespoons unsalted butter, melted
- 2 tablespoons Dijon mustard
- 1 tablespoon Worcestershire sauce
- 1 teaspoon onion powder
- 1 teaspoon poppy seeds
Instructions
- Preheat your oven to 350 degrees Fahrenheit. Lightly grease a 9×13 inch baking dish.
- Slice the entire package of Hawaiian rolls in half horizontally, keeping the rolls connected. Place the bottom half of the rolls in the prepared baking dish.
- Layer the ham evenly over the bottom rolls. Top the ham with the slices of Swiss cheese.
- Place the top half of the rolls over the cheese layer.
- In a small bowl, whisk together the melted butter, Dijon mustard, Worcestershire sauce, and onion powder.
- Brush the butter mixture evenly over the top of the rolls. Sprinkle the poppy seeds over the glaze.
- Cover the baking dish tightly with aluminum foil. Bake for 15 minutes.
- Remove the foil and bake for an additional 5 to 10 minutes, or until the tops are golden brown and the cheese is melted.
- Let the sliders rest for 5 minutes before slicing between the individual rolls for serving.
Notes
- For easy slicing, use a serrated knife to cut through the connected rolls after baking.
- You can assemble these sliders up to 4 hours ahead of time; cover and refrigerate until ready to bake. Add 5 minutes to the covered baking time if baking directly from the refrigerator.
Nutrition
- Serving Size: 1 slider
- Calories: 280
- Sugar: 8
- Sodium: 750
- Fat: 14
- Saturated Fat: 8
- Unsaturated Fat: 6
- Trans Fat: 0
- Carbohydrates: 26
- Fiber: 1
- Protein: 14
- Cholesterol: 40