

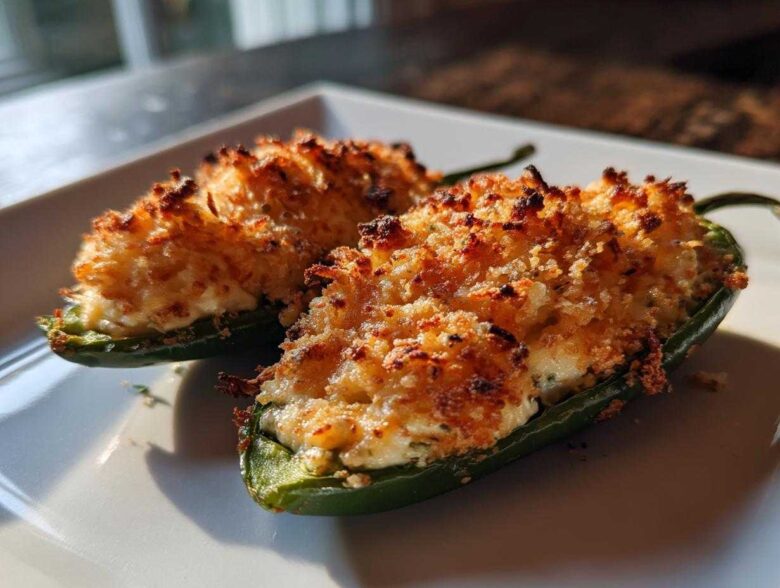
Game day is creeping up, isn’t it? Or maybe you’re just having one of those days where only something cheesy, creamy, and just a little bit spicy will do the trick. Believe me, I get that! For years, I thought the only way to get that perfect, bubbly, slightly charred top on my jalapeño poppers was to drag out the deep fryer. Ugh, what a mess!
But no more! I am so excited to share my absolute favorite secret weapon: these Easy Baked Jalapeño Poppers. Seriously, we’re skipping the oil and making them right on a baking sheet. The trick, I found out after many disastrous batches, is all in the filling blend. I nailed the ratio of rich cream cheese cut perfectly by sharp cheddar, plus just the right hint of garlic—it’s pure magic. You’re going to love how simple these are, and they still deliver that satisfying spicy kick we crave.
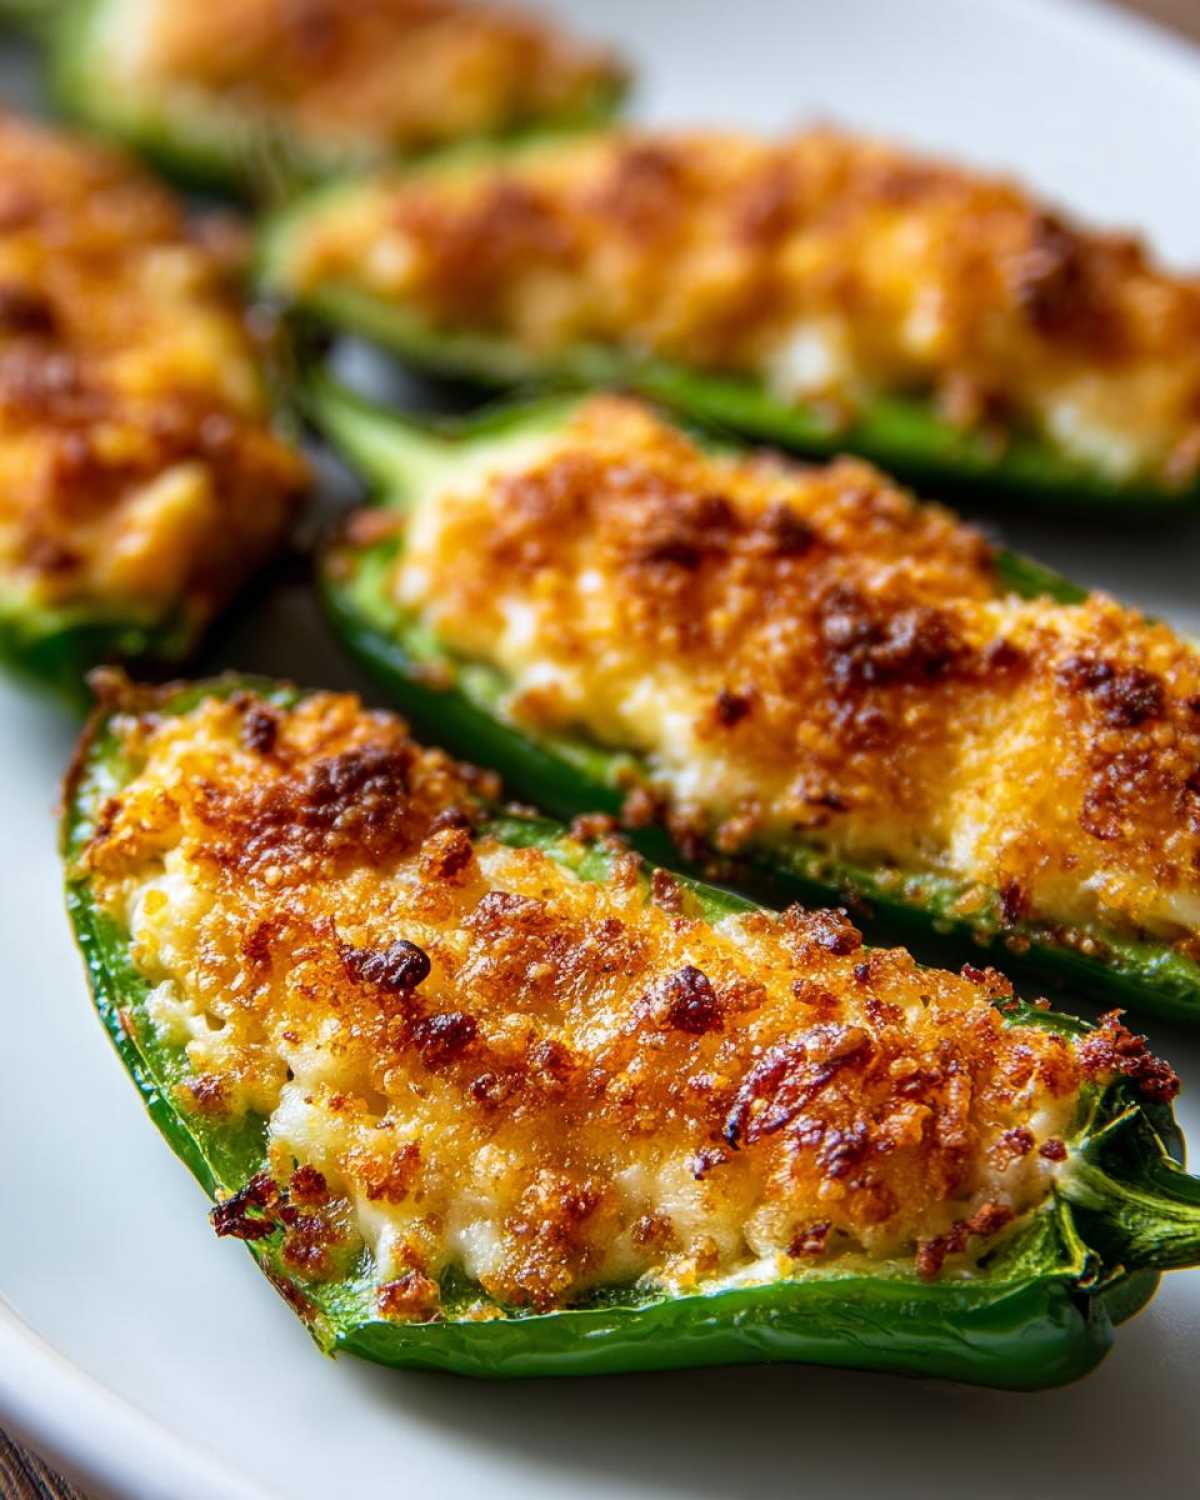
Why You Will Love These Easy Baked Jalapeño Poppers
Honestly, if you’re afraid of frying, this recipe is your new best friend. I’ve made this so many times for parties, and people always ask if I deep-fried them. Nope! Baking creates that bubbly, golden top without all the fuss.
- Skip the Oil Mess: We bake these beauties instead! Cleanup is a breeze when you use parchment paper, trust me.
- Super Fast Prep: You can whip up the whole batch—slicing and stuffing—in just about 15 minutes. Perfect for when guests show up unexpectedly!
- Controllable Heat: You decide how spicy they get. Scrape out all that white spongy stuff inside, and you get creamy comfort with just a little warmth.
- Flavor Bomb Filling: That blend of sharp cheddar melting into the cream cheese is unbeatable. It’s the perfect cheesy blanket to tame the pepper!
- Amazing Texture: The panko topping gets wonderfully golden and crisp in the oven, giving you that satisfying crunch you want in a great spicy appetizer popper.
Gathering Ingredients for Your Cream Cheese Stuffed Jalapeños
Okay, let’s talk about what you need to grab from the kitchen or the store. For these cream cheese stuffed jalapeños, you want quality, I won’t lie. If you use cream cheese that’s too hard or generic cheese, the filling just won’t melt right, and that’s just sad for everyone involved! Don’t substitute the panko breadcrumbs for regular breadcrumbs either—they’re what gives us that lovely crunch when we bake them.
Trust me on the measurements here; they are spot on for getting that perfect cheesy ratio inside our crispy pepper shells.
Essential Components for Perfect Jalapeño Poppers
- 12 fresh jalapeño peppers
- 8 ounces cream cheese, softened (make sure it’s softened!)
- 1 cup shredded sharp cheddar cheese
- 1 teaspoon garlic powder
- 1/2 teaspoon onion powder
- 1/4 teaspoon salt
- 1/2 cup panko breadcrumbs
- 2 tablespoons melted butter
Expert Tips for Handling Peppers in Jalapeño Poppers
Now, listen up because this is the most important part for enjoying your jalapeño poppers without crying later! Capsaicin, that spicy stuff, lives mostly in the clear white membrane inside the pepper. If you want a nice, mild, cheesy treat—perfect for serving everyone—you have to get rid of that membrane. I learned my lesson the hard way mixing cheese with raw pepper juice on my fingers; trust me, wear gloves when you cut these things!
It’s smart to check out a few tips before you jump in, like what I read over at the blog for general kitchen advice. It really helps build confidence when you’re dealing with heat.
Controlling the Spice Level in Your Jalapeño Poppers
When you slice those peppers in half lengthwise, you’ll see the seeds clinging to that white pithy strip. Gently use the tip of a small spoon, or even a melon baller, to scrape everything out. The cleaner you scrape, the milder your final popper will be. If you are serving someone who loves serious heat, though, you can intentionally leave a tiny bit of that white membrane intact on a few of the halves—it kicks the spice level way up!
If you’re worried about how hot those peppers look out of the bag, just cut the tip off one pepper and rub it on the inside of your wrist. If it stings immediately, they’re hot! If not, you’re probably safe to proceed with scraping them clean for that ideal creamy center.
Step-by-Step Instructions for Baked Jalapeño Poppers
Getting these jalapeño poppers ready for the oven is incredibly straightforward, especially since we’re ditching the deep fryer! First things first, crank that oven up to 400 degrees Fahrenheit. You absolutely must line your baking sheet with parchment paper—it saves you from any messy cheese drips. Seriously, I learned this tip early on, and I use parchment for almost everything now; even a great garlic butter recipe is easier to clean up with it!
Once the oven’s warming up, slice those peppers in half right down the middle and make sure you’ve scooped out all the seeds and white bits like we talked about. Then we move right into getting that filling perfect.
Preparing the Cheesy Filling for Your Jalapeño Poppers
This is where we build the flavor base! Grab a bowl and make sure your cream cheese has been sitting out long enough to be totally soft. If it fights you when you stir it, it’s too cold! Beat that soft cream cheese until it’s smooth and light. Then, dump in the sharp cheddar, all those lovely spices—garlic powder, onion powder, and salt. Mix it all up until it’s homogenous, meaning you can’t see streaks of white or yellow anymore. You want a creamy, cohesive mixture that spoons nicely.
Topping and Baking Your Jalapeño Poppers
Next up is the crunch! In a separate tiny bowl, quickly toss those panko breadcrumbs with that melted butter until they look evenly coated. Then, carefully spoon that delicious cheese mixture into every pepper half—don’t pack it too tight! Sprinkle that buttery panko mixture right over the top of the filling. Place them snugly on your prepared baking sheet. They go into that 400-degree oven for about 15 to 20 minutes. You know they’re done when the peppers look a little soft and that panko top is gorgeously golden brown and bubbly!
Variations: Making Bacon Wrapped Poppers or Other Jalapeño Poppers
You know, the beauty of a good base recipe like these easy jalapeño poppers is that you can totally customize them for whatever mood you’re in! While my go-to is the simple panko crunch, I know some folks—especially game day crowds—demand bacon. And honestly, who can blame them? Bacon makes everything better, right?
If you want to level up your poppers immediately, wrapping them in bacon is the way to go. It adds that savory, smoky depth that really pairs wonderfully with the mild heat and cool cheese.
It’s super simple: Just take a half-slice of bacon—you might need a smaller slice or half of a regular slice, depending on how thick your peppers are cut—and wrap it snugly around the stuffed pepper, securing the filling in place. You might use a toothpick to hold it together if the bacon keeps popping off, but try to use as little as possible.
The main thing you need to remember here is baking time! Since bacon needs more time to render its fat and get crispy, you’re going to want to keep them in the oven a little longer than the panko version. I usually add about 5 to 10 minutes to the total cook time, maybe bumping the oven down slightly to 375°F if the bacon starts browning too fast before the cheese is totally melted. You’re looking for that bacon to be perfectly crisp! You can even try different wraps sometimes, like thinly sliced peppers or even using them thinly sliced like in my pepper steak recipe for a totally different vibe, but bacon is the classic upgrade for these poppers.
Tips for Success When Making Jalapeño Poppers
I’ve made these jalapeño poppers way too many times to count now. Honestly, that first batch I made was a disaster—the filling oozed out everywhere, and the tops just sat there looking pale. But over the years, I’ve picked up a few little tricks that make all the difference between good and *great* poppers. These aren’t in the main recipe because they’re the little chef secrets that save you time and guarantee perfection!
First off, piping bags are your friend here! Forget trying to spoon that cheesy mix in there with a tiny spoon; it gets messy and you end up with uneven amounts. If you have a piping bag—or even a Ziploc bag with the corner snipped off—you can pipe the filling into the pepper halves perfectly. It looks professional, and it keeps the cream cheese right where it belongs, neat and tidy.
Another thing I learned when I want them crazy crispy is making sure the pepper halves are completely dry before I add the filling. Moisture is the enemy of crispiness! If the insides of the peppers are wet from washing, that cheese mixture slides around, and the panko won’t stick as well to the topping. I usually just pat them down with a paper towel after slicing them open and deseeding. It takes two seconds.
If you’re baking these alongside something else, or just want to be extra careful about managing the heat, always take a look at the general advice out there. Sometimes a quick peek at a general guide like the one on the blog reminds me about general baking best practices I might be forgetting! But honestly, my final tip is about setting them down after they come out of the oven. Those poppers are scalding hot, and the cheese is molten. Give them at least five minutes to rest on the pan before you try to move them or serve them. That little bit of cooling time lets the cheese set up just enough so your poppers don’t collapse when someone tries to pick one up. Enjoy that spicy, cheesy goodness!
Storing and Reheating Leftover Jalapeño Poppers
Okay, let’s be real. Sometimes you make a huge batch of these jalapeño poppers because you can’t stop yourself, or maybe you just need leftovers for lunch the next day! Luckily, these cheesy guys store pretty well, but you have to do it right if you want them to taste good the second time around.
The key here is keeping them away from moisture. If you just toss them into a plastic container while they’re still warm, the steam is going to sweat them out, and your beautiful crispy panko topping will turn soft and sad by morning. Don’t do it!
Let the poppers cool completely to room temperature after they come out of the oven. Once they are totally cool, transfer them to an airtight container. Press some paper towels right on top of them before sealing the lid—that helps absorb any residual moisture in the container. They should keep just fine in the fridge for about three or four days. But honestly, they rarely last that long in my house!
Now, when it comes to reheating, we can’t use the microwave if we want to keep that crispy texture we worked so hard for! A microwave is going to steam them and make that panko topping soggy again. So, you’ve got two much better options here.
The absolute best way to bring these back to life is in the oven or an air fryer. Preheat your oven to about 350 degrees Fahrenheit. Pop those sad-looking leftovers onto a small baking sheet and bake them for about 8 to 10 minutes. If you have an air fryer, even better! Use the air fryer at 350 degrees for just 4 to 6 minutes. That blast of dry heat re-crisps the panko topping perfectly, melts the cheese just a touch more, and makes them taste almost as fresh as when they came out the first time. It totally revives them!
Frequently Asked Questions About Jalapeño Poppers
I always get so many questions after a party about these things! They are just so popular. It makes total sense, right? Who doesn’t love a cheesy, spicy bite? I put together some of the most common things I hear people ask about making the best jalapeño poppers at home. Hopefully, this covers anything you might be wondering about before you dive into the recipe!
Can I make these jalapeño poppers ahead of time?
Oh yes, you totally can! This is one of my favorite tricks for big gatherings: prep everything *except* the baking step. Once you’ve sliced, seeded, stuffed your peppers, and put that panko topping on, you can arrange the uncooked poppers on your parchment-lined baking sheet. Just cover that tray tightly with plastic wrap and pop it into the fridge. They are good sitting raw like that for up to 24 hours!
When you’re ready to serve, just pull them straight from the fridge, put them in that 400-degree oven, and add about five extra minutes to the baking time. They might need closer to 22-25 minutes total just to make sure that cold cheese filling heats all the way through. It takes the pressure off game day, I promise!
What is the best cheese combination for jalapeño poppers?
My personal obsession, as you know from the recipe, is the combination of softened cream cheese mixed with sharp cheddar. The sharp cheddar is key because it has a lower moisture content and a much bigger flavor punch, so the cheese doesn’t turn watery or bland when baked. I think that blend gives you the perfect, thick, luxurious center in your cream cheese stuffed jalapeños.
However, if you’re feeling adventurous, you can absolutely mix it up! A great substitute for the cheddar, if you want something a little tangier, is Monterey Jack. It melts beautifully and is great for a slightly less sharp bite. Or, if you want to go fancy, swap out half the cheddar for pepper jack—just beware, that adds some extra serious spice to your baked jalapeño poppers!
If you have any other questions while you’re cooking, don’t hesitate to reach out through my contact page. Happy cooking!
Nutritional Snapshot of These Jalapeño Poppers
Now, before we wrap up this session on making the best jalapeño poppers ever, I always feel like I should mention the numbers. I know some of you care about the macros, and I get that! But I have to be super honest with you here.
I’m a home cook, not a registered dietitian! I calculated the rough estimates based on the ingredients I use—like the high-fat cream cheese and the sharp cheddar—but just like any homemade food, the exact nutritional breakdown can really swing depending on what brand of cheese you buy or if you decide to make those delicious bacon wrapped poppers instead.
For the most accurate information about how these fit into your daily intake, please always refer to the full disclaimer policy on my site, which you can check out right here: my site’s detailed disclaimer. It covers everything about ingredient variations and serving sizes. All I know for sure is that these spicy appetizer poppers disappear lightning fast whenever I put them out!
PrintEasy Baked Jalapeño Poppers
Make simple, cheesy, baked jalapeño poppers for a spicy appetizer that is easy to prepare.
- Prep Time: 15 min
- Cook Time: 20 min
- Total Time: 35 min
- Yield: 24 poppers
- Category: Appetizer
- Method: Baking
- Cuisine: American
- Diet: Vegetarian
Ingredients
- 12 fresh jalapeño peppers
- 8 ounces cream cheese, softened
- 1 cup shredded sharp cheddar cheese
- 1 teaspoon garlic powder
- 1/2 teaspoon onion powder
- 1/4 teaspoon salt
- 1/2 cup panko breadcrumbs
- 2 tablespoons melted butter
Instructions
- Preheat your oven to 400 degrees Fahrenheit. Line a baking sheet with parchment paper.
- Slice the jalapeño peppers in half lengthwise. Use a small spoon to carefully scoop out the seeds and white membranes. Wear gloves when handling peppers.
- In a medium bowl, combine the softened cream cheese, cheddar cheese, garlic powder, onion powder, and salt. Mix until smooth and well combined.
- Spoon or pipe the cheese mixture evenly into each jalapeño half. Do not overfill.
- In a small bowl, mix the panko breadcrumbs and melted butter. Sprinkle the breadcrumb mixture over the top of the cheese filling in each pepper half.
- Place the stuffed peppers on the prepared baking sheet.
- Bake for 15 to 20 minutes, or until the peppers are tender and the topping is golden brown and bubbly.
- Let cool for a few minutes before serving.
Notes
- Wear gloves when cutting and seeding jalapeños to prevent skin irritation from the capsaicin.
- For less heat, remove all white membrane from inside the pepper. For more heat, leave some membrane intact.
- If you prefer bacon wrapped poppers, wrap each stuffed half with half a slice of bacon before baking. Adjust baking time as needed until bacon is crisp.
Nutrition
- Serving Size: 2 poppers
- Calories: 110
- Sugar: 1
- Sodium: 180
- Fat: 9
- Saturated Fat: 5
- Unsaturated Fat: 4
- Trans Fat: 0
- Carbohydrates: 4
- Fiber: 0
- Protein: 4
- Cholesterol: 25