

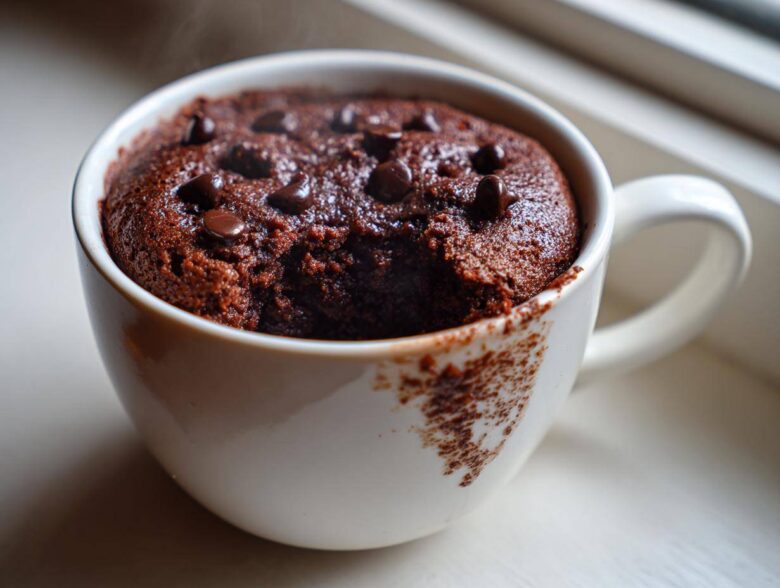
You know those nights, right? It’s 9 PM, you’re cozy on the couch, and suddenly you have this overwhelming, desperate need for something rich, chocolatey, and warm. You don’t want to wait an hour for an oven to preheat, and frankly, making a whole cake for one person is just silly. That’s why I invented, perfected, and probably ate 50 versions of this Moist Chocolate Mug Cake. Trust me when I say that after countless microwave tests—some rubbery, some exploding—I’ve nailed the ratio for a perfect, single-serving dessert. This is the ultimate answer when you need a fast, satisfying sweet treat! If you want to see some of my other baking adventures, check out my main blog page here: my baking portfolio.
Why This Moist Chocolate Mug Cake is Your New Favorite Quick Microwave Dessert
My quest for the perfect chocolate indulgence led me straight to this recipe, and honestly, it changed my life! You don’t needfancy bowls or complicated techniques. This is about instant gratification without the mess. It’s ridiculously fast, delivering that deeply satisfying texture you want in a real cake, but ready before you can even decide what movie to watch.
What makes my chocolate mug cake stand above the others? It’s all about the result versus the effort. You get bakery-level joy for almost zero cleanup.
- Speed: From pantry to plate in under five minutes—seriously!
- Texture: It’s wonderfully moist and tender, not rubbery or dry like some microwave disasters.
- Cleanup: You eat it right out of the mug. That’s my favorite part!
Speed and Simplicity of the Mug Cake
When I say fast, I mean it. This is truly the easiest way to jump on that craving train. If you need a chocolate fix right now, this Instant Dessert Recipe is your savior. We measure, mix, zap, and boom—dessert is served. No tempering chocolate, no scraping parchment; just pure, happy microwave baking.
Ingredients for the Ultimate Chocolate Mug Cake
Gathering your ingredients for this chocolate mug cake is almost faster than actually mixing them! Keep everything organized because rushing ruins the texture, even in a microwave. Precision matters here, even though it’s an ‘instant’ recipe. Everything needs to be measured exactly, especially the baking powder, or you risk a flat, dense flavor.
Here’s what you need for one perfect serving:
- 4 Tablespoons all-purpose flour
- 4 Tablespoons granulated sugar
- 2 Tablespoons unsweetened cocoa powder
- 1/4 teaspoon baking powder
- Pinch of salt
- 3 Tablespoons milk
- 1 Tablespoon vegetable oil
- 1/4 teaspoon vanilla extract
- 1 Tablespoon chocolate chips (optional)
Ingredient Notes and Substitutions
I learned the hard way that some swaps just don’t work well in microwave baking. For instance, I tried using melted butter once, and the cake came out almost spongy instead of moist. Vegetable oil keeps the crumb soft and tender, which is vital when you’re zapping it! If you want a deeper flavor that screams chocolate heaven, use strong brewed coffee instead of the milk—it adds beautiful depth without tasting like coffee.
Don’t skip those optional chocolate chips! Pushing them into the batter right before cooking gives you those wonderful pockets of meltiness we all look for in a great dessert.
How to Prepare Your Single Serving Cake Instructions
Okay, this is the fun part, but pay attention because even these simple steps matter when you’re aiming for the best chocolate mug cake. We always, always start with the dry ingredients. Grab a standard 10 or 12-ounce microwave-safe mug—don’t use a tiny teacup unless you want an epic microwave explosion, trust me! Whisk the flour, sugar, cocoa, baking powder, and salt together right in the mug. You want that cocoa powder totally incorporated so you don’t bite into a bitter, dry pocket later.
Once the dust is settled, add in your wet stuff: the milk, the oil, and the vanilla. Mix it gently with a fork. You’re just aiming to combine everything until it’s smooth and glossy. If you’ve got those chocolate chips, toss them in now and give it one last little swirl. If you’re looking for some inspiration on other tasty baked goods, check out my pistachio muffin recipe—it takes much longer, but it’s worth it!
Microwave Baking Tips for a Perfect Mug Cake
This is where every microwave proves it’s a unique beast, so you need to be ready to play tester! Never just walk away. Since wattages vary so wildly, you must watch this cake carefully. Start your cooking on high power for just 60 seconds. Seriously, start there! Then, you check it. If the top still looks wet and gooey, pop it back in for 10-second bursts. I usually stop around 90 seconds total when I’m using my standard, slightly older microwave.
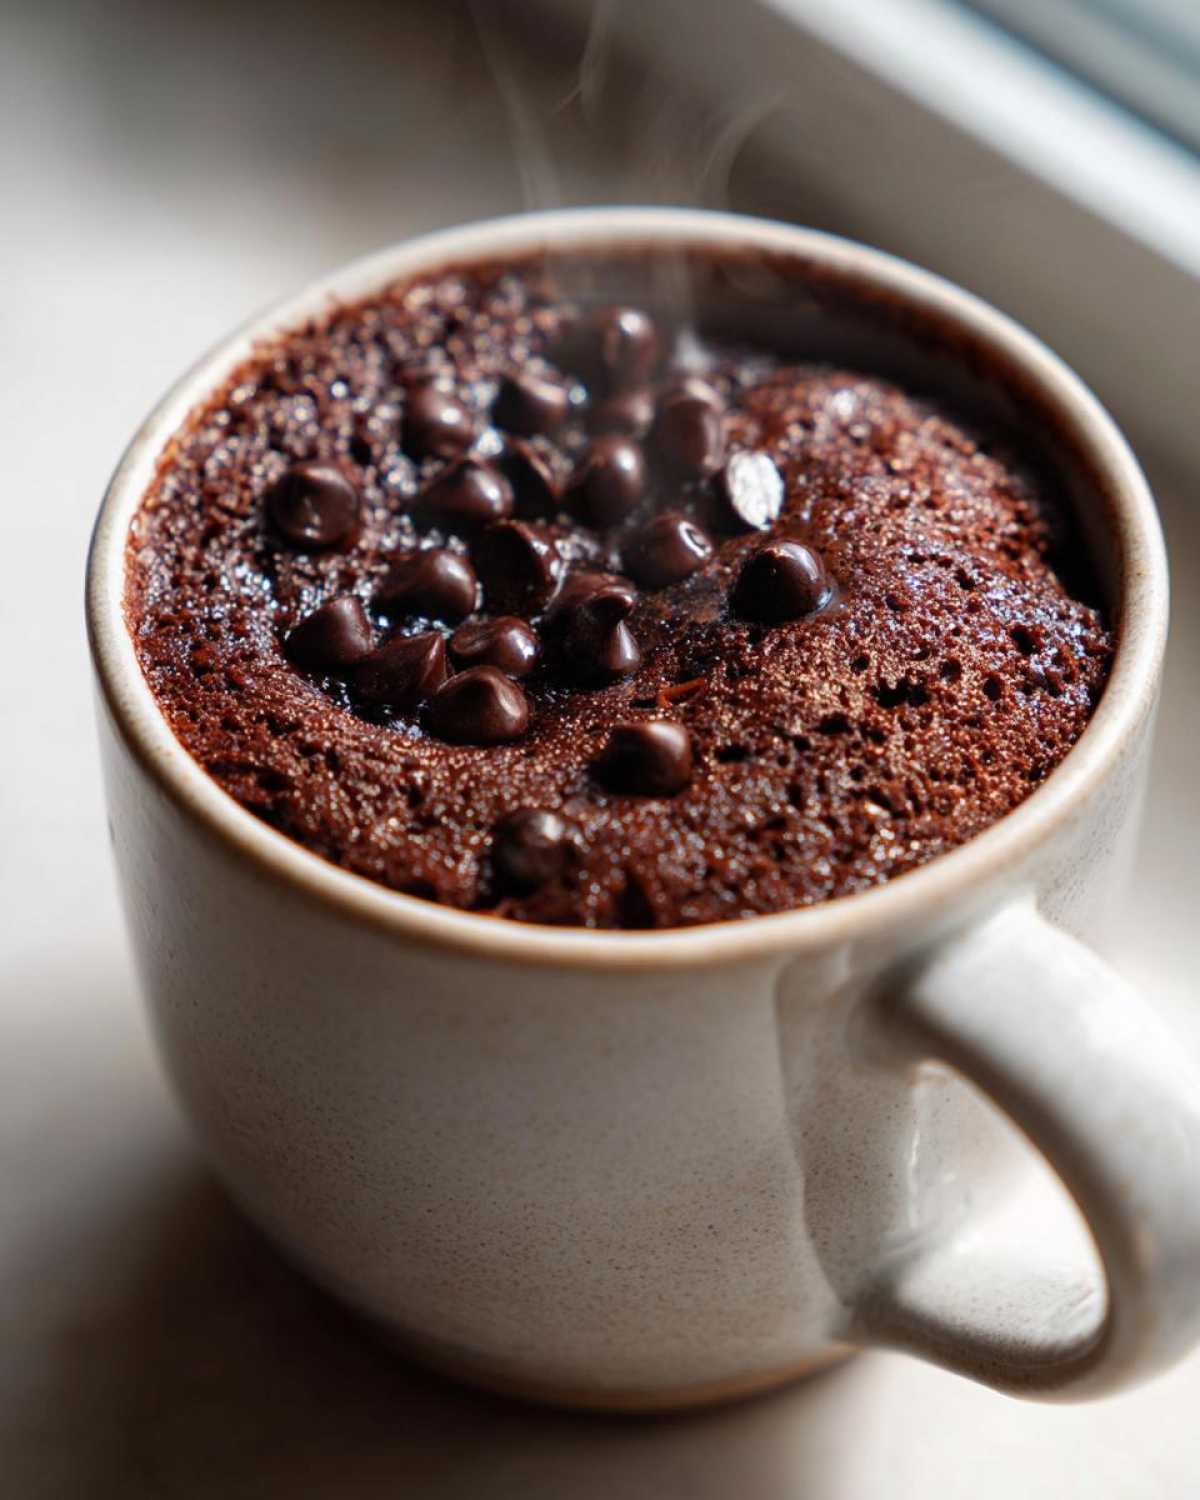
The goal during this Microwave Baking stage is tender, not tough. If you overcook it by even 15 seconds, you’ve crossed the line from moist to rubbery. Learn your machine’s sweet spot, and you’ll have the perfect result every single time.
Tips for Success When Making a Mug Cake
Even though this recipe is designed to be foolproof, I still have a couple of little secrets that keep this mug cake wonderfully soft. When you’re dealing with the intense heat of a microwave, structure is everything. The biggest pitfall people run into is overmixing, and that’s exactly what happened to me when I first started experimenting!
My first attempt resulted in something that looked like a deflated chocolate hockey puck. I mixed those dry and wet ingredients together for what felt like forever, trying to get every single streak of flour gone. Big mistake! Overmixing develops the gluten in the flour way too fast under microwave heat. That’s how you get that tough, chewy texture that nobody wants in a cake.
Now, my rule is simple: mix until *just* combined. If you see a tiny little flour streak here or there, don’t panic! That will usually disappear during the blast in the microwave, and it keeps the final product tender. Also, check your mug size. I learned this the hard way when batter bubbled right over the side—who wants to clean that mess? Stick to a 10-ounce or 12-ounce mug. It gives the cake room to rise without escaping, ensuring your little cake stays put.
For extra flavor insurance, especially with cocoa powder which can sometimes taste dry, I always add that extra teaspoon of good quality vanilla extract. It just brightens everything up. If you’re interested in another recipe where I obsess over the right amount of butter, I think you’ll love my brown butter cookie recipe. It’s the same philosophy: a small ingredient change makes a huge texture difference!
Serving Suggestions for Your Gooey Mug Dessert
Okay, the cake is out of the microwave, it smells heavenly, and it’s still piping hot—now what? While you *could* certainly just grab a spoon and dive right in (and I’ve done it often enough!), this warm, Gooey Mug Dessert really shines when you dress it up a little bit.
Because it’s so rich, you don’t need much to take it over the top. My absolute favorite move is topping it with a big scoop of good quality vanilla bean ice cream. The contrast between the hot, dark chocolate and the cold, creamy vanilla is just divine. It melts right into the cake, making it even gooier!
But if ice cream isn’t your thing, don’t worry! We have plenty of other ways to decorate this little treat.
- Whipped Cream & Berries: A dollop of fresh whipped cream and a few raspberries or sliced strawberries brightens up the flavor profile beautifully. It feels fancy but takes thirty seconds.
- Fancy Dusting: If you’re feeling lazy, just dust it lightly with powdered sugar, just like we used to do for Grandma’s pound cake. Or maybe use a tiny bit of finely grated orange zest mixed in with the powder—that lifts the chocolate flavor surprisingly well.
- The Drizzle: A quick zig-zag of caramel sauce or peanut butter sauce elevates this instantly. If you want to try making a super rich, decadent sauce from scratch without any fuss, you have to check out my recipe for fudgy date brownies—the flavor profiles work so well with this chocolate base, too!
Remember, since this is just one serving, you can be as extra as you want without feeling guilty about wasting ingredients on a fancy presentation!
Storage and Reheating Instructions for Leftover Mug Cake
Alright, let’s talk about leftovers. Technically, this mug cake is designed as a single-serving experience—it’s best eaten the second it comes out of the microwave, all warm and gooey. But hey, sometimes life happens, or maybe you made two! If you absolutely must store this, ditch the idea of keeping it in the mug overnight. Microwaved baked goods don’t love sitting out exposed.
The key to survival is getting it into an airtight container immediately. You want to trap as much moisture in there as you possibly can. Don’t cover the mug itself uncovered, or you risk making the top soggy. Transfer the cooled cake to a small container with a tight lid, or even just wrap the mug securely in plastic wrap.
When you get that urge to finish your leftover chocolate mug cake the next day, the reheating process requires a gentle touch. You don’t want to cook it again; you just want to warm it up. Pop it in the microwave for just 5 or 10 seconds on medium power. Seriously, start at 5 seconds! If you heat it for too long, that lovely moisture we worked so hard to capture with the oil will evaporate, and you’ll be left with a sad, dry disc of chocolate.
If the texture seems a little firm after cooling overnight, adding a tiny splash of milk right before that 5-second reheat can bring some of the softness back. It’s not perfect, but it’s the best rescue mission you can attempt for an instant dessert!
Variations on the Classic Chocolate Mug Cake
Honestly, once you have the base ratio down for this simple mug cake—flour, sugar, liquid, fat—the flavor possibilities are endless! I love having a few simple tweaks ready because sometimes you don’t want rich chocolate; sometimes you want something brighter or nuttier. Switching up these ratios while keeping the cooking time roughly the same is how you expand your microwave baking repertoire.
I’ve got a few recipes I rotate through when I get tired of chocolate, which, though rare, does happen! If you’re looking for another fudgy option that stays unbelievably rich, you have to try my fudgy brownie mug cake recipe. It doubles down on the decadence!
Making a Simple Vanilla Mug Cake Alternative
The easiest pivot you can make is turning this into a bright, fluffy Vanilla Mug Cake. You don’t need to change much at all, which keeps the prep time under two minutes! The key is adjusting the dry ingredients to balance everything out once the cocoa powder is gone.
Here’s what you do: Keep the 4 tablespoons of flour and the 1/4 teaspoon of baking powder exactly the same. But instead of the cocoa powder, you’ll just add one more tablespoon of flour—that keeps the dry-to-wet ratio balanced for the best rise. You’ll want the sugar to stay the same, too. Then, make sure you boost that vanilla extract just a touch, maybe to half a teaspoon, because vanilla is now the star!
If you’re feeling playful, throw in some rainbow sprinkles before you zap it, and suddenly you have a beautiful, quick birthday cake dessert. It whips up just as fast as the chocolate version, making it the best simple cake recipe for a last-minute craving!
Frequently Asked Questions About Baking in a Mug
I get so many questions after people try this, which just shows how much everyone loves a good Dessert For One! Microwave baking is different from our usual oven routine, so it’s smart to ask before you start zapping things. Here are the things I hear most often when people are trying out their first Easy Mug Recipes.
Can I bake this mug cake in a conventional oven?
Oh, you absolutely can! Sometimes you’re just not feeling the microwave vibe, even though it’s the fastest route to a Two Minute Dessert. If you go the oven route, you need to respect the batter. Don’t try to bake it in the ceramic mug itself unless it’s explicitly oven-safe—and even then, ceramic mugs heat up unevenly.
Your best bet is to transfer the batter into a small oven-safe ramekin. Set your oven to 350°F (175°C) and bake for about 15 to 20 minutes. You’ll have to test it with a toothpick because the baking time is much longer than the quick zap we do for this easy cake recipe. It’s slightly more work, but you get that beautiful crust that sometimes only an oven can provide since the heat is more gradual.
What is the best size mug for this recipe?
This is crucial for clean Microwave Baking! I always recommend a standard 10-ounce or 12-ounce mug. We need enough space for the batter to rise without spilling over the side—nobody wants to clean that mess! A mug that’s too small means you risk overflow when the baking powder kicks in, resulting in a sad, cake-like puddle on your microwave floor.
On the flip side, if you use a giant, 16-ounce travel mug, the batter spreads too thinly across the bottom. When the batter is too thin, the intense microwave energy cooks it too fast all the way through, making it instantly tough. That extra moisture we worked so hard to keep will escape immediately! So please, stick to that mid-sized mug for the perfect Single Serving Cake.
If you’re looking for other quick treats that don’t require an oven, I have a fantastic 3-ingredient fudge recipe that relies on chilling rather than heating. It’s another great no-oven dessert option!
Estimated Nutrition for This Quick Microwave Dessert
Now, I know when you’re whipping up a late-night Quick Microwave Dessert, you usually aren’t pulling out your calorie counter, but sometimes it’s good to know what you’re diving into! Since every ingredient can shift drastically based on what milk or oil you use, please treat these numbers as a good ballpark estimate for the basic recipe without any extra sauces or ice cream on top.
This is based on the standard amounts and my usual pantry stock, so think of it as the baseline for your Dessert For One. If I’m watching my sugar intake, I slightly reduce the granulated sugar, but the texture tends to suffer, so I usually stick to the recipe for the best result!
Here’s the nutritional breakdown for one glorious, ready-in-a-minute serving:
- Calories: Roughly 280 Calories
- Sugar: About 20g (Worth every single bite, I promise!)
- Fat: Around 12g total fat
- Carbohydrates: Approximately 40g
- Protein: About 4g
If you’re looking for ways to make healthier savory meals during the week that stick to similar portion control, you absolutely have to check out my turkey chili. It’s a great way to meal prep and keep things balanced outside of emergency dessert time!
PrintMoist Chocolate Mug Cake (Microwave)
Make a rich, single-serving chocolate cake in your microwave in under five minutes.
- Prep Time: 2 min
- Cook Time: 1 min 30 sec
- Total Time: 3 min 30 sec
- Yield: 1 serving
- Category: Dessert
- Method: Microwave
- Cuisine: American
- Diet: Vegetarian
Ingredients
- 4 Tablespoons all-purpose flour
- 4 Tablespoons granulated sugar
- 2 Tablespoons unsweetened cocoa powder
- 1/4 teaspoon baking powder
- Pinch of salt
- 3 Tablespoons milk
- 1 Tablespoon vegetable oil
- 1/4 teaspoon vanilla extract
- 1 Tablespoon chocolate chips (optional)
Instructions
- In a standard microwave-safe mug (about 10-12 oz), whisk together the flour, sugar, cocoa powder, baking powder, and salt until combined.
- Add the milk, vegetable oil, and vanilla extract to the dry ingredients. Mix well with a fork until the batter is smooth and no dry pockets remain. Do not overmix.
- Stir in the chocolate chips, if using.
- Place the mug in the microwave. Cook on high power for 60 to 90 seconds. Cooking time varies by microwave wattage; start with 60 seconds and add 10-second intervals if the top still looks wet.
- Let the cake cool for one minute before eating directly from the mug.
Notes
- For a richer flavor, substitute the milk with coffee.
- If you prefer a gooey center, press a small square of dark chocolate into the center of the batter before microwaving.
- Serve with a scoop of ice cream or a dusting of powdered sugar.
Nutrition
- Serving Size: 1 cake
- Calories: 280
- Sugar: 20g
- Sodium: 150mg
- Fat: 12g
- Saturated Fat: 3g
- Unsaturated Fat: 9g
- Trans Fat: 0g
- Carbohydrates: 40g
- Fiber: 2g
- Protein: 4g
- Cholesterol: 5mg