

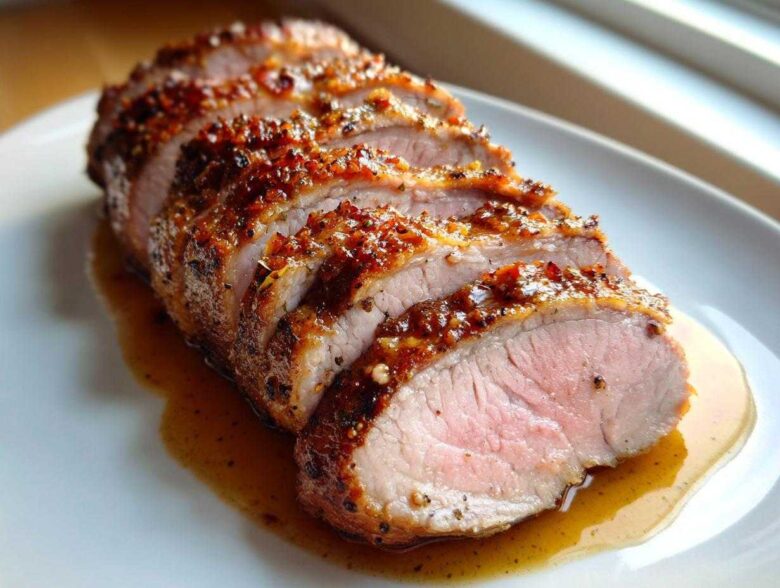
I used to think roasting a decent pork loin roast was reserved for weekend chefs, you know? A lot of recipes out there make it seem like you need herbs flown in from Italy and hours of active tending. But nope! I cracked the code, and trust me, this is the most straightforward, reliable recipe for getting unbelievably tender, juicy pork loin. It’s honestly perfect for a quick weeknight dinner or scaled up for a lovely sunday roast recipe. The trick I learned the hard way involved pulling the meat out *just* before I thought it was done. Once you nail that internal temperature, you’ll never go back!
Why This Juicy Pork Loin Roast is Your New Weeknight Dinner Favorite
If you are looking for an truly easy pork dinner that doesn’t require a whole afternoon commitment, this is it! This recipe takes the stress out of roasting. You throw a few things on the meat, stick it in the oven, and walk away. It’s honestly the best way to get a stunning centerpiece for a weeknight dinner with minimal fuss.
- It delivers incredibly juicy pork every single time, provided you follow my heat rules.
- Cleanup is shockingly simple, especially if you line that pan! Check out more of my kitchen simplicity tips while you’re grabbing your ingredients.
Minimal Ingredients, Maximum Flavor
We’re not messing around with ten different dried herbs here. The flavor really pops because we use a very hot blast of heat first, then a gentle roast. The simplicity of the rub lets the flavor of the pork shine through; it’s about technique, not complicated spice racks!
Foolproof Temperature Guidance
Forget looking at the clock every five minutes! The secret to a juicy pork loin isn’t just resting, it’s hitting that exact temperature target. Pulling it out precisely at 145°F ensures you get a tender, moist roast, not shoe leather. It takes all the guesswork out of things!
Essential Ingredients for Your Pork Loin Roast
When I say this recipe is simple, I really mean it! You don’t need a whole pantry raid to pull off a gorgeous oven roasted pork. The main star needs to be a solid 3 lb pork loin roast, bone out. Make sure it’s a good cut, that’s where the quality starts!
- 1 tablespoon olive oil (just regular, nothing fancy needed for the heat)
- 1 teaspoon salt
- 1/2 teaspoon black pepper
- 1/2 teaspoon garlic powder
That’s it! Seriously. We rely on the roasting technique, not on complicated marinades, to get that amazing flavor.
Step-by-Step Guide to the Perfect Oven Roasted Pork
Okay, this is where the magic happens, and I promise it’s not scary. We use a two-stage heat approach to lock in all the juices while still getting that great crust on our oven roasted pork. Pay close attention to the temperature changes; that’s the secret sauce for turning a simple roast into something worthy of a full sunday roast recipe. If you need inspiration for sides, I have some great vegetable ideas in this post!
Prepping and Seasoning the Pork Loin Roast
First thing! Get those paper towels out and pat the entire surface of your pork loin roast bone dry. I can’t stress this enough—moisture equals steam, and we want browning, not steaming! Once it’s dry, rub it all over with the olive oil. Then mix up your salt, pepper, and garlic powder and sprinkle that rub evenly everywhere. Don’t be shy; make sure it’s fully coated.
Oven Timing and Achieving the Right Pork Loin Internal Temp
Time to shock it! Pop the pan into a 400°F oven for just 15 minutes to get that beautiful sear going. Then, drop the temp right down to 350°F. Now, you roast slowly until your thermometer hits the magic number: 145°F pork loin internal temp in the thickest spot. Generally, plan for about 15 to 20 minutes per pound after that initial blast. Seriously, trust the thermometer over the clock!
The Crucial Resting Period for Your Pork Loin Roast
Once you pull that gorgeous roast out at 145°F, don’t cut it! That’s rookie behavior that leads to dry meat. You have to let it rest for 10 to 15 minutes, loosely tented with foil. This resting time allows all those hot juices that rushed to the center during cooking to settle back out into the meat. It’s non-negotiable if you want that juicy pork loin!
Making a Simple Pan Sauce Gravy for Your Pork Loin Roast
You’ve rested the roast, which means we now have the best, most flavorful liquid sitting in that roasting pan—the drippings! We can’t let that gold go to waste. This is what takes your basic oven roasted pork and turns it into a true sunday roast recipe centerpiece. It’s faster than mixing anything from a packet, I promise!
If you use an oven-safe pan, just put it right over medium heat on your stovetop. Make sure you scrape up all those little brown, caramelized bits stuck to the bottom—that’s the *fond*, and it’s pure flavor for your pan sauce gravy. If you used a regular baking sheet, just pour those drippings into a small saucepan.
Next, pour in about one cup of chicken broth. Bring that right up to a simmer. You have to let it cook down a little bit until it thickens up just enough to coat the back of a spoon. Taste it, adjust your salt and pepper, and bam! If you’re ever in a pinch and don’t have broth, you can definitely use water, though the flavor won’t be quite as deep. For more sauce ideas, check out my recipe for homemade brown gravy!
Tips for Success with Your Oven Roasted Pork
Even though this recipe is super straightforward, there are just a few little secrets that separate a good roast from an absolutely legendary one. Listen, I’m giving you my insider advice here—the things I learned after accidentally making a few less-than-perfect roasts when I was first learning how to manage that crucial pork loin internal temp. Don’t make my mistakes; stick to these tips for perfect results every time you try an oven roasted pork!
If you want to see more simple kitchen hacks, have a peek at some of my favorite quick tips!
Ensuring a Crispy Exterior on Your Pork Loin Roast
Remember how I told you to tent the roast loosely with foil after it comes out of the oven? That’s key for keeping the meat juicy. But here’s the thing: if you want that fantastic, crackly, seasoned crust—that gorgeous mahogany color—you have to skip that step for the first few minutes. If you really prefer a crispier outside and don’t mind sacrificing just a tiny bit of juice retention, leave the foil off for the whole 10 to 15-minute rest. It lets the last bit of steam escape instead of softening that crust you worked so hard to achieve on your pork loin roast.
Flavor Substitutions for the Pan Sauce Gravy
If you’re making this on a Tuesday night (hello, weeknight dinner rush!), sometimes you realize you’re fresh out of chicken broth when you go to make the pan sauce gravy. Don’t panic! You can absolutely use plain water in a pinch. The broth just adds a deeper, savory foundation, but water still works great for deglazing the pan and getting those delicious browned bits into your sauce. Just be sure to taste it really well at the end, because you might need a tiny splash of something salty, like a dash of Worcestershire sauce, to boost the flavor back up where the broth usually carries it!
Storage and Reheating Instructions for Leftover Pork Loin Roast
Oh, leftovers! The best part of a big oven roasted pork meal, right? To keep that meat tasting like it just came out of the oven, you gotta treat it right. For storage, I really suggest slicing what you think you’ll eat first, and keeping the rest whole if you can. Store the sliced meat in an airtight container in the fridge.
When you go to reheat it later for your next easy pork dinner, do it low and slow—think 300°F in the oven, covered with just a tiny bit of broth or water to steam it back to life. Poured-on pan sauce gravy should always be stored separately and reheated on the stovetop. It’s the best way to keep those slices perfectly moist!
Serving Suggestions for Your Easy Pork Dinner
This pork loin roast is so versatile! Since we kept the main dish simple, you have a gorgeous blank canvas for sides. If I’m doing this on a busy night for an easy pork dinner, I keep the sides super fast—think pre-washed salad mix or frozen green beans steamed right in the bag. Done in ten minutes flat!
But when I’m making this for a proper sunday roast recipe, I like to pull out the stops just a little. Pairing those savory spices from the roast with something sweet or creamy is just heavenly. You absolutely have to try it with my loaded potato casserole. Seriously, no meal is too simple for that cheesy goodness! You can find the recipe for the ultimate loaded potato casserole here.
Another winner that pairs beautifully with the savory pork and a side of that rich pan sauce is something sweet to balance it out. My recipe for creamy mashed sweet potatoes with maple and cinnamon brings out the warmth in the roast’s seasoning. It sounds fancy, but it’s honestly just as fast as regular mashed potatoes!
Choose one starchy side and one green vegetable, and you’ve got a full, satisfying meal on the table without breaking a sweat. Enjoy!
Frequently Asked Questions About Pork Loin Roast
I get so many questions about roasting because, let’s face it, dry pork is a tragedy! These are the things folks ask me most often when they are figuring out their oven roasted pork timing. Hopefully, this clears everything up so you can serve up some guaranteed juicy pork tonight!
What is the safe pork loin internal temp to cook to?
The USDA is very clear here, and we always follow their guidance! For pork loin, the absolute minimum safe pork loin internal temp is 145 degrees Fahrenheit when you pull it out of the oven. But here’s the critical part: it continues cooking while it rests. That resting period adds anywhere from 5 to 10 degrees. So if you pull it out at exactly 145°F, it will climb up to a perfect, safe temperature while it sits under the foil. That carryover cooking is essential!
Can I cook this pork loin roast faster?
You *can*, but you risk wrecking the gorgeous texture we worked so hard to achieve! This recipe uses that initial high heat blast (400°F) to quickly develop the crust, but then we have to drop the temperature way down to 350°F. If you try to blast the whole thing at 400°F, you’ll overcook the outside before the inside ever reaches the safe pork loin internal temp properly. For truly juicy pork, patience during that lower roasting phase is non-negotiable.
How do I prevent the pork loin from drying out?
It comes down to two steps that you cannot skip if you want that tender result from your oven roasted pork. First, you must pat the surface completely dry before seasoning. Second, and most important: you HAVE to let it rest for a full 10 to 15 minutes after it comes out of the oven. If you slice it immediately, all the juices run out onto the cutting board, leaving you with dry slices. Resting keeps all that moisture trapped inside!
Share Your Juicy Pork Loin Roast Experience
Wow, you made it through the whole process! I truly hope this simple pork loin roast worked its magic for you. I’ve spent years perfecting this exact method because seeing that slice of meat—tender, pinkish, and swimming in its own juices—is the best payoff after only an hour in the oven.
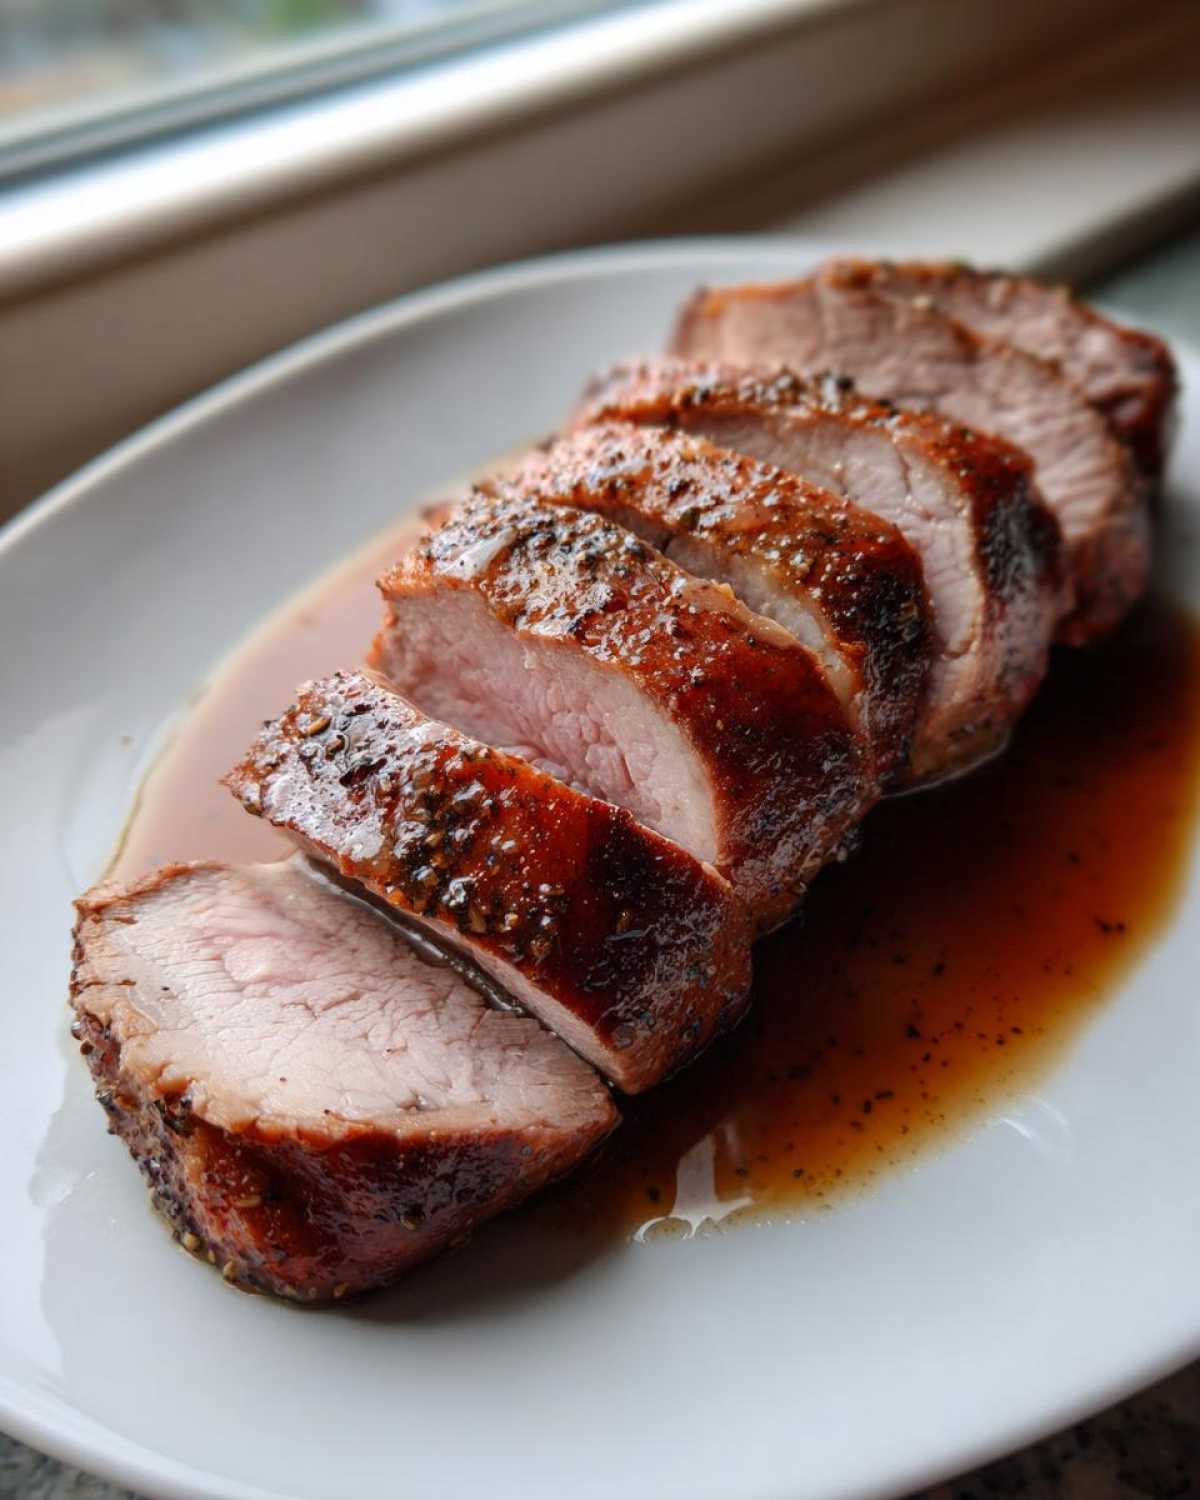
Now, I just want to know: did it turn out as juicy pork as you were hoping? I really want to hear about it! Please take a moment to leave a rating right here on the recipe card. Stars help other busy home cooks find reliable meals, and I love reading those success stories.
Did you try the pan sauce gravy? Was it easy? If you snapped a picture of your plated roast—maybe with my favorite sweet potatoes—upload it! You can always send me a photo or just drop a line through my contact page. Tell me a picture is worth a thousand words, and I’d love to see your beautiful dinner!
PrintSimple Juicy Pork Loin Roast
A straightforward recipe for a tender and juicy oven-roasted pork loin, complete with instructions for a simple pan sauce.
- Prep Time: 10 min
- Cook Time: 60 min
- Total Time: 70 min
- Yield: 6 servings
- Category: Dinner
- Method: Roasting
- Cuisine: American
- Diet: Low Fat
Ingredients
- 3 lb pork loin roast, bone out
- 1 tablespoon olive oil
- 1 teaspoon salt
- 1/2 teaspoon black pepper
- 1/2 teaspoon garlic powder
Instructions
- Preheat your oven to 400 degrees Fahrenheit (200 degrees Celsius).
- Pat the pork loin dry with paper towels. This helps the outside brown.
- Rub the entire surface of the pork loin with olive oil.
- In a small bowl, mix the salt, pepper, and garlic powder. Sprinkle this mixture evenly over the pork loin.
- Place the seasoned pork loin in a roasting pan or on a rimmed baking sheet.
- Roast for 15 minutes at 400 degrees Fahrenheit.
- Reduce the oven temperature to 350 degrees Fahrenheit (175 degrees Celsius). Continue roasting until an instant-read thermometer inserted into the thickest part reads 145 degrees Fahrenheit (63 degrees Celsius). This usually takes about 15 to 20 minutes per pound after the initial high-heat blast.
- Remove the pork from the oven when it reaches 145 degrees Fahrenheit.
- Transfer the roast to a cutting board and tent it loosely with foil. Let it rest for 10 to 15 minutes before slicing. Resting allows the juices to redistribute.
- While the pork rests, make the pan sauce: Place the roasting pan over medium heat on the stovetop (if using an oven-safe pan) or pour the pan drippings into a small saucepan. Scrape up any browned bits from the bottom of the pan.
- Add 1 cup of chicken broth to the pan drippings. Bring to a simmer and cook, stirring occasionally, until the liquid reduces slightly and thickens enough to coat the back of a spoon, about 5 minutes. Taste and add more salt or pepper if needed.
- Slice the pork loin against the grain and serve immediately with the pan sauce poured over the top.
Notes
- For easier cleanup, line your roasting pan with aluminum foil before starting.
- If you prefer a crispier exterior, do not tent the roast during the resting period.
- If you do not have chicken broth for the sauce, water works, but the flavor will be less rich.
Nutrition
- Serving Size: 4 oz cooked meat
- Calories: 280
- Sugar: 1
- Sodium: 450
- Fat: 12
- Saturated Fat: 4
- Unsaturated Fat: 8
- Trans Fat: 0
- Carbohydrates: 1
- Fiber: 0
- Protein: 40
- Cholesterol: 95