

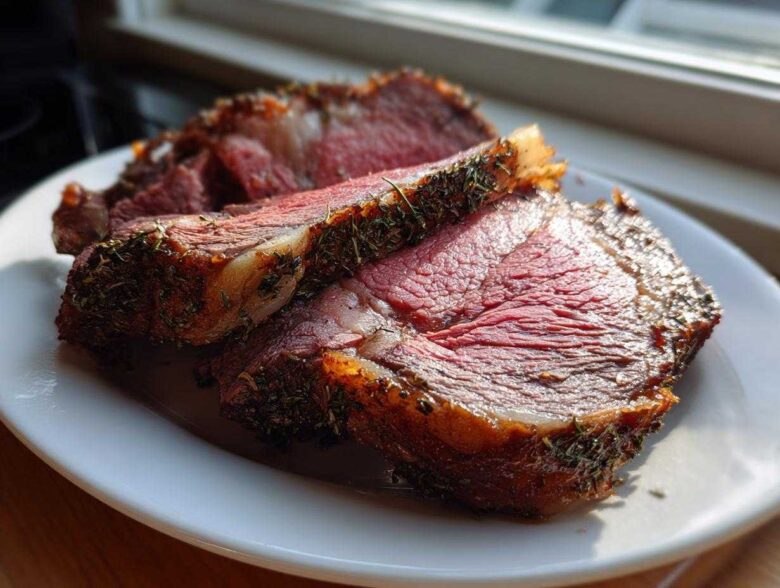
Pulling off that jaw-dropping, show-stopping roast for a big holiday dinner used to fill me with sheer panic. Seriously, nobody wants to carve into a giant piece of beef only to find the edges are grey and the middle is rare the size of a postage stamp! That’s why I spent years—and I mean years—perfecting what I now call the foolproof method for making the absolute best prime rib roast. Forget restaurant guesswork; this roasting technique guarantees you get that gorgeous, seasoned crust and a perfectly medium-rare, tender interior every single time.
When you’re dealing with a beautiful, expensive piece of meat like a standing rib roast, you need simplicity you can trust. My method uses a quick blast of super high heat to start things off, followed by a slow, steady finish. It takes the stress right out of the process! Plus, this garlic and herb crust? Wow. It smells heavenly while it’s roasting, and trust me, you are going to want to serve it with a tangy side of horseradish sauce when it’s done.
Why This Garlic Herb Prime Rib is Your New Holiday Centerpiece
I’m not kidding you, once you nail this method, you’ll actually look forward to being in charge of the beef centerpiece! People think cooking a huge roast means huge risk, but my system takes all the guesswork out. You get all the glory and none of the worry. This isn’t just dinner; it’s the main event, and it’s shockingly easy to pull off.
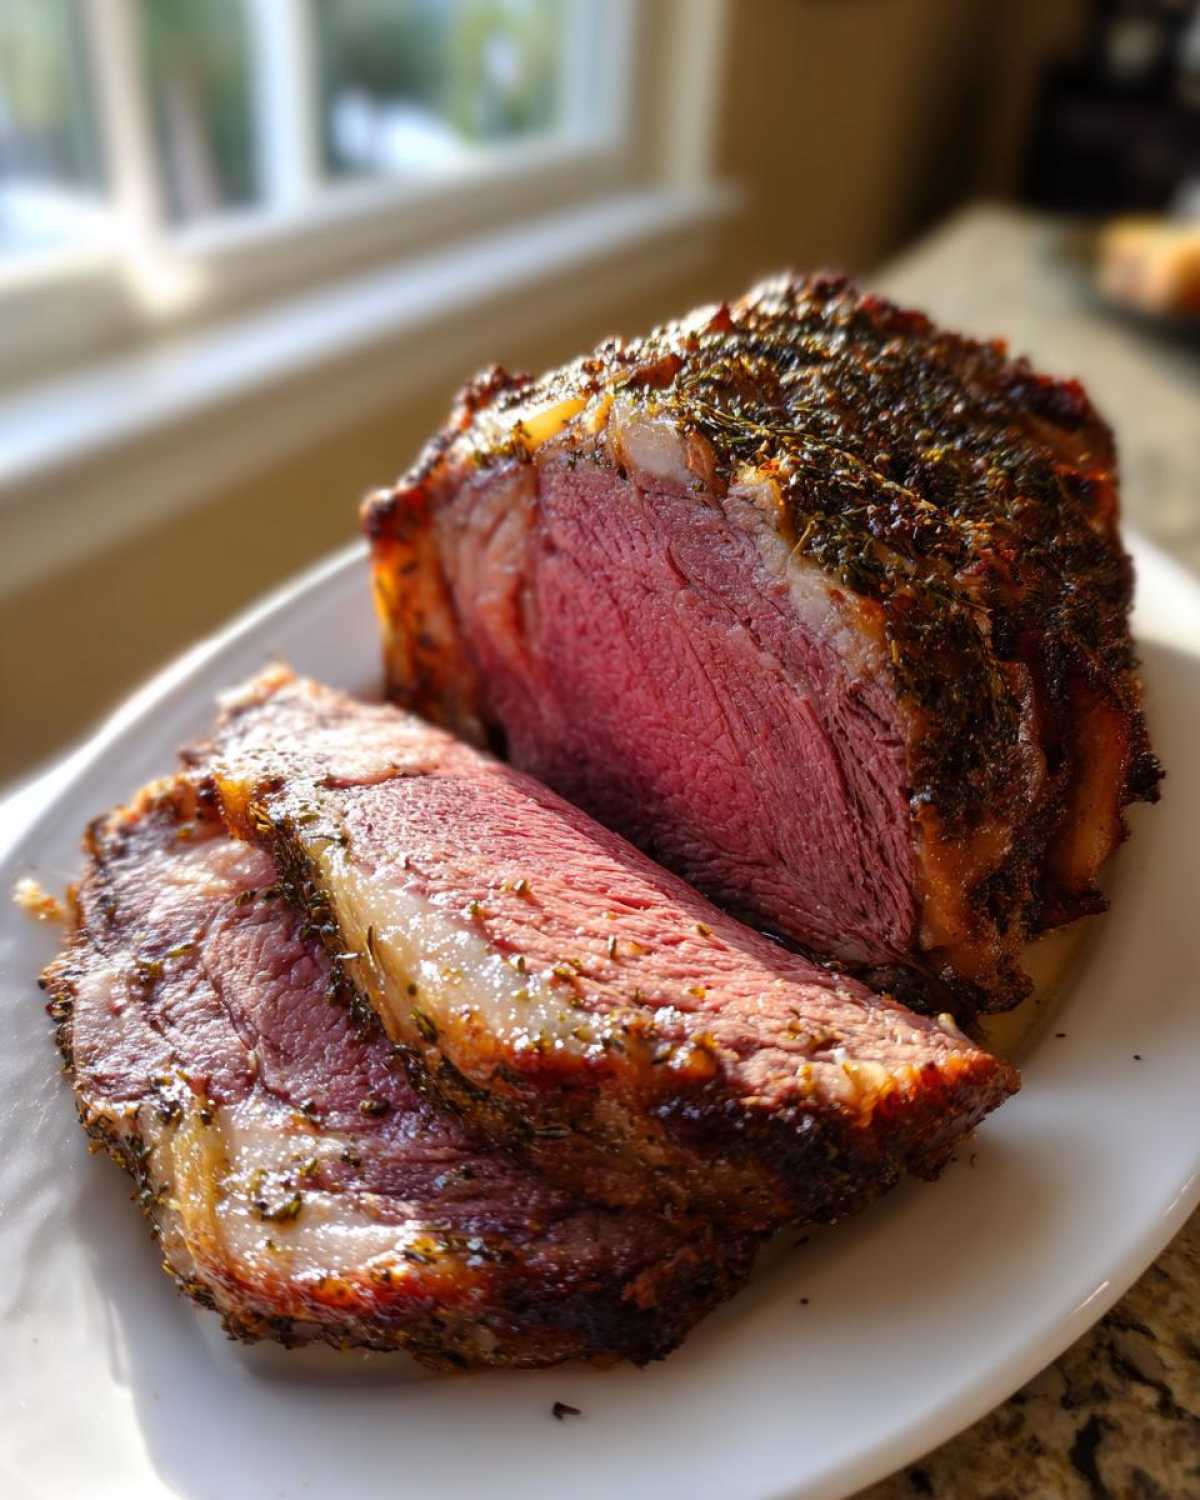
Key Benefits of this Prime Rib Method
- Seriously Juicy Interior: The rest time combined with the two-stage cooking locks in all those wonderful beef juices. No drying this out!
- Flavor Bomb Crust: That kick of fresh rosemary and garlic creates a dark, savory crust that tastes incredible when sliced over the pink center.
- Stress-Free Temperature Control: We rely on a meat thermometer, which is the only reliable way to hit that perfect medium-rare without standing guard over the oven like a hawk.
Essential Ingredients for the Perfect Prime Rib Every Time
Okay, the secret to a truly magnificent prime rib isn’t about some crazy twenty-step brining process. It’s about respecting the incredible beef you bought and using high-quality flavor boosters that love beef! Since this is a holiday roast, we want the best, so pay attention to how we prep these simple things. You don’t need much, but what you use really matters here.
You’ll need a roast that’s tied—that keeps it nice and compact while it cooks evenly. And ditch that fine table salt; we need texture for the crust!
The Garlic Herb Best Prime Rib Seasoning Rub
This mix is basically what makes the outside of your roast taste like a five-star steakhouse. I always chop my herbs fresh, even though the recipe says dried is okay sometimes—fresh rosemary just sings louder, you know?
- A good (5-7 pound) bone-in prime rib roast, tied up nice and snug.
- 3 tablespoons of olive oil—just normal stuff, nothing fancy.
- 6 cloves of garlic, and I mean minced. Don’t crush it, mince it fine so it sticks everywhere!
- 2 tablespoons of fresh rosemary, chopped up small.
- 1 tablespoon of fresh thyme leaves only—no woody stems, please!
- 2 teaspoons of coarse salt. This is vital for drawing out flavor on the outside.
- 1 teaspoon of black pepper.
- And just half a cup of beef broth for the bottom of the pan—that helps stop the drippings from scorching right away.
Choosing Your Standing Rib Roast
This recipe works beautifully with a bone-in roast. Honestly, I always go bone-in! The bones help insulate that bottom layer of meat and add incredible flavor as they sit in the pan drippings. Plus, carving looks much more impressive when you pull those bones out!
Now, if you only have access to a boneless roast, it’s totally fine! Just keep in mind that the cooking time will be a little shorter because there isn’t that bone mass slowing down the heat transfer towards the center. You’ll need to rely even harder on that meat thermometer!
Equipment Needed for Roasting Beef Prime Rib Step by Step
Listen, I’m not a fancy kitchen gadget person, but when it comes to a big piece of beef like this, a few tools make the whole roasting beef prime rib step by step process incredibly smooth. If you don’t have these things ready, you’re just setting yourself up for struggle later on. Trust me on this one—investing in these few items is worth every penny when you pull that perfect roast out!
First off, you need the right foundation. A flimsy baking sheet is not going to cut it here. You want something sturdy that can handle the weight and the heat for a couple of hours.
- A Good Roasting Pan: This needs to have some decent sides, not just a flat sheet. We need those juices to hang out at the bottom, and you don’t want them boiling over into your oven. If you have one with a little V-rack, great, but honestly, setting the roast directly on the bottom works just fine for this recipe since we aren’t trying to lift it high up.
- The Absolute Must-Have: A Meat Thermometer. If you try to guess doneness on a prime rib, you are playing the worst game of chance. Get one with a long probe! You need to be able to stick it deep into the thickest part of the meat, careful not to poke the bone, and keep the oven door closed. This is non-negotiable for achieving that medium rare prime rib temperature without stressing out.
- Aluminum Foil: I always keep a whole roll handy. This is for Tent City when the roast comes out! Wrapping it loosely keeps the outside crust seasoned and gorgeous while the inside finishes cooking during the all-important rest time.
- Sharp Carving Knife: Once it rests, you need to slice it thinly, especially if you have the bone-in cut. A dull knife makes carving feel like combat, and nobody wants that after a big meal.
That’s really it! No special smokers or complicated temperature probes required. Keep it simple, keep it focused on the beef, and you’ll have the best prime rib seasoning experience ever.
How to Prepare Your Juicy Prime Rib Recipe
This is where we turn a nice piece of beef into a masterpiece, and honestly, the preparation is way less busy than you think! For this prime rib to come out totally even—meaning edges aren’t overdone while the center is still cold—we need two main actions. You must let the roast relax, and then you need to slather it in flavor. If you skip the first step, I guarantee you’re walking toward uneven cooking territory, and nobody wants that disappointment.
The beauty of this juicy prime rib recipe is that most of the prep work happens hours before anyone even walks in the door. You’re just setting the stage for the oven to do the heavy lifting later on.
Tempering and Seasoning the Prime Rib
First things first: take that wrapped roast out of the fridge! I know it feels weird leaving expensive meat sitting on the counter, but you absolutely have to let it sit out for 2 to 3 hours before it even thinks about going into the oven. This is called tempering, and it’s my biggest insider secret for achieving the perfect cook. When the center of the roast is too cold, the outside has to blast for so much longer just to warm up the middle, leading to that dreaded grey ring around your beautiful pink center.
Once it’s had its “nap” time, it’s rub time! First, pat the entire surface dry with paper towels—moisture is the enemy of a great crust. Then, drizzle it all over with that olive oil. This acts like glue for our herb crust. Mix up your garlic, rosemary, thyme, salt, and pepper until it looks like chunky green confetti. Now, press that mixture onto every single surface of the beef. Don’t be shy; really press it in there so it adheres. This seasoning blend is what gives you that incredible flavor profile!
The High-Heat Blast Method for Easy Oven Roasted Prime Rib
Now for the part that sounds terrifying but is actually pure genius: the two-stage roasting process! This is how we give you that easy oven roasted prime rib that looks like you spent all day fussing over it. We trick the outer layer into developing that amazing crust quickly, and then we let the inside cook slowly and perfectly.
Get your oven blazing hot—we’re talking 450 degrees Fahrenheit. Pop that seasoned roast into the pan, fat side up, with that little bit of broth underneath. Blast it at that high heat for exactly 15 minutes. Don’t open the door! Let that high heat sear everything up. After 15 minutes are up, here’s the crucial timing change: immediately drop the oven temperature down to 325 degrees Fahrenheit.
From this point on, it’s about checking the internal temperature every 20 or 30 minutes. Do not stress about the time per pound too much, even though the recipe gives you a guide. Every oven is different, and every roast is shaped differently. Trust the thermometer, not the clock, for the second stage!
If you want to read more about how I use this exact two-stage method for my most requested recipe, you can check out the full breakdown of my foolproof herb-crusted technique, which uses similar temperature principles.
Monitoring for Medium Rare Prime Rib Temperature
If you take away only one single piece of advice from me today about making a perfect prime rib, please make it this: You MUST use a good meat thermometer. Guessing leads to grey meat. That’s just science!
You need to slide that probe into the absolute thickest part of the roast. And this is important: make sure you are aiming for the center of the meat, not touching the bone underneath. The bone is colder than the meat, and if you hit it, your reading will be way too low, and you’ll overcook your roast!
For a beautiful, classic medium rare prime rib temperature, you need to pull the roast out of the oven when the thermometer reads 125 degrees Fahrenheit. I know it sounds early, right? But remember the resting step we are about to talk about! That residual heat continues cooking the meat, and it usually jumps up another 5 to 7 degrees while resting. Pulling it at 125°F guarantees you land perfectly around 130–135°F when you finally slice it. That sweet spot is what everyone dreams about!
The Essential Rest Period for a Tender Prime Rib Roast
Okay, I know you are staring at that gorgeous, perfectly cooked roast thermometer reading 125°F, and your tummy is rumbling, demanding that you carve it immediately. STOP! If you slice into that beautifully cooked prime rib right now, all the amazing juices we worked so hard to keep inside are going to flood out onto your cutting board. That’s not a tender roast; that’s a sad, dry roast waiting to happen!
Resting is not optional; it’s part of the cooking process itself. Think about it: when the meat is hot, the fibers are tight, squeezing all the moisture right into the center. Letting it rest lets those fibers relax and slowly reabsorb all those flavorful juices. It’s like giving the meat a moment to breathe and rehydrate itself. You want every single bite of your tender prime rib roast to be moist, right?
The magic number here is 20 minutes. Don’t even think about touching it for less than 20 minutes. Take that roast out of the oven, put it on a clean cutting board, and tent it loosely with aluminum foil. Don’t wrap it tight—we don’t want to steam the beautiful crust we built! Just drape it lightly. This loose tent traps just enough heat to keep it warm.
During those 20 minutes of resting, that internal temperature—which you pulled at 125°F—is going to keep climbing, thanks to carryover cooking. This is fantastic! You can expect that temperature to rise another 5 to 7 degrees, which means you’ll land perfectly in that sweet 130°F to 135°F range for a flawless medium-rare finish. See? No guesswork required if you just trust the timing!
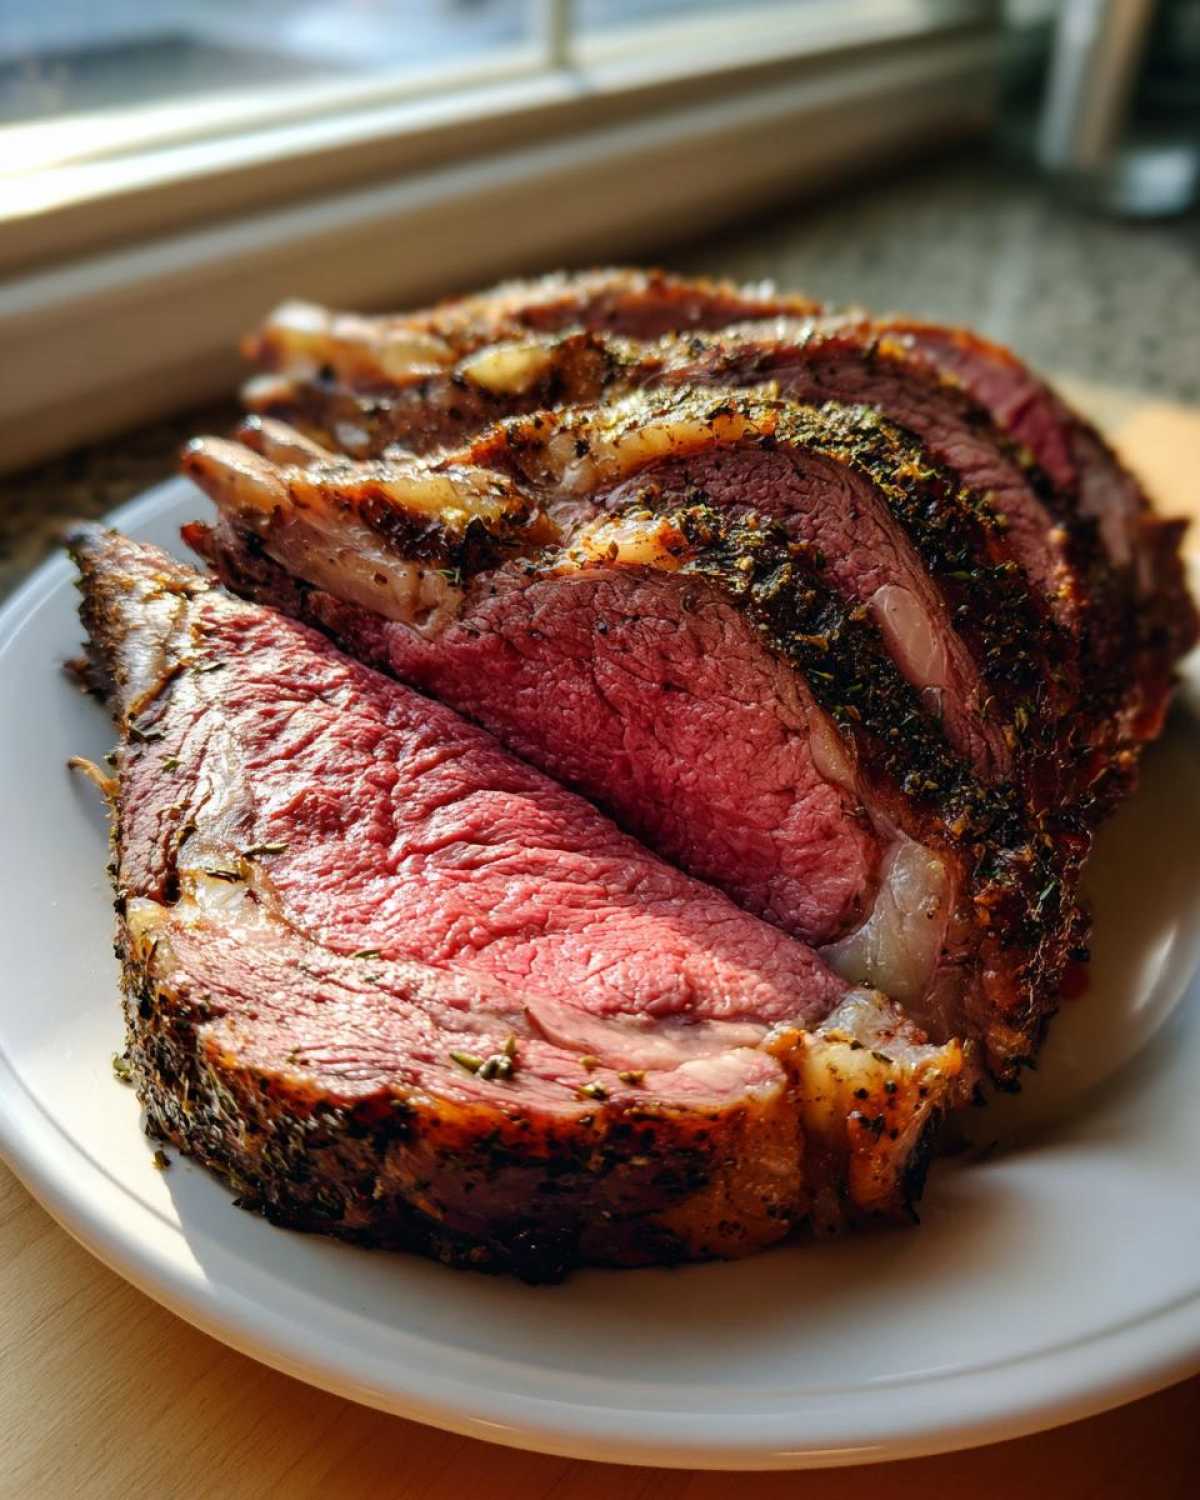
Making Simple Prime Rib Au Jus Recipe from Pan Drippings
Okay, the roast is resting beautifully, the anticipation is sky-high, and now we need the last crucial element for serving an amazing **prime rib**: the pan sauce! Honestly, after you roast a gorgeous piece of beef like this, you already have the base for the most flavorful sauce possible sitting right there in the bottom of your roasting pan. Why would you waste those savory, salty, herb-infused bits? They are pure gold!
I feel like people sometimes see the term Au Jus and think it requires a culinary degree, but for this recipe, it’s incredibly straightforward. We don’t need roux or complicated reductions. We just need to clean up those drippings and turn them into liquid gold that you can spoon right over the freshly carved meat. If you’ve got a sharp knife, you can absolutely master this little trick.
First, carefully pour out those pan drippings into a measuring cup or small bowl. You’ll see a layer of clear rendered fat floating on top of the dark, flavorful beef bits underneath. If you want a lighter sauce, you need to skim off as much of that top layer of fat as you can. You can save that rendered beef fat for roasting potatoes later, but don’t add it to your sauce!
Once you are left with just the dark, concentrated drippings at the bottom, here is where you add your liquid. The recipe notes suggest adding a little water or wine—I usually prefer a touch of dry red wine if I have it, as it cooks down nicely, but water works just fine, too! Add just enough liquid to bring the volume up to what seems like a nice sauce consistency for you. Remember, it will concentrate as it simmers.
Set your roasting pan right on the stovetop over medium heat. Get it simmering gently and use a wooden spoon to scrape up all those tasty brown bits stuck to the bottom of the pan. That scraping process is officially called deglazing, and those scraped bits are where all the intense beef flavor is hiding. Let that mixture simmer gently for about five minutes until it reduces just a little bit. Taste it—if it seems a little too salty, splash in a tablespoon of warm water. If it’s too thin, let it simmer longer. That’s it! Serve that gorgeous **prime rib au jus recipe** immediately alongside your slices. It’s way better than any packet gravy, and you made it yourself!
If you ever find yourself needing a richer, thicker sauce without the beef drippings, I have an amazing recipe for homemade brown gravy that comes together quickly on the stovetop, but honestly, when you have this fantastic pan sauce, you won’t need it for the **prime rib**!
Ingredient Notes and Prime Rib Substitutions
I always get questions after people master the main cooking steps about making small swaps. Look, beef is expensive, and we want to make sure we aren’t accidentally ruining a $100 roast because we didn’t have fresh thyme! Since this is a recipe built on trust—you’ve trusted me with your technique, now let’s talk about ingredients—I want to make sure you feel confident swapping things out if you absolutely have to. This is where experience really helps, because you need to know which changes won’t change the final outcome of your glorious prime rib.
We talked about the bone-in versus boneless adjustment already, but what about that gorgeous herb crust? I’m going to give you my honest opinion on substitutions, because some things just don’t play nice with high-heat roasting!
Tips for Success with Your Prime Rib Roast
Even after you nail the temperature and the resting, there are a few little things you can focus on during the actual cooking time to ensure total success. These are the tiny little habits I picked up after ruining my first few roasts that really make the difference between a good roast and a ‘OMG, you have to give me the recipe’ roast.
- Keep the Oven Door Closed During Cooking! This is the biggest temptation, right? You want to sneak a peek at that crust! But every single time you swing that heavy door open, you drop the oven temperature by 50 degrees or more. That just sends the entire roast into shock, slows down the cooking process unevenly, and ruins the beautiful stability we built up during the high-heat blast. Just use the oven light, or better yet, just trust the thermometer and wait until the timer goes off!
- Mind the Rack Position: For this simple two-stage method, I always keep the roasting rack positioned in the lower-middle slot of the oven. This gives the heat from the bottom element a little more impact during that initial sear, helping to crisp up the underside before we drop the temperature and rely on ambient heat.
- Use the Roast’s Own Fat as Lubricant: Before you put your herb rub on, if you notice your roast has a nice, thick layer of fat marbled on top but it seems a little dry, don’t be shy about using a spoon to scoop some of that rendered fat from the very bottom of the pan drippings (after skimming, of course!) and rubbing it where the herb rub isn’t sticking well. It just helps the seasonings stay put while we blast it with heat.
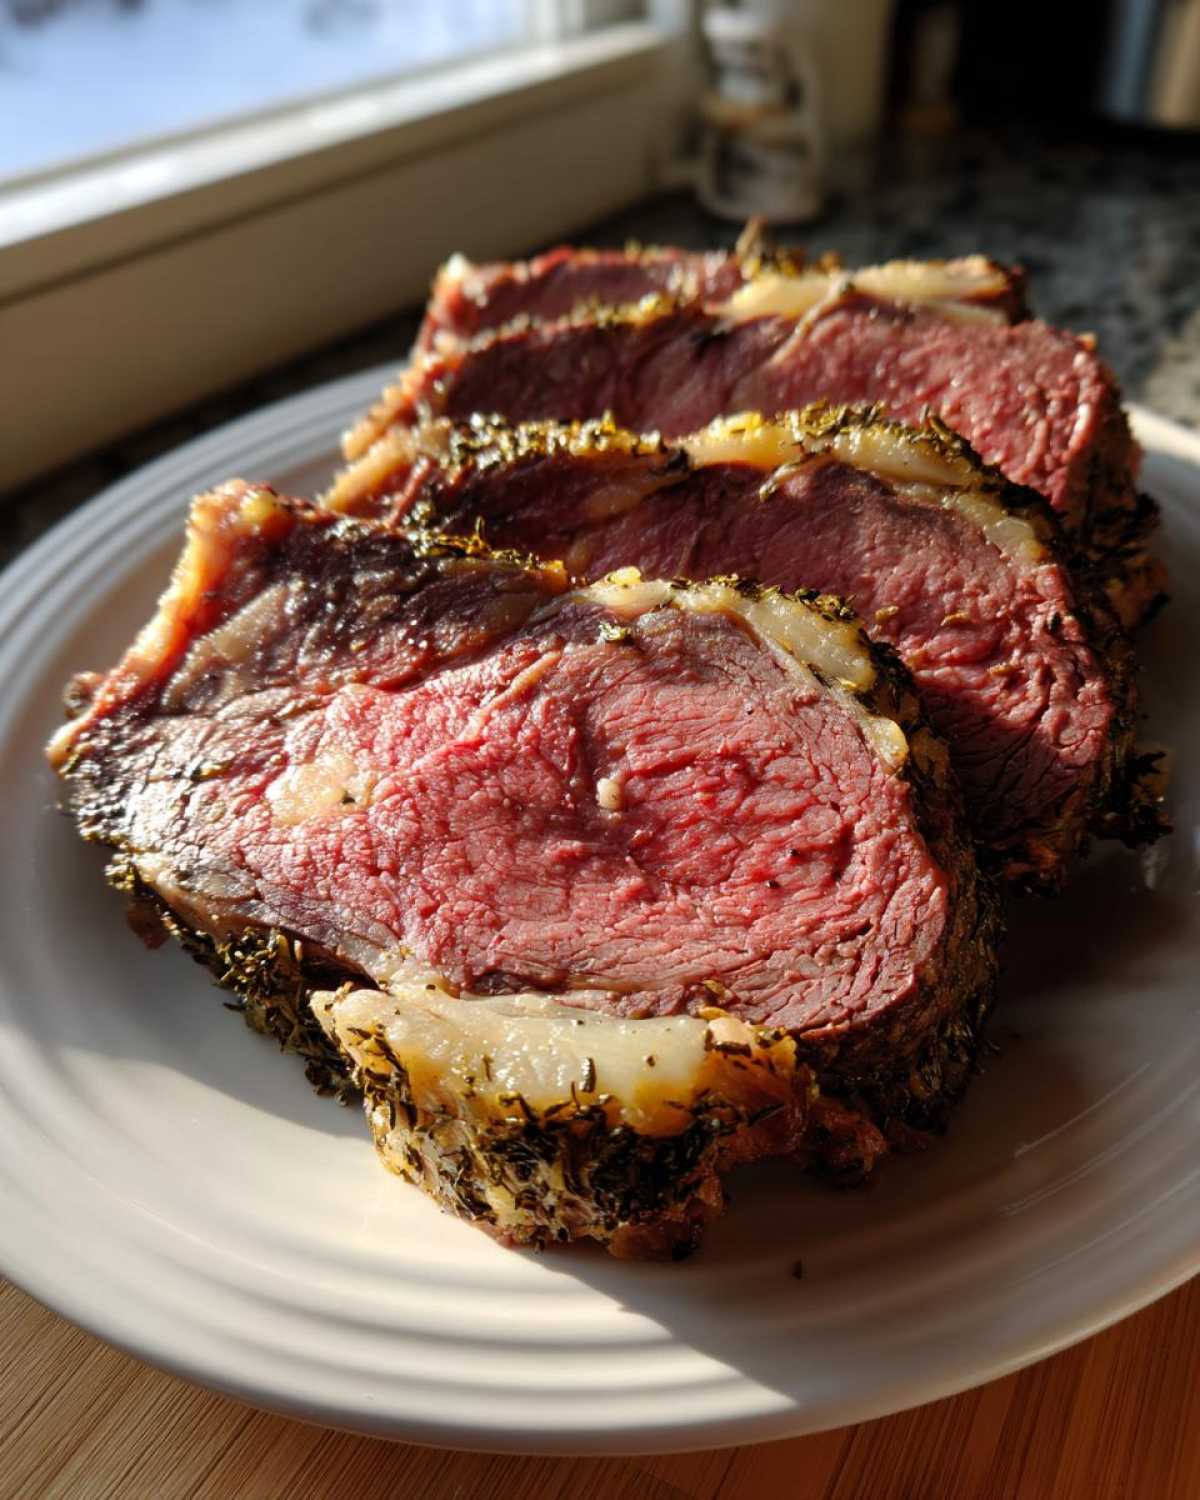
Frequently Asked Questions About Cooking Prime Rib
People always have a million questions once they get this far, usually because they’ve successfully roasted the big one and now they’re thinking about leftovers or their next gathering. That’s good! It means you’re thinking ahead! Cooking a spectacular prime rib roast is all about knowing the little details, so let’s clear up some of the common stuff I hear all the time from folks trying to achieve that perfect cook.
Don’t worry if your question isn’t listed here; chances are, if you call me up, I can tell you! But these are the big ones that tend to come up again and again when people are planning their holiday beef roast.
How do I calculate the cooking time for a smaller prime rib?
This is the question I get asked most right after Christmas! If you had a big 7-pound roast last time, but this year you’re only cooking for four people, you’ll need a smaller cut—maybe a 3 or 4-pound roast. My general rule of thumb is based on how long it takes after you drop the temperature down to 325°F. For this easy oven roasted prime rib method, once you’ve done that initial 15-minute blast at 450°F, you are generally looking at about 13 to 15 minutes per pound until you hit that 125°F pull temperature.
So, if you have a 4-pound roast, you multiply 14 minutes (let’s average it) by 4, which gives you about 56 minutes of roasting time at the lower temperature. Always remember, that’s an estimate! The meat thermometer is your boss. If you have a tiny 2-pound portion, you might only need 30 or 40 minutes at 325°F, so you really need to start checking earlier than you think!
Can I cook prime rib ahead of time?
Yes, you absolutely can, and honestly, sometimes that’s the best way to go for a less stressful holiday! The general consensus among most chefs is that it’s safest and easiest to cook your prime rib a day ahead, cool it completely in the fridge, and then reheat it gently on the day of serving. This is how many restaurants manage their massive dinners!
When you reheat, you want to avoid drying out that beautiful crust and overcooking the center. You need to keep the temperature very low—think 275°F or maybe even 300°F if your oven runs hot. The goal is just to warm it through until the internal temperature hits about 115°F to 120°F. You don’t want it to cook much further, since all the juices have already settled during the first rest. If you slice it first, it reheats faster, but if you leave it whole, cover it tightly with foil, and place a tiny splash of beef broth in the pan, it will keep the meat much juicier!
If you are interested in learning even more tips and tricks about handling large cuts of beef, I post new cooking adventures and experiments over on my main blog page all the time!
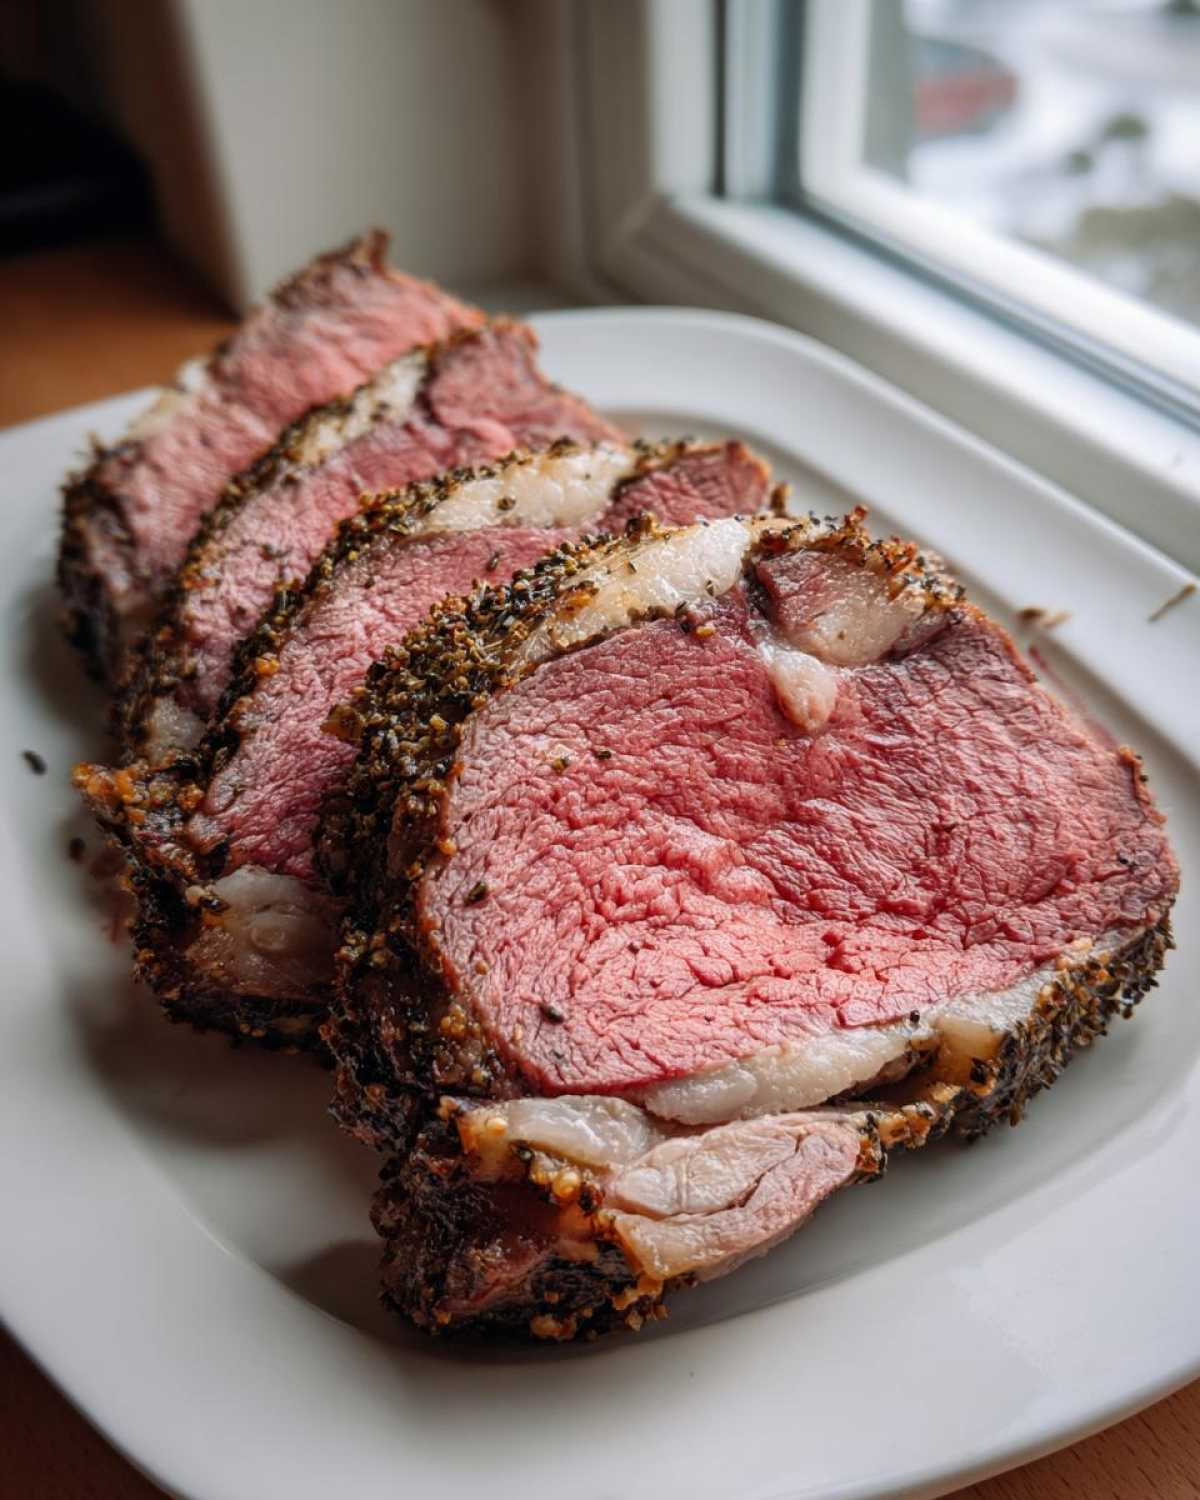
Perfect Oven Roasted Prime Rib
A straightforward guide to cooking a juicy, tender prime rib roast to medium-rare perfection using a simple herb and garlic crust.
- Prep Time: 20 min
- Cook Time: 120 min
- Total Time: 140 min
- Yield: 6-8 servings
- Category: Main Course
- Method: Oven Roasting
- Cuisine: American
- Diet: Low Fat
Ingredients
- 1 (5-7 pound) bone-in prime rib roast, tied
- 3 tablespoons olive oil
- 6 cloves garlic, minced
- 2 tablespoons fresh rosemary, chopped
- 1 tablespoon fresh thyme leaves
- 2 teaspoons coarse salt
- 1 teaspoon black pepper
- 1/2 cup beef broth (for pan)
Instructions
- Remove the roast from the refrigerator 2 to 3 hours before cooking to allow it to come closer to room temperature.
- Preheat your oven to 450 degrees Fahrenheit.
- In a small bowl, mix the minced garlic, chopped rosemary, thyme, salt, and pepper to create the herb rub.
- Rub the entire surface of the prime rib with olive oil.
- Press the herb mixture firmly onto all sides of the roast.
- Place the roast, fat side up, in a roasting pan. Pour the beef broth into the bottom of the pan.
- Roast at 450 degrees Fahrenheit for 15 minutes.
- Reduce the oven temperature to 325 degrees Fahrenheit. Continue roasting until the internal temperature reaches 125 degrees Fahrenheit for medium-rare (this usually takes about 13-15 minutes per pound after the initial high-heat blast). Use a meat thermometer inserted into the thickest part of the meat, avoiding bone.
- Remove the roast from the oven when it reaches 125 degrees Fahrenheit.
- Tent the roast loosely with aluminum foil and let it rest for 20 minutes before carving. The internal temperature will rise to about 130-135 degrees Fahrenheit during resting.
- Carve the roast between the bones and serve immediately.
Notes
- Resting the meat is crucial for juice retention; do not skip this step.
- For an easy au jus, skim fat from the pan drippings, add a little water or wine, and simmer briefly on the stovetop.
- If you prefer a bone-out roast, adjust the cooking time slightly, as boneless roasts cook faster.
Nutrition
- Serving Size: 6 ounces cooked
- Calories: 450
- Sugar: 0
- Sodium: 350
- Fat: 30
- Saturated Fat: 11
- Unsaturated Fat: 19
- Trans Fat: 0
- Carbohydrates: 0
- Fiber: 0
- Protein: 45
- Cholesterol: 150