

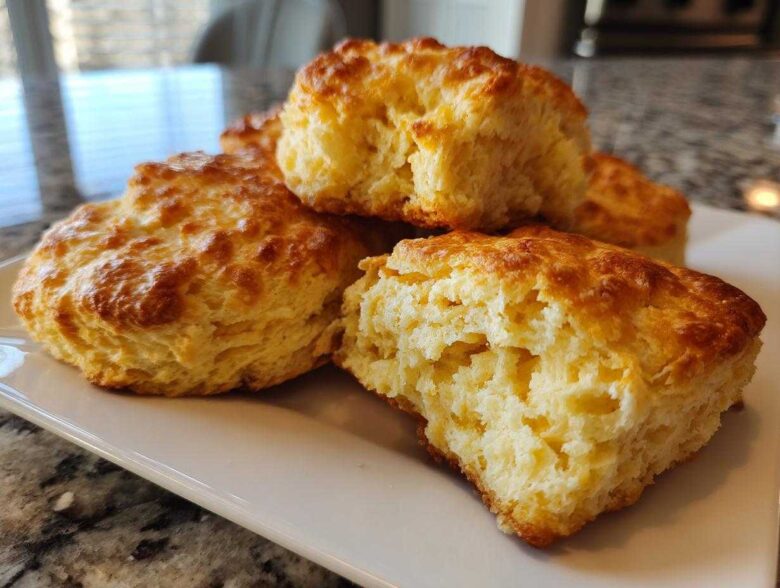
Oh, there is nothing, absolutely *nothing*, like the smell of fresh scones baking in your kitchen early in the morning. It just fills the whole house with this warm, comforting cloud of deliciousness! For years, I struggled with flat, dry scones. You know the ones? They look beautiful, but eating them feels like chewing on a biscuit that went hard in the sun. I was ready to give up! But I finally cracked the code, my friend, and now I have what I genuinely believe is the absolute best scones recipe out there for achieving that beautifully tall, fluffy buttermilk scones texture we all dream about.
I spent way too many afternoons trying everything—different fats, different amounts of liquid—until I realized it wasn’t just the ingredients; it was the *handling*. Trust me when I say, mastering the cold butter technique and treating that dough like spun sugar is the game-changer. These classic scones are simple, requiring just a few pantry staples, but the result is pure magic. They are perfect for a proper afternoon tea, but honestly, I make them anytime I need a quick win!
Why You Will Make These Fluffy Buttermilk Scones Again and Again
What makes this batch better than the last ten you tried? Well, everything! Once you nail this method, you can’t go back. It’s seriously my go-to, no fail scone recipe.
- You get that incredible, tender crumb every single time—they are incredibly light!
- They bake up satisfyingly tall; no more sad, flat discs on your plate.
- The buttermilk gives them a slight, wonderful tang that balances the sugar perfectly.
- They come together faster than you can brew a pot of tea, making them ideal for last-minute scones for afternoon tea.
- Honestly, they taste like they came straight from a tiny, wonderful English bakery, but you made them!
The Essential Ingredients for Perfect Scones
Okay, for these scones to achieve that ethereal fluffy texture, we have to be uncompromising about a couple of things, mainly temperature! Don’t worry, you don’t need fancy equipment, but precision with these core components is everything. Think of these as the foundation for the best scones recipe you’ll ever use.
- 2 cups all-purpose flour
- 1/4 cup granulated sugar (just regular white sugar for this classic batch!)
- 1 tablespoon baking powder (make sure it’s fresh so it gives you that lift!)
- 1/2 teaspoon salt
- 6 tablespoons cold unsalted butter, cut into small cubes (Emphasis on COLD, I mean straight from the fridge cold!)
- 3/4 cup cold buttermilk (This is non-negotiable for the tang and tenderness.)
- 1 large egg, lightly beaten (This is for our egg wash later.)
- 1 tablespoon milk or cream (Mixed with the egg for that shiny egg wash top.)
Now, I know sometimes you don’t have everything on hand, and that’s okay. We can adapt, right? But for this foundational recipe, stick close to this list. If you were making sweet potato biscuits, things would be different, but here, the cold elements rule the day!
Ingredient Notes and Substitution Tips for Your Scones
If there is one area where you cannot skimp or cut corners, it’s with the butter and the buttermilk. Seriously, if your butter isn’t rock-hard and cubed small, it melts before it can steam and create those lovely layers in the oven. We are hunting for those flaky layers, remember?
The buttermilk is critical. It reacts with the baking powder to give you that quick rise and delicious slight sourness that makes a great scone. If you absolutely run out, here’s a quick fix in a pinch: Take your regular milk—say, one cup—and stir in one tablespoon of lemon juice or white vinegar. Let it sit on the counter for about five minutes until it looks slightly curdled. That works just as well to create the required acidity needed for these fluffy buttermilk scones when you need a quick scone recipe.
How to Make Perfect Scones: Step-by-Step Instructions
Alright, let’s get down to the real work here. This section is where we separate the good scones from the legendary ones. Remember, the goal is tall bakery style scones! Baking time is quick—preheat your oven to a screaming hot 425°F (220°C) right now and line a sheet with parchment. If you miss this high heat, you miss the lift! We want things hot right from the start when working with these ingredients. Don’t forget to whisk your dry stuff—flour, sugar, baking powder, and salt—before you even think about the butter.
In a big bowl, combine your dry ingredients. Once whisked, toss in those cubes of butter. If you’re new to this, I’ve found that sometimes I’ll even freeze the butter for about twenty minutes before cubing it up. It just guarantees that icy temperature we need for great results when we’re aiming for those crumbly light scones. Keep that butter as cold as possible before we start cutting it in! By the way, if you love that bakery moist feel, you really need to check out how they manage moisture in things like pistachio muffins; the principles are actually similar!
Mastering the Cold Butter Technique for Crumbly Light Scones
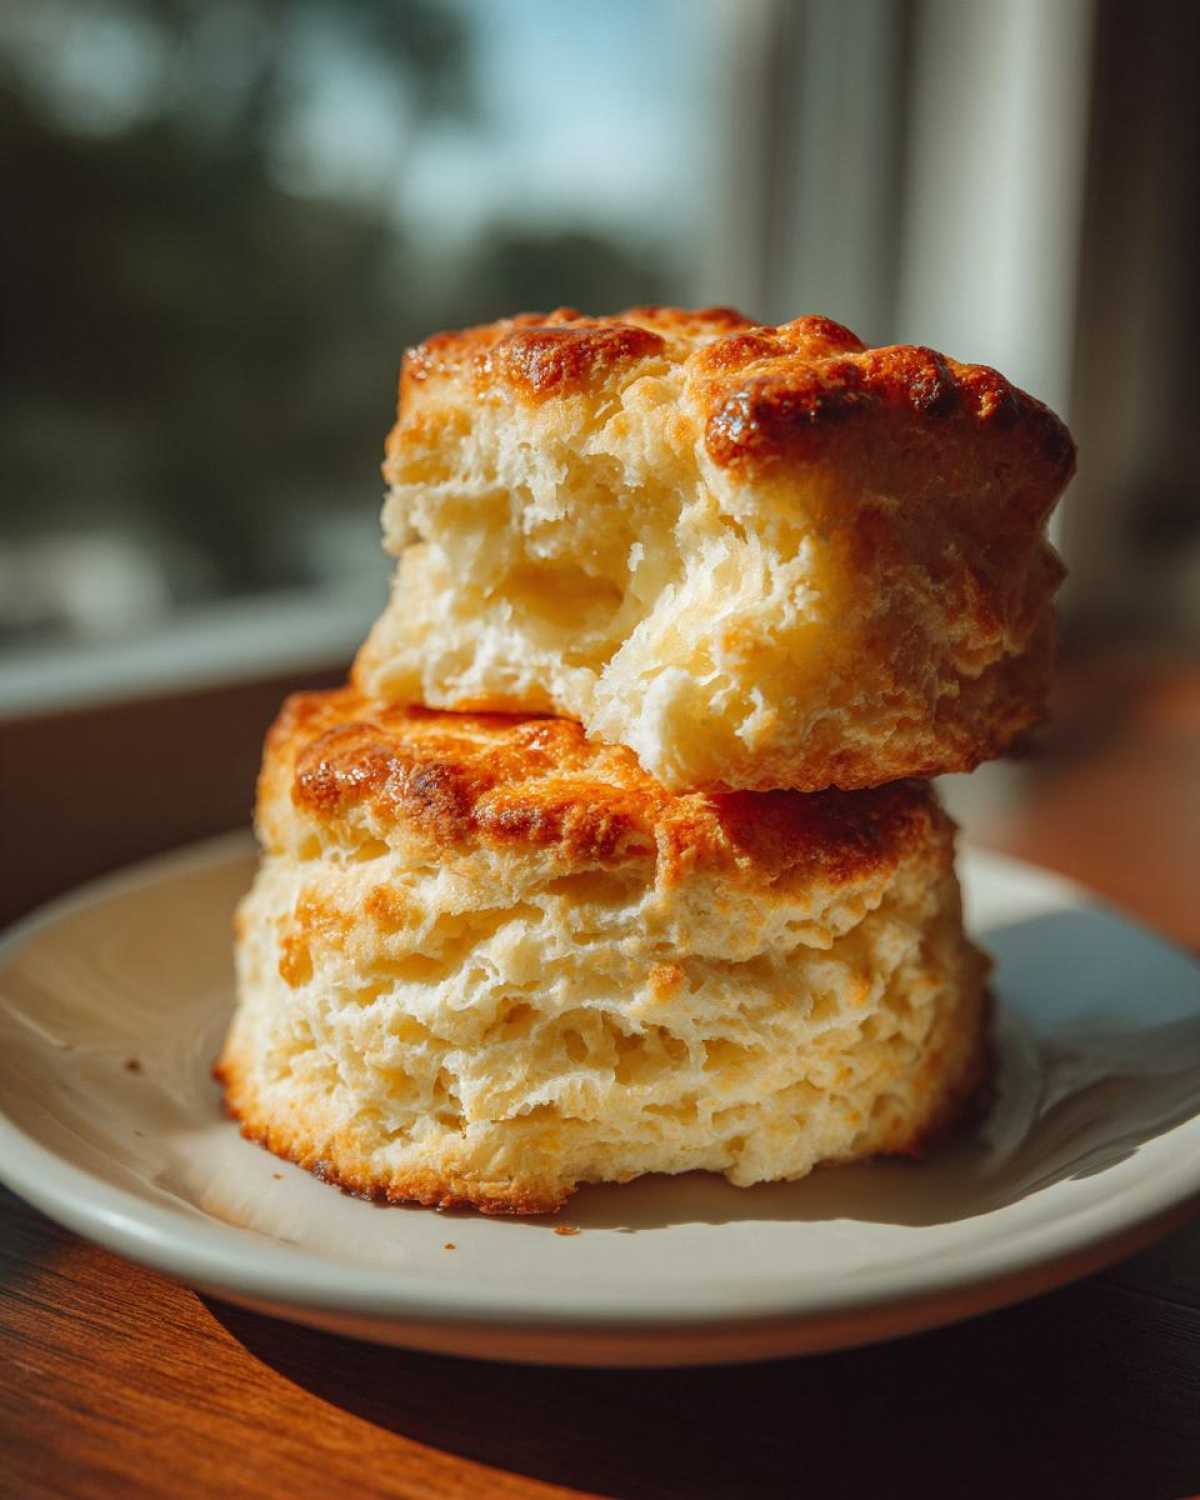
This is the make-or-break moment for texture. You need to cut that cold butter into the flour mixture. I swear by my sturdy pastry blender—it gets the job done quickly without warming the butter up too much from my hand heat. Keep working it until the mixture looks like coarse crumbs, and you still see some recognizable pea-sized chunks of butter scattered throughout. Those little chunks are what create steam in the oven, making the layers puff up and giving you that signature flaky lift we want in our best scones recipe.
If you work it until it looks like fine sand, you’ll end up with a denser, sadder scone that crumbles apart in the wrong way. We want flaky, not sandy! Even if you have to stick the bowl back in the freezer for five minutes mid-process, do it. Keeping that butter cold is the secret to avoiding dry scones.
The Gentle Fold: Avoiding Overmixing Your Scones Dough
Once the butter is cut in, make a small well in the center of your dry mix. Now, pour in all that lovely, cold buttermilk all at once. Grab a fork—not a stand mixer, no way!—and start bringing everything together. You only mix until the liquid is *just* absorbed. I mean it! The dough should look shaggy, messy, and slightly wet. If you can form a cohesive ball without much trouble, you’ve mixed too long, and you’ve gone too far! We are trying to avoid gluten development at all costs because that’s what makes them tough instead of light.
Dump that shaggy mess onto a lightly floured counter. Pat it gently into a 3/4-inch thick circle or whatever shape you prefer. Resist the urge to knead it like bread! We’re not making pizza here. Cut it into wedges, making sure to press straight down and pull up without twisting your cutter. Twisting seals the edges shut, which stops them from rising tall and getting those beautiful tall bakery style scones sides. Bake for about 12 to 15 minutes total. You’ll know they’re done when they smell absolutely irresistible!
Tips for Achieving Tall Bakery Style Scones
Okay, we talked about the cold butter, and that’s huge, but if your goal is that dramatic height that makes you think, “Wow, these came from a real bakery,” there are two more little tricks up my sleeve that I swear by for these scones. If you master the mixing, you nail the rise!
First, when you cut your wedges or circles, don’t space them out on the baking sheet like you do with cookies. Put them close! I mean, just barely touching. When they bake, they support each other, forcing the dough up instead of letting it spread out to the sides. It’s like a little scone neighborhood huddle helping everyone get tall!
Second is the egg wash—the one we mixed with an egg and a splash of milk or cream. Most people just brush the tops, right? That’s fine for color, but if you want truly professional height, you have to pay attention to the edges! Before you pop them in the oven, quickly brush a little bit of that egg wash right down the sides of each scone wedge. The sugar and protein in the wash help the sides set faster and hold that structure as they push upwards. It locks in the height!
If you’ve mastered the cold ingredients and you’re using the gentle fold technique, adding these two spacing and washing tips will guarantee you get those stunning profiles, making this truly the no fail scone recipe for height. For even more inspiration on simple baking methods for great results, take a look at these easy homemade scones techniques!
Creative Variations for Your Next Batch of Scones
Okay, so you’ve mastered the classic plain scones recipe, and now you’re looking for fun ways to mix things up? That’s the best part about baking scones—they are the perfect canvas for whatever flavor mood strikes you! You can totally pivot this basic template into something special for any holiday or season.
Since we used buttermilk, our dough base is robust enough to handle just about anything you throw in. For fall, you absolutely must try making pumpkin spice scones. Just whisk about a teaspoon of pumpkin pie spice into your dry ingredients and use pumpkin puree instead of a bit of the buttermilk—maybe cut back by two tablespoons. Top those with a drizzle of maple glaze, and wow!
Mid-winter calls for brighter flavors. If you want something tart and sweet, shift gears into cranberry orange scones territory. Fold in about a half cup of dried cranberries and the zest of one orange right before you pat the dough out. The orange zest just perfumes the entire kitchen while they bake. If you enjoy orange and cranberry together, you should check out this amazing cranberry orange cake recipe for gifting later!
And for those truly decadent days when you can’t decide between breakfast pastry and dessert? Go for cinnamon bun scones. Add a teaspoon of cinnamon to the dry mix, and then, after you cut the wedges but *before* the egg wash, sprinkle them with a mix of brown sugar and cinnamon. You get all those gooey cinnamon roll vibes but in a perfectly fluffy scone shape!
Ideas for Scone Glaze Recipe Toppings
While these fluffy buttermilk scones are perfect served simply with jam, sometimes you just need the extra sweetness of a scone glaze recipe. Keep it simple so it doesn’t weigh down that amazing lift we worked so hard to achieve!
For a classic finish, just whisk together one cup of powdered sugar, two tablespoons of milk or cream, and a tiny splash of vanilla. If you want to echo those fruity flavors we just talked about, swap the milk for fresh lemon juice or a little orange juice. The glaze should be thick enough to cling to the back of a spoon but still runny enough to drizzle nicely when you pour it over the cooled scones. Don’t use too much liquid, or it gets thin and disappears! Trust me, a simple white drizzle looks so sharp against the golden tops!
Serving Suggestions for Classic Plain Scones Recipe
We’ve done the hard work—we’ve chilled the butter, we’ve folded gently, and now we have these glorious, warm, crumbly light scones fresh out of the oven. What do we do next? We eat them, obviously! But *how* you serve them really elevates the experience, especially if you’re planning a little something special like an at-home scones for afternoon tea service.
The beauty of this classic plain scones recipe is how versatile they are, but when I’m feeling traditional, nothing beats the holy trinity: a scone split in half, slathered with good quality strawberry jam, and topped with a generous dollop of real clotted cream. That combination of fluffy, slightly savory bread with the bright sweetness of the jam and the rich cream is heavenly. It’s worth searching out proper clotted cream if you can find it because it makes all the difference in the world.
If you’re serving them for brunch, they are fantastic alongside savory flavors too! Think about slicing one open and adding thinly sliced smoked salmon and a smear of cream cheese—it’s unexpectedly delicious, kind of like a savory twist on a bagel. Or, if you really want to go all out, make a little side dipping sauce. Speaking of savory sides, when I am making quick sauces, like for something totally different like homemade teriyaki, I always think about how a simple pairing elevates everything we bake!
Honestly, even just slathering one of these warm beauties with good quality salted butter and a little sprinkle of sugar is a perfect moment. Don’t overthink it too much; just enjoy the fact that you made something that smells this incredible!
Storage and Reheating Instructions for Scones
So, what happens when you manage to have leftovers of these perfect scones? Because they are so moist and light, storage needs a little attention—we want to keep that tenderness intact for tomorrow morning!
The absolute best way to store them is completely cooled, placed in an airtight container at room temperature. They should stay wonderfully soft for a full day, maybe even two, as long as your kitchen isn’t overly humid. I never, ever put them in the fridge right away. Cold temperatures are the enemy of a good scone; they tend to stiffen up and feel a bit dry when chilled, which is the precise opposite of the fluffy buttermilk scones we worked so hard to create!
If you find yourself with a few left over after day two, or if they start to feel a touch stale, don’t toss them! They are salvageable. You have to reheat them to bring back that fresh-from-the-oven life. The key here is quick, dry heat. Forget the microwave, unless you enjoy slightly chewy scones.
The secret reactivation method is popping them back into a preheated oven set to about 300°F (150°C). Give them just four to six minutes—just long enough for the butter inside to warm up a tiny bit and the crumb to soften again. You’ll know they’re ready when you can smell that sweet, buttery aroma again as they come out. They will seriously taste like they were just pulled from the oven, ready for another layer of jam or cream. This little trick ensures that your easy homemade scones satisfy for days!
Frequently Asked Questions About Making Scones
I get so many questions after sharing this recipe because everyone wants to know how to avoid the sneaky challenges that can turn a beautiful dough into something disappointing. It’s all about troubleshooting those little hurdles! Here are the things I hear most often!
My scones came out flat! What did I do wrong?
Oh, that is the sad sound of a flat scone! Usually, there are two main culprits here. First, your baking powder might be old and has lost its power. Baking powder is what gives these scones the dramatic push upwards, so make sure yours is fresh. Second, you probably overworked the dough when cutting in the butter or mixing in the buttermilk. Remember, we want shaggy! If you stir and stir until it looks smooth, you’ve activated the gluten, and that locks your dough down, stopping it from rising tall when it hits the heat. This is why we stress minimal handling for tall bakery style scones!
Can I substitute the buttermilk with something else?
I strongly recommend sticking to buttermilk because its acidity is key to activating the baking powder and tenderizing the flour, giving you that crumbly light scones texture. But, if you’re in a real pinch and need a quick scone recipe fix, yes, you can make a substitute! Just mix one cup of regular milk (whole milk is best) with one tablespoon of white vinegar or lemon juice. Let it sit on the counter for about five minutes until it curdles slightly. That acidity will mimic the buttermilk well enough to save your batch!
Can I make the dough ahead of time?
This is a great question if you’re planning brunch! For the absolute best, highest, fluffiest results, no, you really shouldn’t mix the dough more than 30 minutes ahead of time. The magic happens when the cold butter hits the hot oven. If you chill the dough for too long, the butter might soften slightly, or the baking powder starts to lose a little oomph. If you absolutely must prep ahead, mix the dry ingredients (flour, sugar, leavening) and cut the butter in, then wrap that crumbly mixture tightly and keep it in the fridge the night before. When you’re ready to bake the next day, stir in the cold buttermilk and proceed immediately! That way, you’re still getting that burst of rise!
What is the best way to store leftover scones?
Don’t let leftovers go bad! These easy homemade scones are best eaten the day they are made, warmed up slightly, of course. If you have any left overnight, store them tightly wrapped in plastic wrap or in an airtight container at room temperature. I never refrigerate them unless I’m planning to keep them for several days, as the fridge dries them out way too fast. For best results the next day, pop them on a baking sheet for about five minutes at 350°F (175°C) to refresh that flaky interior. If you need some inspiration on how to enhance simple recipes, check out my tips on flavor boosters even for something simple like an easy dip!
Estimated Nutritional Data for These Scones
I always get asked about the health factor, though let’s be honest, these numbers are just an estimate based on the basic recipe without any extra glazes or rich additions like chocolate chips. I put these together for general reference, but remember, the real joy is in the taste, not just the numbers!
- Serving Size: 1 scone
- Calories: 250
- Sugar: 6g
- Sodium: 280mg
- Fat: 12g
- Saturated Fat: 7g
- Carbohydrates: 32g
- Protein: 6g
For a full breakdown, including disclaimers on variability, please see my standard nutritional disclosure over on the disclaimer page. Enjoy the baking!
Estimated Nutritional Data for These Scones
I always get asked about the health factor, though let’s be honest, scones are a treat! These numbers are just an estimate based on the basic recipe without any extra glazes or rich additions like chocolate chips. I put these together for general reference, but remember, the real joy is in the taste, not just the numbers!
- Serving Size: 1 scone
- Calories: 250
- Sugar: 6g
- Sodium: 280mg
- Fat: 12g
- Saturated Fat: 7g
- Carbohydrates: 32g
- Protein: 6g
For a full breakdown, including disclaimers on variability, please see my standard nutritional disclosure over on the disclaimer page. Enjoy the baking!
PrintPerfect Fluffy Buttermilk Scones

A straightforward recipe for classic buttermilk scones that results in a tall, tender, and light crumb, ideal for afternoon tea.
- Prep Time: 15 min
- Cook Time: 15 min
- Total Time: 30 min
- Yield: 8 scones
- Category: Breakfast
- Method: Baking
- Cuisine: British
- Diet: Vegetarian
Ingredients
- 2 cups all-purpose flour
- 1/4 cup granulated sugar
- 1 tablespoon baking powder
- 1/2 teaspoon salt
- 6 tablespoons cold unsalted butter, cut into small cubes
- 3/4 cup cold buttermilk
- 1 large egg, lightly beaten (for egg wash)
- 1 tablespoon milk or cream (for egg wash)
Instructions
- Preheat your oven to 425°F (220°C). Line a baking sheet with parchment paper.
- In a large bowl, whisk together the flour, sugar, baking powder, and salt.
- Add the cold butter cubes to the dry ingredients. Use a pastry blender or your fingertips to cut the butter into the flour until the mixture resembles coarse crumbs with some pea-sized pieces remaining. Keep the butter cold.
- Make a well in the center of the dry mixture. Pour in the cold buttermilk all at once.
- Use a fork to mix the ingredients until just combined. Do not overmix; the dough will look shaggy. Overmixing develops gluten and makes tough scones.
- Turn the dough out onto a lightly floured surface. Gently pat the dough into a 3/4-inch thick circle or rectangle.
- Cut the dough into 8 wedges or use a round cutter to cut out circles. Place the pieces onto the prepared baking sheet, ensuring they are close together for taller sides.
- In a small bowl, whisk the egg and milk/cream together for the egg wash. Brush the tops of the scones lightly with the wash.
- Bake for 12 to 15 minutes, or until the tops are golden brown and a toothpick inserted into the center comes out clean.
- Transfer the scones to a wire rack to cool slightly before serving warm.
Notes
- Keep all wet and dry ingredients cold before mixing. This is key for flaky layers.
- Handle the dough as little as possible. Mix only until the ingredients come together.
- For extra height, brush the sides of the cut scones with the egg wash before baking.
Nutrition
- Serving Size: 1 scone
- Calories: 250
- Sugar: 6
- Sodium: 280
- Fat: 12
- Saturated Fat: 7
- Unsaturated Fat: 5
- Trans Fat: 0
- Carbohydrates: 32
- Fiber: 1
- Protein: 6
- Cholesterol: 55