

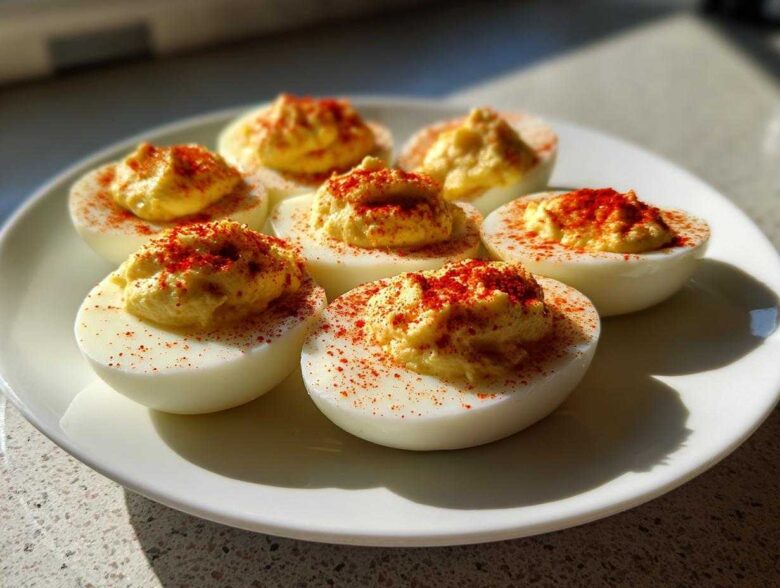
Oh, thank goodness you’re here! If there’s one thing that absolutely vanishes first at every single family picnic or holiday get-together I’ve ever hosted, it’s the deviled eggs. Seriously, they are party gold. But everyone has that one friend whose eggs are either chalky or swimming in mayo, right? Not ours!
Forget those dry, crumbly nightmares. I’m sharing my absolute, rock-solid, foolproof **deviled eggs recipe** that guarantees the creamiest, tangiest filling every single time. After years of making this **classic appetizer**—from summer barbecues to New Year’s Eve—I’ve perfected the balance of mustard and vinegar so they taste exactly like the ones your favorite aunt used to make. I share all my biggest secrets over on my blog, but this recipe is the cornerstone!
This isn’t fancy foam nonsense; this is just the best, most reliable way to make truly perfect deviled eggs. Trust me, you’ll want to make extra because these disappear fast!
Why This is the Best Deviled Eggs Recipe for Parties
You are going to love how truly easy these are to pull together, even if you’re stressed about feeding a crowd. I’ve mastered this recipe over years of backyard chaos, and I can promise you these are the **best deviled eggs** you’ll ever serve. They hit that perfect sweet spot: tangy, slightly savory, and incredibly smooth.
These are the ultimate **party finger food** because they require zero utensils and are ready in about 35 minutes total. That’s hardly any time for something that tastes this good! If you’re looking for a simple, reliable appetizer that never fails to impress at potlucks, you’ve found it right here. Plus, they look fantastic on any platter, which you can read more about here.
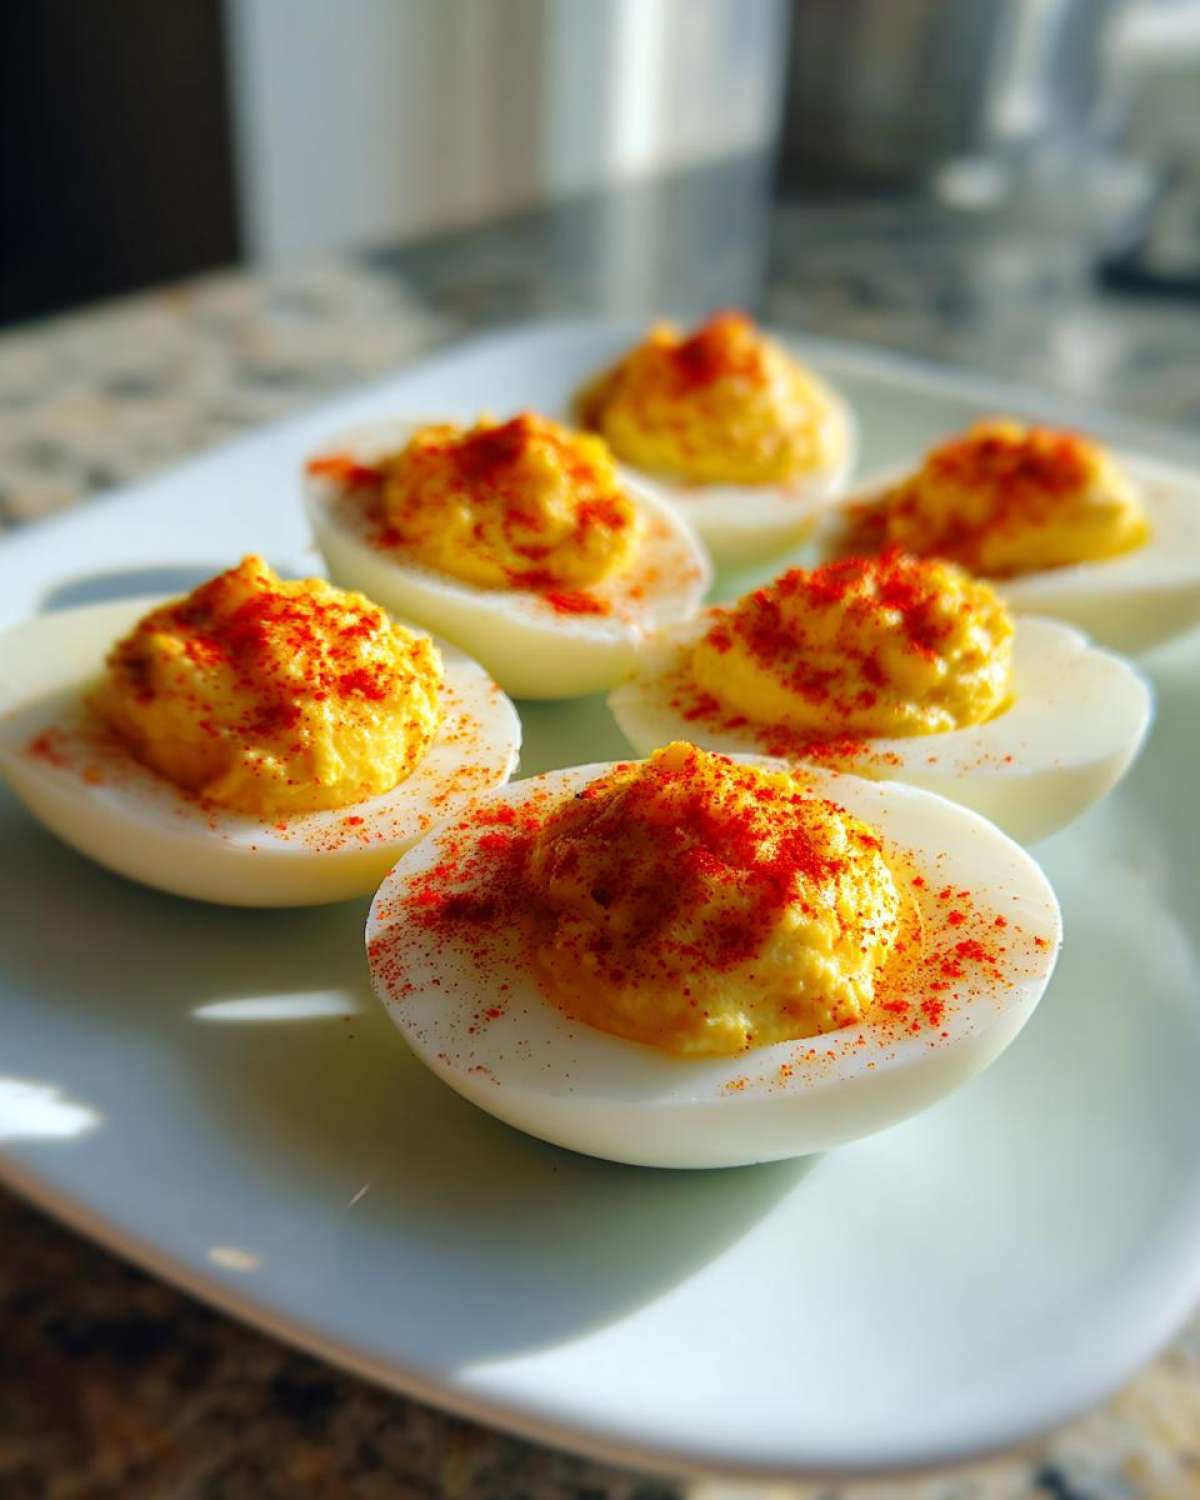
Quick Facts About Your Deviled Eggs Recipe
- Prep Time: 20 min
- Cook Time: 15 min
- Total Time: 35 min
- Yield: 24 halves
Essential Ingredients for Perfect Deviled Eggs
Honestly, the beauty of this recipe is that the ingredient list is so short. You probably have everything you need for **how to make deviled eggs** sitting in your fridge right now! But the quality of these few items really makes a difference, so pay attention to the details I use.
Here’s what you need for about two dozen perfect bites:
- 12 large eggs, ideally brought close to room temperature before boiling—it helps them peel!
- 1/2 cup mayonnaise. This is crucial: use the good, full-fat stuff! It’s what makes the filling so rich and creamy. Sorry, light mayo just won’t behave the same way.
- 2 tablespoons yellow mustard. Don’t go crazy with Dijon here; the classic, bright yellow mustard gives you that necessary vinegar tang and perfect color.
- 1 tablespoon white vinegar. It gives that necessary sharp pop against the richness of the yolk and mayo.
- 1/4 teaspoon salt
- 1/8 teaspoon black pepper
- Paprika, for that little classic dusting on top.
Ingredient Notes and Substitutions
To really nail the flavor, I always opt for a full-fat, slightly tangy mayonnaise. If you’re feeling adventurous and want to ditch the store-bought stuff (which I love to do when I have time!), check out my recipe for easy, foolproof homemade mayonnaise. It makes these eggs absolutely divine!
For the vinegar, white vinegar is traditional, but a small splash of apple cider vinegar works just fine if that’s what you have. And listen up—for a little extra texture and a bright little sweet-and-sour burst, I always sneak in about 1 teaspoon of sweet pickle relish into the yolk mix. Grandma always did this, and it’s my little secret weapon!
How to Achieve Perfectly Cooked Eggs for Your Deviled Eggs
Okay, here is where most people stumble, and I don’t want you to! Getting hard-boiled eggs that peel easily and have beautiful, bright yellow yolks—not that sad, greenish-gray ring around the outside—is the foundation of making this **how to make deviled eggs** recipe shine. If you mess this part up, the rest of the filling won’t save it!
My method is foolproof, and it involves immediately stopping the cooking process once the water hits boiling. Here’s the exact routine I follow:
- First, place all 12 eggs in a regular saucepan. Don’t crowd them! Cover them with cold tap water, making sure the water sits about an inch above the top of the eggs.
- Put the pan over high heat and bring that water to a rolling, full boil—you want big, enthusiastic bubbles!
- The instant that water hits a full boil, yank the entire pan right off the burner. Put the lid on tightly. Seriously, turn the heat off completely. Let them just sit there, covered, for exactly 12 minutes.
- When the timer goes off, don’t wait! Immediately pour off that hot water and dump the eggs straight into a big bowl packed with ice and cold water. This is your ice bath, and it’s non-negotiable. Keep them in there for at least 10 minutes.
That ice bath does two amazing things. First, it stops the residual heat from cooking the yolks too long, which is what causes that awful gray ring. Second, the shock of the cold makes the egg white shrink just slightly away from the shell, making peeling a breeze!
If you want to see how I apply this perfect boiling technique to my creamy egg salad recipe, check out the details over here. A perfectly cooked egg is the secret to everything!
Step-by-Step Instructions for Easy Deviled Eggs
Now that we have our perfectly cooked and peeled eggs—look how nicely they come apart!—it’s time to turn them into the absolute king of **easy deviled eggs**. This is where we transform basic components into that creamy, savory filling everyone craves. Follow these steps exactly, and you won’t get any gritty textures, I promise!
First, lay out all those naked egg white halves on your prettiest serving platter. We want them ready to greet the filling! Then, carefully scoop all those beautiful, bright yellow yolks into a medium mixing bowl. If you smash them a bit against the side of the bowl with your fork first, it helps break them down before you add anything wet.
Here are the core mixing instructions:
- Mash those yolks with a fork until they look like fine sand. Seriously, break them down as much as you can before moving on.
- Now, add the good stuff: the mayonnaise, the yellow mustard, that splash of white vinegar, salt, and pepper.
- Mix everything together thoroughly. You should gently fold and press until the mixture is completely uniform.
Once the filling looks smooth, it’s time to get them back into the whites. You can use a small spoon—which is perfectly acceptable and classic—or if you want that great, professional swirl, load it into a piping bag. Don’t worry if you don’t have a fancy tip; just snipping the very corner off a Ziploc baggie works like a charm for getting that nice mound back into the egg white halves. Finally, finish every single one with a light dusting of paprika before you put them out!
Achieving the Creamiest Yolk Filling for Deviled Eggs
I know, I know, sometimes you get a little clump of yolk that just won’t break up. If you have a powerful little immersion blender or a food processor, you can blitz the dry yolks first before adding any liquid ingredients. A tiny pulse or two is all it takes to break down every single barrier and create a filling so smooth it practically melts on your tongue.
If you’re sticking to the fork method (which I usually do because I hate cleaning the blender!), press the yolks against the side of the bowl as you mix. Keep stirring until you don’t feel any more grit. The filling should be pliable and hold its shape nicely when you spoon it in. This attention to texture is what separates a good deviled egg from the *best* one!
I bake a lot of things that require perfect texture, like my soft butter cookies, and the principle is the same: break things down completely before adding the final structure ingredients. Keep that creamy focus, and your eggs will be a hit!
Tips for Success with Your Classic Appetizer Deviled Eggs
Making deviled eggs is easy, sure, but making them *great* requires knowing a few little tricks I’ve picked up hosting a million backyard parties. These aren’t in the main recipe because they are the little bonuses that move your eggs from “good” to “can you please bring these next time?” These tips focus on presentation and making sure the peeling stress is gone forever.
First thing’s first: peeling efficiency. If you skipped the ice bath, I’m gently shaking my head at you! My biggest structural tip is to crack the shell all over—like, give it a thorough tap session—and then peel those eggs right under cool running water. The water magically gets between the shell membrane and the egg white, letting the shell literally slip right off! It saves so much frustration.
Next comes presentation. Everybody expects the paprika sprinkle, but don’t just dust it on lazily. Use a fine-mesh sieve to dust a *very* light, even layer over the top of all your filled eggs right before you serve them. It looks professional and ensures the color is bright and appealing. If you want to go the extra mile, toss some fresh snipped chives or a tiny piece of pimento in the middle of the filling mound, too. It just brightens everything up.
Finally, I always test my mixture before I start filling all 24 halves. I take a tiny dab of the yolk mix on a cracker just to check the seasoning. Does it need more salt? A tiny bit more zing from the vinegar? Since this is our **classic appetizer**, you want the flavor profile to be exactly right for your guests. Making a small adjustment now is much easier than trying to fix a whole platter later! If you loved the flavor here, you might want to try mixing it into a pasta salad sometime; check out my recipe for Deviled Egg Pasta Salad if you want that flavor profile in a new way!
Variations on Traditional Deviled Eggs
Now, while the classic version, seasoned only with salt, pepper, mustard, and paprika, is absolutely my go-to—it’s the foundation, after all—sometimes you need to jazz things up a little, especially if you’re making these for the third weekend in a row!
I look at these basic **deviled eggs** as a fantastic blank canvas. They are so forgiving that you can stir in all sorts of delicious flavor bombs without losing that creamy texture we worked so hard to achieve. These are small tweaks that make a huge impact on your **party finger food**.
Here are a few of my favorite ways to switch up the filling that still keep the assembly nice and simple:
- For a Smoky Kick: Add about 1/4 teaspoon of smoked paprika instead of regular, or stir in a very small dash of your favorite hot sauce (I love Cholula here). Remember, a little goes a long way, but it adds such depth!
- Herby Goodness: Fresh herbs just scream summer picnic food, don’t they? Try adding 1 tablespoon of finely chopped fresh dill or chives right into the yolk mixture. It brightens everything up instantly.
- For the Bacon Lovers: Nobody ever complains about bacon, right? If you have a few slices cooked until crispy and then crumbled finely, fold about 1 tablespoon of those crispy bits into the filling mixture. Save a few crumbles for the garnish on top!
If you want to get really wild and creative—maybe for a themed party like Halloween—you can check out some of my more adventurous flavor profiles over here. But for your standard Sunday dinner or tailgate, stick to one of those three simple additions. It’s still the same reliable, delicious egg, just with a little personality added!
Serving Suggestions for These Party Finger Food Deviled Eggs
So, you’ve got your perfect platter of creamy, tangy **deviled eggs** ready to go. That’s half the battle won! But now you have to think about the rest of the appetizer spread, right? These are the quintessential **party finger food**, and they look best when they have great neighbors on the buffet table.
When I’m setting out a plate of these, I always try to surround them with contrasting textures. You’ve got the smooth, rich creaminess of the egg filling, so you need something crunchy or salty to balance everyone out. My absolute favorite thing to serve alongside them for a holiday spread is my classic cheese ball recipe.
The combination of salty cheese, crumbly crackers, and the cool, savory deviled egg is just *chef’s kiss*. It creates a little appetizer station that people can graze on all evening. If it’s for a summer picnic vibe, I’ll serve them next to veggie sticks and perhaps some simple marinated olives, but honestly, they hold their own!
And let’s talk presentation one last time, because it matters for these little guys! Once you’ve sprinkled that paprika on top (which you have to do, trust me!), arrange them neatly on a platter. If you want to add a final, fresh touch, I like to tuck a tiny, perfectly folded leaf of fresh parsley right into the center of the paprika mound on about every third or fourth egg. It gives a great pop of green color and makes people think you spent hours on them instead of just 35 minutes!
Storage and Make-Ahead Tips for Deviled Eggs
Hosting a crowd means planning ahead, and deviled eggs are wonderful because you can absolutely prep them out of order! But you absolutely cannot just make everything the night before and hope for the best. Eggs are delicate, and we want our filling to stay perfectly creamy and vibrant, not develop that weird, slightly rubbery dried-out texture.
Here is my rule for timing: Separate the cooking, the mashing, and the filling. If you try to combine them too soon, you’ll regret it later, trust me!
The absolute best thing you can do ahead of time is **cook and peel your eggs**. Get those hard-boiled beauties ready up to two days in advance! Once they are peeled, store the egg white halves in an airtight container in the fridge. Keep the yolks separate—just mash them up with all the mayonnaise, mustard, and seasonings, and store the finished yolk filling in its own sealed container.
I usually make the filling up to a day ahead. It’s amazing how resting the flavors overnight actually *improves* the taste! I’ve done this with big batches of my make-ahead chili too, just sealing it tightly and letting it chill; things taste better after a nap! You can see how I prep things in advance here.
Crucial Step: Assembly! Do not fill your deviled eggs until *at least* one hour before you plan to serve them. If you fill them too far in advance, the mayo starts to seep into the whites, and the paprika garnish gets soggy. If you are scrambling right before the party, fill them, cover them loosely with plastic wrap (try not to let the wrap touch the filling!), and keep them chilled. They are best enjoyed the day they are assembled.
As for leftovers? Well, if you have any, store them tightly covered in the fridge. Since they contain mayonnaise, they are best eaten within two days. But honestly, with this recipe, you might not have any leftovers to worry about!
Frequently Asked Questions About Deviled Eggs
I get so many questions every time I post these perfect **deviled eggs**, and honestly, it’s because they seem so simple that people worry they must be doing something wrong! Let’s clear up the most common things folks ask me about getting **easy deviled eggs** right every time.
Can I use the pre-cooked eggs I buy at the grocery store? Oh, honey, please don’t! While convenient, those mass-produced eggs often have shells that stick terribly, and they never look as pretty once you peel them. For the best appearance and **easy deviled eggs**, stick to fresh, raw eggs and use my boiling method above. It prevents that nasty green ring almost every time!
Why do I sometimes see a gray or green ring around the yolk? That’s totally normal if you cook the eggs too long or let them cool down slowly. That greenish-gray tint is just a harmless chemical reaction between the sulfur in the egg white and the iron in the yolk. The key to avoiding it for your **classic appetizer**? Get those eggs into an ice bath the second they are done boiling. Seriously, that’s the trick!
How long do these **party finger food** eggs stay good in the fridge? Because we use mayonnaise, safety is key! Filled deviled eggs are best eaten the day they are made, but they will keep well for up to two days stored tightly covered in the fridge. Remember, you can always store the yolks and whites separately for longer, as I mentioned before!
I want a richer filling—can I use something other than mayo? You absolutely can! If you find your filling is too loose, or you just want a different flavor profile, try replacing about half of the mayonnaise with softened cream cheese or even substituting a little bit of full-fat plain Greek yogurt. It keeps them creamy while giving them a little tang, almost like a richer version of the potato salad I love making here!
Nutritional Estimate for Deviled Eggs
For those of you who track macros or just like to know what you’re eating, here is a genuine estimate for two of these beauties. Keep in mind that this changes slightly depending on your brand of mayo, but this gives you a great ballpark figure for these delicious bites:
- Serving Size: 2 halves
- Calories: 90
- Fat: 8g
- Protein: 3g
- Carbohydrates: 0.5g
They are wonderfully low-carb, which is another reason they disappear so fast at parties, if you ask me!
PrintClassic Deviled Eggs Recipe

A simple recipe for making traditional, creamy deviled eggs, perfect for any gathering.
- Prep Time: 20 min
- Cook Time: 15 min
- Total Time: 35 min
- Yield: 24 halves
- Category: Appetizer
- Method: Boiling and Mixing
- Cuisine: American
- Diet: Vegetarian
Ingredients
- 12 large eggs
- 1/2 cup mayonnaise
- 2 tablespoons yellow mustard
- 1 tablespoon white vinegar
- 1/4 teaspoon salt
- 1/8 teaspoon black pepper
- Paprika, for garnish
Instructions
- Place eggs in a saucepan and cover with cold water by one inch.
- Bring water to a full boil over high heat.
- Once boiling, remove the pan from the heat, cover it, and let it stand for 12 minutes.
- Immediately transfer the eggs to an ice bath (a bowl of ice and water) for at least 10 minutes to stop the cooking process.
- Peel the cooled eggs. Slice each egg in half lengthwise.
- Carefully scoop the yolks into a medium bowl. Place the egg white halves on a serving platter.
- Mash the yolks with a fork until fine.
- Mix in the mayonnaise, mustard, vinegar, salt, and pepper until the filling is smooth.
- Spoon or pipe the yolk mixture back into the hollowed egg white halves.
- Sprinkle the tops of the filled eggs with paprika before serving.
Notes
- For easy peeling, gently crack the shell all over and peel under cool running water.
- If you do not have a piping bag, use a small spoon to fill the egg white halves.
- For extra flavor, add 1 teaspoon of sweet pickle relish to the yolk mixture.
Nutrition
- Serving Size: 2 halves
- Calories: 90
- Sugar: 0.5
- Sodium: 120
- Fat: 8
- Saturated Fat: 2
- Unsaturated Fat: 6
- Trans Fat: 0
- Carbohydrates: 0.5
- Fiber: 0
- Protein: 3
- Cholesterol: 95