

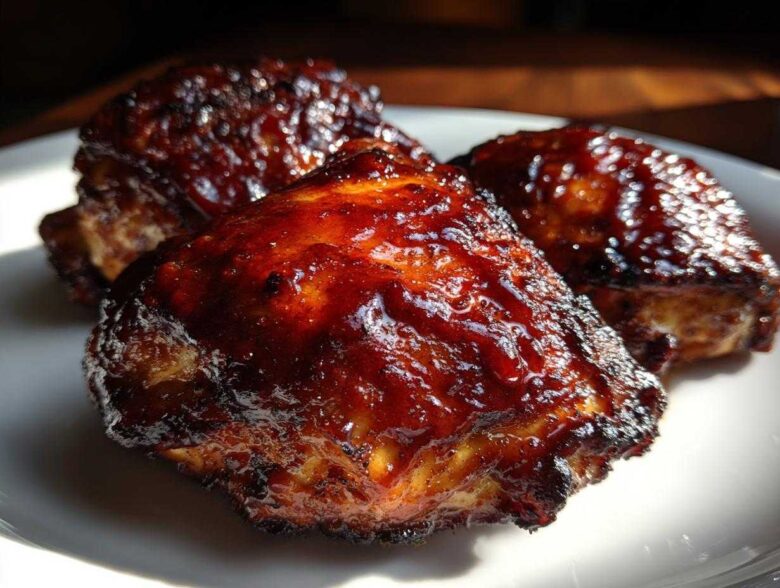
Oh, the eternal struggle of the weeknight dinner, right? You want that amazing, smoky flavor of a real summer cookout, but who has hours to babysit a grill when you’re trying to get homework done? Trust me, I’ve been there, staring into the fridge at chicken pieces wondering how to make magic happen fast. That’s why this recipe for Easy Oven-Baked BBQ Chicken Thighs is my absolute lifeline. It delivers the juiciest, stickiest, most perfect bbq chicken you can imagine, all while using just one sheet pan. Seriously, this simple oven method kicked my weekend grilling habit to the curb for Tuesday nights!
Why This Oven Baked BBQ Chicken Recipe Works for Weeknight BBQ Chicken
When dinner needs to be fast but still feel like a special treat, this oven method is the answer. The prep time is ridiculously short—maybe ten minutes if you’re moving slow—which makes this a genuine Quick Chicken Dinner superhero. Cleanup? Forget about scrubbing the grill grates! We use foil, so you just toss it when you’re done.
The real magic is how unbelievably juicy the chicken stays. It’s the perfect Weeknight BBQ Meal because the baking technique locks everything in tight. Want more ideas for speedy flavor profiles? You can check out how I use a quick glaze over here—it’s a lifesaver on busy nights! 30-Minute Honey Garlic Chicken Glaze.
Achieving Tender Chicken Recipe Results Every Time
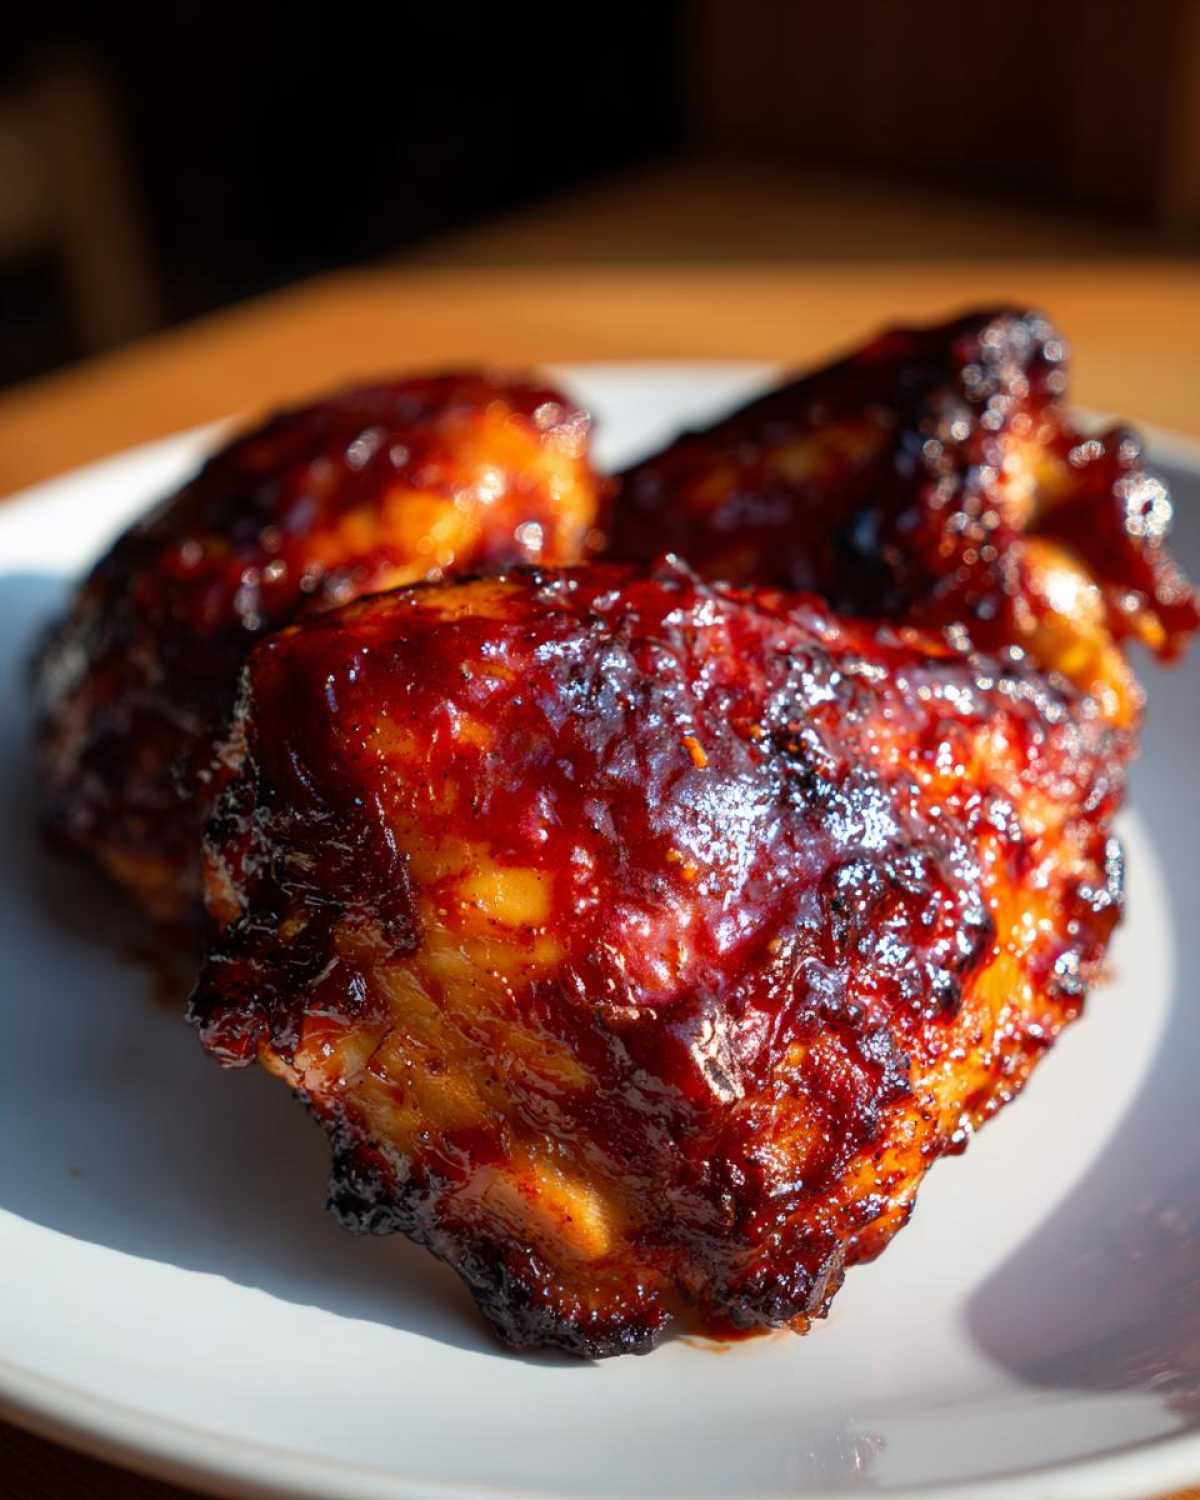
You might think chicken breasts are faster, but honestly, they dry out if you look at them wrong. We stick to bone-in, skin-on thighs here because they come out dripping with moisture, giving you that unbelievably Tender Chicken Recipe feel. All that flavor comes from the initial dry rub we apply first. That little mix of oil and spices acts like armor, protecting the meat while it cooks before the sticky sauce goes on later.
Gathering Ingredients for Your Easy BBQ Chicken
Okay, let’s talk ingredients because the beauty of this Easy BBQ Chicken is its simplicity. We aren’t messing around with ten different spice jars or making a sauce from scratch every time—that’s what weekends are for! We use a super fast homemade rub to build flavor, and then your favorite bottle of store-bought sauce takes over the glazing duties. It keeps things moving so you can get dinner on the table!
Ingredient Clarity: The Simple Homemade BBQ Rub for BBQ Chicken
This dry rub is crucial, so get these measurements right! You’ll need a little olive oil to make the spices stick, plus 1 teaspoon of salt, 1/2 teaspoon of black pepper, 1 teaspoon of garlic powder, and my absolute favorite flavor enhancer: 1/2 teaspoon of smoked paprika. That paprika is what gives us that deep, almost wood-fire flavor without turning on the grill.
Selecting the Best BBQ Chicken Thighs Cut
My number one recommendation? Bone-in, skin-on BBQ Chicken Thighs. They are virtually foolproof. They stay moist, and that skin gets beautifully crackly when baked! If you *have* to swap, breasts work okay, but you’ll need to watch them closely so they don’t dry out, usually pulling them around the 20-minute mark before you sauce them. Wings work too, but they need a bit longer baking time before you even think about glazing them.
Step-by-Step Instructions for Perfect Oven Baked BBQ Chicken
Alright, this is where the magic really happens! We are making this Oven Baked BBQ Chicken foolproof, even if your current relationship with the oven involves burning toast. The timing here is everything—don’t rush the phases, but trust me, the total active time is minimal. By the time it’s done, you’ll have the Juicy BBQ Chicken everyone talks about.
Preparing the Chicken and Initial Seasoning for BBQ Chicken
First things first: your oven needs to be hot—set it to 400 degrees Fahrenheit. While it heats up, grab your baking sheet and line it with foil. This saves you so much scrubbing later, I promise! Now, take those thighs and pat them bone-dry with paper towels. I mean *really* dry. If there’s any moisture left, the skin will steam instead of crisping up later. Once dry, mix up that spice rub we talked about, slather a little olive oil over the chicken, and rub that seasoning mix all over every single nook and cranny. Don’t be shy; we want full coverage for the best BBQ Chicken flavor foundation!
Baking and Glazing for Smoky BBQ Chicken Flavor
Toss the seasoned thighs skin-side up onto that foil-lined sheet. Pop them into the hot oven for a solid 25 minutes. This first phase cooks the meat through just enough that the juices are sealed in. Then, pull the pan out carefully—watch the heat! Brush a great, thick layer of your favorite BBQ sauce right over the top of them. Back into the oven for just 5 to 10 more minutes. You are looking for that sauce to bubble up and get sticky, and you must hit 165 degrees Fahrenheit internally before you pull them out. That final blast of heat caramelizes the sauce and seals in that wonderful Smoky BBQ Chicken essence. Don’t forget to let them rest for five minutes after they come out; that stops all those wonderful juices from running all over the plate!
Pro Tips for Making Your BBQ Glazed Chicken Even Better
Now that you have the basic steps nailed down, I want to share the little tricks that take this from a good weeknight dinner to something you’ll brag about at the next cookout. These aren’t in the standard recipe card, but they make a huge difference, especially if you want that perfect crispiness we talked about.
If you really want skin that snaps, forget just laying the chicken on the foil. You need air circulating underneath! I always use a wire rack set inside my foil-lined baking sheet. It lifts the chicken just enough so the bottom skin doesn’t sit in the rendered fat and steam. It takes maybe 30 seconds longer to clean up the rack, but that crispy skin is worth every second.
Another thing I fiddle with is the sauce. If your store-bought sauce seems a little thin—and sometimes they are, especially if you use a vinegar-based one—I just let it simmer on the stovetop for about five minutes before I use it. It reduces slightly and gets much thicker, guaranteeing you get that beautiful, thick BBQ Glazed Chicken coating instead of a thin, sad drip.
If you want to try something completely different next time, remember that flavor swaps are easy here. For instance, if you were feeling Asian-inspired instead of smoky, you could swap the rub totally! I have a fantastic recipe for a homemade teriyaki glaze—you can check out the recipe here—and use that same baking technique with fantastic results.
Honestly, the key to this recipe feeling special is just paying attention to the texture you want. Texture makes or breaks your bbq chicken experience!
Variations: From BBQ Chicken Breasts to Crockpot BBQ Pulled Chicken
This recipe is built around the mighty thigh, but I know not everyone has thighs cluttering up the fridge! We need options for those of you dedicated to breasts or those who just want to push a button and walk away. The beauty of a great flavor profile—like that sweet, smoky rub we used—is that it works across the board, you just have to tweak the cooking method a little.
If you’ve got chicken breasts instead of thighs, remember they cook faster and are leaner, so you have to watch them like a hawk. Instead of 25 minutes before saucing, start checking them around 18 minutes, and you might even remove them from the oven when the internal temp hits 155 degrees, because that final glazing step will bring them right up to the required 165 degrees without drying them out.
Now, for those days where even turning the oven on feels like too much work, we can pivot straight to Crockpot magic for shredded flavor. If you want impossibly simple shredded chicken that you can use for sandwiches or tacos, you should definitely check out this dedicated slow cooker recipe—it requires almost zero active time! You can find the full details here: Slow Cooker BBQ Pulled Chicken.
That recipe just dumps the sauce and chicken in and walks away until dinner time. It’s a totally different texture—super tender and perfect for piling high on buns—but it uses the same great balance of sweet and smoky you get from our oven method!
Serving Suggestions for Your Family Favorite BBQ Chicken
You’ve made this incredible, juicy chicken—now what are we going to serve it with? A Family Favorite BBQ Chicken deserves sides that match its greatness, right? You can’t just serve BBQ chicken with a handful of potato chips; we need proper cookout fuel! This recipe shines brightest when it’s served hot straight off the baking sheet alongside classic summer sides.
For me, the sides have to be cool and creamy to contrast with that sticky, slightly spicy glaze. My first grab is always a good bowl of crunchy coleslaw. If you want to skip the boring mayo-based stuff, I have an amazing tangy recipe that uses something unexpected to keep it crisp!
You can find my favorite tangy version right here: Tangy Pickle Pasta Salad Recipe. It’s a total crowd-pleaser.
But you absolutely cannot forget corn! Whether you grill it until it’s slightly charred or just boil it and slather it with butter, corn on the cob is mandatory. If you’re having a big gathering, make sure you have big bowls of creamy potato salad chilling in the fridge too. That’s the traditional route, and it never fails when you’re aiming for that perfect Summer Cookout Chicken vibe.
If you made this a little spicier but kept the sauce sweet, try serving it over a simple bed of fluffy white rice. The rice soaks up all those extra sticky bits of sauce running off the chicken, and honestly, that’s almost the best part of the whole meal. Don’t let those delicious drippings go to waste!
Storage and Reheating Instructions for Leftover BBQ Chicken
It’s a rare thing around my house, but sometimes we actually end up with leftover bbq chicken. And even when we do, it’s still delicious the next day, provided you put it away correctly! Here’s the deal: you want to get that chicken into an airtight container as soon as it cools down completely. Don’t leave it sitting on the counter dreaming about barbecue sauce; food safety first, always!
You can safely keep this chicken in the fridge for about three to four days. Any longer than that, and you start losing that wonderful tenderness we worked so hard to achieve in the oven.
The Best Way to Reheat BBQ Chicken for Maximum Moisture
If you throw leftover chicken covered in sugary sauce into the microwave, it usually ends up rubbery or with weird hot spots. I always try to avoid the microwave for reheating anything I want to stay juicy!
My absolute favorite method is going back to the oven, but at a much lower temperature. Wrap those pieces tightly in aluminum foil first—this creates a little steam environment. Set your oven to 300 degrees Fahrenheit. Pop the foil-wrapped chicken in for about 15 to 20 minutes. That gentle heat warms the meat all the way through without drying out the tough parts, and the foil keeps all those delicious juices contained.
A Quick Microwave Trick (If You’re Really Running Late)
Okay, but sometimes you’re starving, and 20 minutes feels like a decade. If you absolutely must use the microwave, you need to add moisture back in. Place the chicken piece in a microwave-safe dish. Now, drop about a teaspoon or two of water or a splash of chicken broth right in the bottom of the dish—not on the chicken, but beside it. Cover the dish tightly with wax paper or a paper towel. This creates steam to prevent drying. Heat it in short 45-second bursts until it’s just warm enough to eat. It won’t be quite as good as the foil-wrapped oven reheat, but it beats cold chicken!
Remember, any time you reheat chicken, you’re aiming for 165 degrees inside, but the low-and-slow method in the oven is always going to give you that beautiful, tender texture you love.
Frequently Asked Questions About Making BBQ Chicken
It feels like every time I cook this bbq chicken, someone asks me a slightly different version of the same question! It’s totally normal; everyone has their own favorite way they like their meat cooked. I’ve gathered the most common ones here so you don’t have to dig through the comments looking for an answer next time you’re in a rush!
Can I use a Sweet BBQ Sauce Chicken recipe with a spicy rub?
Oh, absolutely! I think that balance is what separates a good barbecue dish from a great one. If you use a really sweet sauce—like a Carolina-style one, for instance—you need some serious earthy heat in your initial rub to keep the complex flavors going. I often bump up the cayenne pepper in my dry rub measurement if I know I’m using a sweeter sauce later on. The initial heat stands up against the sugar and kind of cuts through the richness. It’s a beautiful flavor dance, trust me!
What is the best way to get crispy skin on my Oven Baked BBQ Chicken?
We talked about the wire rack earlier, and that’s my number one non-negotiable trick. But before you even get to that, you have to make sure that skin is bone dry when you season it. Moisture is the enemy of crispiness! Use paper towels and dab, dab, dab until the skin feels almost tacky, not wet. Then, the high heat of the initial 25-minute bake is crucial—don’t drop the temperature down until you are ready to apply the sauce. High heat starts rendering that fat quickly, which is exactly what you want for fantastic skin texture.
Can I adapt this recipe for Grilled Chicken Recipe perfection?
Yes, though grilling requires way more active attention than the oven! For grilling, you need to use the two-zone heat method—you want one side of your grill hot and one side cooler (indirect heat). Season the chicken just like we did here, but skip the oil since the grill grates will provide enough fat to prevent sticking. Sear the chicken skin-side down over the direct heat for about 4 to 5 minutes per side until you get good char marks. Then, move them over to the indirect heat zone, sauce them, and close the lid until they hit that internal temperature of 165°F. It’s faster than the oven overall, but you need to stay right there watching it! If you love outdoor cooking, I have a fantastic Grilled Chicken Caesar Salad recipe that uses a similar dry rub base!
What if I only have BBQ Chicken Breasts available?
If breasts are all you have, you can definitely make this work, but you have to adjust your timing because they are much leaner than thighs. You can still use the exact same rub! However, after the first 20 minutes of baking (instead of 25), check the temperature. Breasts cook much faster. Sauce them when they hit about 150°F, because that final 5-10 minutes of baking with the glaze will bring them right up to the safe 165°F without overshooting and getting tough. They might not have the heavy fat content of thighs, but they’ll still be moist if monitored closely!
Nutritional Estimate for This BBQ Chicken Recipe
Now, I know some of you are tracking macros or are just curious about what’s in your dinner, and that’s totally fair! We all want to know what we’re eating, especially when we’re slathering on that sweet, sticky glaze. So, based on the measurements in this recipe—and that’s a big “based on”—here is what you can roughly expect per serving (that’s one lovely thigh!).
Keep in mind, these numbers swing wildly depending on what brand of BBQ sauce you grab off the shelf; some are super sugary, and some are much lighter! Consider this your baseline so you know you’re getting a great hit of protein without totally blowing your day’s goals.
- Calories: Around 450
- Protein: A whopping 35 grams! Great post-workout fuel!
- Fat: About 25 grams (a lot of that is from the glorious skin).
- Carbohydrates: Around 25 grams, mostly from that sweet sauce.
If cutting down on sugar or sodium is a goal for your bbq chicken, this is where you can really play around. Look for low-sugar BBQ sauces if that’s important to you, or maybe go easier on the salt in the initial dry rub. The chicken itself is fantastic, so the sauce is where you can really customize things without losing that tender texture we fought so hard to achieve.
As always, since these calculations rely heavily on the specific ingredients you bring into your kitchen, these are just estimates. For the most accurate information, especially if you have allergies or strict dietary requirements, you should definitely check the labels on your sauce and consult a professional! You can read a bit more about how ingredients affect final nutrition here: Our Nutritional Disclaimer.
But don’t let numbers scare you away from this fantastic, easy oven baked bbq chicken. It’s worth every delicious calorie for a guaranteed crowd-pleaser on a busy night!
Share Your Best BBQ Chicken Creations
Whew! That’s it! We’ve covered everything from patting the skin dry to the very best way to reheat leftovers. Now it’s your turn to take this awesome, easy oven recipe and make it your own family’s favorite! I truly hope this becomes your go-to for weeknight meals or those last-minute summer cookouts.
I’d absolutely *love* to see what you come up with! If you tried this Oven Baked BBQ Chicken and it was a huge hit, please do me a favor and pop back here to leave a rating. Five stars if you loved it, obviously! Knowing it worked out perfectly in your kitchen means the world to me.
Also, don’t forget to take a picture! If you share your sticky, saucy masterpiece on social media, tag me! I always check through my mentions to see everyone’s beautiful results. It’s so fun seeing how people customize their sauces and sides.
If anything felt tricky, or if you experimented with a different cut like wings, please don’t hesitate to drop a comment or question below. I try to answer everyone who reaches out! If you need to get in touch directly for a private question, you can always use the contact form too.
Happy cooking, and enjoy that phenomenal, juicy chicken!
PrintEasy Oven-Baked BBQ Chicken Thighs
Make juicy, tender BBQ chicken thighs using a simple oven method. This recipe uses a sweet and smoky sauce for a quick weeknight dinner.
- Prep Time: 10 min
- Cook Time: 35 min
- Total Time: 45 min
- Yield: 4 servings
- Category: Dinner
- Method: Baking
- Cuisine: American
- Diet: Low Fat
Ingredients
- 6 bone-in, skin-on chicken thighs
- 1 tablespoon olive oil
- 1 teaspoon salt
- 1/2 teaspoon black pepper
- 1 teaspoon garlic powder
- 1/2 teaspoon smoked paprika
- 1 cup your favorite BBQ sauce
Instructions
- Preheat your oven to 400 degrees Fahrenheit (200 degrees Celsius). Line a baking sheet with foil for easy cleanup.
- Pat the chicken thighs completely dry using paper towels. This helps the skin crisp.
- In a small bowl, mix the olive oil, salt, pepper, garlic powder, and smoked paprika to create a rub.
- Rub the spice mixture evenly over all surfaces of the chicken thighs.
- Place the seasoned thighs skin-side up on the prepared baking sheet.
- Bake for 25 minutes.
- Remove the pan from the oven. Brush the tops of the chicken generously with the BBQ sauce.
- Return the chicken to the oven and bake for another 5 to 10 minutes, or until the internal temperature reaches 165 degrees Fahrenheit (74 degrees Celsius) and the sauce is slightly caramelized.
- Let the chicken rest for 5 minutes before serving.
Notes
- For extra crispy skin, place the thighs on a wire rack set inside the baking sheet before baking.
- You can substitute bone-in, skin-on breasts for thighs, but adjust the cooking time as needed.
- If you prefer a thicker sauce coating, apply a second layer of BBQ sauce during the last 5 minutes of cooking.
Nutrition
- Serving Size: 1 thigh
- Calories: 450
- Sugar: 22
- Sodium: 650
- Fat: 25
- Saturated Fat: 8
- Unsaturated Fat: 17
- Trans Fat: 0
- Carbohydrates: 25
- Fiber: 1
- Protein: 35
- Cholesterol: 110