


Oh, honestly, if you’re going to make one dessert this season, make it a proper, show-stopping lemon meringue pie. I struggled with this recipe for years, I really did! You know, the filling would weep like crazy, or the meringue would sink the second it left the oven. It felt like such a fussy, vintage recipe that modern cooks forgot how to handle.
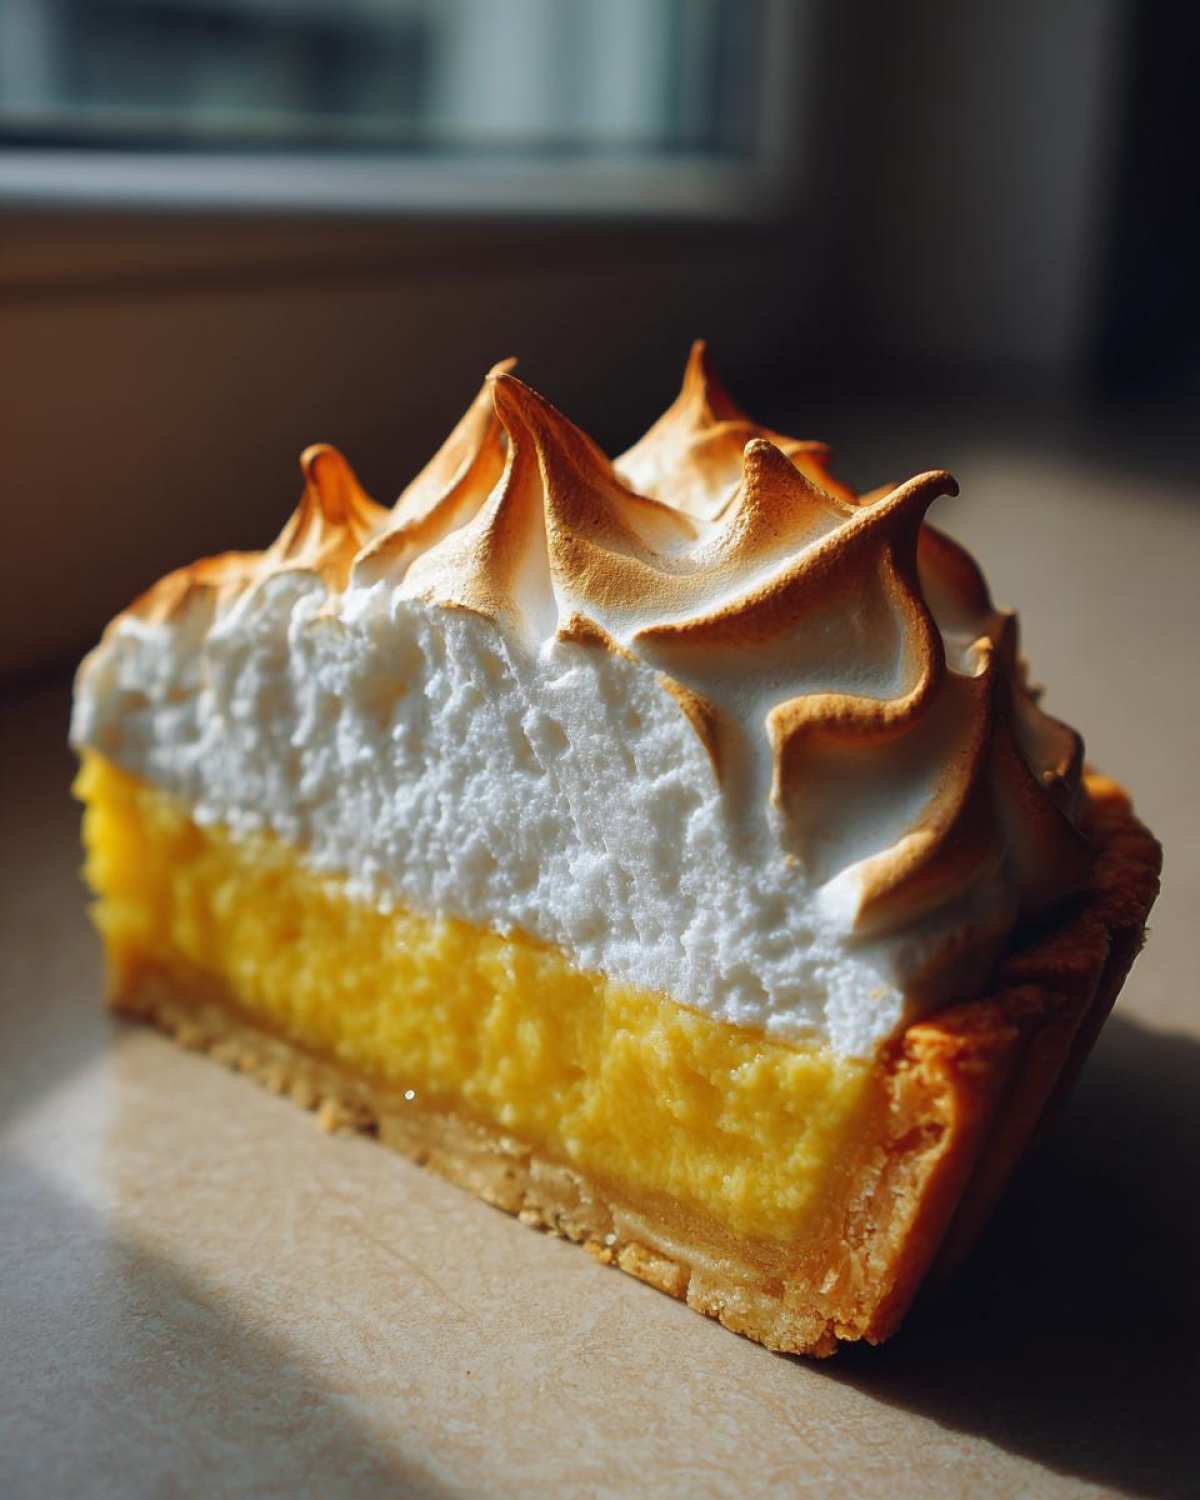
But I finally cracked the code, and I’m telling you, this classic homemade recipe is my secret weapon for any gathering. We’re aiming for that perfect, mouth-puckering tartness in the filling, grounded by a buttery crust, and topped with a towering, fluffy meringue that stays put. Trust me, mastering this pie makes you feel like a baking legend.
Why This Homemade Lemon Meringue Recipe is Your New Favorite
Look, there are a million shortcuts out there, but when you break it down, nothing beats the real deal. This recipe is my go-to because it delivers that incredible tart and sweet pie experience every single time without making me pull my hair out. It’s surprisingly simple, especially once you know the little tricks.
- It’s completely homemade lemon pie from scratch, so you control every zesty, sweet drop of flavor.
- We focus on stability; forget soupy filling! This method helps lock in the lemon curd so you get clean slices.
- It’s genuinely the easy lemon meringue recipe you’ve been searching for, no fancy equipment needed besides a mixer for the topping.
- You end up with that gorgeous contrast—a firm base, a bright center, and a light, airy cloud on top.
My friends always ask for the secret when they see this beauty sitting on the counter. Check out my latest thoughts on baking over at the Taste Portfolio blog for more inspiration!
Ingredients for the Perfect Lemon Meringue Pie Recipe
Okay, gather your tools, because good ingredients are non-negotiable for a spectacular slice of classic lemon pie. I’m going to list everything out, split into three key areas: the base, the bright center, and that gorgeous fluffy cloud on top. Remember those emphasis points—they are crucial for nailing the texture.
For the crust, I usually cheat a little bit on time, but if you want to make your crust truly special, you must check out my tutorial on a classic flaky crust. But for this recipe, we just need that shell ready.
For the Buttery Pie Crust Tutorial
You need one fully baked and absolutely cooled 9-inch pie crust ready to go. Cooling is key! If it’s warm, the filling melts, and we cannot have that.
- 1 unbaked 9-inch pie crust (I use a store-bought one sometimes to save time, no judgment here!)
For the Zesty Lemon Filling Recipe
This is where the magic happens. We need that intense flavor, so please, please use fresh lemon juice and zest. Bottled just doesn’t give you the vibrant punch needed for a truly zesty lemon dessert.
- 1 1/2 cups granulated sugar
- 1/3 cup cornstarch (this is the stabilizer!)
- 1/4 teaspoon salt
- 1 1/2 cups cold water
- 4 large egg yolks, lightly beaten
- 2 tablespoons unsalted butter
- 1/2 cup fresh lemon juice
- 1 tablespoon lemon zest
For the Fluffy Meringue Topping
This is perhaps the most important part to get right! For the absolute best volume for your fluffy meringue topping, those egg whites must be at room temperature. It really makes a difference in how high they whip up!
- 4 large egg whites, totally room temperature. And I mean *grease-free* room temperature!
- 1/4 teaspoon cream of tartar (my secret for extra stability)
- 6 tablespoons granulated sugar (for the meringue)
How to Make Perfect Lemon Meringue Pie From Scratch
Alright, here’s where we put it all together. This isn’t just about dumping things in a pan; it’s tactical! Making this lemon meringue pie requires us to work fast once the filling is done because we want that heat to help set the meringue properly. Pay close attention to heating times, because that’s the real secret to avoiding a runny mess. If you want the master guide, check out my full post on this classic lemon meringue pie recipe!
Preparing the Crust and Lemon Curd Recipe Base
First things first: make sure that crust is totally cool. Seriously, run your fingers all over it; if it’s even a little warm, the filling melts, and we cannot have that. In a medium pot, whisk together the 1 1/2 cups of sugar, the cornstarch, and salt. Then slowly add the 1 1/2 cups of cold water, stirring constantly so you don’t get any lumps of cornstarch hiding out.
Put that pot on medium heat and stir, stir, stir! You need this to get really thick—think pudding consistency—and then you have to let it boil for a full minute while stirring. That minute is crucial for activating the cornstarch so your filling sets up firm. Don’t skip it! Pull the pot off the heat right after that minute is up.
Tempering Yolks and Finishing the Tart Lemon Filling
This next part is the most important technique in the whole classic lemon pie process: tempering the yolks so they don’t scramble! Take about a cup of that hot sugar mixture you just made and slowly drizzle it into your four lightly beaten egg yolks while you whisk like crazy. Don’t stop whisking! Once those yolks are warmed up, you pour that tempered mixture right back into the main pot.
Put the pot back on medium heat. Stir it constantly until it thickens up again and you see those little gentle bubbles popping—just a bit! As soon as that happens, yank it off the heat for good. Now we mix in the good stuff: the butter until it melts completely, followed by your fresh lemon juice and that beautiful zest. Pour this hot, fragrant lemon curd recipe base right into your cooled crust immediately.
Whipping the Fluffy Meringue Topping
While the filling is sitting, get your egg whites ready. Remember those super clean, grease-free bowls I mentioned earlier? Now is when they pay off! Put your 4 room-temperature egg whites and the cream of tartar into your stand mixer bowl. Start beating on medium speed until you get soft peaks—they should look like soft clouds.
Now, slowly, I mean *slowly*, rain in that remaining 6 tablespoons of sugar one spoonful at a time. Increase that mixer speed up high and just keep going until you see stiff, glossy peaks. You want those peaks to hold their shape perfectly when you lift the whisk—this is how to make perfect meringue! If you want another fun meringue project, try these easy meringue cookies!
Assembling and Baking the Showstopper Dessert Lemon Meringue
Okay, get that meringue on top of that hot filling ASAP! Spread it all the way out to the edges of the crust. This little gap-filling trick prevents the meringue from shrinking back and leaving strips of yellow exposed. Use the back of a spoon to make big, dramatic swirls—this is supposed to be a showstopper dessert!
Pop the whole beautiful lemon meringue into a 350°F (175°C) oven. It only needs about 12 to 15 minutes, just long enough for those beautiful peaks to get that lovely golden tan on top. Once they look good, take it out and let it cool on a wire rack for a solid four hours. Resist the urge to move it to the fridge too soon—that’s another weeping disaster waiting to happen!
No Weep Lemon Meringue Tips for a Stable Finish
Oh wow, let’s talk problems because I’ve certainly had them! Everyone searches for no weep lemon meringue tips online, and I’ve boiled down my experience into a couple of foolproof rules. The main culprits for weeping—that ugly sugary liquid that separates out—are tiny traces of grease or cooling the pie too fast.
First, that bowl you used for the meringue? It has to be surgically clean. I mean, wipe it down with a little vinegar or lemon juice before you start, just to be absolutely sure there’s zero fat residue from previous whipping sessions (maybe you made whipped cream last night, oops!). Fat stops the egg whites from forming stable structure, plain and simple.
Second, the cooling process. This is where most people mess up their gorgeous pie. You must let the pie cool completely on the counter for at least four hours. Putting that hot filling straight into a cold fridge shocks the meringue, causing it to contract too fast and squeeze out moisture. Patience, my friend, is the last step in making a stable lemon meringue!
Also, remember how I told you to spread the meringue all the way to the crust edge? That seals the filling in. If you leave a gap, steam escapes, condensates, and drips right down the side. Follow these steps, and you’ll have a truly gorgeous, weeping-free slice of heaven.
Ingredient Notes and Substitutions for Your Lemon Meringue
I get so many questions about swapping ingredients, especially on an old-school recipe like this classic lemon pie. Listen, for the filling, I really preach using fresh lemon juice. The bottled stuff just tastes cooked, and we’re aiming for that electric zing in our zesty lemon dessert!
If you absolutely run out of fresh, bottled juice is better than none, but I promise you’ll notice the difference. Now, about the thickener: we use cornstarch because it gives you that beautifully glossy, clean set. If you try to swap it for flour, your filling will end up cloudy and a bit gummy. For the best lemon meringue, stick to the cornstarch!
And for the egg whites? Never, ever substitute those. The size matters for the volume in that fluffy meringue topping. Room temperature whites create softer, more stable peaks than if they come straight from the cold fridge. It’s non-negotiable for a successful, easy lemon meringue recipe!
Storage & Reheating Instructions for Lemon Meringue
This is the moment of truth after you wait those agonizing four hours for the pie to set! For the absolute best eating quality, you need to let your beautiful lemon meringue pie cool completely on the counter—that means a good four hours—before it even thinks about seeing the fridge. That initial cooling period is essential to locking in the structure we worked so hard to build.
Once it’s cool, you can cover it loosely with plastic wrap (try tenting it so the plastic doesn’t touch the meringue!) and move it to the refrigerator. Honestly, this classic lemon pie is best eaten within a day, maybe two—it doesn’t hold up as long as a custard pie.
And here’s a hard rule I stick to: do not try to reheat this pie! Seriously, don’t even think about it. Any warmth you introduce will just melt all that gorgeous structure in your meringue, causing it to weep and deflate instantly. Just serve it straight from the fridge!
Variations: Mini Lemon Meringue Tarts and Lemon Meringue Bars
This is such a versatile recipe, isn’t it? Once you nail the filling stability, you can use it for all sorts of gorgeous summer citrus dessert creations. If you’re having a party and want to skip the slicing drama, turning this into mini lemon meringue tarts is a fantastic idea.
For the tarts, you just use pre-made pastry shells or a shortbread base. You simply fill them with the hot lemon mixture just like you did the big pie, and then top them off with meringue. The baking time shortens dramatically—we’re talking 8 to 10 minutes max under the broiler or in the oven until they get those lovely toasted tips! Keep a close eye on them, though, because small things burn so fast!
If you’re leaning towards something chewier, like lemon meringue bars, that’s easy too, though it changes the texture a bit. You’d need a proper shortbread or cookie base baked first, of course. Then you spread in the hot filling and top it like usual. Because the base is denser, the baking time for the meringue might be slightly longer, maybe 15 minutes, but the bars won’t have that airy, fluffy topping the pie boasts.
Serving Suggestions for This Zesty Lemon Dessert
After all that waiting, you deserve a perfect bite! Since this is such a vibrant, summer citrus dessert, I love keeping things light alongside it. Don’t go for heavy chocolate or anything competing with that bright lemon curd.
Honestly, the pie is the star, but if you are serving it with coffee or tea, a simple, classic shortbread cookie is heavenly. You can find my favorite recipe for those amazing, melt-in-your-mouth vanilla butter cookies right here on the site. Just one little cookie on the side cuts through the richness perfectly!
We always serve this pie chilled after the initial four-hour resting period. That crisp bite against the slightly tart filling is just perfection.
Frequently Asked Questions About Classic Lemon Pie
I always get a flood of questions after people try this recipe, which just means you all are getting serious about baking your own classic lemon pie! Here are the things I hear most often when people are trying out this easy lemon meringue recipe for the first time.
Can I use pre-made lemon juice in my lemon meringue recipe?
Oh, I know that feeling when you realize you’re out of lemons! Look, technically, yes, you can use bottled juice in a pinch. But if you truly want that bright, clean flavor that makes this zesty dessert sing, fresh is the only way to go. Bottled juice just doesn’t have the same zing, and you risk ending up with a slightly duller filling.
Why did my meringue deflate after cooling?
This breaks my heart every time it happens to someone! Deflation usually comes down to two things we covered in the no weep lemon meringue tips section, or under-beating the sugar. If you didn’t whip enough air in while slowly adding that sugar, the structure isn’t strong enough to hold up as it cools. It needs those high, stiff peaks! Cooler shrinkage is another big culprit, so make sure you let it rest on the counter for those four hours before chilling.
How long does a homemade lemon pie from scratch last?
Because we are using real, fresh ingredients and not a ton of stabilizers meant for shelf life, this pie really is at its peak when eaten quickly. I always say that a homemade lemon pie from scratch is best enjoyed within one to two days. After that, the beautiful meringue starts to get weepy, and the filling just loses that incredible fresh texture. Honestly, mine never lasts that long anyway!
Nutritional Estimates for Lemon Meringue
Now, let’s talk numbers for those of you tracking macros, or maybe you just want to know what you’re really diving into when you grab a slice of this towering dessert! I pulled the estimates together based on the ingredients list above, but remember, this is just a guideline.
Because we are using real butter and fresh eggs, this isn’t exactly a diet food, but wow, it’s worth every single calorie for a special treat! These figures are calculated based on dividing the recipe into 8 generous servings, which is how I usually end up slicing it.
- Serving Size: 1 slice
- Calories: About 380
- Sugar: Roughly 45g (That’s the lemon zing and the sweet meringue working together!)
- Fat: Around 16g
- Protein: About 6g
- Carbohydrates: Approximately 58g
I want to be super clear: these are standard estimates for a traditional pie made with a standard crust. If you use a puff pastry or a gluten-free base, those numbers will shift a bit. But for my classic, homemade recipe, this is a great baseline!
Share Your Best Lemon Meringue Creations
I truly, truly hope this recipe brings you the same joy it brings my family every single time I bake it. There’s nothing better than seeing beautiful citrus desserts out there, and I’m so proud of you for tackling this classic!
Now, the homework part! Once you’ve let your pie cool and you’ve cut that first perfect, clean slice, please come back here and let me know how it went! Give the recipe a rating out of five stars—I’d love to see how it worked for you.
Did you manage to get those high, stiff peaks on your meringue? Or maybe you found an amazing pairing for your zesty lemon dessert? Drop your stories, tips, triumphs, or even your newbie questions in the comments below. Don’t be shy!
If you snap a picture of your glorious tower of lemon meringue goodness, tag me on social media! I can’t wait to cheer you on. If you ever need to shoot me a private note about a specific baking issue, you can always reach out directly via my contact page. Happy baking, everyone!
PrintClassic Homemade Lemon Meringue Pie

Make a traditional lemon meringue pie featuring a tart, zesty lemon filling and a tall, fluffy meringue topping on a buttery crust.
- Prep Time: 30 min
- Cook Time: 30 min
- Total Time: 270 min
- Yield: 8 servings
- Category: Dessert
- Method: Baking
- Cuisine: American
- Diet: Vegetarian
Ingredients
- 1 unbaked 9-inch pie crust (store-bought or homemade)
- 1 1/2 cups granulated sugar
- 1/3 cup cornstarch
- 1/4 teaspoon salt
- 1 1/2 cups cold water
- 4 large egg yolks, lightly beaten
- 2 tablespoons unsalted butter
- 1/2 cup fresh lemon juice
- 1 tablespoon lemon zest
- 4 large egg whites, room temperature
- 1/4 teaspoon cream of tartar
- 6 tablespoons granulated sugar (for meringue)
Instructions
- Preheat your oven to 350°F (175°C). Bake the pie crust according to package directions or your preferred method until lightly golden. Cool completely.
- For the filling, whisk together 1 1/2 cups sugar, cornstarch, and salt in a medium saucepan. Gradually whisk in the cold water until smooth.
- Cook the mixture over medium heat, stirring constantly, until it thickens significantly and boils. Boil for 1 minute, stirring constantly. Remove from heat.
- In a separate bowl, whisk the egg yolks lightly. Slowly temper the yolks by whisking about 1 cup of the hot sugar mixture into the yolks.
- Pour the tempered yolk mixture back into the saucepan with the remaining hot mixture. Cook over medium heat, stirring constantly, until the filling thickens again and just begins to bubble. Do not boil vigorously.
- Remove from heat. Stir in the butter, lemon juice, and lemon zest until the butter melts and is fully incorporated.
- Pour the hot lemon filling immediately into the cooled, baked pie crust.
- For the meringue, place the room temperature egg whites and cream of tartar in a clean, grease-free mixing bowl. Beat with an electric mixer on medium speed until soft peaks form.
- Gradually add the 6 tablespoons of sugar, one tablespoon at a time, beating well after each addition. Increase speed to high and beat until stiff, glossy peaks form.
- Spread the meringue over the hot lemon filling, making sure the meringue touches the edges of the crust all around to prevent shrinking. Create decorative swirls with the back of a spoon.
- Bake at 350°F (175°C) for 12 to 15 minutes, or until the meringue peaks are lightly golden brown.
- Cool the pie completely on a wire rack at room temperature for at least 4 hours before slicing. Avoid placing it in the refrigerator too soon, as this can cause weeping.
Notes
- To prevent the meringue from weeping, ensure your mixing bowl and beaters are completely free of any grease or fat residue before whipping the egg whites.
- For a stable filling, make sure you boil the cornstarch mixture for a full minute after it thickens.
- Bake the pie on the upper-middle rack of the oven for even browning of the meringue.
Nutrition
- Serving Size: 1 slice
- Calories: 380
- Sugar: 45g
- Sodium: 210mg
- Fat: 16g
- Saturated Fat: 7g
- Unsaturated Fat: 9g
- Trans Fat: 0.2g
- Carbohydrates: 58g
- Fiber: 1g
- Protein: 6g
- Cholesterol: 110mg