

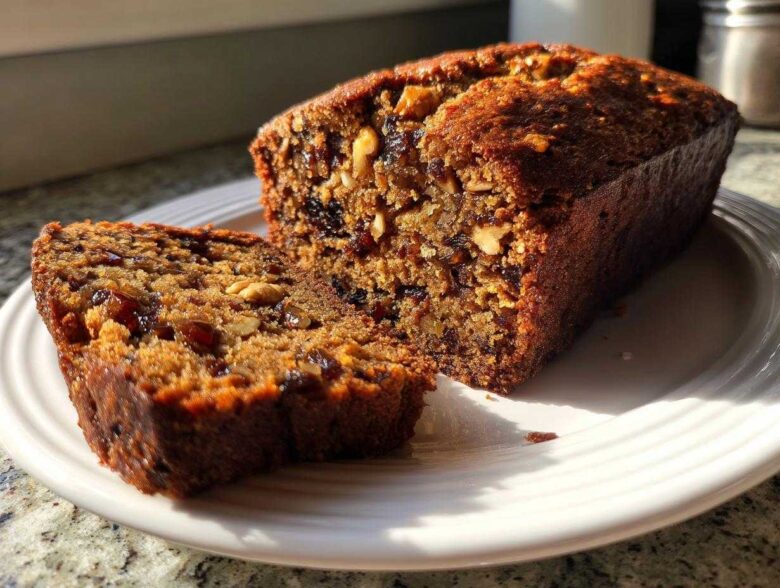
Oh, you know those days? The ones where you just *need* something warm, crumbly, and packed with comforting, deep flavors? When I get that craving, nothing hits the spot quite like a slice of real, old-fashioned baked goodness. Forget those dry, sad little loaves you sometimes find—we are not making those here, ever!
This recipe, my friends, is the standard I hold all other quick breads to. It is my **Old-Fashioned, Ultra-Moist Date Nut Bread Recipe**, and I promise you, it never fails. I’ve been tinkering with this basic formula since I was learning to cream butter properly, and I can honestly say I’ve made this specific date nut bread more times than I care to admit. If you follow these simple steps, you’ll get a perfectly tender, sweet, and satisfying loaf every single time. Seriously, it’s addictive!
Why This Old-Fashioned date nut bread Recipe Delivers Moisture
You know how frustrating it is to bite into a quick bread only to find it dry two days later? That is a tragedy we simply cannot allow in this house! The reason I swear by this recipe—the *best* Moist Date Nut Bread Recipe you’ll ever find—comes down to one key trick involving the dates themselves.
We aren’t just tossing dry, chopped dates into the batter. No way! We soak them first, and that step changes everything. It rehydrates the fruit and starts building moisture right from the beginning. Plus, using quality brown sugar instead of just white sugar gives us a deeper, richer sweetness that feels old-fashioned, not synthetic.
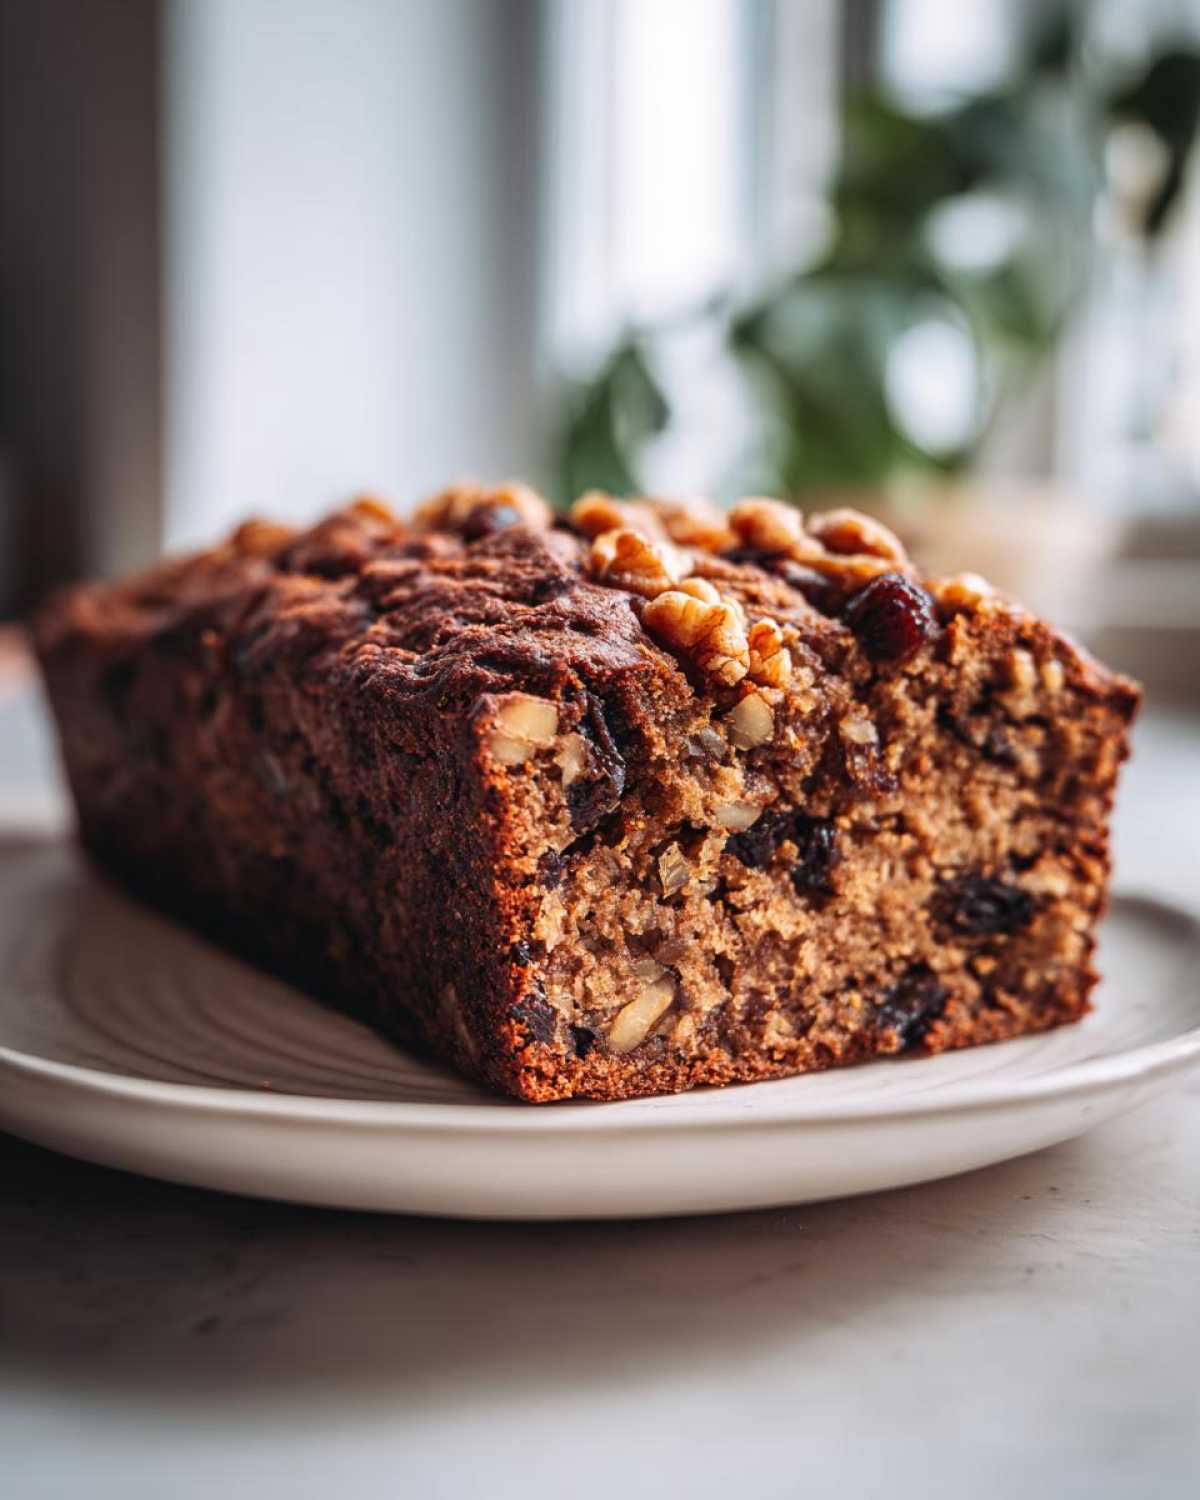
Key Techniques for a Perfect date nut bread Loaf
That 10-minute soak is non-negotiable! When you pour boiling water over those chopped jewels with the baking soda, it’s like waking them up. The soda helps break down the structure just enough so they become melty, brown little pockets of sweetness in the final bake. Trust me, don’t skip including that soaking liquid when you mix everything together. If you’re curious about other ways to keep your baked goods super tender, check out my tricks for moist pistachio muffins; the philosophy is similar!
Gathering Ingredients for Your date nut bread
Okay, let’s talk about what you need to pull this magic together. The beauty of this Old Fashioned Quick Bread is that the ingredient list is actually pretty short and wholesome. We’re relying on pantry staples, which means you probably have most of this stuff hanging out right now!
You definitely want 1 cup of pitted Medjool dates, chopped small, and make sure you use that full cup of packed light brown sugar—that’s essential for that classic color and depth. We also need the usual building blocks: butter, eggs, flour, vanilla, baking powder, salt, and of course, those crunchy nuts. Remember, you need 1 cup of walnuts or pecans, depending on what you love most!
Ingredient Notes and Substitutions for this Classic Loaf Cake
If you don’t have walnuts on hand, pecans are an absolutely dreamy swap in this Nut and Date Cake Recipe. They offer a slightly sweeter, buttery crunch. And speaking of swaps, I mentioned the baking soda earlier, right? That’s so important! It reacts with the natural acidity when we soak the dates, which gives us the lift we need since we aren’t adding a ton of chemical leavening. If you wanted to try a slightly different flavor profile, you could use maple syrup instead of some of the brown sugar, but honestly, the traditional brown sugar mix just sings with the dates.
Step-by-Step Instructions for Easy date nut bread Baking
Okay, are your ingredients ready? We’re moving fast now, but don’t panic! Because this is a Quick Bread for Breakfast recipe, the mixing part goes really quickly once you nail the prep. First things first: crank that oven up to 350 degrees F (175 degrees C). Like any good loaf cake, you need to grease and flour that standard 9×5 inch pan so we don’t have a sticky meltdown later!
Preparing the Dates and Wet Mixture
Here’s where we start building that moisture! Gather your chopped dates and toss them right into a bowl. Hit them with 1 cup of boiling water and stir in that teaspoon of baking soda. Now, here’s the crucial pause: let that mixture sit for a full 10 minutes. You’ll see the dates get soft and tender—that’s exactly what we want. While that’s happening, you can cream your softened butter and that packed brown sugar until it’s light and fluffy. Beat in the eggs one by one, then swirl in the vanilla. Then we pivot back to the dates!
When the 10 minutes are up, those dates are ready to join the party. You MUST remember to stir in the date mixture *and* all that liquid left in the bottom of the bowl right into your creamy wet ingredients. That soaking liquid holds so much flavor and moisture, so don’t drain a single drop!
Combining Batter and Baking the date nut bread
Next, we deal with the dry stuff. Whisk your flour, baking powder, and salt in a separate bowl. Now comes the gentle hand. Add the dry ingredients to your wet ingredients a little at a time. I mean it—mix until it’s *just* combined. If you see streaks of flour, that’s okay! Overmixing is how you get tough bread, and we are aiming for melt-in-your-mouth tenderness here. Finally, gently fold in your chopped walnuts or pecans.
Pour that glorious batter into your prepped pan. Pop it into that hot oven and let it bake for about 55 to 65 minutes. You’re looking for that wooden skewer inserted right into the center to come out clean, not sticky! For more super-reliable baking methods, you can always check out my general guide to easy quick bread baking.
Tips for the Best date nut bread Success
Even with a fantastic recipe, a couple of last-minute checks will ensure you get that perfect slice every time. My main tip for any Simple Baking Recipes like this sweet loaf is to really fight the urge to open the oven door early. Peeking before the 50-minute mark can cause the loaf to collapse in the middle. We want it tall and proud!
When you test for doneness, if the skewer comes out with just a tiny bit of moist crumb clinging to it—not wet batter, but moist crumbs—pull it out immediately! Carryover heat will finish the baking process while it rests.
And please, let it cool in the pan for 10 minutes before you try to remove it! If you flip it out immediately, this moist loaf can stick or tear apart. A few minutes on the wire rack after that initial rest helps it set up just enough. For more foolproof baking advice, I always point people toward my collection of simple baking recipes when they need reliability!
Serving Suggestions for Your Homemade date bread
This Wholesome Snack Bread is honestly amazing just sitting on the counter, but serving it warm? That’s next level, folks. Trust me on this one: slice it thick and give it a quick 20 seconds in the microwave. The heat melts the little pockets of date goodness inside until they are gooey and irresistible.
The absolute classic way to eat it is spread generously with real, softened butter. But if you’re feeling fancy—or if it’s brunch time—a schmear of plain cream cheese is perfection. It cuts through the sweetness just right. I have a few more ideas for enjoying sweet loaves over on my Sweet Loaf Recipes page, but this date bread is perfect just as it is!
Storage and Make Ahead Bread Options
This is truly the perfect Make Ahead Bread, which is why I love baking two loaves when I get going! For short-term storage, just wrap the cooled loaf tightly in plastic wrap, and it’ll stay wonderfully fresh at room temperature for three or four days. I use mine up fast, but I know some people like to refrigerate.
If you want to freeze it for later—a lifesaver during the holidays—make sure it’s completely cool first. Wrap it tightly in a double layer of plastic wrap, then slide it into foil to prevent freezer burn. It keeps beautifully for up to three months! You can thaw it on the counter overnight. For all my favorite make-ahead techniques, you should definitely peek at my tips for make ahead bread recipes.
Variations on the Classic date nut loaf
While I absolutely stand by this original, simple recipe for the Walnut Date Loaf, I know bakers love to tinker! If you find yourself wanting to jazz this up just a bit for the holidays or just because, you have a few great options where you won’t sacrifice that essential moisture.
You can easily bring in some warmth by tossing in about half a teaspoon of ground cinnamon and a quarter teaspoon of nutmeg right along with your flour. That spiced flavor complements the dates so beautifully! Also, if you want a healthier vibe, swapping out half the all-purpose flour for whole wheat flour works wonderfully without drying it out, thanks to our date-soaking trick. For other fun sweet loaf ideas, take a look at my tips for cranberry orange cake!
Creating a Banana date nut bread Variation
This is the one variation I get asked about constantly: how to make it a Banana Date Nut Bread Variation! It’s super simple. If you have two ripe bananas that are getting a little too spotty, mash them up really well—you’ll need about three-quarters of a cup of mashed banana. You can replace the 1/2 cup of butter with that mashed banana, or even better, reduce the butter to 1/4 cup and use the banana for the rest of the fat/moisture requirement. The banana adds sweetness and makes the loaf even more tender! Just fold it in right when you add the soaky date mixture.
Frequently Asked Questions About date nut bread
I get so many questions about this recipe because everyone wants that perfect, tender loaf! Troubleshooting quick breads can feel tricky, but honestly, most issues come down to one or two simple things. Here are the things I hear most often when folks are baking their first loaf of this Homemade Date Bread.
Can I make this date nut bread recipe without nuts?
Absolutely! Honestly, I love the crunch the walnuts provide, but if you have an allergy or just aren’t feeling them, leave them right out! This is still going to be a fantastic Sweet Loaf Recipe because the dates do most of the heavy lifting for flavor and moisture. If you find your batter looks a little empty without them, you can add a little extra chopped fruit or even some toasted rolled oats for texture instead. But if you skip them completely, it’s totally fine!
Why is my quick bread dense instead of fluffy?
Oh, that’s the dreaded result of overworking the batter! When you mix flour into wet ingredients, you start developing gluten, which is great for chewy bread but terrible for tender loaves. You must stop mixing almost immediately after the last streaks of flour disappear. Remember what I said in the instructions: stop when it’s *just* combined! Another sneaky cause is old baking soda or baking powder. If those haven’t been refreshed in a while, they won’t give you the lift you need, leading to a heavy, dense final product. Double-check those dates too—if you didn’t include that soggy soaking liquid, you might not have enough hydration, which also leads to density.
Estimated Nutritional Information for this Sweet Loaf
Now, I have to be upfront here. When you bake something this homemade and wonderful, the exact numbers can wiggle around depending on the specific brand of butter you use or exactly how packed your brown sugar was. These figures are my best estimate based on the recipe’s measurements, but they give you a fantastic ballpark idea of what you’re looking at for a slice of this delicious Sweet Loaf Recipe.
It’s important to remember that this is a treat! It has naturally occurring sugars from the dates and molasses from the brown sugar, so treat it as the satisfying, comforting snack it is. If you want to see the full breakdown, please always cross-reference with a detailed nutritional calculator, but here are the key stats for about one slice:
- Calories: Around 280
- Total Fat: About 12g (that’s where the rich butter comes in!)
- Carbohydrates: Roughly 42g
- Protein: About 5g
As always, for the complete legal disclaimer regarding nutritional estimates, you can read more here. But honestly, the best metric is how happy it makes you feel when you eat it warm with a little butter melting over the top!
PrintOld-Fashioned, Ultra-Moist Date Nut Bread Recipe
Bake a classic, moist date nut bread loaf using simple steps. This recipe yields a tender, flavorful quick bread perfect for snacking or breakfast.
- Prep Time: 15 min
- Cook Time: 60 min
- Total Time: 75 min
- Yield: 1 loaf (about 10 slices)
- Category: Baking
- Method: Baking
- Cuisine: American
- Diet: Vegetarian
Ingredients
- 1 cup boiling water
- 1 cup pitted Medjool dates, chopped
- 1 teaspoon baking soda
- 1/2 cup (1 stick) unsalted butter, softened
- 1 cup packed light brown sugar
- 2 large eggs
- 1 teaspoon vanilla extract
- 1 3/4 cups all-purpose flour
- 1 teaspoon baking powder
- 1/2 teaspoon salt
- 1 cup chopped walnuts or pecans
Instructions
- Preheat your oven to 350 degrees F (175 degrees C). Grease and flour a standard 9×5 inch loaf pan.
- Place the chopped dates in a bowl and pour 1 cup of boiling water over them. Stir in the baking soda and let the mixture stand for 10 minutes. The dates will soften.
- In a large bowl, cream together the softened butter and brown sugar until light and fluffy. Beat in the eggs one at a time, then stir in the vanilla extract.
- In a separate medium bowl, whisk together the flour, baking powder, and salt.
- Gradually add the dry ingredients to the wet ingredients, mixing until just combined. Do not overmix.
- Stir in the softened date mixture (including any remaining liquid) and the chopped nuts until evenly distributed throughout the batter.
- Pour the batter into the prepared loaf pan.
- Bake for 55 to 65 minutes, or until a wooden skewer inserted into the center comes out clean.
- Let the bread cool in the pan for 10 minutes before turning it out onto a wire rack to cool completely.
Notes
- For extra moisture, you can substitute half of the boiling water with strong brewed coffee.
- This bread freezes well once completely cooled; wrap tightly in plastic wrap and then foil.
- Serve slices warm with softened butter or cream cheese.
Nutrition
- Serving Size: 1 slice
- Calories: 280
- Sugar: 25g
- Sodium: 180mg
- Fat: 12g
- Saturated Fat: 5g
- Unsaturated Fat: 7g
- Trans Fat: 0g
- Carbohydrates: 42g
- Fiber: 2g
- Protein: 5g
- Cholesterol: 55mg