

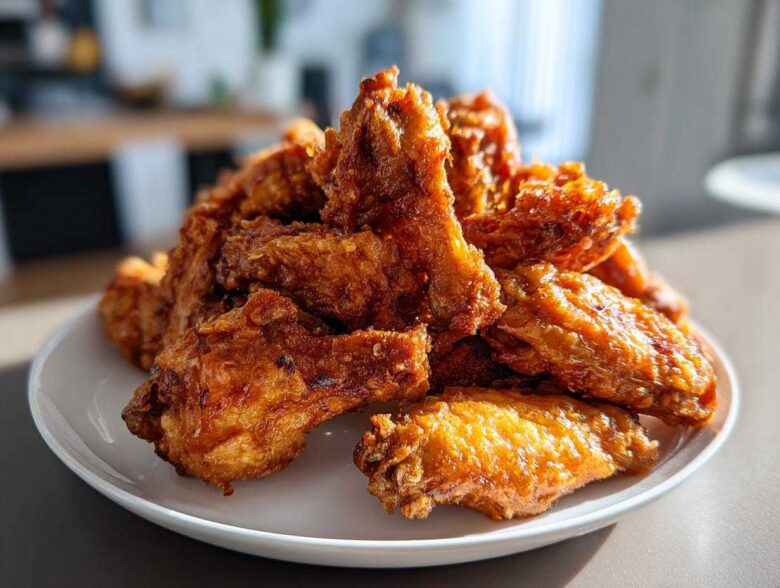
Oh, listen to me. If you’ve ever pulled chicken wings out of the oven only to find that sad, slightly rubbery skin that refuses to crisp up, I know your pain! I spent years battling that terrible sogginess. We tried everything, right? Overcrowding the pan, crazy high heat—nothing worked consistently until I found the magic trick. Forget deep frying forever, because I cracked the code to truly crispy baked chicken wings using one humble pantry staple. Trust me, this baking powder hack changes everything. After endless testing, I promise this technique delivers that perfect, shatteringly crispy skin while keeping the inside super juicy. It’s the best technique for crispy baked chicken, hands down!
Why You Will Make These Crispy Baked Chicken Wings Every Time
Seriously, these wings are a game-changer. You’re going to ditch the fryer for good once you see the results! Here’s why you need to bookmark this specific recipe:
- Texture Perfection: You get that incredible, juicy inside, crispy outside chicken texture every single time—no soggy bottoms here!
- Health Factor: This is a genuinely healthy baked wings recipe. You skip all that heavy frying oil.
- Easy Cleanup: We use foil and a rack, so cleanup is ridiculously fast, making these perfect for a last-minute game day chicken wings appetizer.
- Reliability: This method is foolproof. If you follow the drying step, success is guaranteed!
The Secret to Crispy Baked Chicken Wings: Essential Ingredients
Okay, so let’s talk ingredients. This isn’t a complicated grocery run, I promise. In fact, the secret to achieving these amazing crispy baked chicken wings lies mostly in what you *add* to the wings, not what you rub them with. You need the foundational stuff—salt, pepper, garlic powder—but the true hero ingredient is the baking powder. That’s right, baking powder!
We’re dealing with just three pounds of wings here, enough for a decent party appetizer, and we coat them lightly in about a tablespoon of powder mixed with our seasonings. It’s such a simple swap, but this is where the magic happens for those crispy wings no fry dreams to come true.
Ingredient Notes and Substitution Guidance
When gathering your supplies, pay close attention to the baking powder. This is crucial, so don’t confuse it with baking soda—they work completely differently in this hack!
Baking powder is essential because it slightly raises the pH level of the chicken skin. Think of it like this: it helps break down the proteins on the surface just enough so that when the heat hits it, the skin dries out faster and really puffs up into that perfect crust. If you have aluminum-free baking powder, I highly recommend using that because sometimes the aluminum variety can leave a *slightly* metallic aftertaste if you don’t use enough, though usually, it’s fine.
Now, what if you only have baking soda? Please, don’t use it straight! Baking soda is highly alkaline; using it as a direct substitute for the powder will likely yield a soapy or overly bitter crust, and it can burn before the inside is done. If you absolutely have zero powder, you can try mixing 1 teaspoon of baking soda with 2 teaspoons of cream of tartar—that combination mimics baking powder, but honestly, just running to the store for the right powder is worth the effort for genuinely crispy baked chicken wings.
For the rest of the seasonings, don’t feel too limited. The base is salt, pepper, and garlic powder. If you’re leaning toward a garlic parmesan baked wings flavor later, just add the Parmesan cheese *after* they come out of the oven, not before, or it will burn!
Equipment Needed for Perfect Crispy Baked Chicken Wings
Okay, so you’ve got your magic powder—now we need the right stage for our performance! You don’t need a fancy deep fryer or even an air fryer for these treats, but you absolutely need the right setup in your regular oven to get those gorgeous, crackly skins. Trust me, the pans you use matter immensely when you are trying to master how to make wings crispy in oven.
First up, you need a sturdy, rimmed baking sheet. Nothing flimsy, please! Line that sheet with aluminum foil. This isn’t for the crispiness; this is purely for my sanity later when I’m cleaning up. It saves scrubbing, which means less time cleaning and more time eating these amazing wings!
But here is the absolute, non-negotiable star of the show: you must use a wire cooling rack. This is why we can achieve crispy wings no fry results! If you just lay the wings directly on the foil or the pan, the bottom side steams in its own rendered fat and juice. That’s how you get rubbery wings, and we have zero tolerance for rubbery wings here.
The wire rack lifts the wings up, allowing the 425°F hot air to circulate everywhere—top, sides, and underneath. This is what ensures you get that lovely, uniform texture all the way around. If you have an old rack, make sure it’s clean, or maybe grab a new one when you get your baking powder. If you’re looking for other ways to use your racks for crispy results, you should check out my guide on how to get a really fluffy interior with a crispy top on baked potatoes here!
So, to sum up your equipment checklist for the best oven baked chicken wings: foil, a sturdy baking sheet, and a wire rack. That’s it! No special gadgets required to make these the ultimate party finger food chicken.
Step-by-Step Instructions for Crispy Baked Chicken Wings
Alright, here is where we put all that science and secret knowledge to work! Getting those crispy baked chicken wings consistently perfect is all about timing and initial prep. We move through a few temperature stages, so stick with me. I promise that once you see how easy this is, you’ll never go back to sloppy, under-crisped wings again. If you’re looking for another versatile weeknight recipe, you might want to try my amazing honey garlic chicken while you wait for these to finish up!
The Crucial Drying and Coating Technique for Crispy Wings No Fry
First things first: Preheat that oven to a roaring 425 degrees Fahrenheit. You need it hot when those wings go in! Line your sheet pan with foil (for later, glorious cleanup!) and set that wire rack right on top. Now, listen, this next part is the most important thing you’ll do: you have to pat your wings so dry they squeak! Grab a roll of paper towels and just blot, blot, blot those flats and drumettes until they feel dry to the touch. Moisture is the mortal enemy of crispiness; moisture creates steam, and steam means rubber skin.
Once they are bone-dry, toss them right into a bowl with your seasoning blend, making sure that baking powder is evenly distributed. You want a very thin, even veil of that powder mix over every single piece. That coating is what creates the texture!
Baking and Broiling for Juicy Inside Crispy Outside Chicken
Once coated, spread those wings out on your rack. Space them out! Do not let them touch—air needs to flow around them like they’re sunbathing. Pop them into the 425°F oven for 25 minutes. You’ll start smelling how good they are getting!
After 25 minutes, take them out, flip every single wing over carefully, and then drop the temperature down to 400°F. Bake them for another 20 minutes. This two-stage heat process is key to getting that juicy inside crispy outside chicken result.
Finally, for the real finishing touch, switch your oven to the highest broil setting. Now, you have to stand guard! Broil them for just 2 to 4 minutes, watching like a hawk. They will go from perfectly brown to burnt in seconds flat. When they look deeply golden and unbelievably crisp, pull them out immediately. That quick blast of direct heat guarantees the best texture for truly crispy baked chicken wings.
Tips for Success with Oven Baked Chicken Wings
Look, I’ve got a few extra tricks up my sleeve to troubleshoot common wing problems. We’ve nailed the baking powder and the high heat, but a couple of final details can really elevate your crispy baked chicken wings from great to legendary. These are the little things I learned after baking literally hundreds of wings while hunting down the perfect oven baked chicken wings method.
My number one piece of advice that I sometimes forget myself? Don’t you dare overcrowd the pan! I know, I know, you want to make a huge batch for everyone because these things disappear fast. But if you layer them on that wire rack, or if they’re touching each other, you’re trapping the moisture again. You’re basically recreating the steam effect we worked so hard to avoid earlier. If you’re cooking for more than four people, do two batches. It’s better to keep your oven running a little longer than serve up a tray of less-than-perfect wings.
And speaking of the rack—let’s really drill down on why we use it. That wire rack is doing the heavy lifting for us when we talk about getting that crispy wings no fry result. It acts like a little metal scaffold, holding the wings up out of the rendered fat and juices that drain off the skin. This allows the hot air to hit the entire surface area of the wing evenly. If you skip the rack, that bottom side is just sitting there simmering, and you end up with that sad, soggy patch. Every successful batch of healthy baked wings recipe hinges on hot air hitting all sides!
Also, think about placement in the oven. Try to keep the baking sheet on a rack near the middle or slightly higher up in your oven if you can. This ensures the wings are closer to the top element, which we use during that final broil blast. If they are too low, you risk the bottom burning before the top gets that final touch of color. If you follow these little placement rules, I guarantee you’ll be pulling out wings that look and taste like they just came out of a fryer!
Serving Suggestions for Your Crispy Baked Chicken Wings
Phew! Those babies just came out of the oven, they are screaming hot, and they are perfectly crisp. Don’t just let them sit there looking lonely on the rack! These crispy baked chicken wings are screaming out for a delicious coating or some great dipping sides. Since these are practically mandatory for any good party or game day chicken wings appetizer, I always have a couple of things ready to go the second they are done.
My go-to strategy, especially if I’ve made a big batch of that basic seasoning mix, is to toss them right away in a sauce. This is what separates a good wing tray from a spectacular one! If you want to keep it classic, you can always whip up a quick homemade BBQ sauce, but honestly, the best part about having crispy wings is that they act as the perfect vehicle for any sauce you throw at ’em.
If you’re having a burger night too, you might have some of my signature smash burger sauce kicking around. While it’s totally meant for burgers, it makes an absolutely killer dipping sauce for plain, seasoned wings! My rule is, if you have a great sauce, it doesn’t matter if it’s a wing sauce or not—just dip! You can find the recipe for that amazing stuff right here.
Making Buffalo Style Baked Wings
You can’t talk about wings without talking Buffalo! If you want to transform your perfectly crisp wings into buffalo style baked wings, timing is everything. You must sauce them immediately after they come off that wire rack.
Here’s how I do it: While the wings are finishing their final minute under the broiler, I quickly melt about half a stick of butter in a small saucepan over low heat. Once it’s totally melted, I whisk in about a half cup of your favorite cayenne-based hot sauce. Don’t boil it, just warm it through so it combines nicely. As soon as the wings are plated, pour that butter-sauce mixture right over the top and toss gently but quickly with tongs right on the serving platter.
The residual heat and residual crispiness of the wings will help the sauce adhere without immediately turning them soggy. If you let them cool down before saucing, the sauce just slides off or sits on top instead of really clinging to that slightly textured skin. This ensures you get that fantastic heat kick while maintaining maximum crispness!
Storage and Reheating Instructions for Leftover Crispy Baked Chicken Wings
Now, let’s talk about the sad reality: sometimes, even when you make the perfect batch of crispy baked chicken wings, you have leftovers. I mean, who has restraint? Truthfully, nothing beats a wing fresh off the rack right after that final broil minute. That initial crispness is fleeting, and once wings get chilled, they generally soften up. That’s just science, folks!
But don’t despair and definitely do not reach for the microwave! The microwave is the sworn enemy of crispiness. It heats the moisture inside the wing, turning that beautiful skin back into soggy leather. We are not letting that happen to our hard work!
If you’ve got extras, the best way to store them is in a single layer in an airtight container in the fridge. You want to keep them cold and dry for up to three days. And when you’re ready to bring them back to life? You need heat, and you need air circulation!
If you happen to own an air fryer—which, if you follow my blog, you probably do—that’s your best bet for reheating. Toss those cold wings in the air fryer basket, set it to about 360 degrees, and cook them for just 6 to 8 minutes. They come out shockingly close to their original glory! If you don’t have one, the next best method is using your trusty oven and that wire rack again. Lay the wings back out on the rack, put the sheet pan underneath for catching drips, and pop them into a 375°F oven for about 10 minutes. You’re essentially giving them a second, quick bake/crisp cycle.
For a great tutorial on using your air fryer for other crispy items, check out my notes on making baked potatoes in there—it uses similar principles of circulating hot air right here. Trust me, taking the extra five minutes to reheat properly guarantees you still get some great texture, even on Day Two wings!
Frequently Asked Questions About Crispy Wings No Fry Methods
I totally get it—when you’re trying out a new technique like this, you want everything to be perfect! It’s easy to get nervous, especially when that primary keyword, crispy baked chicken wings, has such high stakes. Here are the few things people usually ask me after they first try the baking powder method:
Can I use baking soda instead of baking powder for these crispy baked chicken wings?
Oh, please, resist that urge! I know they sit right next to each other in the cabinet, but they are molecularly very different when it comes to baking, and it really matters here. You absolutely should not use baking soda as a direct substitute for baking powder when trying to achieve healthy baked wings recipe results.
Baking soda is much, much stronger. It’s super alkaline! If you use the same amount of baking soda that you use for baking powder, the wings will taste metallic, almost soapy, and let’s be honest, gross. On top of that weird flavor, baking soda reacts much faster and more aggressively with heat, meaning your wings are going to burn on the outside before the inside has a chance to cook properly. We need the gentle lift baking powder provides to dry out that skin without setting off any chemical alarms. Stick to the powder for the crispest results!
What is the best oven temperature for crispy wings?
This is brilliant because the best technique for crispy baked chicken wings isn’t just one temperature; it’s a little heat graduation! We tackle it in stages to ensure we get that perfect balance for the juicy inside crispy outside chicken.
You need to start hot—we jump right into 425°F initially. That intense heat hits the baking powder coating and immediately starts working on dehydrating the surface so the crisping process can begin, while the inside is still safely cooking through. After that first 25 minutes, we lower the temperature down to 400°F for another 20 minutes. This gives the interior time to finish cooking without scorching the exterior you worked so hard to create.
And finally, for the absolute crunchiest finish, we use the broiler for just those final couple of minutes. That quick blast of direct heat is what seals the deal. So, the best strategy isn’t one temperature but using that high-low-broil sequence to mimic fantastic results from much less healthy methods.
How do I prevent my wings from getting soggy after saucing?
This is the million-dollar question after you’ve already mastered how to make wings crispy in oven! You did all the hard work to get that perfect crackly skin, and then you drown them in sauce, and boom—soggy city. It happens!
My main rule, and this is crucial for keeping those oven baked chicken wings crisp, is to sauce them immediately before serving. Have your sauce ready and waiting. As soon as the wings come off that final broil, transfer them to your serving bowl and drizzle or toss the sauce on right then. Warm wings paired with a warm, slightly thicker sauce adhere better and don’t sit long enough to really penetrate the crust.
If you must sauce them ahead of time—say, you’re serving a huge crowd at a party—use the thickest glaze possible. If your sauce is very thin or watery, it’s going to migrate straight into the skin structure and ruin your crispness. Always aim for a glaze that is thick enough to coat the wing without immediately running off. You can always toss them in sauce right before you carry the platter from the kitchen to the living room!
Nutritional Estimate for Healthier Baked Wings Recipe
Now, I know what some of you are thinking: Wings are wings, right? But honestly, because we’ve ditched the deep fryer and used this amazing technique to make crispy baked chicken wings, we actually end up with a fantastic, healthier version perfect for snacking guilt-free. Since we aren’t submerging them in oil, we cut down a ton of extraneous fat, which is why this falls under a lighter meal option!
Keep in mind here, these numbers are just estimates based on the recipe as written—meaning without any heavy sauce added afterwards! If you toss them in a tablespoon of butter and hot sauce, those numbers will change a little, but the base wings themselves are surprisingly lean for such a satisfying snack. Because we are focusing on a truly healthier chicken wings recipe, it’s nice to see the protein numbers stay high while keeping the carbs practically zero. If you’re looking for other healthy meal prep ideas that deliver big on flavor without the fat, you have to check out my recipe for healthy turkey chili!
Here is the breakdown per serving (which we defined as four wings):
- Serving Size: 4 wings
- Calories: 250
- Protein: 27g
- Fat: 15g
- Saturated Fat: 4g
- Carbohydrates: 1g
- Sugar: 0g
- Sodium: 350mg
See that? Twenty-seven grams of protein in just four pieces! That’s why these make such a great party finger food chicken that actually fills you up a bit. We managed to get that amazing texture associated with fried food while keeping the fat and sugar way down, which is honestly what makes this whole crispy wings no fry method so revolutionary for everyone who loves finger food but hates the oil cleanup!
Share Your Crispy Baked Chicken Wings Results
Okay, now that you have tried the system—the drying, the baking powder dredge, flipping twice, and that glorious final broil—I need to hear all about it! Seriously, seeing your creations is the best part of being in the kitchen. Did you finally achieve that perfectly even, shatteringly crisp skin on your crispy baked chicken wings? Did you notice the difference that simple aluminum-free baking powder made?
Please, don’t keep this success story to yourself! If you made these, I want you to leave a star rating right here on the recipe card. It helps other folks who are looking for that perfect oven baked chicken wings recipe trust that this method works every time. I love reading your feedback, especially when you share little adjustments you made for your family’s taste.
And if you took a picture—which you absolutely should, because these look seriously good—tag me on social media! Tag me when you show off your perfectly textured, healthy baked wings recipe spread across everyone’s game day spread makes all my testing worth it. You can find me at all the usual spots when you’re showing off your amazing, no-fry results. If you want to see what else I’ve been cooking up lately, you can always check out my main recipe index for more foolproof dinners and appetizers!
Go on now, get those wings on the rack, and come back soon to tell me how amazingly crispy they turned out!
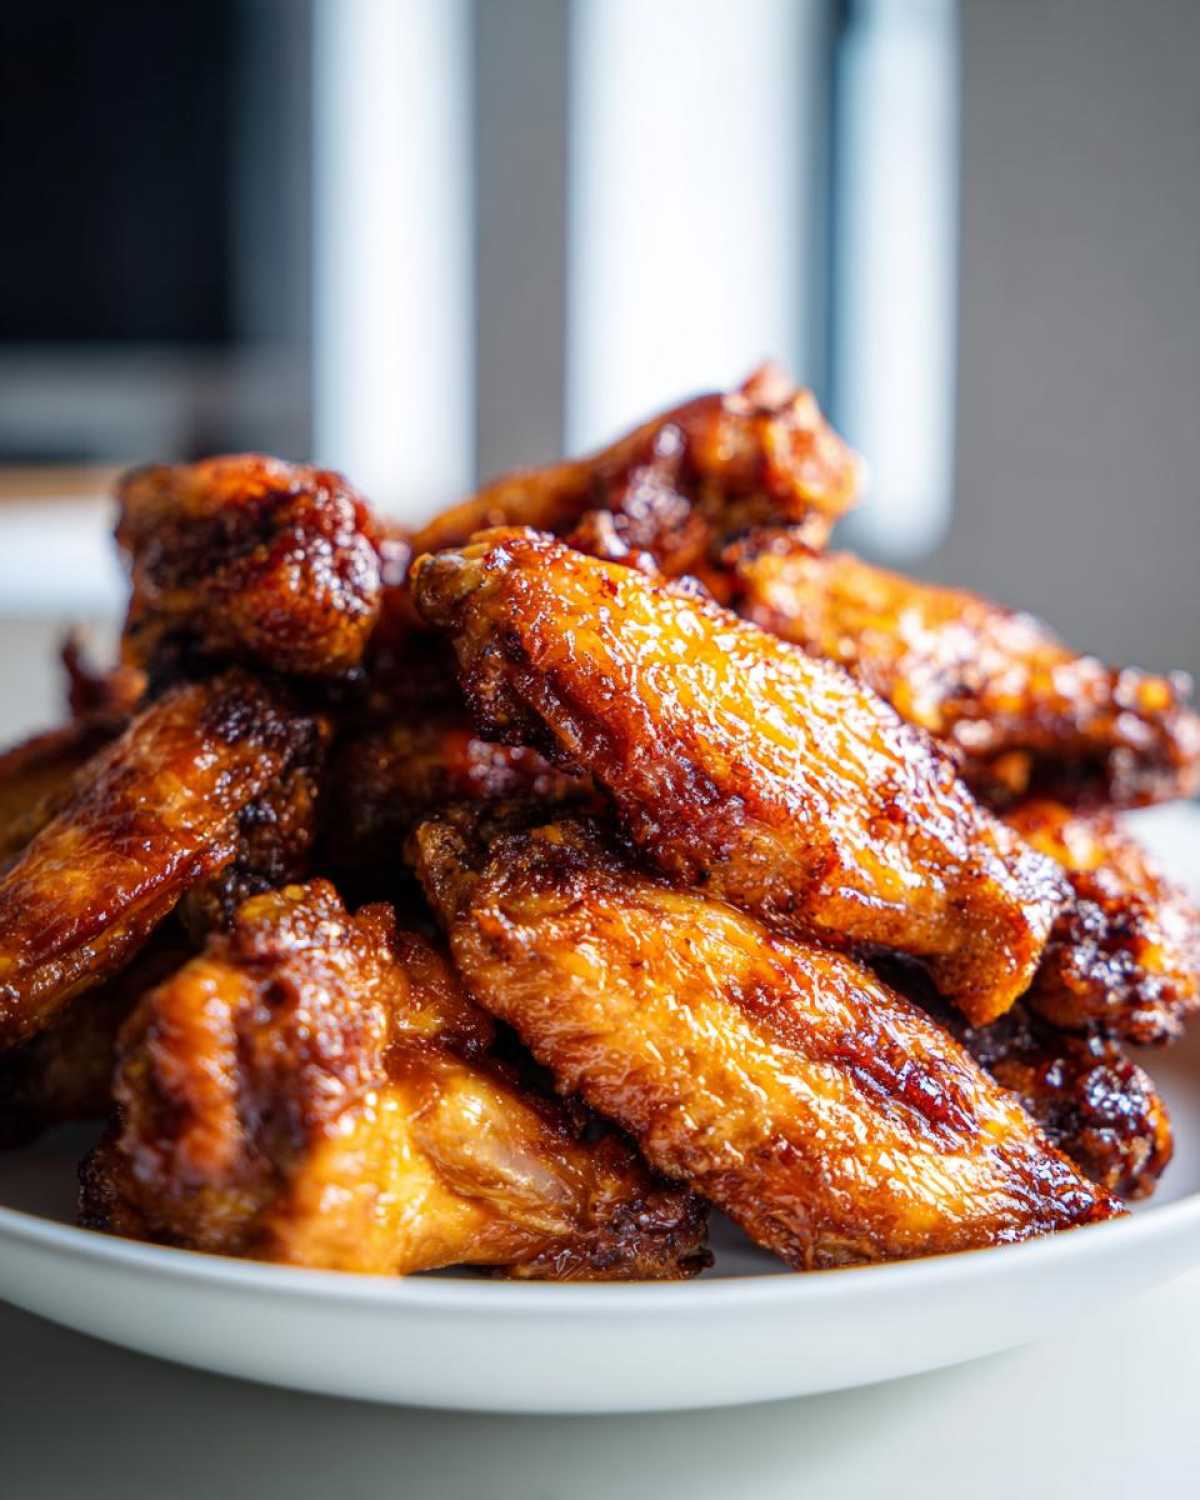
The Ultimate Secret to Truly Crispy Baked Chicken Wings (No Frying Needed)

Learn the simple technique using baking powder to achieve juicy inside, crispy outside chicken wings entirely in your oven. This method prevents sogginess without deep frying.
- Prep Time: 15 min
- Cook Time: 45 min
- Total Time: 60 min
- Yield: 4 servings
- Category: Appetizer
- Method: Baking
- Cuisine: American
- Diet: Low Fat
Ingredients
- 3 lbs chicken wings, separated into flats and drumettes
- 1 tablespoon baking powder (not baking soda)
- 1 teaspoon salt
- 1/2 teaspoon black pepper
- 1/2 teaspoon garlic powder
- 1/4 teaspoon cayenne pepper (optional)
Instructions
- Preheat your oven to 425 degrees Fahrenheit. Line a large baking sheet with foil for easy cleanup, and place a wire cooling rack on top of the foil.
- Pat the chicken wings completely dry using paper towels. This step is critical for crispiness.
- In a large bowl, mix the baking powder, salt, pepper, garlic powder, and cayenne pepper.
- Add the dried chicken wings to the bowl and toss thoroughly until every piece is lightly and evenly coated with the powder mixture.
- Arrange the coated wings in a single layer on the wire rack, ensuring there is space between each wing for air circulation.
- Bake for 25 minutes.
- Flip the wings over. Reduce the oven temperature to 400 degrees Fahrenheit and bake for another 20 minutes.
- For extra crispiness, switch the oven setting to broil (high) for the final 2 to 4 minutes, watching constantly to prevent burning.
- Remove from the oven and serve immediately, tossing with your favorite sauce if desired.
Notes
- Use aluminum-free baking powder for the best results with the coating.
- Do not skip drying the wings; moisture creates steam, which prevents crisping.
- The wire rack allows hot air to circulate underneath the wings, crisping the bottom skin.
- If you are making a large batch, cook the wings in two separate batches rather than overcrowding the pan.
Nutrition
- Serving Size: 4 wings
- Calories: 250
- Sugar: 0
- Sodium: 350
- Fat: 15
- Saturated Fat: 4
- Unsaturated Fat: 11
- Trans Fat: 0
- Carbohydrates: 1
- Fiber: 0
- Protein: 27
- Cholesterol: 90