

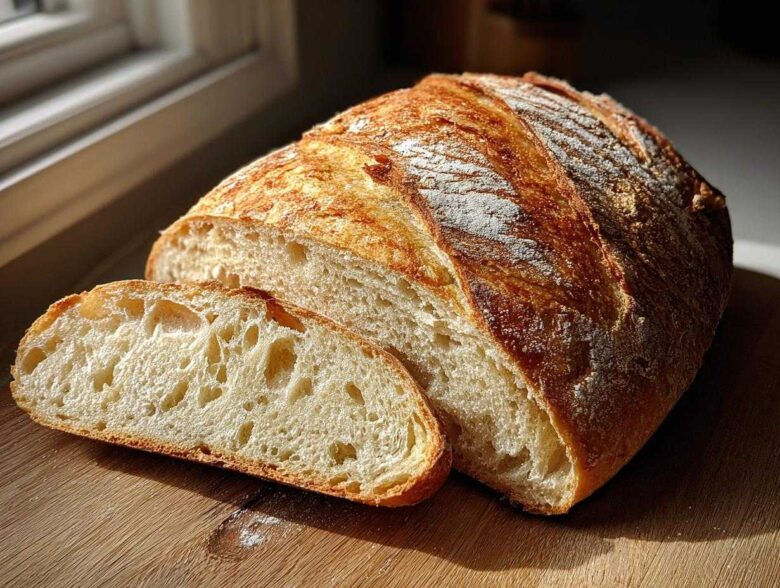
Oh my gosh, can we just talk for a second about the smell of fresh bread baking? Seriously, nothing beats it! Forget those sad, squishy supermarket loaves. Today, I’m handing over the keys to what I promise is the best Easy Homemade Soft and Crusty French Bread you will ever make right in your own kitchen. I know, I know, baking French bread sounds intimidating, like something only Parisian bakers can master, but trust me on this one.
We’re aiming for that magical combination: an interior that’s surprisingly soft and fluffy, almost cloud-like, paired with a gorgeous, crackly, bakery-style crust. I developed this recipe because I wanted something quick and reliable—something a true beginner could tackle without ending up with a brick. It uses simple pantry staples and gets you to that finish line in under two hours total. It’s my secret weapon for weeknight dinners when company suddenly shows up!
Since this recipe doesn’t require overnight fermentation or complicated shaping (though we touch on that later!), it’s built for speed while still respecting the yeast. You can find my guide on some of my other quick dough recipes here, but this one hits different. It’s simple enough that you’ll feel like a baking pro after just one try!
Why This Homemade French Bread Recipe Delivers Bakery Style Bread
When people try to make Homemade French Bread Recipe at home, they often compromise—either you get a soft loaf with no crust, or a rock-hard shell with a dense middle. Not here! This formula is all about balance, hitting those two main desires: that pillow-soft fluffiness inside and that signature crackle outside. It’s the secret to consistently getting that amazing Bakery Style Bread without needing a stone oven or a whole afternoon.
We keep the ingredient list tight, which cuts down on confusion. It’s honestly easier than most dinner rolls, but because we respect the yeast and the timing, the results look professional. You can check out all my must-knows for general success in baking homemade bread tips right here!
Achieving the Perfect Soft French Bread at Home Texture
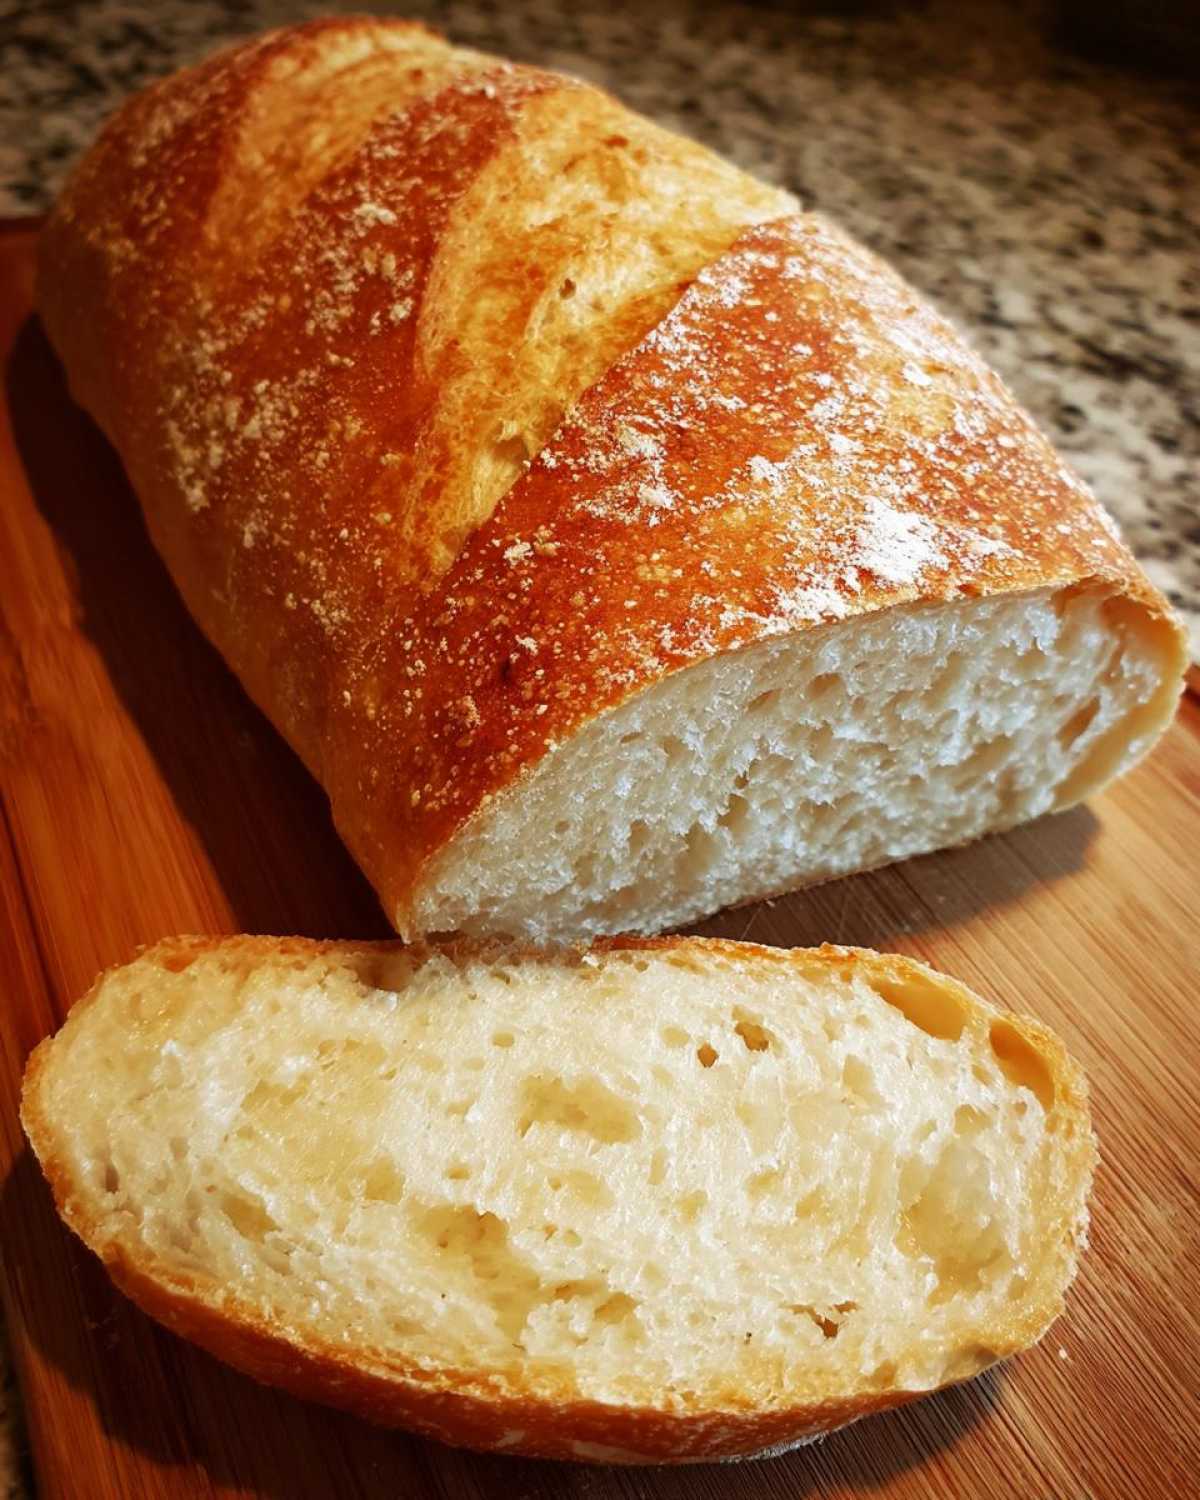
The secret to that tender crumb is all in the connection between the flour and the kneading. You MUST knead until the dough is genuinely elastic—that means the gluten is developed enough to trap all the gas the yeast makes. Don’t skimp on those 6 to 8 minutes! Allowing that full first rise also ensures the final product delivers that lovely, Soft French Bread at Home you’re dreaming of.
Creating a Satisfying Crusty Exterior Bread
This is non-negotiable for me; you need that crunch! The trick isn’t just high heat, although that helps. It’s all about the steam we introduce in the first few minutes of baking. When you pop that water pan in the bottom of the oven, the moisture creates a humid environment. This keeps the outside of the dough flexible long enough to fully expand before the crust sets hard—giving you that beautiful, shattering Crusty Exterior Bread.
Gathering Ingredients for Your Easy French Bread
Okay, let’s get organized! Because this is a Quick French Bread Recipe, we want to make sure everything is measured out and ready to go before we even wake up the yeast. I always line up my ingredients on the counter first—it’s my little version of mise en place, and it stops me from forgetting the salt or dumping in the whole bag of flour by accident!
We are using active dry yeast here, so pay attention to the water temperature so you don’t shock it. You’ll need just a touch of sugar to feed that yeastman, and the olive oil is going to give us just a tiny bit of richness without weighing down that light interior crumb we’re aiming for. Don’t forget the egg white for the wash; that’s what gives you that gorgeous shine when it comes out of the oven!
Once you have everything assembled, I highly recommend heading over to check out my post on easy homemade garlic butter—because while this bread is amazing plain, slathered in that butter when it’s still warm? Forget about it!
- 3 cups all-purpose flour
- 1 teaspoon salt
- 1 packet (2 1/4 teaspoons) active dry yeast
- 1 cup warm water (must be between 105-115°F—test it before you pour!)
- 1 tablespoon sugar
- 1 tablespoon olive oil
- 1 egg white, lightly beaten (this is just for the wash on top)
Step-by-Step Instructions to Make French Bread
This is where the magic happens, folks! I’ve broken down the process into manageable chunks to make sure your first batch of French bread turns out perfectly. Don’t panic about the timing; we integrate the resting and preheating so there’s zero wasted downtime. Ready to get your hands dusty? If you’re feeling nervous about yeast breads in general, I have a whole guide dedicated to beginner bread baking that walks you through these basics, but let’s jump right in!
Activating Yeast and Mixing the Dough for French Bread
First things first: wake up that yeast! Mix your yeast, sugar, and the 105-115°F warm water together in your biggest bowl. It absolutely has to be in that temperature window. Too cool and the yeast sleeps; too hot and you kill it—game over! Wait about five minutes until you see a lovely foam—that’s the yeast saying hello. Then, just stir in your olive oil.
Kneading and First Rise for a Fluffy Loaf Recipe
Now, add your flour and salt mixture gradually until you get what I call a “shaggy dough”—it looks messy, and that’s fine! Turn that whole mess out onto a lightly floured counter and start kneading it. You need to work it firmly for a solid 6 to 8 minutes until it feels smooth and stretchy. Pop the dough into an oiled bowl, cover it tight, and let it hang out somewhere warm for 45 minutes. Seriously, let it double in size! This long first rest is key to getting that airy, Fluffy Loaf Recipe texture.
Shaping and Final Proofing of the French Bread
Once it’s doubled, gently punch the air out—don’t be aggressive! Shape it carefully into one long loaf, like a classic French loaf, or divide it into two smaller baguettes. Place your shaped bread on that parchment-lined sheet and cover it loosely again. Let it rest for a 20-minute second rise. Crucially, while that’s happening, crank your oven up to 400°F (200°C)! Right before it goes in, brush the top with your beaten egg white and make three quick, diagonal slashes across the top with a very sharp knife. This helps guide the expansion. This whole final stage makes it a Quick French Bread Recipe indeed!
If you love simple, impressive bakes, you’ll also want to try my easy bakery moist pistachio muffins next!
Tips for Success When Baking Homemade French Bread
You have the main steps down, but if you really want those show-stopping results that rival the local bakery, a few extra bits of knowledge go a long way. These little cheats are part of what makes my Homemade French Bread Recipe so successful every time. If you’re looking for more general advice, check out my collection of Baking Homemade Bread Tips!
Remember that steam trick for the crust? Definitely use it! Put a shallow pan on the bottom rack while the oven preheats, and pour about a cup of very hot water into the pan right after you slide your bread in. That oven moisture is everything for a crunchy shell.
Also, if you’re baking in the middle of winter when the house is chilly, the dough might struggle to rise. Don’t worry about a few extra minutes, or better yet, pop that covered bowl into your oven with just the light turned on. It creates a perfect little warm spot for proofing!
Serving Suggestions for Your Dinner Side Bread
So, you’ve got this perfect, warm loaf! What do you do next? Honestly, the hardest part is the willpower not to tear into it right away. This bread excels as a classic Dinner Side Bread. I always serve it with a shallow bowl of good olive oil mixed with balsamic vinegar for dipping—it’s simple elegance!
But this loaf is versatile! It’s sturdy enough for fantastic sandwiches, too. Try scooping out just a little bit of the center crumb and loading it up with my chickpea salad for an amazing tuna-free sandwich (you have to try the filling, trust me!). Or, if you manage to let it cool, slice it thick and toast it well for dipping into hearty soups, like my quick take on French Onion Soup. Seriously, it’s the perfect vehicle for soaking up every last drop.
Storage and Reheating Instructions for Fresh French Bread
Okay, once this masterpiece has cooled down a bit, storage is important if you want that crust to last. Don’t—and I mean *don’t*—stick this glorious loaf in a plastic bag! Plastic traps moisture and will turn your beautifully crisp exterior into a sad, chewy disaster overnight. Stick it in a plain paper bag, sealed loosely, and keep it on the counter.
If you happen to have leftovers the next day, don’t toss it! To revive that amazing crustiness, just spritz the loaf lightly with water and pop it back in a 350°F oven for about 5 to 7 minutes. It’s like magic; you get that fresh-from-the-oven crackle all over again!
Frequently Asked Questions About Making French Bread
I get asked so many questions about this recipe, especially since it’s often people’s first foray into making French bread! Honestly, yeast bread can seem scary, but once you see how reliable this formula is, you’ll be shaking off those doubts. Here are a few things people always ask me when they’re getting ready to bake.
Can I make this a Quick French Bread Recipe using instant yeast?
Yes, you absolutely can! Instant yeast is wonderful because it doesn’t need that pre-foaming step. If you use it, just dump it right in with your flour and salt mixture. You might even shave off about 10 minutes from the total time since you don’t have to wait for the activation bubble!
What if I want a Chewier Texture instead of Soft French Bread at Home?
That’s an interesting question! If you prefer a little more chew, you actually need to *reduce* your kneading time by maybe a minute, or slightly increase your water volume by a tablespoon or two, which slightly changes the flour-to-water ratio. Remember, our goal here is the Soft French Bread at Home pillowy crumb, so less work develops less gluten, which makes it chewier instead of perfectly tender!
How long does it take to Make French Bread from Scratch using this method?
That’s the beauty of this recipe! When we talk about how long it takes to Make French Bread from Scratch, we’re looking at about 1 hour and 50 minutes total. That includes the 15 minutes of active prep and the 30 minutes of baking, plus two short rest periods. It’s lightning fast compared to those huge, 24-hour artisan loaves, making it a truly Quick French Bread Recipe for any night of the week. If you want to explore other quick doughs, check out my guide on Simple Yeast Bread techniques!
Estimated Nutritional Data for This French Bread
I always feel a little funny listing out the numbers here because, honestly, who sits around counting calories when they’re tearing into a fresh loaf of French bread? But hey, for those of you who track things or are curious, I pulled the estimated data based on the recipe yield of one large loaf. Keep in mind these are rough estimates!
These figures are based on dividing the total recipe into 10 slices. Your final numbers might shift a tiny bit depending on the brand of flour you use or exactly how much egg wash soaks into the crust rather than dripping off. For full transparency, I always link out to my full nutrition disclaimer if you need all the fine print details!
- Serving Size: 1 slice
- Calories: 150
- Fat: 1.5g
- Saturated Fat: 0.2g
- Carbohydrates: 30g
- Protein: 4g
- Sugar: 1g
- Sodium: 180mg
- Fiber: 1g
See? Not too bad for something that tastes like pure happiness! This Dinner Side Bread is totally worth enjoying warm with just a smear of butter.
Share Your Experience Making This Simple Yeast Bread
Now that you’ve pulled that gorgeous, crackling loaf out of the oven, I really want to hear all about it! Did you manage to get that perfect crackle on the crust? Did your house smell amazing while the Simple Yeast Bread was baking? Please, don’t be shy!
Jump down into the comments section below and tell me how it went. Did you dip it in butter? Did you make sandwiches the next day? I absolutely live for seeing your beautiful loaves! Take a quick snap and tag me on social media—I love cheering you on and seeing my recipes come to life in kitchens everywhere.
If you enjoyed this adventure into making French bread at home, I always have new things coming out on the main blog page. Happy baking, and thank you for trying out a loaf dear to my heart!
PrintEasy Homemade Soft and Crusty French Bread
Make soft, fluffy French bread with a crisp crust at home. This simple recipe is suitable for beginners and ready quickly.
- Prep Time: 15 min
- Cook Time: 30 min
- Total Time: 1 hour 50 min
- Yield: 1 large loaf
- Category: Side Dish
- Method: Baking
- Cuisine: French
- Diet: Vegetarian
Ingredients
- 3 cups all-purpose flour
- 1 teaspoon salt
- 1 packet (2 1/4 teaspoons) active dry yeast
- 1 cup warm water (105-115°F)
- 1 tablespoon sugar
- 1 tablespoon olive oil
- 1 egg white, lightly beaten (for wash)
Instructions
- In a large bowl, mix the warm water, yeast, and sugar. Let stand for 5 minutes until foamy.
- Stir in the olive oil.
- In a separate bowl, whisk together the flour and salt. Gradually add the flour mixture to the wet ingredients, mixing until a shaggy dough forms.
- Turn the dough out onto a lightly floured surface and knead for 6 to 8 minutes until the dough is smooth and elastic.
- Place the dough in a lightly oiled bowl, turning once to coat. Cover the bowl with plastic wrap and let it rise in a warm place for 45 minutes, or until doubled in size.
- Gently punch down the dough. Shape it into a long, even loaf or two smaller baguettes. Place the loaf on a baking sheet lined with parchment paper.
- Cover the loaf loosely and let it rest for a second rise for 20 minutes. Preheat your oven to 400°F (200°C) during this time.
- Brush the top of the loaf lightly with the beaten egg white. Make three diagonal slashes across the top of the bread using a sharp knife.
- Bake for 25 to 30 minutes, or until the crust is golden brown and the bread sounds hollow when tapped.
- Cool on a wire rack before slicing.
Notes
- For a crispier crust, place a shallow pan of water on the bottom rack of the oven while preheating to create steam.
- If your kitchen is cold, place the rising dough in the oven with just the light on.
- Use a stand mixer with a dough hook for easier kneading if desired.
Nutrition
- Serving Size: 1 slice
- Calories: 150
- Sugar: 1
- Sodium: 180
- Fat: 1.5
- Saturated Fat: 0.2
- Unsaturated Fat: 1.3
- Trans Fat: 0
- Carbohydrates: 30
- Fiber: 1
- Protein: 4
- Cholesterol: 0