

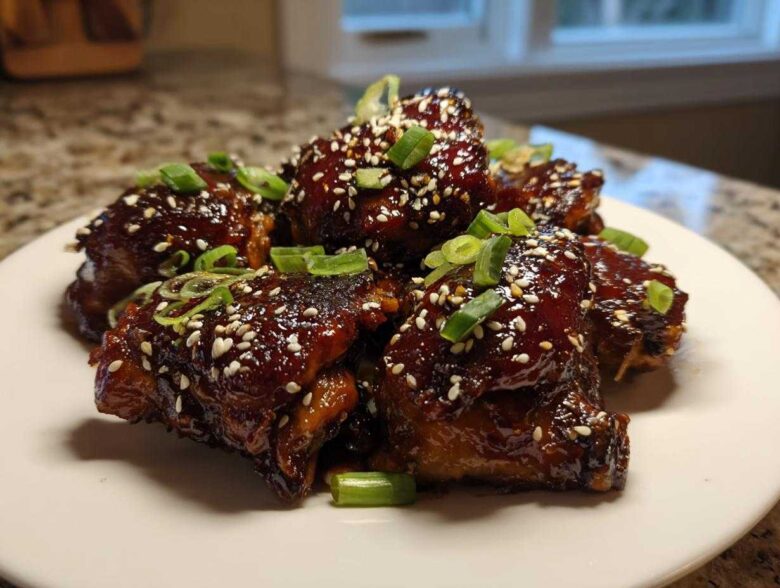
Oh my gosh, are you ever in the mood for that takeout dish? You know the one—where the chicken is perfectly tender, but the sauce is clinging to every single piece like it’s wearing a beautiful, thick, shiny coat? I spent years chasing that takeout magic right here in my own kitchen, and let me tell you, I finally cracked the code! Forget thin, runny glazes that slide right off.
This recipe is all about nailing that texture. We’re talking **Irresistibly Sticky Honey Chicken** that bubbles up beautifully under the broiler. The secret isn’t just tossing everything in a pan; it’s layering the flavors and using a tiny bit of cornstarch right at the very end to lock that gorgeous honey-garlic mixture onto the chicken thighs where it belongs. Trust me, once you make this, you won’t call for delivery for this dish again!
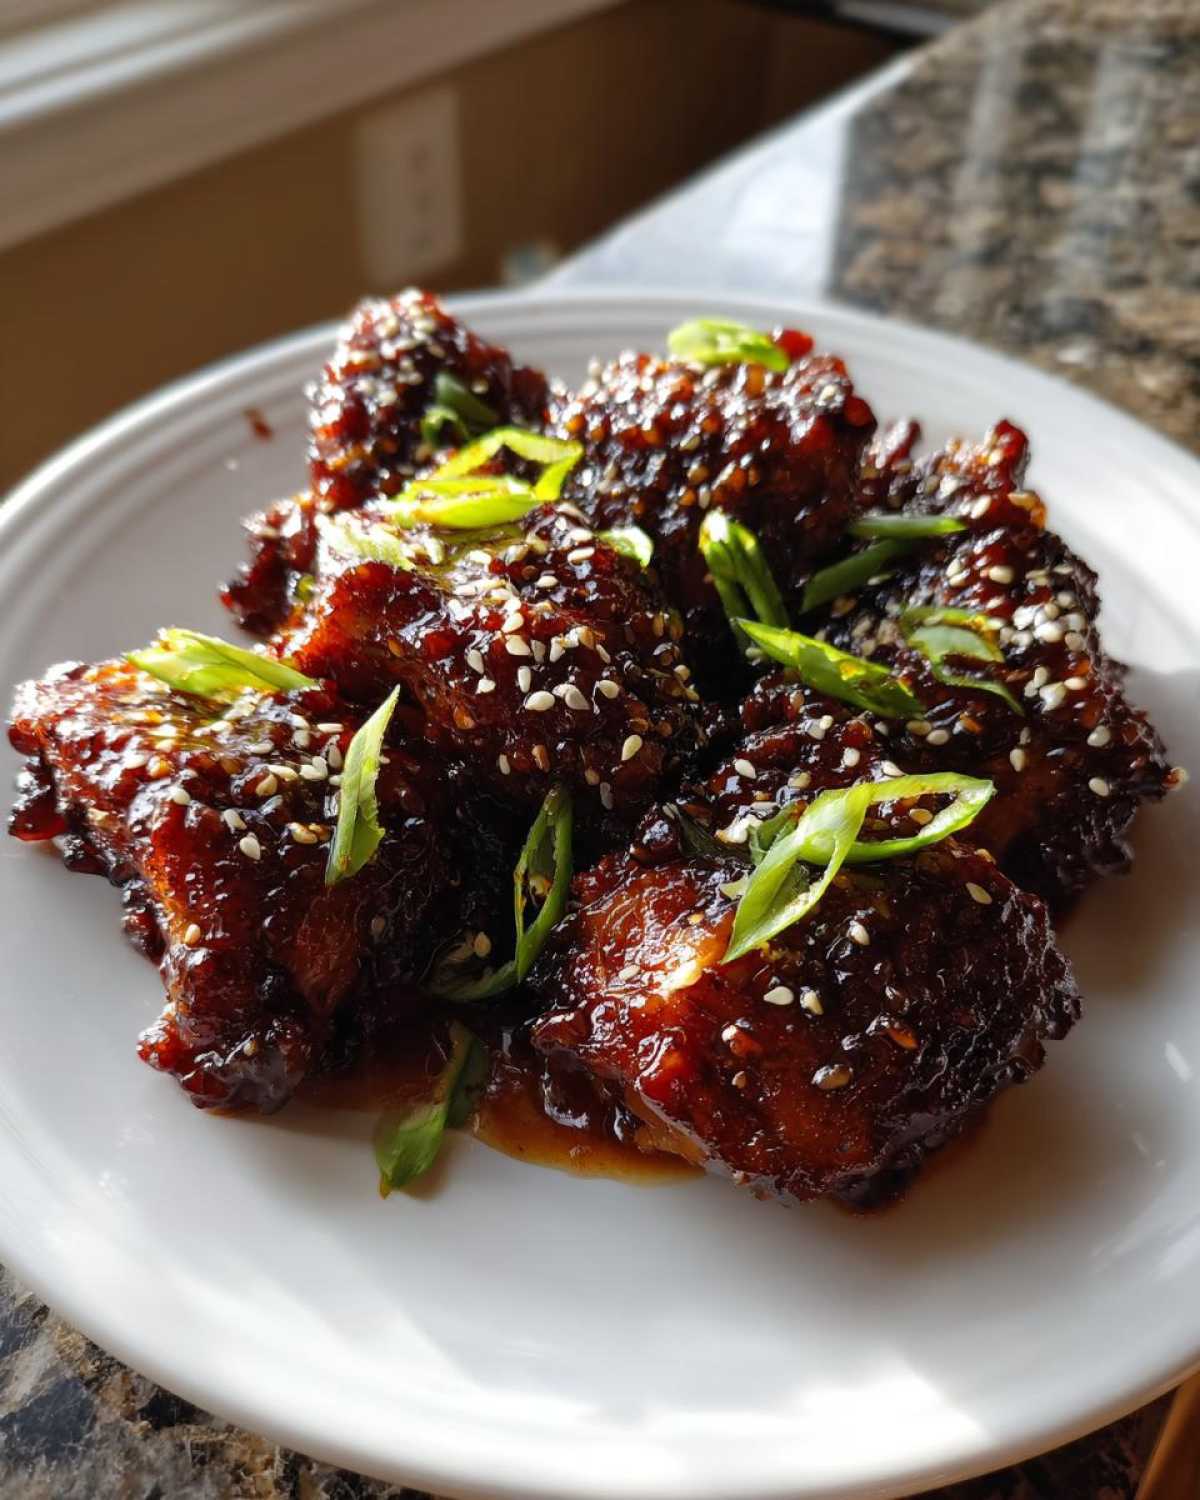
Why This Is Your New Favorite Irresistibly Sticky Honey Chicken Recipe
This recipe stops the sauce slide! You get flavor and texture in perfect harmony. Other recipes leave you with sweet chicken dripping into a puddle at the bottom of the pan, but not this one.
- We hit that sweet spot: savory soy mixed with sweet honey and a necessary tang from vinegar.
- The texture is guaranteed to be that perfect, thick, clingy coating you dream about.
- It’s fast enough for a busy night, but tastes like you spent all day on it.
Check out my other quick honey garlic recipe if you’re ever short on time, but for the absolute stickiest result, this method is the star.
Achieving the Best Glossy Honey Chicken Glaze
The key to that amazing, glossy look is twofold! First, we brush on some sauce early, but we save that initial batch so it stays clean. Then, right at the end, we introduce the cornstarch slurry just before that high blast of heat from the broiler. That quick burst of heat caramelizes that starchy coating instantly, making the whole thing set up shiny and impossibly sticky.
Ingredients for Irresistibly Sticky Honey Chicken
I’ve laid out everything you need here. Honestly, the magic of this **Irresistibly Sticky Honey Chicken** comes from making sure you use *fresh* aromatics. Don’t grab that jar of pre-minced garlic—it just doesn’t have the same punch that really helps cut through the sweetness of the honey.
We keep the list simple, borrowing elements from classic honey garlic dishes, but adding the necessary components to guarantee that thick glaze.
- 2 lbs boneless, skinless chicken thighs (Thighs hold up best to the thick glaze, trust me!)
- 1/4 cup soy sauce
- 1/4 cup honey (Use a good quality, runnier honey if you can)
- 3 cloves garlic, minced (Don’t skimp here!)
- 1 tablespoon fresh ginger, grated
- 1 tablespoon rice vinegar
- 1 teaspoon sesame oil
- 1/2 teaspoon red pepper flakes (optional—I always throw them in for a little background warmth!)
- 1 tablespoon cornstarch (This is the secret texture builder!)
- 2 tablespoons water (For mixing with the cornstarch)
- Sesame seeds, for garnish
- Sliced green onions, for garnish
See? It’s mostly staple ingredients. The quality of your honey and that fresh garlic is what will elevate this from good to absolutely delicious.
Essential Equipment for Your Sticky Honey Chicken Dinner
Before you even think about grabbing that honey, get your tools ready! When you are aiming for that super sticky coating, having everything measured out and handy makes the process totally seamless. You don’t want to be scrambling for a whisk while your sauce is about to burn, right?
I always pull these items out first. It’s my little system to ensure I don’t miss any of those crucial layering steps.
- A sturdy baking sheet—this holds everything together during the long bake time.
- A wire rack that fits inside that baking sheet. This is IMPORTANT! It lets the heat circulate evenly around the chicken, which makes the bottom just as glazed as the top.
- Several small bowls for mixing. You need one for the cornstarch slurry and one for the main sauce base.
- A whisk or a small fork for getting that cornstarch perfectly smooth.
- A reliable pastry brush for evenly painting that sticky glaze onto the chicken.
Because we are baking and broiling, setting up your station properly is half the battle won. If you want extra crispy sides instead of greens, you’ll want those potato wedges crispy warming up next to them!
Step-by-Step Instructions for Irresistibly Sticky Honey Chicken
Okay, buckle up, because this is where we turn that lovely marinade into that thick, gorgeous, takeout-style coating. The order matters here—especially when you are trying to achieve that Irresistibly Sticky Honey Chicken that just coats the back of your spoon perfectly. Make sure your oven is already hot before you start mixing!
Preparing the Chicken and Initial Bake
First thing’s first: preheat your oven to 400°F (200°C). I always line my baking sheet with foil first—it makes cleanup practically non-existent! Then, place a wire rack right on top and give that rack a quick spray of non-stick oil. The rack is vital because it lets the air *under* the thighs cook too, giving us that even texture.
Now, take your chicken thighs and pat them really, really dry with paper towels. Seriously, dry chicken gets the best texture! Mix up your sauce in a bowl: soy sauce, honey, garlic, ginger, vinegar, sesame oil, and pepper flakes. Brush half of that glorious mixture over the dry chicken pieces sitting on the rack. Pop it in the oven and let it bake for just 15 minutes. Time for a quick check-in with my favorite 30-minute glaze tips while we wait!
Creating the Thick Honey Sauce for Chicken
While those chicken pieces are starting to cook, we tackle the thickening agent. In a separate tiny bowl, whisk 1 tablespoon of cornstarch with 2 tablespoons of water until it’s totally smooth—no lumps allowed! That’s your slurry.
After the first 15 minutes, pull the tray out. Brush the remaining half of the *raw* sauce mixture over the chicken. Bake it again for 10 minutes. Then, pull it out one last time and brush on the sauce you reserved initially—the one that never touched the raw meat. Bake that for 5 more minutes. We’re building flavor layers here!
The Final Broil for Maximum Stickiness
This is the grand finale! Once the chicken looks mostly cooked through, take it out and gently brush the cornstarch slurry mixture over everything. This slurry is what makes that sauce truly sticky and thick. Immediately switch your oven to the high broil setting. Watch it like a hawk! You only need 1 to 3 minutes under the broiler, until the glaze is dark, bubbly, and looks completely stuck to the chicken. If you walk away for even thirty seconds, it will go from sticky perfection to burnt mess!
Once it’s gloriously caramelized, take it out! Let it rest for 5 minutes so that sticky sauce sets up just a touch more, then garnish with those bright green onions and sesame seeds. Dinner is served!
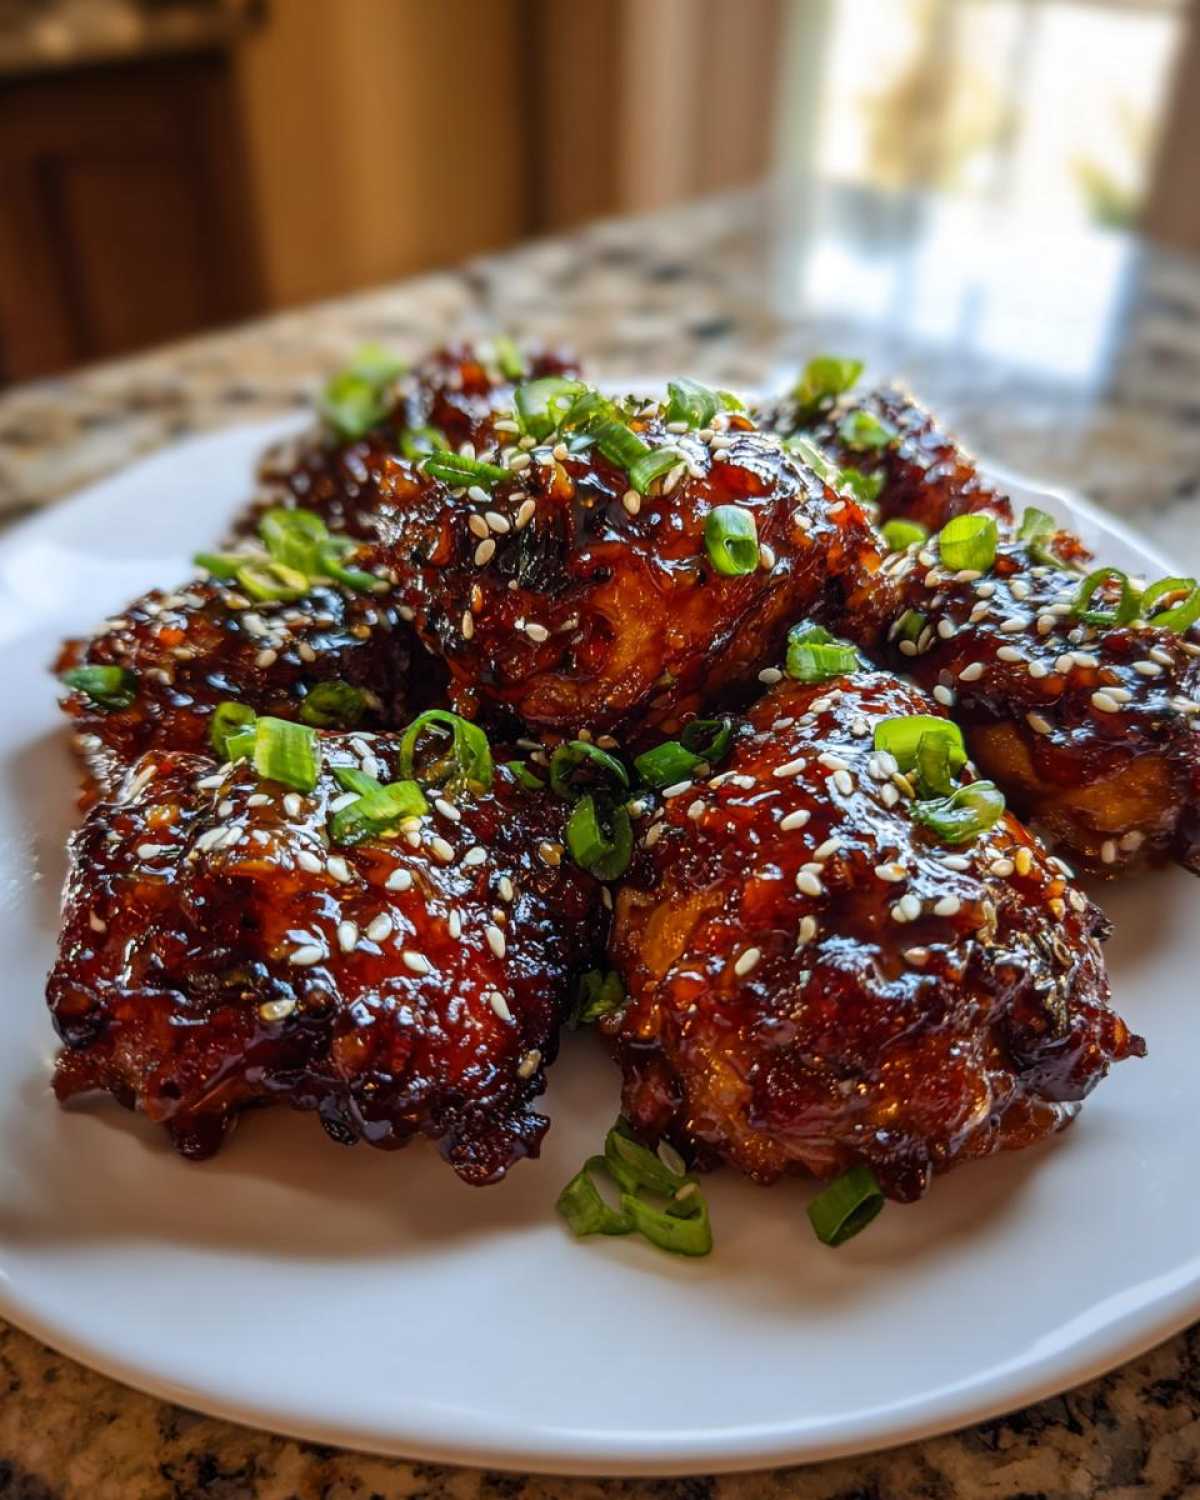
Tips for Success with Your Sticky Honey Chicken Recipe
Listen, nailing the glaze is everything, and I’ve picked up a few tricks over the years to make sure you get that perfect finish every single time. Don’t stress if your first attempt isn’t restaurant quality; a few tweaks make all the difference!
The biggest secret to getting that truly thick sauce is making sure you don’t skip the slurry step just before the final broil. This is what makes the sauce adhere instead of just dripping off. You can read more about the mechanics of thick sauces here.
If you’re using chicken thighs like I insist on, they are pretty forgiving. But if you’re tempted to use breasts, you have to watch them like a hawk during that final bake because they dry out fast!
And hey, if you don’t want to fire up the big oven, the air fryer sticky honey chicken variation is fantastic too. Cook at 380°F for about 18 to 20 minutes, making sure you brush on that sauce halfway through. If your air fryer has a broil function, use it like we did here for that incredible finish. Otherwise, just brush the thickened slurry sauce on right at the very end and let it sit for a final couple of minutes outside the air fryer.
Serving Suggestions for Your Sweet and Sticky Chicken Dinner Ideas
Since this chicken has such a bold, sweet, and sticky profile, you need sides that can stand up to it without totally disappearing under that rich glaze! I always look for something neutral or slightly bright to balance out all that amazing flavor we packed into the sauce.
The absolute classic pairing is steamed white rice. The rice soaks up any little bit of extra sauce that might escape, and honestly, the chicken looks incredible sitting right on top of a fluffy bed of it. My kids just love that combo.
Beyond rice, you gotta have some green on the plate to cut through the richness. Steamed broccoli is perfect; it’s simple, and you can even toss it with a little sesame oil after steaming. If you want something a little more flavorful on the side, try my super simple garlic butter rice—it adds just the right amount of savory kick without competing with the honey chicken.
It’s all about eating a balanced bite—a little bit of the savory, sticky chicken, and a little bit of fresh vegetable!
Storage and Reheating Instructions for Leftover Irresistibly Sticky Honey Chicken
I hope you have leftovers, because this chicken is tasty the next day! Store any leftover **Irresistibly Sticky Honey Chicken** in an airtight container in the fridge. It keeps well for about three days.
Reheating is key to bringing back the shine. Skip the microwave if you can, because it softens the glaze. Pop the pieces on a small baking sheet and give them just 3 minutes under the broiler or 5 minutes in an air fryer. Watch carefully! That quick blast of heat reactivates the sticky sauce perfectly.
Frequently Asked Questions About This Easy Sticky Honey Chicken Recipe
You guys always have the best questions! Cooking is just as much about tweaking things for your own pantry as it is about following exact steps, so let’s tackle some common hurdles for making the **best glossy honey chicken glaze**.
Can I substitute chicken thighs with chicken breasts?
Yes, you absolutely can use chicken breasts if you prefer, but you have to be much gentler with them! Breasts are much leaner, so they dry out way faster than thighs do. If you use breasts, cut them into roughly similar-sized pieces and aim for a total bake time closer to 20-22 minutes *before* you start the final sauce applications. Keep checking them! We want juicy chicken, not sandpaper!
How to make the sauce thicker without cornstarch?
If you’re out of cornstarch, you need pure reduction time! Instead of making the slurry, boil the remaining sauce (the raw and leftover parts, but not the slurry bowl contents!) in a saucepan over medium heat until it reduces by about a third. You’ll notice it thickening as the honey concentrates. It won’t be quite as magically set as the cornstarch version, but it will still be deliciously thick for this **sweet and sticky chicken dinner ideas** recipe!
What if I don’t have fresh ginger?
Oh, this happens to the best of us! If you don’t have fresh ginger, you can substitute it with about half a teaspoon of ground ginger. Start with less, though, because dried spices are much more potent than fresh ones. You can always add a little more, but you can’t take it out! This is one of the key things that makes it an **easy sticky honey chicken recipe**!
Can I make this spicier?
Definitely! If you want more heat than just the subtle background kick from the pepper flakes, I recommend adding a teaspoon of chili garlic sauce (like Huy Fong brand) right into your main sauce mixture when you first whisk everything together. That really pumps up the savory heat without messing with the texture too much. You can read more about my **simple five ingredient sticky chicken** variations over here if you’re looking for simple swaps!
Nutrition Estimates for Irresistibly Sticky Honey Chicken
I always like to give folks a heads-up on the nutritional side of things, especially since we are dealing with honey and a delicious glaze here! This isn’t exactly a diet dish, but it’s definitely a healthier homemade takeout option because we control exactly what goes in it.
Here are the general estimates for one thigh serving based on the recipe ingredients. Remember, these are just guidelines, and they can vary based on the specific brands of soy sauce or the amount of honey you choose to brush on!
- Serving Size: 1 thigh
- Calories: 380
- Sugar: 18g
- Sodium: 650mg
- Fat: 15g
- Saturated Fat: 4g
- Protein: 35g
- Carbohydrates: 25g
Now, here’s the important part—the fine print! Always remember that these are estimates based on standard calculations. If you check out our official disclaimer page, you’ll see we always recommend adjusting calculations based on the exact products you use, especially if you are tracking sodium or sugar for specific reasons!
PrintIrresistibly Sticky Honey Chicken
Make this easy, flavorful chicken with a thick, glossy, and adhesive honey garlic glaze. This recipe uses baking for maximum stickiness.
- Prep Time: 10 min
- Cook Time: 30 min
- Total Time: 40 min
- Yield: 4 servings
- Category: Dinner
- Method: Baking and Broiling
- Cuisine: Asian Inspired
- Diet: Low Fat
Ingredients
- 2 lbs boneless, skinless chicken thighs
- 1/4 cup soy sauce
- 1/4 cup honey
- 3 cloves garlic, minced
- 1 tablespoon fresh ginger, grated
- 1 tablespoon rice vinegar
- 1 teaspoon sesame oil
- 1/2 teaspoon red pepper flakes (optional)
- 1 tablespoon cornstarch
- 2 tablespoons water
- Sesame seeds, for garnish
- Sliced green onions, for garnish
Instructions
- Preheat your oven to 400°F (200°C). Line a baking sheet with foil and place a wire rack on top. Lightly spray the rack with cooking spray.
- Pat the chicken thighs dry with paper towels. Place them on the wire rack.
- In a small bowl, whisk together the soy sauce, honey, minced garlic, grated ginger, rice vinegar, sesame oil, and red pepper flakes (if using).
- Brush half of the sauce mixture evenly over the chicken thighs.
- Bake for 15 minutes.
- While the chicken bakes, prepare the thickening slurry: Whisk the cornstarch and 2 tablespoons of water together in a small bowl until smooth.
- Remove the chicken from the oven. Brush the remaining half of the raw sauce mixture over the chicken. Return to the oven and bake for another 10 minutes.
- Brush the chicken again with the reserved sauce from the initial coating (the one that did not touch the raw chicken). Bake for 5 more minutes.
- Remove the chicken from the oven. Brush the thickened cornstarch slurry over the chicken pieces. Return to the oven and switch the oven setting to broil (high). Broil for 1 to 3 minutes, watching closely, until the glaze is dark, bubbly, and very sticky. Do not let it burn.
- Remove from the oven. Let the chicken rest for 5 minutes. Garnish with sesame seeds and sliced green onions before serving.
Notes
- For the thickest glaze, ensure you use the cornstarch slurry step just before the final broil.
- Serve this chicken over steamed white rice or with roasted broccoli to balance the sweetness.
- If you prefer an air fryer method, cook at 380°F for 18-20 minutes, brushing with sauce halfway through, and finish with the broiled glaze step if your air fryer has a broil function, or simply brush on the thickened sauce at the end.
Nutrition
- Serving Size: 1 thigh
- Calories: 380
- Sugar: 18
- Sodium: 650
- Fat: 15
- Saturated Fat: 4
- Unsaturated Fat: 11
- Trans Fat: 0
- Carbohydrates: 25
- Fiber: 1
- Protein: 35
- Cholesterol: 110